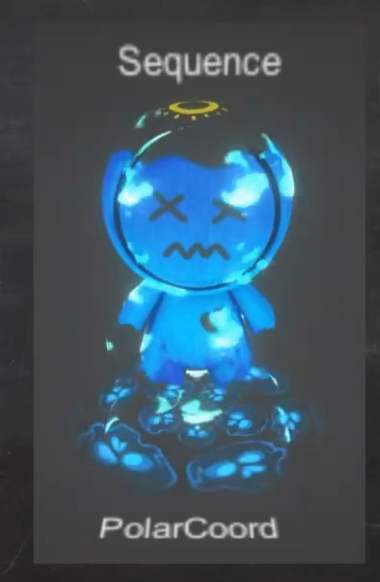
小人是AB的,鬼火是AD的
仔细看还会发现有两层,所以它是两个pass的shader
之前讲过一下SubShader有什么用
一个Shader里可能有好几个SubShader,这些SubShader可能是不同LOD级别的回退
一个游戏可能比较复杂,要针对很多机型去做适配,一个Shader写一个内容经常是不够的
会根据中低配写不同Shader的内容,SubShader可以学LOD进行高中低配
SubShader往下有个pass,可以写好几个pass,渲染完这一遍,再渲另外一遍其他的内容

1 序列帧

采样这个图,原本UV是0-1,我们要把它缩放成每一个小格子的火,然后隔一段时间跳到下一个格子
Shader首先是属性
根据行和列我们进行编号

并且UV的重复如果选成Repeat,那么可以继续往下拓展
Properties {


    _MainTex    ("RGB:颜色 A:透贴", 2d) = "gray"{

    }
    _Opacity    ("透明度", range(0, 1)) = 0.5
    _Sequence   ("序列帧", 2d) = "gray"{

    }
    _RowCount   ("行数", int) = 1
    _ColCount   ("列数", int) = 1
    _Speed      ("速度", range(0.0, 15.0)) = 1
}
第一个Pass,小人的AB
SubShader {


        Tags {


            "Queue"="Transparent"               // 调整渲染顺序
            "RenderType"="Transparent"          // 对应改为Cutout
            "ForceNoShadowCasting"="True"       // 关闭阴影投射
            "IgnoreProjector"="True"            // 不响应投射器
        }

        Pass {


            Name "FORWARD"
            Tags {


                "LightMode"="ForwardBase"
            }
            Blend One OneMinusSrcAlpha          // 修改混合方式One/SrcAlpha OneMinusSrcAlpha

            CGPROGRAM
            #pragma vertex vert
            #pragma fragment frag
            #include "UnityCG.cginc"
            #pragma multi_compile_fwdbase_fullshadows
            #pragma target 3.0
            // 输入参数
            uniform sampler2D _MainTex;
            uniform half _Opacity;
            // 输入结构
            struct VertexInput {


                float4 vertex : POSITION;       // 顶点位置 总是必要
                float2 uv : TEXCOORD0;          // UV信息 采样贴图用
            };
            // 输出结构
            struct VertexOutput {


                float4 pos : SV_POSITION;       // 顶点位置 总是必要
                float2 uv : TEXCOORD0;          // UV信息 采样贴图用
            };
            // 输入结构>>>顶点Shader>>>输出结构
            VertexOutput vert (VertexInput v) {


                VertexOutput o = (VertexOutput)0;
                    o.pos = UnityObjectToClipPos( v.vertex);    // 顶点位置 OS>CS
                    o.uv = v.uv;                                // UV信息 支持TilingOffset
                return o;
            }
            // 输出结构>>>像素
            half4 frag(VertexOutput i) : COLOR {


                half4 var_MainTex = tex2D(_MainTex, i.uv);      // 采样贴图 RGB颜色 A透贴
                half3 finalRGB = var_MainTex.rgb;
                half opacity = var_MainTex.a * _Opacity;
                return half4(finalRGB * opacity, opacity);                // 返回值
            }
            ENDCG
        }
第二个Pass,给序列帧
floor向下取整,idV相当于商,idU相当于余数
 Pass {


            Name "FORWARD"
            Tags {


                "LightMode"="ForwardBase"
            }
            Blend One One          // 混合方式

            CGPROGRAM
            #pragma vertex vert
            #pragma fragment frag
            #include "UnityCG.cginc"
            #pragma multi_compile_fwdbase_fullshadows
            #pragma target 3.0
            // 输入参数
            uniform sampler2D _Sequence; uniform float4 _Sequence_ST;
            uniform half _Opacity;
            uniform half _RowCount;
            uniform half _ColCount;
            uniform half _Speed;
            // 输入结构
            struct VertexInput {


                float4 vertex : POSITION;       // 顶点位置 总是必要
                float3 normal : NORMAL;
                float2 uv : TEXCOORD0;          // UV信息 采样贴图用
            };
            // 输出结构
            struct VertexOutput {


                float4 pos : SV_POSITION;       // 顶点位置 总是必要
                float2 uv : TEXCOORD0;          // UV信息 采样贴图用
            };
            // 输入结构>>>顶点Shader>>>输出结构
            VertexOutput vert (VertexInput v) {


                VertexOutput o = (VertexOutput)0;
                    v.vertex.xyz += v.normal * 0.03;            // 顶点位置法向挤出
                    o.pos = UnityObjectToClipPos(v.vertex);     // 顶点位置 OS>CS
                    o.uv = TRANSFORM_TEX(v.uv, _Sequence);      // 前置UV ST操作
                    float id = floor(_Time.z * _Speed);         // 计算序列id
                    float idV = floor(id / _ColCount);          // 计算V轴id
                    float idU = id - idV * _ColCount;           // 计算U轴id
                    float stepU = 1.0 / _ColCount;              // 计算U轴步幅
                    float stepV = 1.0 / _RowCount;              // 计算V轴步幅
                    float2 initUV = o.uv * float2(stepU, stepV) + float2(0.0, stepV * (_ColCount - 1.0));   // 计算初始UV
                    o.uv = initUV + float2(idU * stepU, idV * stepV);   // 计算序列帧UV
                return o;
            }
            // 输出结构>>>像素
            half4 frag(VertexOutput i) : COLOR {


                half4 var_Sequence = tex2D(_Sequence, i.uv);      // 采样贴图 RGB颜色 A透贴
                half3 finalRGB = var_Sequence.rgb;
                half opacity = var_Sequence.a * _Opacity;
                return half4(finalRGB * opacity, opacity);        // 返回值
            }
            ENDCG
        }
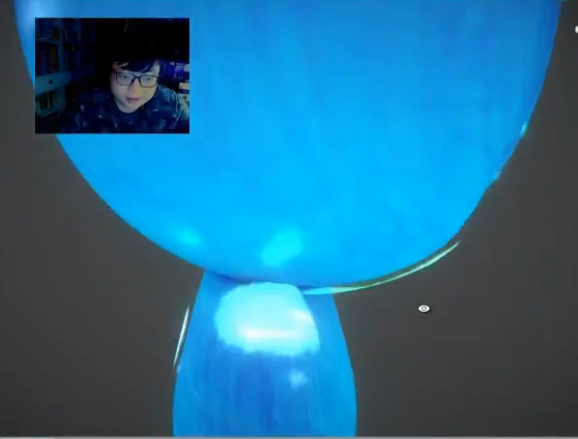
2 极坐标
从AB开始,基本参数没改,多了个颜色
Properties {


    _MainTex    ("RGB:颜色 A:透贴", 2d)   = "gray"{

    }
[HDR]   _Color      ("混合颜色", color)         = (1.0, 1.0, 1.0, 1.0)
    _Opacity    ("透明度", range(0, 1))     = 0.5

}
SubShader {


    Tags {


        "Queue"="Transparent"               // 调整渲染顺序
        "RenderType"="Transparent"          // 对应改为Cutout
        "ForceNoShadowCasting"="True"       // 关闭阴影投射
        "IgnoreProjector"="True"            // 不响应投射器
    }
    Pass {


        Name "FORWARD"
        Tags {


            "LightMode"="ForwardBase"
        }
        Blend One OneMinusSrcAlpha                       // 修改混合方式

        CGPROGRAM
        #pragma vertex vert
        #pragma fragment frag
        #include "UnityCG.cginc"
        #pragma multi_compile_fwdbase_fullshadows
        #pragma target 3.0
        // 输入参数
        uniform sampler2D _MainTex;
        uniform half _Opacity;
        uniform half3 _Color;
        // 输入结构
        struct VertexInput {


            float4 vertex : POSITION;       // 顶点位置 总是必要
            float2 uv : TEXCOORD0;          // UV信息 采样贴图用
            float4 color : COLOR;
        };
        // 输出结构
        struct VertexOutput {


            float4 pos : SV_POSITION;       // 顶点位置 总是必要
            float2 uv : TEXCOORD0;          // UV信息 采样贴图用
            float4 color : COLOR;
        };
shader部分
淡入淡出的部分是用了顶点色
// 输入结构>>>顶点Shader>>>输出结构
VertexOutput vert (VertexInput v) {


    VertexOutput o = (VertexOutput)0;
        o.pos = UnityObjectToClipPos( v.vertex);    // 顶点位置 OS>CS
        o.uv = v.uv;                                // UV信息 支持TilingOffset
        o.color = v.color;
    return o;
}
// 直角坐标转极坐标方法
float2 RectToPolar(float2 uv, float2 centerUV) {


    uv = uv - centerUV;
    float theta = atan2(uv.y, uv.x);    // atan()值域[-π/2, π/2]一般不用; atan2()值域[-π, π]
    float r = length(uv);
    return float2(theta, r);
}

// 输出结构>>>像素
half4 frag(VertexOutput i) : COLOR {


    // 直角坐标转极坐标
    float2 thetaR = RectToPolar(i.uv, float2(0.5, 0.5));
    // 极坐标转纹理采样UV
    float2 polarUV = float2(
        thetaR.x / 3.141593 * 0.5 + 0.5,    // θ映射到[0, 1]
        thetaR.y + frac(_Time.x * 3.0)      // r随时间流动
    );
    // 采样MainTex
    half4 var_MainTex = tex2D(_MainTex, polarUV);
    // 处理最终输出
    half3 finalRGB = (1 - var_MainTex.rgb) * _Color;
    half opacity = (1 - var_MainTex.r) * _Opacity * i.color.r;
    // 返回值
    return half4(finalRGB * opacity, opacity);
}