Recommendation: NSDT scene editor helps you quickly build 3D application scenes that can be redeveloped
It's not always necessary to create any details, sometimes in a scene you need to add elements in the background that give the impression that events are happening in a particular place. This approach saves a lot of time and effort. Therefore, in this tutorial, you will learn to model the Eiffel Tower for the above purpose.
let's start
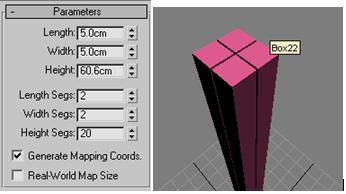
Step 1: Select the primitive box and draw 4 boxes in the top view and place them in the corners of the square area.
Use the following parameters.....
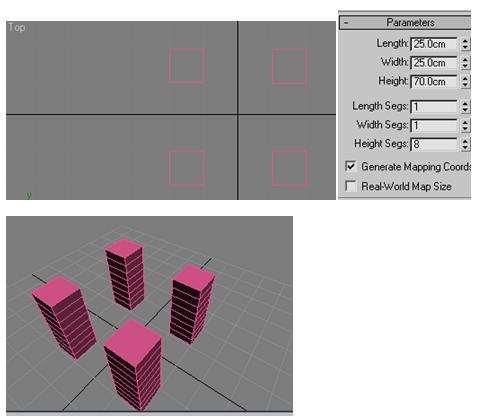
(I changed the units to centimeters for convenience, it's not mandatory. To change the units, go to Customize >> Units Settings)
Step 2: Connect these 4 boxes. To do it, first select any of the four boxes, then go to Compound Object >> Connections.
In the Control Panel, select Connections, click the Select Operands option, and select the other three boxes. These four objects are now connected into one object.

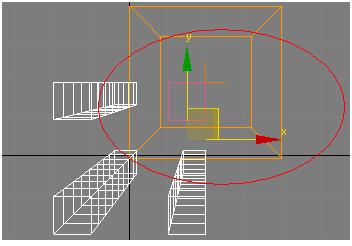
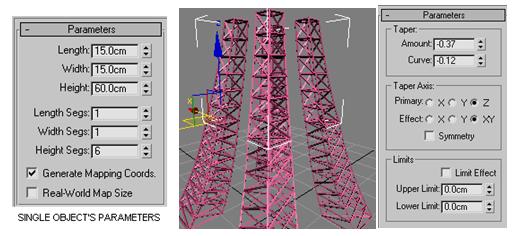
Step 3: By selecting the object (the one we just connected), go to the modify panel and select "Taper".
The pivot will be somewhere around the corner like this...
So to center it, select "Gizmo" in the taper dropdown
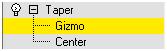
Place the pivot in the center as shown below. .
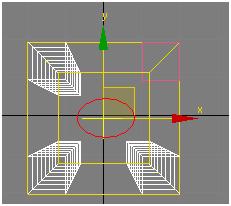
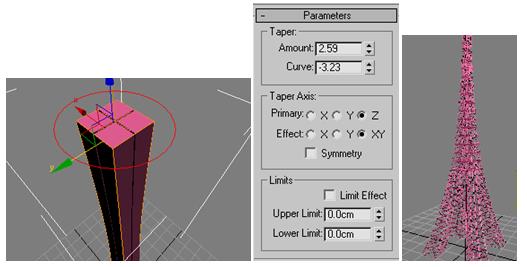
Now, set the taper parameter like this.
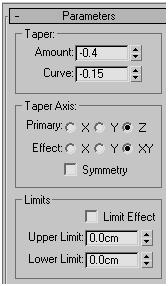
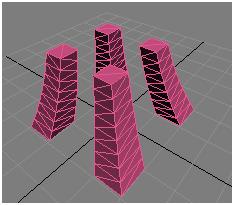
Object should look like this.....

Step 4: Convert the object to an "editable patch", the object should look like this (watch the edge faces, these are important).
Step 5: Now, add the "Lattice" modifier to the object and set the parameters as follows.
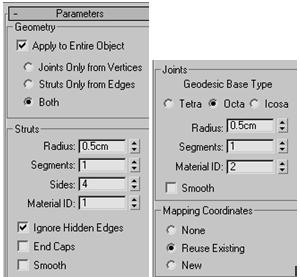
The current scene should look like this.
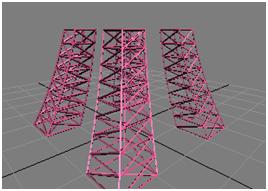
Step 6: Repeat the process to further create the tower, you can duplicate the same object or create a new one and adjust the taper parameters as desired.....
Step 5: Now for the very top of the tower, I made some changes:
Set the parameters of the boxes as follows and place these 4 boxes close to each other like this...
As I said before, to center the pivot of the taper, now move the pivot to the top of the box and set the parameters as shown below.
On top of the tower, add railings, domes and poles. And add a lattice modifier to it.

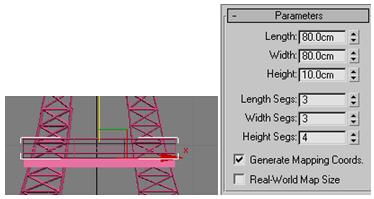
Create railings to the tower
To do this, take a box as a basis and add the following parameters.
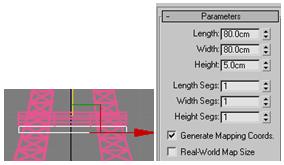
For railings, take another box with the following parameters and add lattice modifiers
Now, duplicate the railing and base, resize and place as follows...
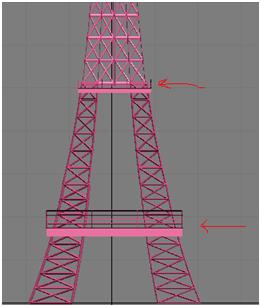
I didn't mention where to put the first railing, just because I gave you strict parameters, you can put it where it can fit.
create arc
To do this, take a torus object and cut it in half and rotate it a small angle so that it is aligned with the pole,
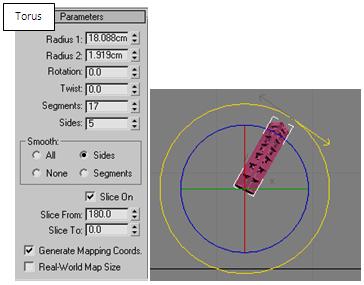
Make 4 copies and place them on 4 sides and add a Lattice modifier....

Here is the final image

Original Link: 3Ds Max Getting Started Tutorial: Creating the Eiffel Tower (mvrlink.com)