This tutorial describes how to create a complete scene with 3ds max .
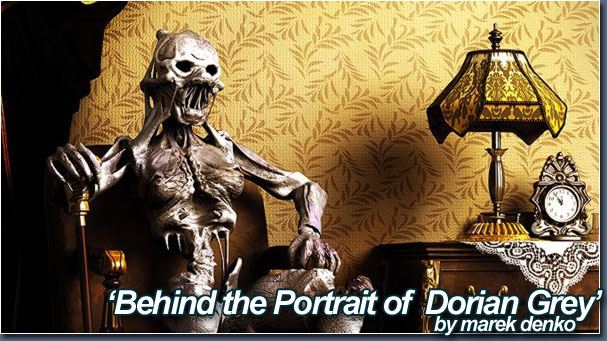
Source of inspiration: When I encountered something and couldn't sleep, I was trying to imagine something else, so I came up with this scene, in fact, for my character, I have neither a reference picture nor a draft picture, there are It's just my imagination, I made it bit by bit over the course of a few weeks. Chairs, clocks, lamps and tables can be referenced from the web.
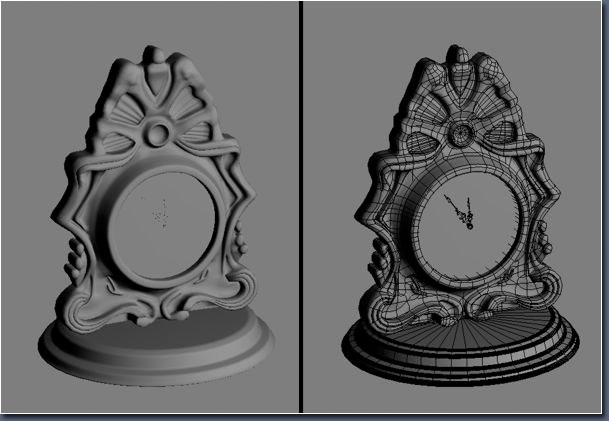
1. Modeling: All objects in the scene are built with editable poly. The body of the clock is obtained by modifying the Editable Poly with the Symmetry modifier. The base of the clock is lathe made of wire. The hands of the clock are stretched through closed curves. As shown in the figure:
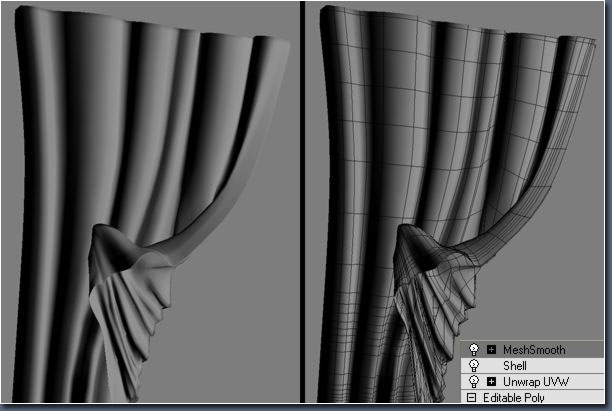
2. Curtains: Use a plane and add a wave modifier. Then convert it to a polygon, and after that I added a shell modifier to him to add thickness to the curtains, and finally meshsmooth (repeat=2). As shown in the figure:
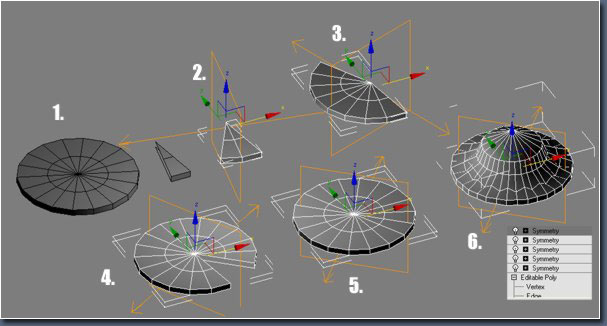
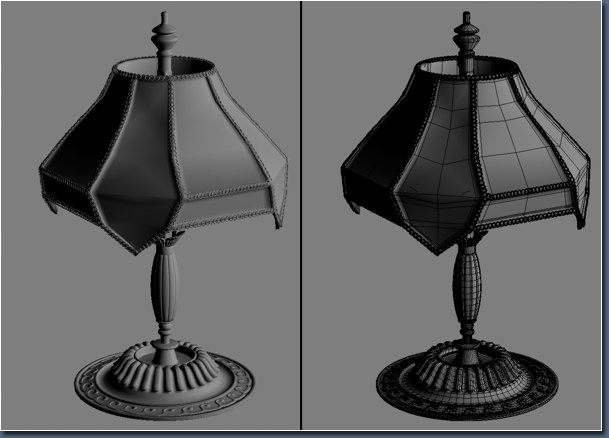
3. Desk Lamp: I started with a cylinder and deleted the other pieces to leave only one as shown, then gave him a Symmetry modifier until I got a new round body. Then use the Editable Poly tool and the Symmetry modifier to make the symmetry of the lamp. The rest of the lamp can be reached in a similar way. As shown in the figure:
4. Take a look at the effect:
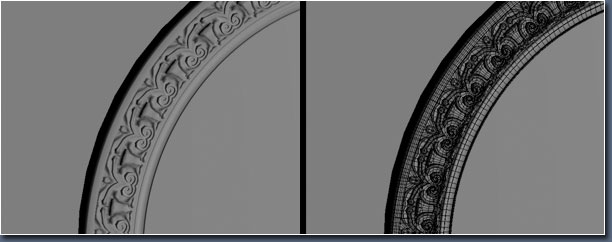
5. Frame: The same method as the lamp base. As shown in the figure:
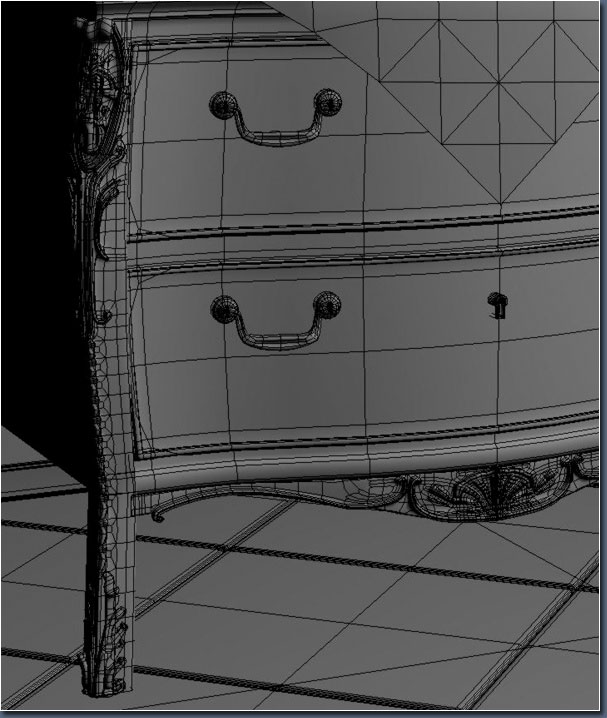
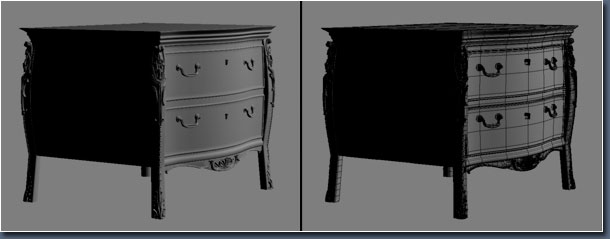
6. Table: Modeled by polygon editing, also using the Symmetry modifier. As shown in the figure:
7. Finished product.
8. Dorian: It is also through the symmetry modifier of polygons, and there are forever polygon tools cut, ring, loop, connect, extrude, bevel, insert.... All these tools can be very easy in the user view of max Well play their role. After using the symmetry tool I gave the whole an edit mesh modifier to modify some asymmetrical parts. There are other ways to achieve the same effect, for example you can convert to poly again and do the asymmetric part. As shown in the figure:
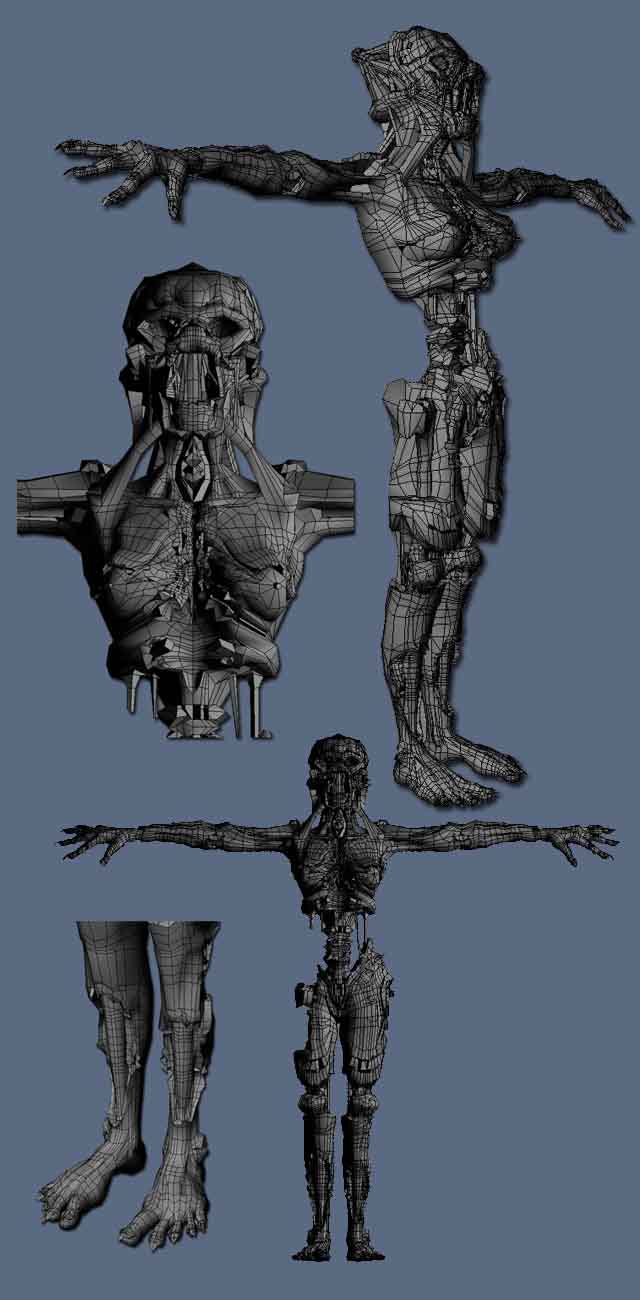
9. Dog: I used a picture I found in google. It's important to have a reference image when you're modeling, it helps you get the overall proportions when you're working on it. As shown in the figure:

10. Wireframes:

11. The finished scene has 377,932 faces before subdivision and 1,352,065 faces after subdivision.
12. Wireframes:

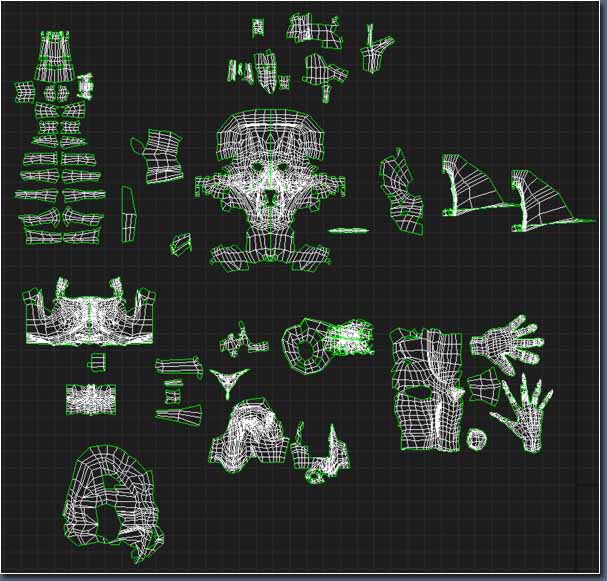
13. The image below shows the expanded coordinates of the Dorians. Drawing textures on top of it can be a real headache. Remember the coordinates below do not correspond to their positions, I just wanted to put all the unwrapped coordinates here. This uses a lot of plane mapping methods and cylindrical mapping coordinates, and then I used the texture expansion modifier to modify it. With the help of textporter I imported my uv map into photoshop. As shown in the figure:
14. Materials: The base texture maps for the Dorian and the dog are from a picture of a dead bird. I took this photo a long time ago, and almost all of my friends say I'm abnormal but I know I'll use it someday. Other wood or other textures are obtained from the Internet or from my own texture library.
15. Rigging and skining: Human:

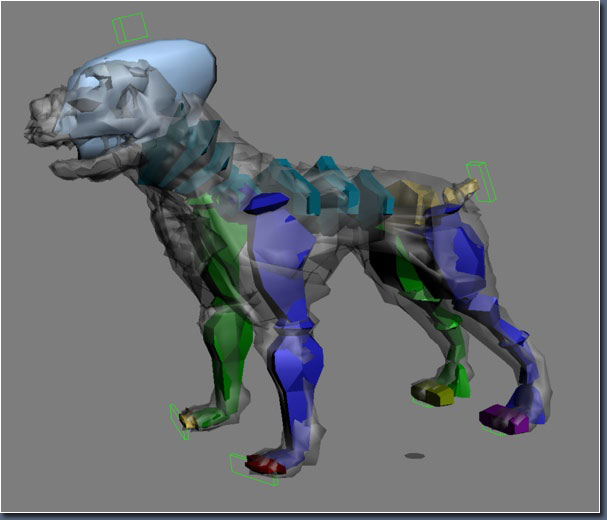
16. Dog's:
17. Here are the three poses in all the tests, as shown:

18. Lighting: When the character is complete, we start thinking about the environment. I added some relatively simple basic objects to the scene. I started by placing some simple objects and lighting them. When I'm satisfied with these I import the more multi-faceted models. Some of these models are still imported after the lights are built. As you can see from the image below I gave a sky light and a rectangular light with a face shadow coming in from the top right. As shown in the figure:

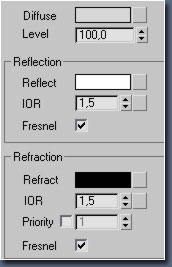
19. Here is my rendering without textures:
20. Materials: All materials are advanced material types used in final render. Especially my large spherical reflection material, which is also an advanced material for fr, and fresnel for the reflectivity of 1.5. Settings as shown:
21. Sphere 1 is a standard material with both diffuse and 100 self-illumination white. Ball 2 has the same settings as the ball. The difference is that his diffuse map channel has increased output. The RGB level is 5, and the standard is 1. Changed to 5 for better reflections on larger balls. You can see from the picture that the reflection of ball 2 is stronger than that of ball you. Ball 3 is also the same as Ball 2 but its RGB level is 10, which means more reflection.

22. But why do I do these things? Because in the scene I added a self-illuminating plane, he only sees it in the emission. I like to use launch like in the real world. In the real world there are no highlights, only emissions. I know reflections require better hardware, but I use it for all my animations.

23. Rendering: I used final render stage-1 for rendering.
24. Post: You can see that I have corrected the color, brightness/contrast. I made these changes to make it look deep and more like a portrait. As shown in the figure:

25. After modification:

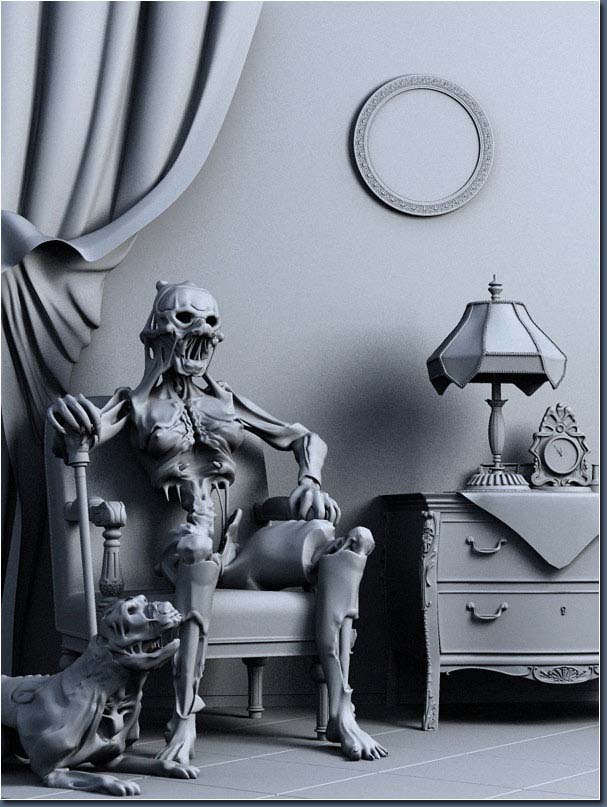
26. Final effect:

The tutorial is over. The original text is transferred from the PS tutorial self-study network. If you want to get more 3ds max tutorials, you can pay attention to the 3ds Max Chinese official website (www.xy3dsmax.com) to help you quickly understand and learn the software.