1、运行show3d_ball出错
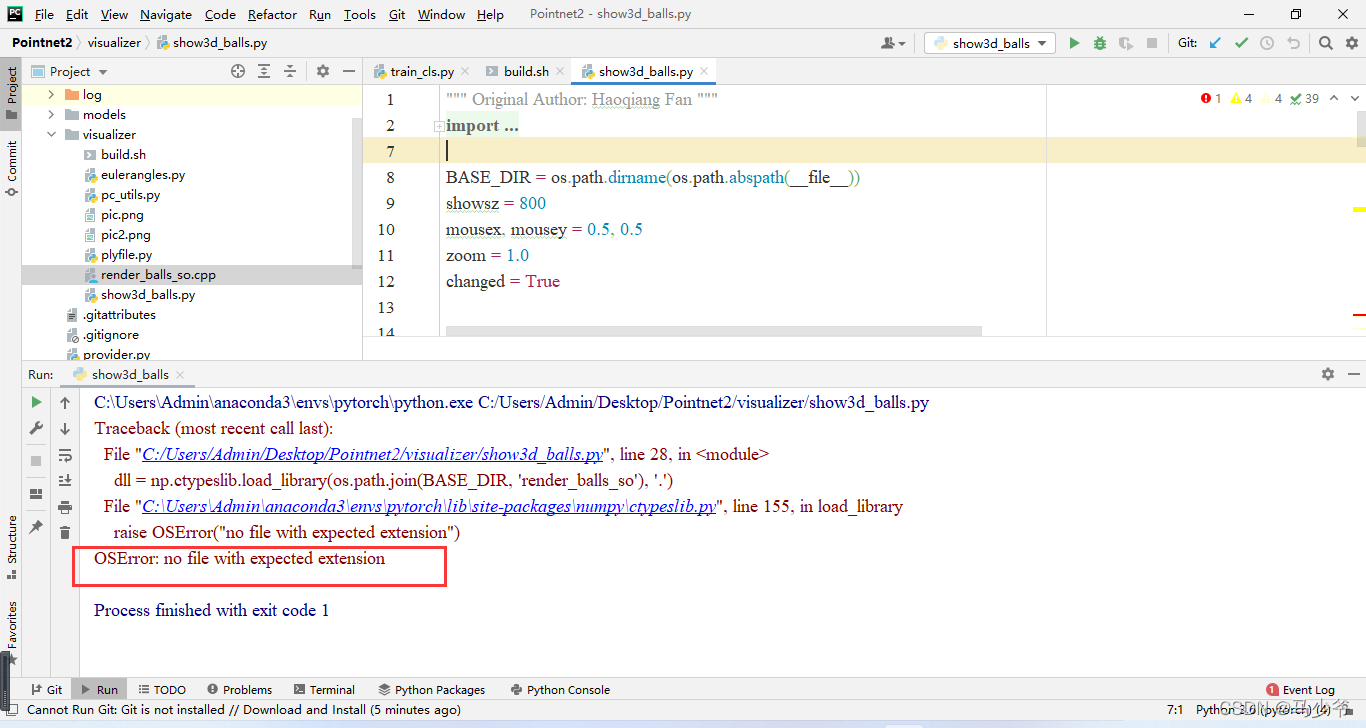
2、在运行PointNet的可视化程序时,作者只提供了linux平台下的动态链接库程序源码,自己的windows平台下无法调用。发现是动态链接库的文件格式不对,遂学习如何将.so文件转换成.dll文件(PS:前提是你有文件的.cpp源码)
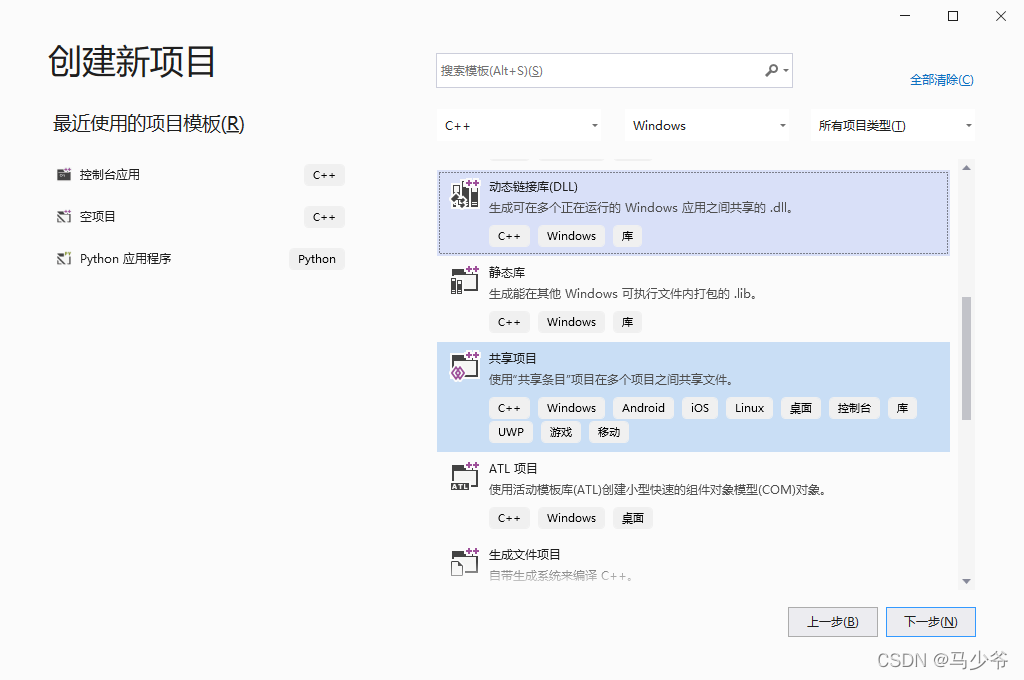
3、第一步新建C++动态链接库项目
那现在我们的目的就很明显了,把cpp生成dll库,再用python调用这个库。在vs2019中,点击新建动态链接库(DLL)
创建完成之后,得到这四个文件:

pch.h 是写对外调用接口的地方,写下声明就好了,然后在pch.cpp中写实现就完成了。framework.h和dllmain.cpp先不用管。
pch.h添加声明:
// pch.h: 这是预编译标头文件。
// 下方列出的文件仅编译一次,提高了将来生成的生成性能。
// 这还将影响 IntelliSense 性能,包括代码完成和许多代码浏览功能。
// 但是,如果此处列出的文件中的任何一个在生成之间有更新,它们全部都将被重新编译。
// 请勿在此处添加要频繁更新的文件,这将使得性能优势无效。

#ifndef PCH_H
#define PCH_H

// 添加要在此处预编译的标头
#include "framework.h"
extern "C" _declspec(dllimport) void render_ball(int h, int w, unsigned char* show, int n, int* xyzs, float* c0, float* c1, float* c2, int r);
#endif //PCH_H
其中render_ball就是外部调用的方法。那问题来了,怎么知道是这个方法的呢?其实就是打开 visualizer下面的render_balls_so.cpp中的文件看到的哈。把里面的内容复制到pch.cpp中
// pch.cpp: 与预编译标头对应的源文件

#include "pch.h"

// 当使用预编译的头时,需要使用此源文件,编译才能成功。
#include <cstdio>
#include <vector>
#include <algorithm>
#include <math.h>
using namespace std;

struct PointInfo {
	int x, y, z;
	float r, g, b;
};

	void render_ball(int h, int w, unsigned char* show, int n, int* xyzs, float* c0, float* c1, float* c2, int r) {
		r = max(r, 1);
		vector<int> depth(h * w, -2100000000);
		vector<PointInfo> pattern;
		for (int dx = -r; dx <= r; dx++)
			for (int dy = -r; dy <= r; dy++)
				if (dx * dx + dy * dy < r * r) {
					double dz = sqrt(double(r * r - dx * dx - dy * dy));
					PointInfo pinfo;
					pinfo.x = dx;
					pinfo.y = dy;
					pinfo.z = dz;
					pinfo.r = dz / r;
					pinfo.g = dz / r;
					pinfo.b = dz / r;
					pattern.push_back(pinfo);
				}
		double zmin = 0, zmax = 0;
		for (int i = 0; i < n; i++) {
			if (i == 0) {
				zmin = xyzs[i * 3 + 2] - r;
				zmax = xyzs[i * 3 + 2] + r;
			}
			else {
				zmin = min(zmin, double(xyzs[i * 3 + 2] - r));
				zmax = max(zmax, double(xyzs[i * 3 + 2] + r));
			}
		}
		for (int i = 0; i < n; i++) {
			int x = xyzs[i * 3 + 0], y = xyzs[i * 3 + 1], z = xyzs[i * 3 + 2];
			for (int j = 0; j<int(pattern.size()); j++) {
				int x2 = x + pattern[j].x;
				int y2 = y + pattern[j].y;
				int z2 = z + pattern[j].z;
				if (!(x2 < 0 || x2 >= h || y2 < 0 || y2 >= w) && depth[x2 * w + y2] < z2) {
					depth[x2 * w + y2] = z2;
					double intensity = min(1.0, (z2 - zmin) / (zmax - zmin) * 0.7 + 0.3);
					show[(x2 * w + y2) * 3 + 0] = pattern[j].b * c2[i] * intensity;
					show[(x2 * w + y2) * 3 + 1] = pattern[j].g * c0[i] * intensity;
					show[(x2 * w + y2) * 3 + 2] = pattern[j].r * c1[i] * intensity;
				}
			}
		}
	}
注意把源文件中的extern “C”{}去掉,以免重复。
准备好了pch.h和pch.cpp,就可以生成了。不过在此之前要查看一下python解释器的平台是32bit还是64bit,因为64bit只能调用64bit的DLL,32bit只能调用32bit的DLL。
查看python解释器平台
import platform
print(platform.architecture()) #Output: ('64bit', 'WindowsPE')

那生成解决方案时选用x64

运行可能会报错,不影响最后获得dll文件
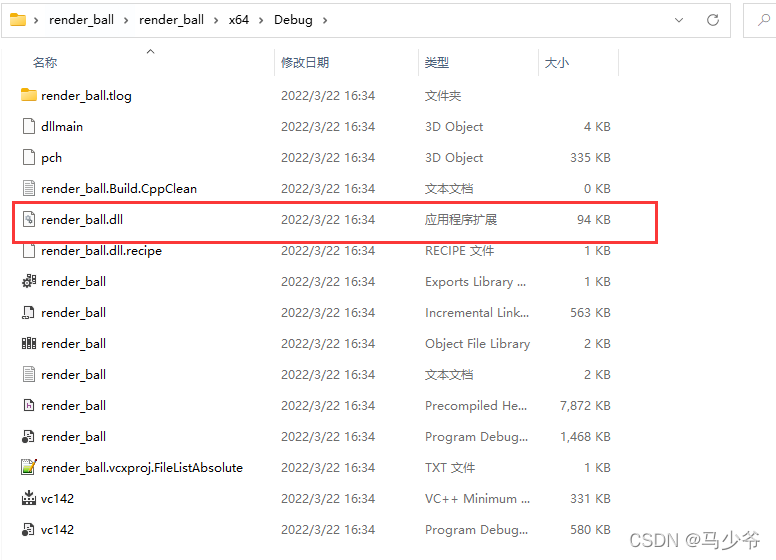
将render_ball.dll文件复制到visualizer

更新dll
'''dll = np.ctypeslib.load_library(os.path.join(BASE_DIR, 'render_balls_so'), '.')'''
dll = CDLL("./render_ball.dll")
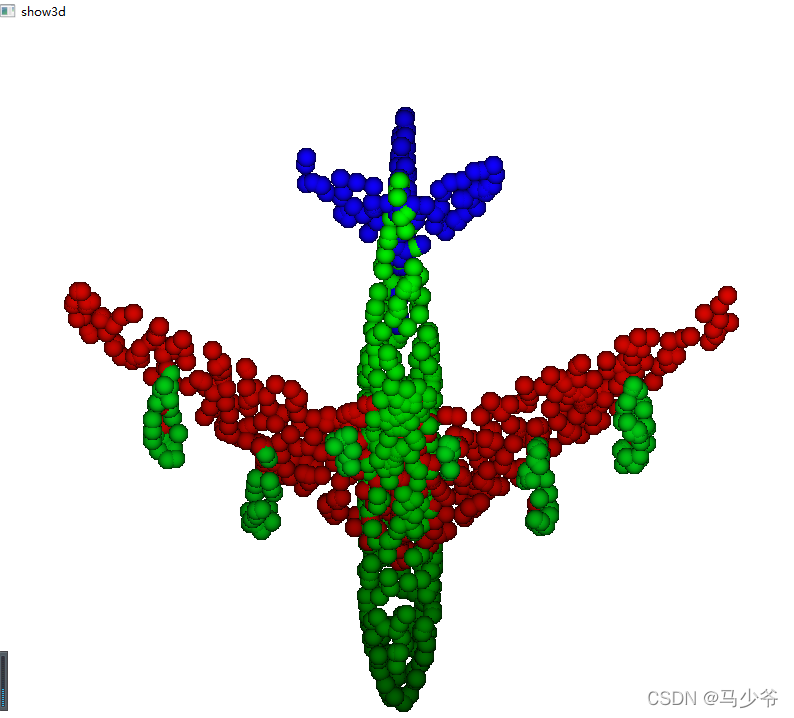
再次运行show_3dballs.py,,成功显示

来源:公众号机器人视觉