1.Haproxy
一、HAProxy简介
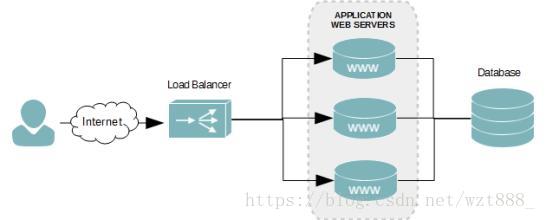
(1)HAProxy 是一款提供高可用性、负载均衡以及基于TCP(第四层)和HTTP(第七层)应用的代理软件,支持虚拟主机,它是免费、快速并且可靠的一种解决方案。 HAProxy特别适用于那些负载特大的web站点,这些站点通常又需要会话保持或七层处理。HAProxy运行在时下的硬件上,完全可以支持数以万计的 并发连接。并且它的运行模式使得它可以很简单安全的整合进您当前的架构中, 同时可以保护你的web服务器不被暴露到网络上。
(2)HAProxy 实现了一种事件驱动、单一进程模型,此模型支持非常大的并发连接数。多进程或多线程模型受内存限制 、系统调度器限制以及无处不在的锁限制,很少能处理数千并发连接。事件驱动模型因为在有更好的资源和时间管理的用户端(User-Space) 实现所有这些任务,所以没有这些问题。此模型的弊端是,在多核系统上,这些程序通常扩展性较差。这就是为什么他们必须进行优化以 使每个CPU时间片(Cycle)做更多的工作。
(3)HAProxy 支持连接拒绝 : 因为维护一个连接的打开的开销是很低的,有时我们很需要限制攻击蠕虫(attack bots),也就是说限制它们的连接打开从而限制它们的危害。 这个已经为一个陷于小型DDoS攻击的网站开发了而且已经拯救
了很多站点,这个优点也是其它负载均衡器没有的。
(4)HAProxy 支持全透明代理(已具备硬件防火墙的典型特点): 可以用客户端IP地址或者任何其他地址来连接后端服务器. 这个特性仅在Linux 2.4/2.6内核打了cttproxy补丁后才可以使用. 这个特性也使得为某特殊服务器处理部分流量同时又不修改服务器的地址成为可能。
性能
(1)单进程、事件驱动模型显著降低了上下文切换的开销及内存占用。
(2)0(1)事件检查器(event checker)允许其在高并发连接中对任何连接的任何事件实现即时探测。
(3)在任何可用的情况下,单缓冲(single buffering)机制能以不复制任何数据的方式完成读写操作,这会节约大量的CPU时钟周期及内存带宽;
(4)借助于Linux 2.6 (>= 2.6.27.19)上的splice()系统调用,HAProxy可以实现零复制转发(Zero-copy forwarding),在Linux 3.5及以上的OS中还可以实现零复制启动(zero-starting);
(5)内存分配器在固定大小的内存池中可实现即时内存分配,这能够显著减少创建一个会话的时长;
(6)树型存储:侧重于使用作者多年前开发的弹性二叉树,实现了以O(log(N))的低开销来保持计时器命令、保持运行队列命令及管理轮询及最少连接队列;
(7)优化的HTTP首部分析:优化的首部分析功能避免了在HTTP首部分析过程中重读任何内存区域;
(8)精心地降低了昂贵的系统调用,大部分工作都在用户空间完成,如时间读取、缓冲聚合及文件描述符的启用和禁用等;
所有的这些细微之处的优化实现了在中等规模负载之上依然有着相当低的CPU负载,甚至于在非常高的负载场景中,5%的用户空间占用率和95%的系统空间占用率也是非常普遍的现象,这意味着HAProxy进程消耗比系统空间消耗低20倍以上。因此,对OS进行性能调优是非常重要的。即使用户空间的占用率提高一倍,其CPU占用率也仅为10%,这也解释了为何7层处理对性能影响有限这一现象。由此,在高端系统上HAProxy的7层性能可轻易超过硬件负载均衡设备。
在生产环境中,在7层处理上使用HAProxy作为昂贵的高端硬件负载均衡设备故障故障时的紧急解决方案也时长可见。硬件负载均衡设备在“报文”级别处理请求,这在支持跨报文请求(request across multiple packets)有着较高的难度,并且它们不缓冲任何数据,因此有着较长的响应时间。对应地,软件负载均衡设备使用TCP缓冲,可建立极长的请求,且有着较大的响应时间。
二.四层和七层负载均衡的区别
(1)四层:
通过分析IP层及TCP/UDP层的流量实现的基于"IP+端口"的负载均衡。
(2)七层:
可以根据内容,再配合负载均衡算法来选择后端服务器,不但可以根据"ip+端口"方式进行负载分流,还可以根据网站的URL,访问域名,浏览器类别,语言等决定负载均衡的策略。七层负载均衡模式下,负载均衡与客户端及后端的服务器会分别建立一次TCP连接,而在四层负载均衡模式下(DR),仅建立一次TCP连接;七层负载均衡对负载均衡设备的要求更高,处理能力也低于四层负载均衡。
server1,server4:集群节点
server2,server3:后端服务器
在server1上安装配置haproxy
[root@server1 ~]# yum install rpm-build
[root@server1 ~]# rpmbuild -tb haproxy-1.6.11.tar.gz
[root@server1 ~]# rpm -ivh /root/rpmbuild/RPMS/x86_64/haproxy-1.6.11-1.x86_64.rpm
[root@server1 ~]# tar zxf haproxy-1.6.11.tar.gz
[root@server1 ~]# cd haproxy-1.6.11
[root@server1 haproxy-1.6.11]# cd examples/
[root@server1 examples]# cp content-sw-sample.cfg /etc/haproxy/haproxy.cfg #拷贝生成的文件必须是/etc/haproxy/haproxy.cfg,这是其启动脚本规定的
cp: overwrite `/etc/haproxy/haproxy.cfg'? y
[root@server1 examples]# cd /etc/haproxy/
[root@server1 haproxy]# vim haproxy.cfg
#
# This is a sample configuration. It illustrates how to separate static objects
# traffic from dynamic traffic, and how to dynamically regulate the server load.
#
# It listens on 192.168.1.10:80, and directs all requests for Host 'img' or
# URIs starting with /img or /css to a dedicated group of servers. URIs
# starting with /admin/stats deliver the stats page.
#
global
maxconn 10000 #进程最大并发连接数
stats socket /var/run/haproxy.stat mode 600 level admin
log 127.0.0.1 local0
uid 200 #文件里默认的uid 和gid
gid 200
chroot /var/empty
daemon
defaults
mode http
log global
option httplog
option dontlognull
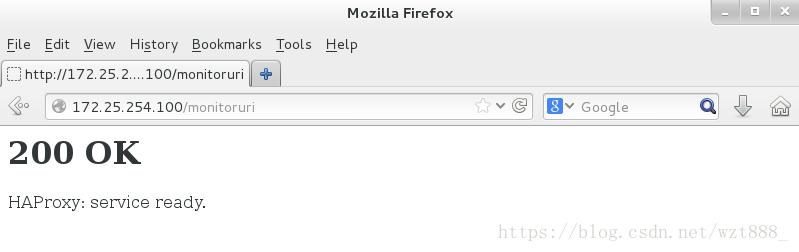
monitor-uri /monitoruri #监控
maxconn 8000
timeout client 30s
stats uri /admin/stats #健康检查
retries 2
option redispatch
timeout connect 5s
timeout server 5s
# The public 'www' address in the DMZ
frontend public
bind *:80 name clear #监听所有网络
#bind 192.168.1.10:443 ssl crt /etc/haproxy/haproxy.pem
#use_backend static if { hdr_beg(host) -i img }
#use_backend static if { path_beg /img /css }
default_backend static #静态
# The static backend backend for 'Host: img', /img and /css.
backend static
balance roundrobin #调度算法
server statsrv1 172.25.254.2:80 check inter 1000 #后端真实主机
server statsrv2 172.25.254.3:80 check inter 1000
[root@server1 haproxy]# groupadd -g 200 haproxy #添加用户组
[root@server1 haproxy]# useradd -u 200 -g 200 -M haproxy #添加用户,200是文件里默认的uid 和gid
在server4上进行同样的配置
#测试:
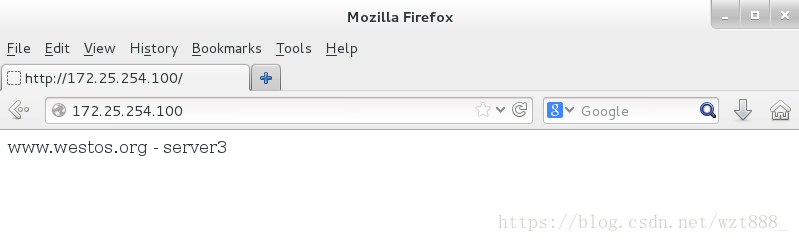
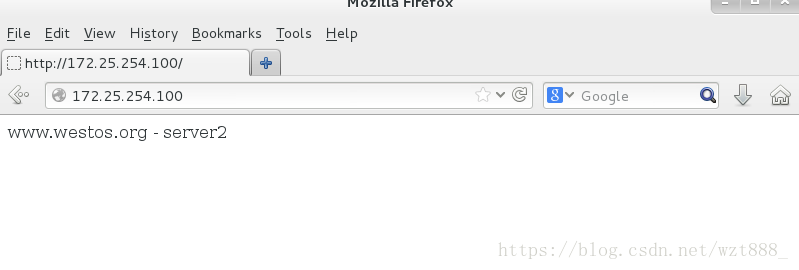
##在浏览器中输入 172.25.254.100 #可以实现负载均衡
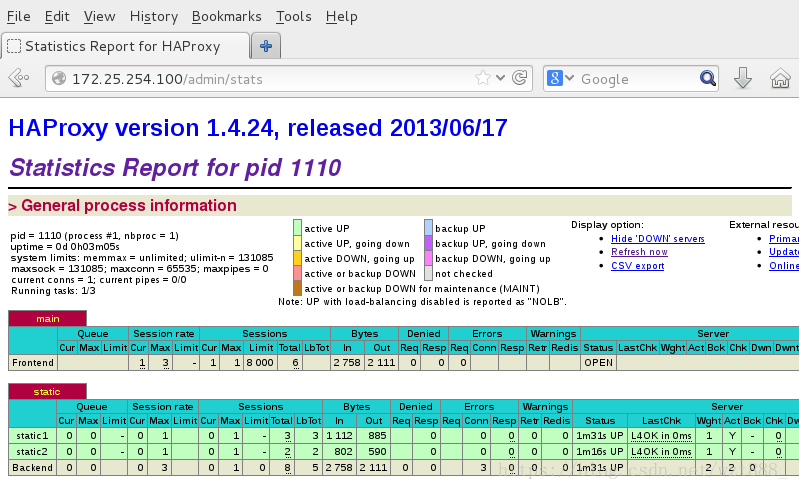
http://172.25.254.100/admin/stats #自带健康检查
http://172.25.254.100/monitoruri #不管后端服务是否打开,都会生效
编辑日志文件
[root@server1 haproxy]# vim /etc/rsyslog.conf
 13 $ModLoad imudp
 14 $UDPServerRun 514
 42 *.info;mail.none;authpriv.none;cron.none;local0.none                /var/log/messages
 62 local0.*                                                /var/log/haproxy
[root@server1 haproxy]# /etc/init.d/rsyslog restart
Shutting down system logger:                               [  OK  ]
Starting system logger:                                    [  OK  ]
[root@server1 haproxy]# cd /var/log
[root@server1 log]# ls
audit        cluster     dmesg      haproxy.log  maillog     rhsm    spooler
boot.log     ConsoleKit  dmesg.old  lastlog      messages    samba   wtmp
clumond.log  cron          luci         mysqld.log  secure  yum.log
[root@server1 log]# ll haproxy.log
-rw------- 1 root root 0 8月   4 03:03 haproxy.log
[root@server1 log]# cat haproxy.log   #日至为空
[root@server1 log]# cat haproxy.log   #刷新一下网页就会有日志生成
Aug  4 03:04:08 localhost haproxy[6895]: 172.25.44.250:55950 [04/Aug/2018:03:04:08.008] public public/<STATS> 0/-1/-1/-1/0 200 9798 - - PR-- 0/0/0/0/0 0/0 "GET /admin/stats HTTP/1.1"
算法
[root@server1 haproxy]# vim haproxy.cfg
 45 backend static
 46         #balance         roundrobin
 47         balance        source     #相当于之前学的算法 ha_hash
 48         server          statsrv1 172.25.44.2:80 check inter 1000
 49
 50         server          statsrv2 172.25.44.3:80 check inter 1000
[root@server1 haproxy]# /etc/init.d/haproxy  restart
Stopping haproxy:                                         [  OK  ]
Starting haproxy:                                          [  OK  ]
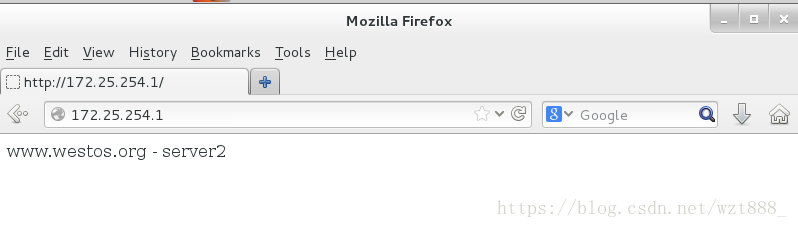
##访问测试:一直在停留在server2(企业中一般这种方式,保证了稳定性)
动静分离
默认静态,把 server3 设置为动态,
动静分离,访问默认就访问到server2;访问*.php就是访问到server3
[root@server1 haproxy]# vim haproxy.cfg
40 use_backend static2 if { path_end -i .php }
41 default_backend static1
43 # The static backend backend for 'Host: img', /img and /css.
44 backend static1
45 balance roundrobin
47 server statsrv1 172.25.44.2:80 check inter 1000
48 backend static2
49 balance roundrobin
50 server statsrv2 172.25.44.3:80 check inter 1000
[root@server1 haproxy]# /etc/init.d/haproxy restart
Stopping haproxy: [ OK ]
Starting haproxy: [ OK ]
[root@server3 ~]# yum install php -y
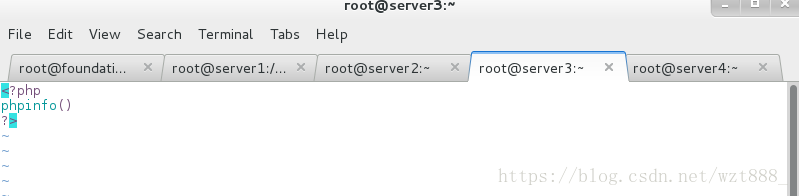
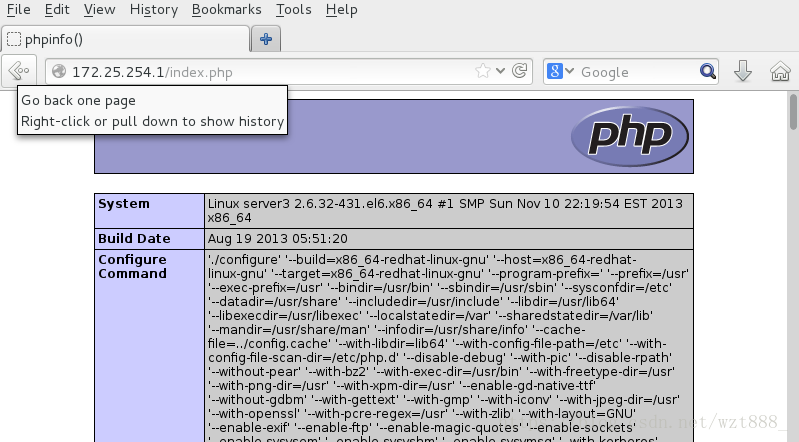
[root@server3 ~]# vim /var/www/html/index.php #编写php网页
<?php
phpinfo()
?>
[root@server3 ~]# /etc/init.d/httpd restart
Stopping httpd:                                            [  OK  ]
Starting httpd: httpd: Could not reliably determine the server's fully qualified domain name, using 192.168.0.3 for ServerName
                                                           [  OK  ]
#测试:
172.25.44.1 : 访问到的是server2
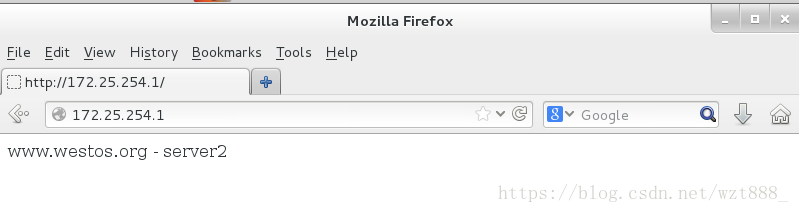
172.25.44.1/index.php : 访问到的是server3的php网页
访问禁止
[root@server1 haproxy]# vim haproxy.cfg
50       acl blacklist    src  172.25.254.78
51       http-request deny if blacklist     #设置访问黑名单,因为是用真机的浏览器进行访问测试,所以把黑名单设置为真机ip

[root@server1 haproxy]# /etc/init.d/haproxy  reload
Reloading haproxy:
#测试:
172.25.44.1/index.php 访问禁止
重定向
curl 不支持重定向


[root@server1 haproxy]# yum install httpd -y
[root@server1 haproxy]# vim /etc/httpd/conf/httpd.conf
 136 Listen 8080
[root@server1 haproxy]# vim /var/www/html/index.html
       网站正在维护中.....
[root@server1 haproxy]# vim haproxy.cfg

     46         errorloc 403 http://172.25.254.1:8080    #把错误端口重定向到172.25.254.1:8080

[root@server1 haproxy]# /etc/init.d/haproxy  reload
Reloading haproxy:
[root@server1 haproxy]# /etc/init.d/httpd start
Starting httpd:
[root@server1 haproxy]# /etc/init.d/httpd restart
Stopping httpd:                                            [  OK  ]
Starting httpd: httpd: Could not reliably determine the server's fully qualified domain name, using 172.25.254.1 for ServerName
                                                           [  OK  ]
#访问测试:
访问172.25.254.1 会自动调转到172.25.254.1:8080 网站正在维护中。。。。。

[root@server1 haproxy]# vim haproxy.cfg
 43         acl blacklist src 172.25.254.250      #因为是用真机测试的,所以把这个ip写成真机的ip
 47         redirect location http://www.baidu.com   #重定向到www.baidu.com
[root@server1 haproxy]# /etc/init.d/haproxy  restart
Stopping haproxy:                                          [  OK  ]
Starting haproxy:                                          [  OK  ]
#测试:直接跳转到baidu界面

[root@server1 haproxy]# vim haproxy.cfg
43 acl blacklist src 172.25.254.250
44
45 #http-request deny if blacklist
46 #errorloc 403 http://172.25.254.1:8080
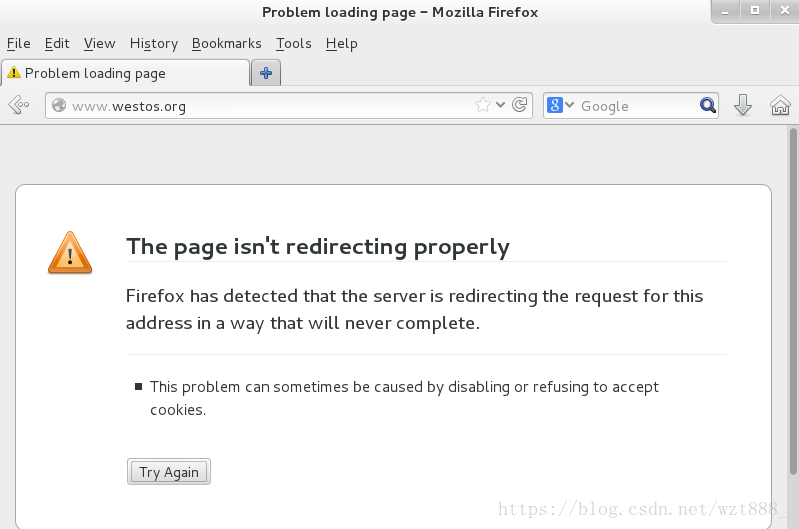
47 redirect location http:www.westos.org #重定向到www.westos.org
48
49 use_backend static2 if { path_end -i .php }
50 default_backend static1
[root@server1 haproxy]# /etc/init.d/haproxy restart
Stopping haproxy: [ OK ]
Starting haproxy: [ OK ]
[root@foundation44 Desktop]# vim /etc/hosts #在真机上写解析
172.25.254.1 server1 www.westos.org #把www.westos.org解析到172.25.254.1
#测试:
访问172.25.254.1,会直接跳转到www.westos.org,但在真机中又把把www.westos.org解析到172.25.254.1,一直这样循环进行
#用curl测试,因为curl不支持重定向,所以访问不到结果,只能看到被解析到的位置
[root@foundation44 Desktop]# curl 172.25.254.1    #看不到结果
[root@foundation44 Desktop]# curl 172.25.254.1 -I   #可以看到解析
        HTTP/1.1 302 Found
        Cache-Control: no-cache
        Content-length: 0
        Location: http:www.westos.org #被解析到的位置
        Connection: close

[root@foundation44 Desktop]# curl 172.25.254.1
[root@foundation44 Desktop]# curl 172.25.254.1 -I
HTTP/1.1 302 Found
Cache-Control: no-cache
Content-length: 0
Location: http:www.baidu.com
Connection: close

读写分离
[root@server1 haproxy]# vim haproxy.cfg
     44         acl write method POST
     45         acl write method PUT
     46         use_backend static2 if wrire
     47         defualt_backend static1

[root@foundation78 Desktop]# scp redhat.jpg [email protected]:/var/www/html/   #图片随意,只要看到效果即可,注意路径
[email protected]'s password:
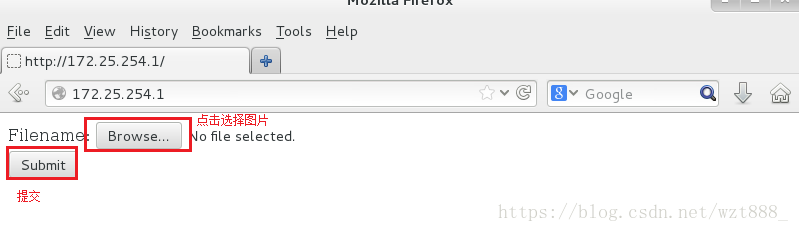
#测试:

[root@server3 html]# cd upload/
[root@server3 upload]# ls
index.php  upload_file.php
[root@server3 upload]# mv * ..
mv: overwrite `../index.php'? y
[root@server3 upload]# ls
[root@server3 upload]# cd ..
[root@server3 html]# ls
index.html  index.php  upload  upload_file.php
[root@server3 html]# chmod 777 upload
[root@server3 upload]# /etc/init.d/httpd restart
Stopping httpd:                                            [  OK  ]
Starting httpd: httpd: Could not reliably determine the server's fully qualified domain name, using 192.168.0.3 for ServerName
                                                           [  OK  ]

[root@server3 html]# vim upload_file.php
  1 <?php
  2 if ((($_FILES["file"]["type"] == "image/gif")   #上传的图片必须符合这三种格式
  3 || ($_FILES["file"]["type"] == "image/jpeg")
  4 || ($_FILES["file"]["type"] == "image/pjpeg"))
  5 && ($_FILES["file"]["size"] < 2000000))     #限制图片的大小

[root@server2 html]# ls
images  index.html  upload
[root@server2 html]# cd upload/
[root@server2 upload]# mv * ..
[root@server2 upload]# ls
[root@server2 upload]# cd ..
[root@server2 html]# ls
images  index.html  index.php  upload  upload_file.php
[root@server2 html]# chmod  777 upload
[root@server2 html]# vim upload_file.php
  1 <?php
  2 if ((($_FILES["file"]["type"] == "image/gif")   #上传的图片必须符合这三种格式
  3 || ($_FILES["file"]["type"] == "image/jpeg")
  4 || ($_FILES["file"]["type"] == "image/pjpeg"))
  5 && ($_FILES["file"]["size"] < 2000000))     #限制图片的大小

[root@server2 html]# yum install -y php    #用来解析图片
[root@server2 html]# /etc/init.d/httpd  restart
Stopping httpd:                                            [  OK  ]
Starting httpd: httpd: Could not reliably determine the server's fully qualified domain name, using 192.168.0.2 for ServerName
                                                           [  OK  ]
#测试:
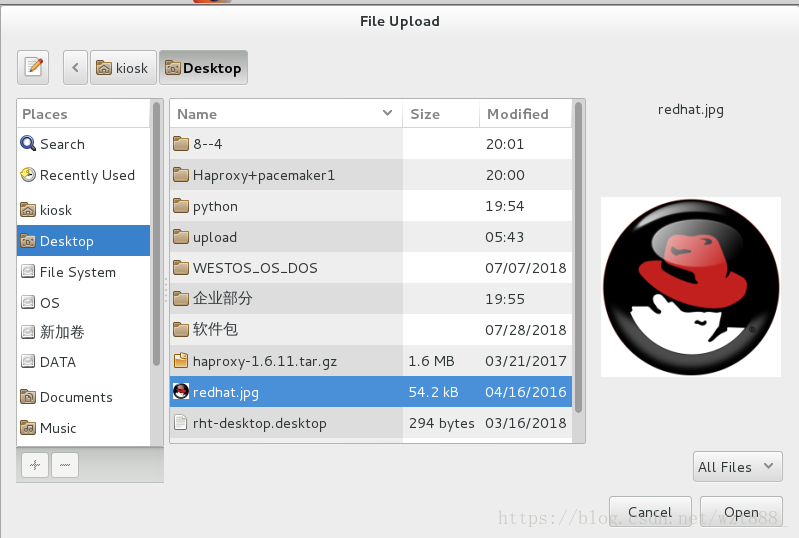
可以看到server3上成功被上传了图片

2.pacemaker
[root@server1 ~]# yum install pacemaker corosync -y
[root@server1 haproxy]# cp /etc/corosync/corosync.conf.example /etc/corosync/corosync.conf
cp: overwrite `/etc/corosync/corosync.conf'? Y
[root@server1 ~]# cd /etc/corosync/
[root@server1 corosync]# cp corosync.conf.example corosync.conf
[root@server1 corosync]# vim corosync.conf
  4 totem {
  5         version: 2
  6         secauth: off
  7         threads: 0
  8         interface {
  9                 ringnumber: 0
 10                 bindnetaddr: 172.25.254.0    #监控网段
 11                 mcastaddr: 226.94.1.1       #多播地址,同一局域网中多播地址或端口是唯一的

  12                mcastport: 5405             #多播端口
  13             ttl: 1
  14        }
  15}

  16 loging {
  17        fileline: off
  18        to_stderr: no
  19        to_logfile: yes
  20        to_syslog: yes
  21        logfile: /var/log/cluster/corosync.log
  22        debug: off
  23        timestamp: on
  24        logger_subsys {
  25                subsys: AMF
  26                debug: off
  27        }
  28}
  29  service{    #添加的服务
  30         name : pacemaker
  31         ver: 0  #表示pacemaker作为corosync的插件来运行
  32        }

[root@server1 ~]# scp /etc/corosync/corosync.conf  server4:/etc/corosync/
[root@server1 ~]# /etc/init.d/corosync start
Starting Corosync Cluster Engine (corosync):               [  OK  ]
[root@server1 ~]# /etc/init.d/corosync  restart
[root@server1 ~]#  yum install crmsh-1.2.6-0.rc2.2.1.x86_64.rpm  pssh-2.3.1-2.1.x86_64.rpm

在server4同server1的所有操作,即保证配置保证同步


[root@server1 ~]# crm
crm(live)# status
Last updated: Sat Aug  4 22:43:20 2018
Last change: Sat Aug  4 22:38:39 2018 via crmd on server1
Stack: classic openais (with plugin)
Current DC: server1 - partition with quorum
Version: 1.1.10-14.el6-368c726
2 Nodes configured, 2 expected votes
0 Resources configured


Online: [ server1 server4 ]
crm(live)#  configure
crm(live)configure# show
node server1
node server4
property $id="cib-bootstrap-options" \
    dc-version="1.1.10-14.el6-368c726" \
    cluster-infrastructure="classic openais (with plugin)" \
    expected-quorum-votes="2" \
    stonith-enabled="fasle"
crm(live)configure# primitive vip ocf:heartbeat:IPaddr2 params ip=172.25.254.100 cidr_netmask=24 op monitor interval=1min   #ocf资源代理,添加vip,每隔1min监控一次

crm(live)configure# commit   #提交,有报错
   error: cluster_option:   Value 'fasle' for cluster option 'stonith-enabled' is invalid.  Defaulting to true
   error: unpack_resources:     Resource start-up disabled since no STONITH resources have been defined
   error: unpack_resources:     Either configure some or disable STONITH with the stonith-enabled option
   error: unpack_resources:     NOTE: Clusters with shared data need STONITH to ensure data integrity
Errors found during check: config not valid
Do you still want to commit? yes
crm(live)configure# property stonith-enabled=false   #关闭STONITH特性
crm(live)configure# property no-quorum-policy=ignore  #默认集群最少两个节点,ignore忽略节点数检测
crm(live)configure# primitive haproxy lsb:haproxy op monitor interval=1min   #添加haproxy服务,lsb资源代理
crm(live)configure# commit


 #######在server4上监控
[root@server4 ~]# crm_mon

Last updated: Sat Aug  4 22:53:38 2018
Last change: Sat Aug  4 22:53:38 2018 via cibadmin on server1
Stack: classic openais (with plugin)
Current DC: server1 - partition with quorum
Version: 1.1.10-14.el6-368c726
2 Nodes configured, 2 expected votes
1 Resources configured


Online: [ server1 server4 ]  #可以看到两台都开启了

vip     (ocf::heartbeat:IPaddr2):   Started server1   #vip添加成功
haproxy (lsb:haproxy):  Started server1             #服务添加成功
[root@server1 ~]# crm node standby #把server1干掉,则通过监控可以看到只有server4在工作
[root@server1 ~]# crm node online #把server1恢复,又恢复了两台服务器在工作的状态

[root@foundation78 ~]# yum install fence-virtd-multicast.x86_64 fence-virtd.x86_64 fence-virtd-libvirt.x86_64  -y
[root@foundation78 ~]# fence_virtd -c
Module search path [/usr/lib64/fence-virt]:

Available backends:
    libvirt 0.1
Available listeners:
    multicast 1.2

Listener modules are responsible for accepting requests
from fencing clients.

Listener module [multicast]:

The multicast listener module is designed for use environments
where the guests and hosts may communicate over a network using
multicast.

The multicast address is the address that a client will use to
send fencing requests to fence_virtd.

Multicast IP Address [225.0.0.12]:

Using ipv4 as family.

Multicast IP Port [1229]:

Setting a preferred interface causes fence_virtd to listen only
on that interface.  Normally, it listens on all interfaces.
In environments where the virtual machines are using the host
machine as a gateway, this *must* be set (typically to virbr0).
Set to 'none' for no interface.

Interface [virbr0]: br0

The key file is the shared key information which is used to
authenticate fencing requests.  The contents of this file must
be distributed to each physical host and virtual machine within
a cluster.

Key File [/etc/cluster/fence_xvm.key]:

Backend modules are responsible for routing requests to
the appropriate hypervisor or management layer.

Backend module [libvirt]:

Configuration complete.

=== Begin Configuration ===
backends {
    libvirt {
        uri = "qemu:///system";
    }

}

listeners {
    multicast {
        port = "1229";
        family = "ipv4";
        interface = "br0";
        address = "225.0.0.12";
        key_file = "/etc/cluster/fence_xvm.key";
    }

}

fence_virtd {
    module_path = "/usr/lib64/fence-virt";
    backend = "libvirt";
    listener = "multicast";
}

=== End Configuration ===
Replace /etc/fence_virt.conf with the above [y/N]? y
[root@foundation78 ~]# mkdir /etc/cluster
[root@foundation78 ~]# dd if=/dev/urandom of=/etc/cluster/fence_xvm.key bs=128 count=1   #截取fence_key
        1+0 records in
        1+0 records out
        128 bytes (128 B) copied, 0.000186964 s, 685 kB/s
[root@foundation78 ~]# cd /etc/cluster/
[root@foundation78 cluster]# ls   #fence_key  #把真机上的fence_key传给两个集群节点,没有的话就自己截一个出来
fence_xvm.key
[root@foundation78 cluster]# systemctl start fence_virtd
[root@foundation78 cluster]# systemctl status fence_virtd
        fence_virtd.service - Fence-Virt system host daemon
           Loaded: loaded (/usr/lib/systemd/system/fence_virtd.service; disabled)
           Active: active (running) since Sat 2018-08-04 23:21:25 CST; 8s ago
          Process: 12362 ExecStart=/usr/sbin/fence_virtd $FENCE_VIRTD_ARGS (code=exited, status=0/SUCCESS)
         Main PID: 12363 (fence_virtd)
           CGroup: /system.slice/fence_virtd.service
                   └─12363 /usr/sbin/fence_virtd -w

        Aug 04 23:21:25 foundation78.ilt.example.com systemd[1]: Starting Fence-Virt system host daemon...
        Aug 04 23:21:25 foundation78.ilt.example.com fence_virtd[12363]: fence_virtd starting.  Listen...t
        Aug 04 23:21:25 foundation78.ilt.example.com systemd[1]: Started Fence-Virt system host daemon.
        Hint: Some lines were ellipsized, use -l to show in full.
[root@foundation78 cluster]# scp -r fence_xvm.key [email protected]:/etc/cluster
        [email protected]'s password:
        fence_xvm.key                                                   100%  128     0.1KB/s   00:00
    [root@foundation78 cluster]# scp -r fence_xvm.key [email protected]:/etc/cluster
    [email protected]'s password:
    fence_xvm.key                                                   100%  128     0.1KB/s   00:00


[root@server1 cluster]# stonith_admin -I
         fence_pcmk
         fence_legacy
        2 devices found
[root@server1 cluster]# yum install fence-virt.x86_64   -y
[root@server1 cluster]# stonith_admin -I
         fence_xvm
         fence_virt
         fence_pcmk
         fence_legacy
        4 devices found
[root@server1 cluster]# stonith_admin -M -a fence_xvm   #添加fence代理
[root@server1 cluster]# crm
crm(live)# configure
crm(live)configure# primitive vmfence stonith:fence_xvm params pcmk_host_map="server1:test1;server4:test4" op monitor interval=1min
crm(live)configure# property stonith-enabled=true
crm(live)configure# commit


Last updated: Sat Aug  4 23:48:59 2018
Last change: Sat Aug  4 23:48:59 2018 via cibadmin on server1
Stack: classic openais (with plugin)
Current DC: server1 - partition with quorum
Version: 1.1.10-14.el6-368c726
2 Nodes configured, 2 expected votes
3 Resources configured


Online: [ server1 server4 ]

vip     (ocf::heartbeat:IPaddr2):   Started server4   #工作的是server4
haproxy (lsb:haproxy):  Started server1
[root@server4 cluster]# fence_xvm -H test