在上一篇使用C#采集语音视频、屏幕桌面【基于MCapture组件】的文章中,我们已经可以采集到语音、视频、桌面数据了,那么,接下来我们再结合MFile的录制功能,便能把这些数据写到文件中,生成标准的mp4文件。
使用MCapture+MFile,我们可以实现以下类似的应用:
(1)录制课件:录制屏幕桌面+语音。
(2)录制自己的MV:录制摄像头视频+语音。
(3)录制教学视频:录制桌面+自己的视频+语音。(其中将桌面与自己视频叠加在一起)
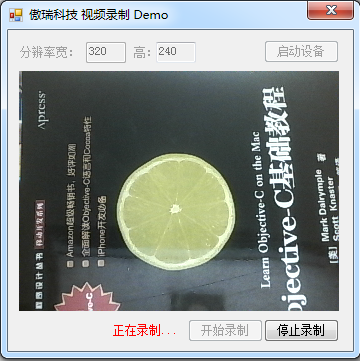
那接下来这篇文章将详细介绍应用(2)的实现,我们做一个简单的Demo(文末有源码下载)。另外两种应用都可以在本文Demo的基础上作一些修改即可。Demo 运行的截图如下所示:
首先,当点击启动设备按钮时,我们创建一个摄像头采集器实例和一个麦克风采集器实例,并启动它们开始采集:

    this.cameraCapturer = CapturerFactory.CreateCameraCapturer(0, new Size(int.Parse(this.textBox_width.Text), int.Parse(this.textBox_height.Text)), this.fps);
    this.cameraCapturer.ImageCaptured += new CbGeneric<Bitmap>(cameraCapturer_ImageCaptured);
    this.cameraCapturer.CaptureError += new CbGeneric<Exception>(cameraCapturer_CaptureError);
    this.microphoneCapturer = CapturerFactory.CreateMicrophoneCapturer(0);
    this.microphoneCapturer.AudioCaptured += new CbGeneric<byte[]>(microphoneCapturer_AudioCaptured);
    this.microphoneCapturer.CaptureError += new CbGeneric<Exception>(microphoneCapturer_CaptureError);
    //开始采集
    this.cameraCapturer.Start();
    this.microphoneCapturer.Start();
接下来,点击开始录制按钮时,我们初始化VideoFileMaker组件:
    this.videoFileMaker = new VideoFileMaker();
    this.videoFileMaker.AutoDisposeVideoFrame = true;
    this.videoFileMaker.Initialize("test.mp4", VideoCodecType.H264, int.Parse(this.textBox_width.Text), int.Parse(this.textBox_height.Text), this.fps, AudioCodecType.AAC, 16000, 1, true);
this.isRecording = true;
参数中设定,使用h.264对视频进行编码,使用aac对音频进行编码,并生成mp4格式的文件。然后,我们可以通过OMCS获取实时的音频数据和视频数据,并将它们写到文件中。
    void microphoneCapturer_AudioCaptured(byte[] audioData) //采集到的语音数据
    {
        if (this.isRecording)
        {
            this.videoFileMaker.AddAudioFrame(audioData);
        }
    }
    //采集到的视频图像
    void cameraCapturer_ImageCaptured(Bitmap img)
    {
        if (this.isRecording)
        {
            this.DisplayVideo((Bitmap)img.Clone());
            this.videoFileMaker.AddVideoFrame(img);
        }
        else
        {
            this.DisplayVideo(img);
        }
    }
当想结束录制时,则调用Close方法:
this.videoFileMaker.Close(true);
更多细节大家可以下载文末的源码研究,最后,有几点需要额外强调一下的:
(1)摄像头采集的帧频最好与录制所设定的帧频完全一致。demo中是使用成员变量fps来表示的。
(2)videoFileMaker的AutoDisposeVideoFrame属性要设置为ture,即尽快释放不再使用的视频帧,节省内存。
(3)DisplayVideo方法使用的是采集视频帧的复制品,这是因为videoFileMaker不是同步写入的,而是先将帧放入队列,然后异步写入的。
(4)DisplayVideo方法在使用完作为背景的视频帧后,也要尽快释放。道理同上。