写在前面
跨域描述符LCD可以实现二维图片特征点到三维点云特征点的配准,是个具有通用性的深度学习特征描述子。(图片来源于论文LCD: Learned Cross-Domain Descriptors for 2D-3D Matching)
在Github开源的源码里面给出了利用LCD进行三维点云配准的例程。align_point_cloud.py,这里对例程如何使用已经训练好的模型来进行三维点云配准进行解析。
运行环境
python版本3.6.0以上
pytorch非CPU版本(可选)
Open3D
numpy及其它库,自行下载
需要注意的是,官方的源码中使用的Open3D版本较旧,在运行程序时回出现新版本对应函数不匹配的报错,详情可以参考我之前发的解决办法。
顺带一提,例程是不能在pycharm里面直接运行的,需要输入参数,具体是啥参照官方Github里面给的:
Aligning two point clouds with LCD This demo aligns two 3D colored
point clouds using our pre-trained LCD descriptor with RANSAC. How to
run:
$ python -m apps.align_point_cloud samples/000.ply samples/002.ply --logdir logs/LCD-D256/
For more information, use the--helpoption.
在代码的根目录下运行python -m apps.align_point_cloud samples/000.ply samples/002.ply --logdir logs/LCD-D256/即可运行调试。在pycharm里面需要带参数运行,具体方法自行搜索。
正文
1.库
把该用的库引一引:
import os
import json
import open3d
import torch
import argparse
import numpy as np

from lcd.models import *
但是pycharm提示我这个例程里面似乎并没有用到pytorch,删了也能正常运行。
这部分里面的from lcd.models import * 对应的lcd.models文件夹下有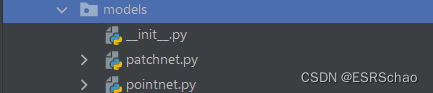
patchnet和pointnet两种分别对应了二维和三维描述子生成网络,例程中使用了pointnet下的PointNetAutoencoder类,之后会展开说说。
2.参数输入和模型建立
parser = argparse.ArgumentParser()
parser.add_argument("source", help="path to the source point cloud")
parser.add_argument("target", help="path to the target point cloud")
parser.add_argument("--logdir", help="path to the log directory")
parser.add_argument("--voxel_size", default=0.1, type=float)
parser.add_argument("--radius", default=0.15, type=float)
parser.add_argument("--num_points", default=1024, type=int)
args = parser.parse_args()
(1) source → 输入点云路径
(2) target → 目标点云路径
(3) --logdir → 模型文件路径
(4) --voxel_size → 体素大小,默认为0.1
(5) --radius → 最近邻搜索半径,默认为0.15
(6) --num_points → 采样点对应patch内特征点个数,默认为1024
得到输入args为:

接着是读取网络配置文件config.json
logdir = args.logdir
config = os.path.join(logdir, "config.json")
config = json.load(open(config))

device = config["device"]
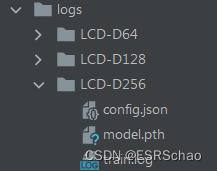
logdir 是 Log/LCD-D256目录,保存了训练好的模型和配置等:
接下来
fname = os.path.join(logdir, "model.pth")
print("> Loading model from {}".format(fname))
model = PointNetAutoencoder(
    config["embedding_size"],
    config["input_channels"],
    config["output_channels"],
    config["normalize"],
)
model.load_state_dict(torch.load(fname)["pointnet"])
model.to(device)
model.eval()
fname为模型文件model.pth的路径
我们来看一下 PointNetAutoencoder类的输入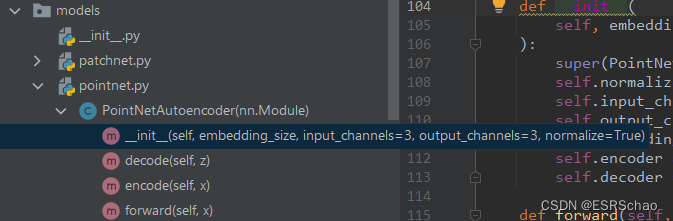
程序这边model直接和config保持了一致。
在获得配置文件后进行模型加载:
model.load_state_dict(torch.load(fname)["pointnet"])
fname路径对应的model文件里面有 pointnet 和 patchnet 两批参数,这边因为只有点云的网络所以只需要读取[“pointnet”]。
model.to(device)
将模型加载在配置读取出来的设备上(GPU)
model.eval()
eval()挺重要的,在模型预测阶段我们需要Dropout层和batch normalization层设置到预测模式。
3.extract_uniform_patches
定义函数extract_uniform_patches,获得点云Patch。
def extract_uniform_patches(pcd, voxel_size, radius, num_points):
    kdtree = open3d.geometry.KDTreeFlann(pcd)
    downsampled = pcd.voxel_down_sample(voxel_size)
    points = np.asarray(downsampled.points)
    patches = []
    for i in range(points.shape[0]):
        k, index, _ = kdtree.search_hybrid_vector_3d(points[i], radius, num_points)
        if k < num_points:
            index = np.random.choice(index, num_points, replace=True)
        xyz = np.asarray(pcd.points)[index]
        rgb = np.asarray(pcd.colors)[index]
        xyz = (xyz - points[i]) / radius  # normalize to local coordinates
        patch = np.concatenate([xyz, rgb], axis=1)
        patches.append(patch)
    patches = np.stack(patches, axis=0)
    return downsampled, patches
输入pcd, voxel_size, radius, num_points
kdtree = open3d.geometry.KDTreeFlann(pcd)
downsampled = pcd.voxel_down_sample(voxel_size)
points = np.asarray(downsampled.points)
kdtree一会最近邻搜索用的;
对点云进行体素降采样得到downsampled,是一个Open3D点云对象;
得到采样点points。
 patches = []
    for i in range(points.shape[0]):
        k, index, _ = kdtree.search_hybrid_vector_3d(points[i], radius, num_points)
        if k < num_points:
            index = np.random.choice(index, num_points, replace=True)
        xyz = np.asarray(pcd.points)[index]
        rgb = np.asarray(pcd.colors)[index]
        xyz = (xyz - points[i]) / radius  # normalize to local coordinates
        patch = np.concatenate([xyz, rgb], axis=1)
        patches.append(patch)
    patches = np.stack(patches, axis=0)
    return downsampled, patche
最近邻搜索kdtree.search_hybrid_vector_3d对每个降采样之后的点进行最近邻搜索。
返回一个Tuple[int, open3d.utility.IntVector, open3d.utility.DoubleVector],程序中的K为搜索点的个数,index为搜索点对应的索引,是个一维数组。
后面的
 if k < num_points:
            index = np.random.choice(index, num_points, replace=True)
是当k的值小于给定目标点的个数(1024)时将进行随机填充,将index填充到目标长度。
xyz = np.asarray(pcd.points)[index]
rgb = np.asarray(pcd.colors)[index]
取xyz为采样点的位置信息,rgb为采样点的颜色信息。
xyz = (xyz - points[i]) / radius
点云位置归一化处理。
		patch = np.concatenate([xyz, rgb], axis=1)
        patches.append(patch)
    patches = np.stack(patches, axis=0)
将位置和颜色信息合并,对所有采样点处理完毕后将列表patches堆叠为一个[points.shape[0], num_points, 6](例程中为[1469, 1024, 6])维度的矩阵。
return downsampled, patches
返回值为Open3D点云对象downsampled和patches。可以看出函数功能就是将输入的点云降采样并得到所有采样点对应的patch。
4.compute_lcd_descriptors
计算LCD特征描述子
def compute_lcd_descriptors(patches, model, batch_size, device):
    batches = torch.tensor(patches, dtype=torch.float32)
    batches = torch.split(batches, batch_size)
    descriptors = []
    with torch.no_grad():
        for i, x in enumerate(batches):
            x = x.to(device)
            z = model.encode(x)
            z = z.cpu().numpy()
            descriptors.append(z)
    return np.concatenate(descriptors, axis=0)
输入为生成的patch和model以及选择参数batch_size(例程中为128)、device(例程中为CUDA)。
batches = torch.tensor(patches, dtype=torch.float32)
batches = torch.split(batches, batch_size)
将输入的patch转换为张量并将生成的张量按照batch_size进行分割。例程中的batch为若干(128, 1024, 6)的张量块。
	with torch.no_grad():
        for i, x in enumerate(batches):
            x = x.to(device)
            z = model.encode(x)
            z = z.cpu().numpy()
            descriptors.append(z)
只是想看一下训练的效果,并不是想通过验证集来更新网络时,可以使用with torch.no_grad()。
对于z = model.encode(x),在类PointNetAutoencoder中有:
    def encode(self, x):
        z = self.encoder(x)
        if self.normalize:
            z = F.normalize(z)
        return z
然后pointnet.py前面有写
self.normalize = normalize
self.input_channels = input_channels
self.embedding_size = embedding_size
self.encoder = PointNetEncoder(embedding_size, input_channels)
其中类PointNetEncoder如下:
class PointNetEncoder(nn.Module):
    def __init__(self, embedding_size, input_channels=3):
        super(PointNetEncoder, self).__init__()
        self.input_channels = input_channels
        self.stn1 = STN3D(input_channels)
        self.stn2 = STN3D(64)
        self.mlp1 = nn.Sequential(
            nn.Conv1d(input_channels, 64, 1),
            nn.BatchNorm1d(64),
            nn.ReLU(),
            nn.Conv1d(64, 64, 1),
            nn.BatchNorm1d(64),
            nn.ReLU(),
        )
        self.mlp2 = nn.Sequential(
            nn.Conv1d(64, 64, 1),
            nn.BatchNorm1d(64),
            nn.ReLU(),
            nn.Conv1d(64, 128, 1),
            nn.BatchNorm1d(128),
            nn.ReLU(),
            nn.Conv1d(128, 1024, 1),
            nn.BatchNorm1d(1024),
            nn.ReLU(),
        )
        self.fc = nn.Linear(1024, embedding_size)
正是训练得到的三维点云编码器模型,得到一个CUDA tensor格式的数据、
z = z.cpu().numpy()
先将其转换成cpu float-tensor随后再转到numpy格式。 numpy不能读取CUDA tensor 需要将它转化为 CPU tensor,得到一个(128,256)的描述子矩阵。
return np.concatenate(descriptors, axis=0)
将得到的所有描述子堆叠后输出,例程中的输出格式为(1469,256)。
5.点云读取与处理
source = open3d.io.read_point_cloud(args.source)
target = open3d.io.read_point_cloud(args.target)
读取源点云和目标点云。
source_points, source_patches = extract_uniform_patches(
    source, args.voxel_size, args.radius, args.num_points)
通过exract_uniform_patches得到降采样后的源点云和其对应的patch。
source_descriptors = compute_lcd_descriptors(
    source_patches, model, batch_size=128, device=device)
通过compute_lcd_descriptors得到源点云的特征描述子source_descriptors。
source_features = open3d.pipelines.registration.Feature()
source_features.data = np.transpose(source_descriptors)  # T
print("Extracted {} features from source".format(len(source_descriptors)))
open3d.pipelines.registration.Feature()在官方文档中的解释如下:
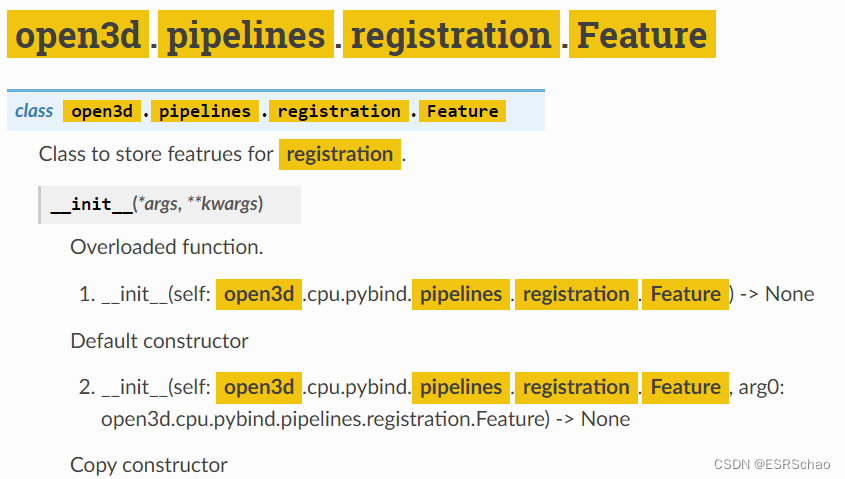
大概可以理解为在Open3D的piplines里面用于储存用于配准的特征数据的类,需要将生成的特征描述子转置后赋给source_features中的data——source_features.data = np.transpose(source_descriptors)
目标点云的处理方式一致:
target_points, target_patches = extract_uniform_patches(
    target, args.voxel_size, args.radius, args.num_points
)
target_descriptors = compute_lcd_descriptors(
    target_patches, model, batch_size=128, device=device
)
target_features = open3d.pipelines.registration.Feature()
target_features.data = np.transpose(target_descriptors)
print("Extracted {} features from target".format(len(target_descriptors)))
6. 特征点配准
threshold = 0.075
result = open3d.pipelines.registration.registration_ransac_based_on_feature_matching(
    source_points,
    target_points,
    source_features,
    target_features,
    True,
    threshold,
    open3d.pipelines.registration.TransformationEstimationPointToPoint(False),
    4,
    [open3d.pipelines.registration.CorrespondenceCheckerBasedOnDistance(threshold)],
    open3d.pipelines.registration.RANSACConvergenceCriteria(4000000, 500),
)
注意:这部分的代码是在新版本Open3D的基础上修改的,并非原代码。
修改原因见我之前发的Open3D 15.1 报错 module ‘open3d‘ has no attribute ‘registration‘(跑LCD代码时报错)
open3d.pipelines.registration.registration_ransac_based_on_feature_matching函数新版本官方给出的解释如下:
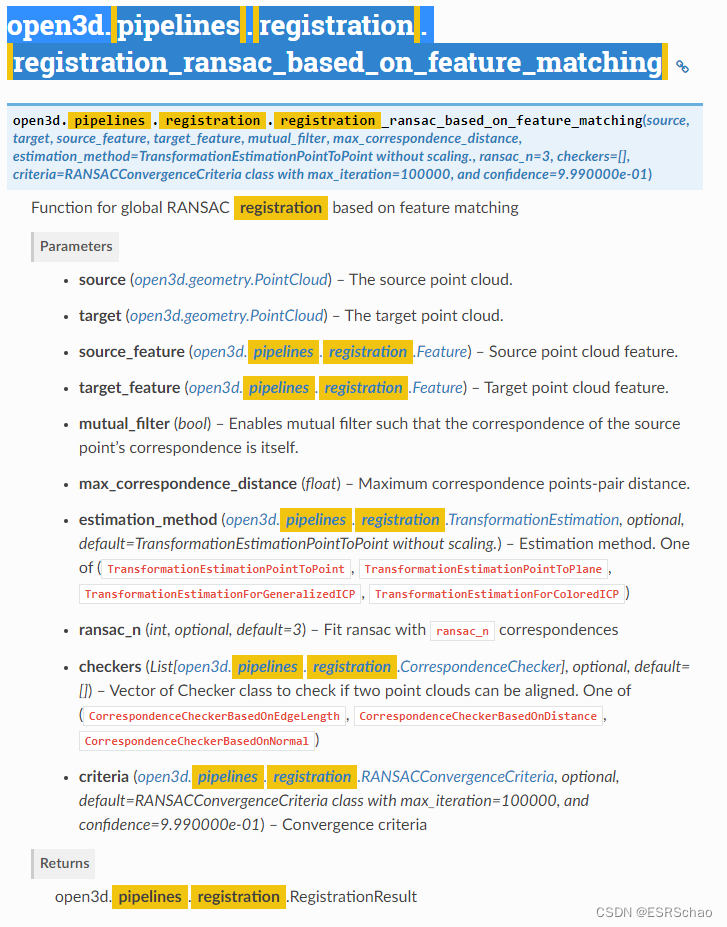
对两点云进行特征配准得到结果result,
if result.transformation.trace() == 4.0:
    success = False
当变换矩阵的迹为4时(没有产生旋转)认定未完成配准。
information = open3d.pipelines.registration.get_information_matrix_from_point_clouds(
    source_points, target_points, threshold, result.transformation
)
n = min(len(source_points.points), len(target_points.points))
if (information[5, 5] / n) < 0.3:  # overlap threshold
    success = False
通过获得信息矩阵来判定是否配准成功。
if not success:
    print("Cannot align two point clouds")
    exit(0)
如果配准未成功,直接结束程序。
print("Success!")
print("Visualizing alignment result...")
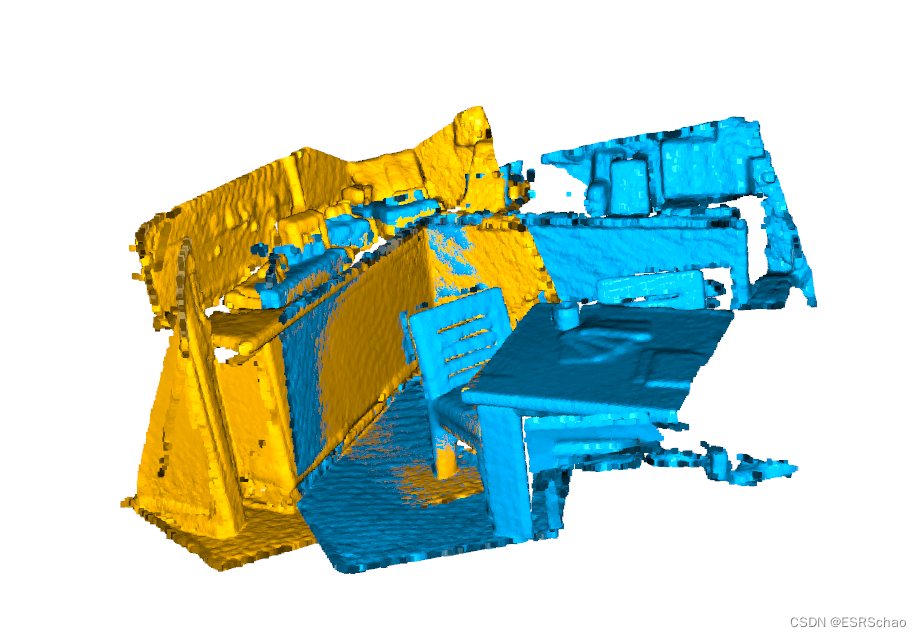
source.estimate_normals(open3d.geometry.KDTreeSearchParamHybrid(radius=0.2, max_nn=30))
target.estimate_normals(open3d.geometry.KDTreeSearchParamHybrid(radius=0.2, max_nn=30))
source.paint_uniform_color([1, 0.706, 0])
target.paint_uniform_color([0, 0.651, 0.929])
source.transform(result.transformation)
open3d.visualization.draw_geometries([source, target])
print(result.transformation)
如果配准成功完成,将配准后的点云变换后着色进行可视化输出得到如下结果: