目录
1 open3d中的IMAGE
1.1 open3d中的image
在open3d中可以对图片数据进行操作,包括
read_image,-
write_image, filter_image-
draw_geometries
同时open3d中的Image对象可以直接冲numpy array中转换得到
import cv2
import numpy as np
import open3d as o3d
if __name__ == "__main__":
# open3d中自带的图片数据
img_data = o3d.data.JuneauImage()
print(f"Reading image from file: Juneau.jpg stored at {img_data.path}")
img = o3d.io.read_image(img_data.path)
print(img)
print("Saving image to file: copy_of_Juneau.jpg")
o3d.io.write_image("copy_of_Juneau.jpg", img)
# o3d.visualization.draw_geometries([img])
# numpy与open3d的图片数据的转换
img_numpy = cv2.imread("/home/mmdet/slam/rgbd_dataset_freiburg3_long_office_household/rgb/1341847980.722988.png")
o3d_img = o3d.geometry.Image(img_numpy)
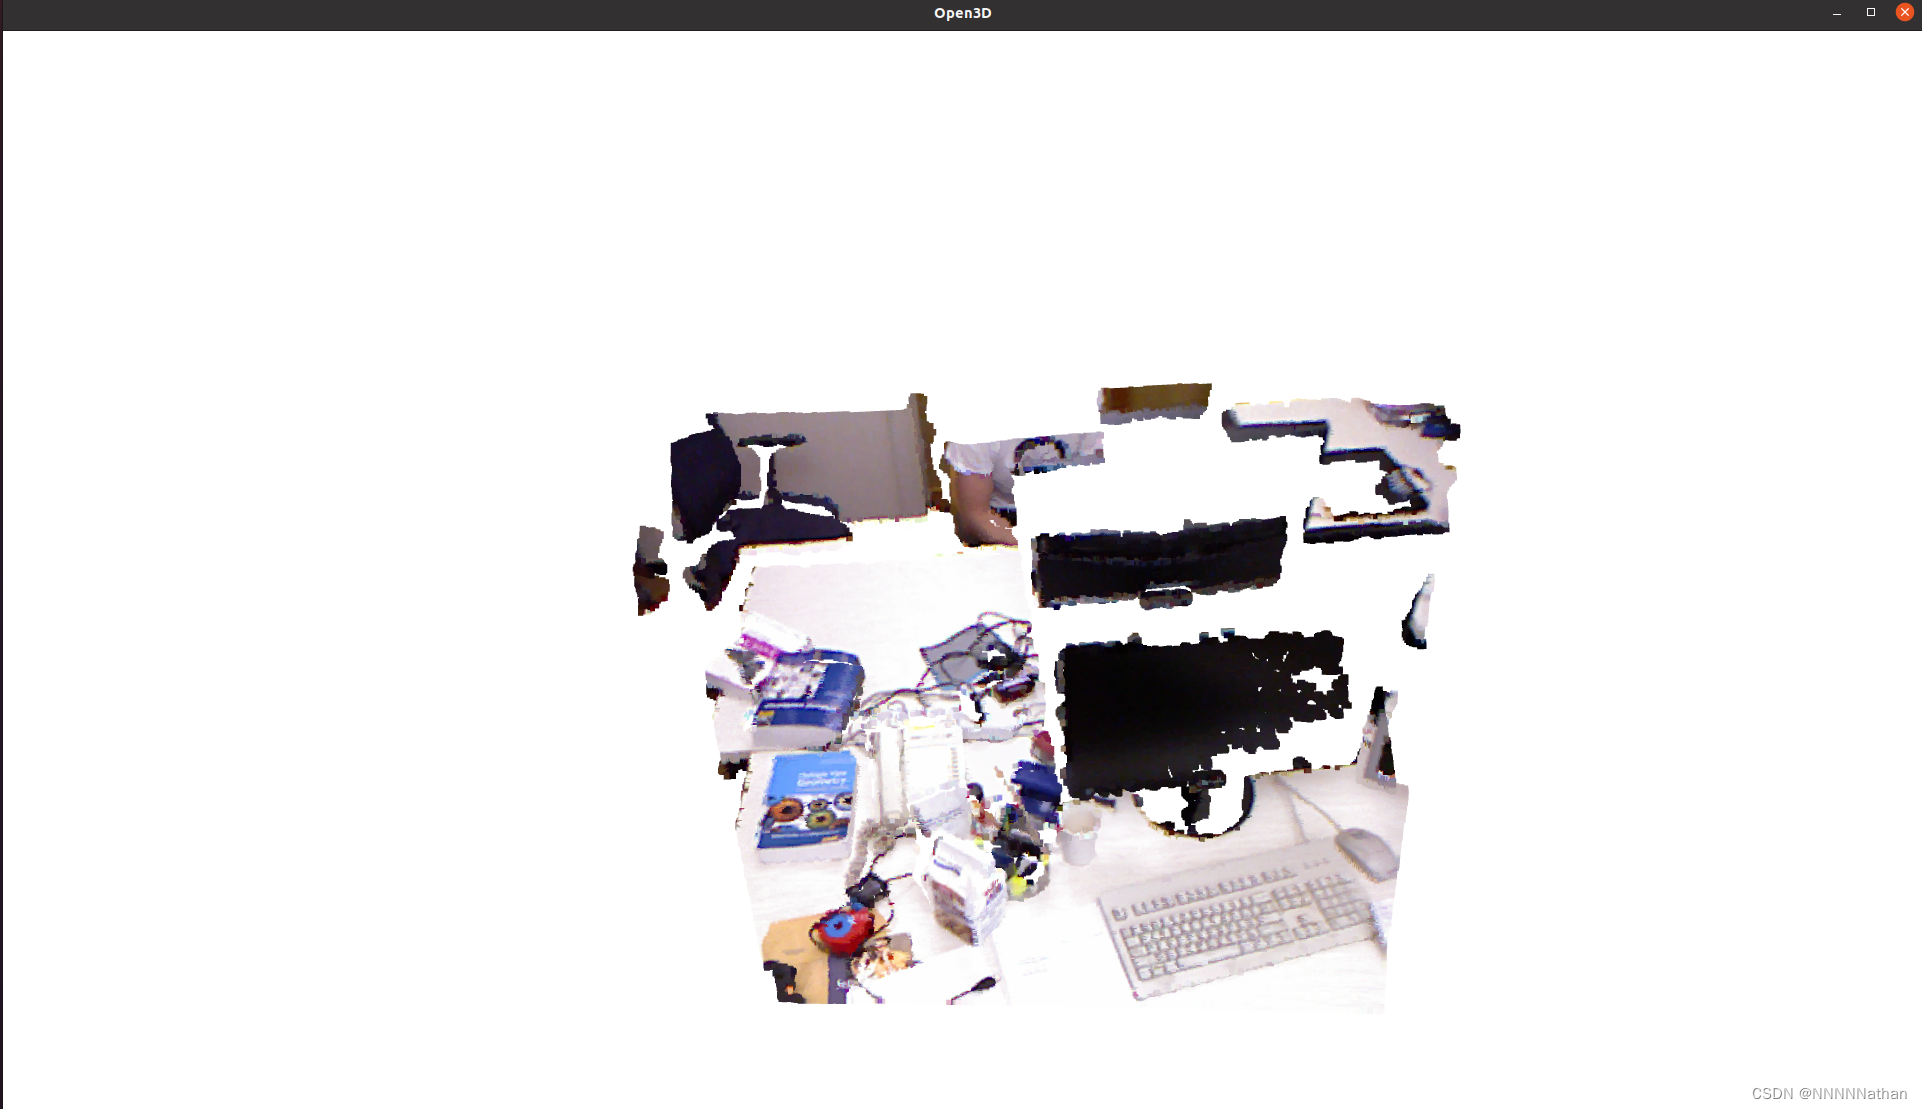
o3d.visualization.draw_geometries([o3d_img])
# o3d中的图像滤波
"""
Gaussian3= <ImageFilterType.Gaussian3: 0>
Gaussian5= <ImageFilterType.Gaussian5: 1>
Gaussian7= <ImageFilterType.Gaussian7: 2>
Sobel3dx= <ImageFilterType.Sobel3dx: 3>
Sobel3dy= <ImageFilterType.Sobel3dy: 4>
"""
o3d_img = o3d_img.filter(o3d.geometry.ImageFilterType.Gaussian3)
o3d.visualization.draw_geometries([o3d_img])
# o3d的image到numpy
img_cv2 = np.asarray(o3d_img)
cv2.imshow("image", img_cv2)
cv2.waitKey(0)
1.2 open3d中的rgbd image
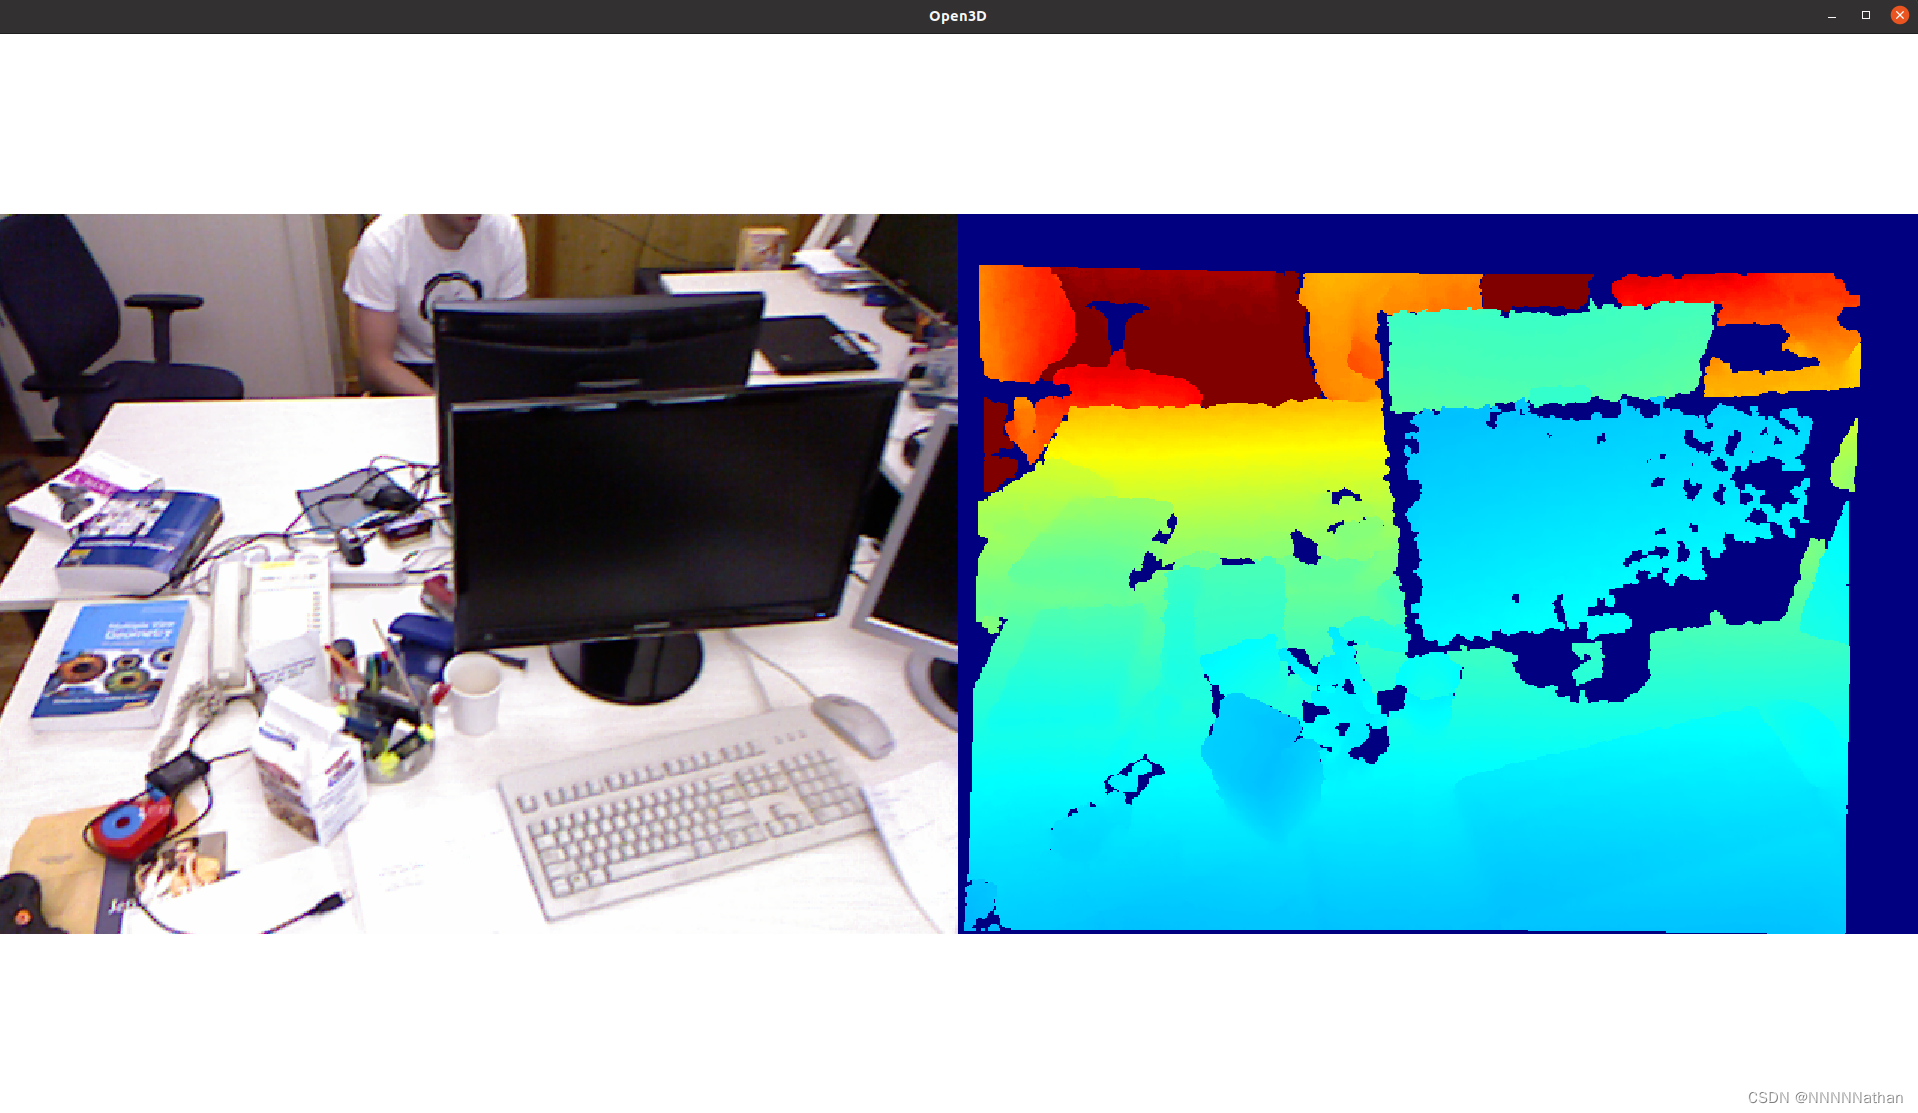
其中open3d还提供了对RGBD图片的支持,RGBD 图片由两张图片组成,分别是深度图和彩色图,一般RGBD 图片采集的数据来自深度相机,深度相机的实现技术当前主要为结构光(realsense D415)、ToF(kinect DK)、激光(realsense L515)实现。其中RGB(彩色)图像为CV_8UC3、深度图像为CV_16U。深度图像一般为16位的无符号整型,最大数据为65536,一般代表的是以毫米为单位的距离。
RGBD图像示例 (来自TUM数据集,由kniect相机拍摄)
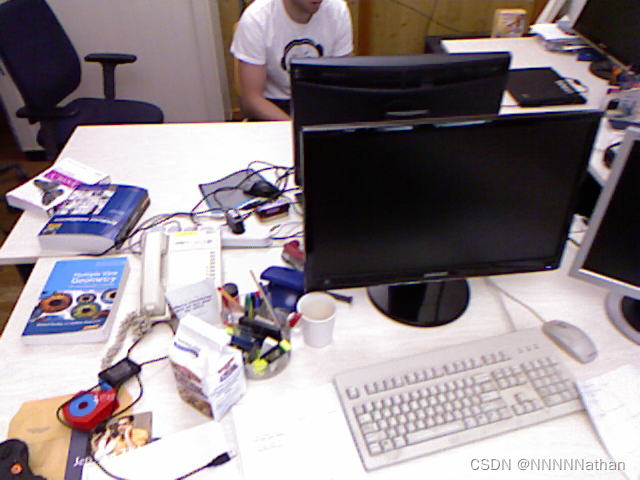

rgbd相机需要将深度相机传感器与彩色相机传感器进行配准(一般厂商出产会自动配准),配准完后的深度相机的彩色相机和深度相机统一了分辨率、相机的内参K,一般是将深度相机重投影到彩色相机上。
以下的内容将会基于RGBD数据集进行,所以这里先介绍以下常见的RGBD数据集,包括
这里以TUM的数据集为例,进入网址后下载Sequence 'freiburg1_xyz'或者直接点https://vision.in.tum.de/rgbd/dataset/freiburg1/rgbd_dataset_freiburg1_xyz.tgz![]() https://vision.in.tum.de/rgbd/dataset/freiburg1/rgbd_dataset_freiburg1_xyz.tgz
https://vision.in.tum.de/rgbd/dataset/freiburg1/rgbd_dataset_freiburg1_xyz.tgz
进行下载,下载解压后会如下信息
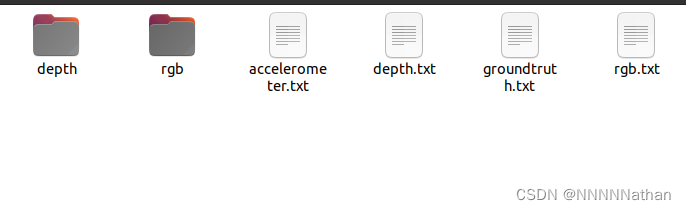
其中depth为深度图图像,rgb为彩色图图像, accelerometer.txt为加速度计信息,depth.txt和rgb.txt为时间戳与对应的图片名,groundtruth.txt为每一参的外参位姿。
该份数据的内参K为:(忽略畸变影响)
fx: 517.306408
fy: 516.469215
cx: 318.643040
cy: 255.313989
深度图的比值为1:5000
代码示例:
import open3d as o3d
import numpy as np
import matplotlib.pyplot as plt

if __name__ == '__main__':
    depth = o3d.io.read_image("rgbd_dataset_freiburg1_xyz/depth/1305031102.160407.png")
    color = o3d.io.read_image("rgbd_dataset_freiburg1_xyz/rgb/1305031102.175304.png")
    # print(color.dimension)

    # 相机的内参
    K = np.array([[517.306408, 0, 318.643040],
                  [0, 516.469215, 255.313989],
                  [0, 0, 1]], dtype=np.float64)
    # 内参设置为open3d camera 的PinholeCamera,在open3d中暂时只支持的PinholeCamera
    o3d_intrinsic = o3d.camera.PinholeCameraIntrinsic(width=640, height=480,
                                                      fx=517.306408, fy=516.469215,
                                                      cx=318.643040, cy=255.313989)

    # 将彩色图和深度图数据转换为open3d中的rgbd数据结构
    rgbd = o3d.geometry.RGBDImage.create_from_color_and_depth(color=color,
                                                              depth=depth,
                                                              depth_scale=5000,  # 实际距离与深度图的比值,该数据集为5000:1
                                                              depth_trunc=5.0,  # 由于深度相机采集到的远处深度距离不准确,所以裁剪掉远处的深度点
                                                              convert_rgb_to_intensity=False
                                                              # 是否将RGB图像转换为intensity图像,即没有颜色信息(灰度图像?)
                                                              )
    # 从RGBD数据中创建点云信息
    pcd = o3d.geometry.PointCloud.create_from_rgbd_image(image=rgbd,
                                                         intrinsic=o3d_intrinsic,  # 设置相机的内参0
                                                         extrinsic=np.eye(4)  # 设置当前帧的外参信息
                                                         )

    o3d.visualization.draw_geometries([rgbd])
    o3d.visualization.draw_geometries([pcd])
2 open3d.camera
| PinholeCameraIntrinsic class stores intrinsic camera matrix, and image height and width. 针孔相机内参雷,存储相机的内参矩阵,和图片的宽高 |
|
| Enum class that contains default camera intrinsic parameters for different sensors. open3d中内置的默认相机参数,包括了Kinect2相机和PrimeSense相机 |
|
| Contains both intrinsic and extrinsic pinhole camera parameters. 设置相机的内参和外参数据 |
|
| Contains a list of 该轨迹数据为PinholeCameraParameters组成的列表类型 |
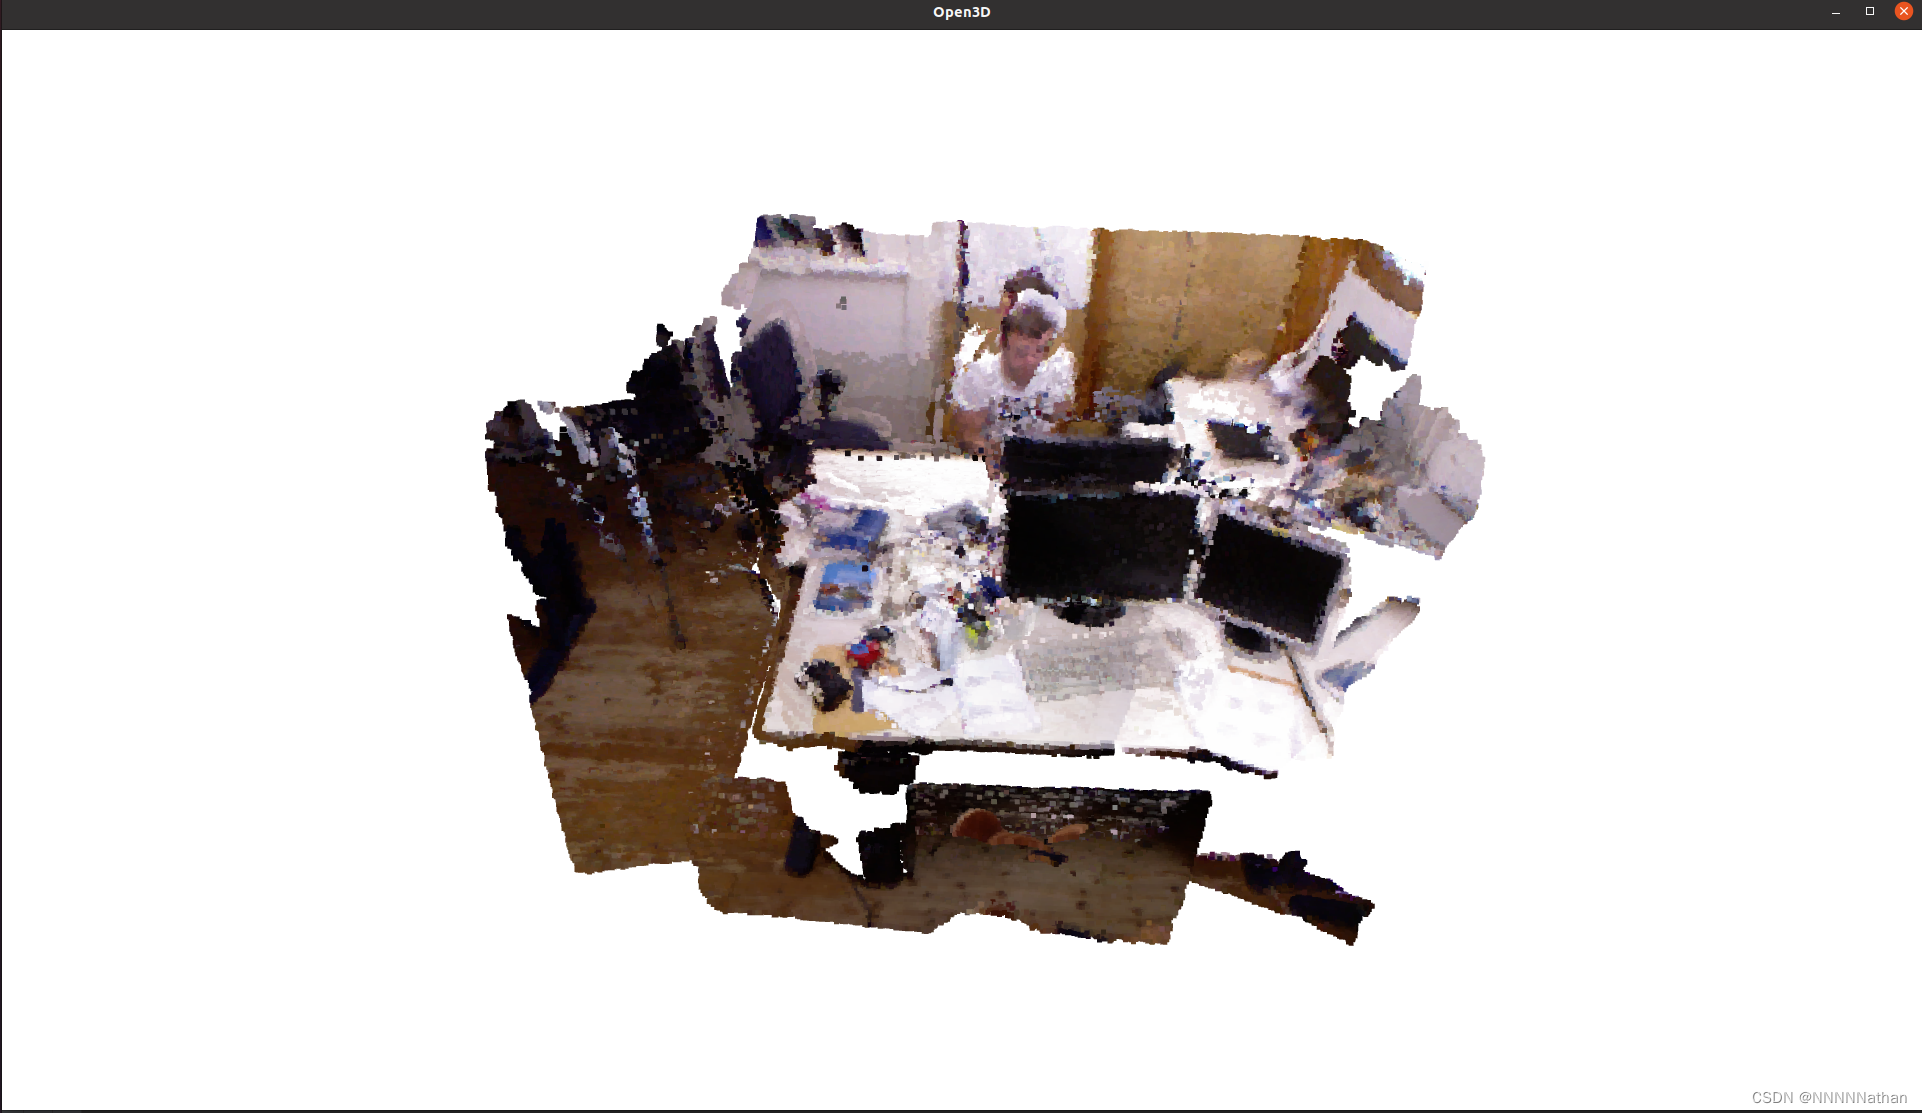
3 RGBD图像的点云拼接
此处还是使用先前的tum数据集,但是该数据集使用kinect采集,深度图和彩色图不是同步的,所以每个相机的拍摄都有自己的时间戳;因此这里需要对才彩色图和深度图进行时间戳的对齐,减少误差。同时,我们根据数据集提供的groundtruth信息,获取每帧的位姿信息,并使用位姿信息对点云进行拼接。
如下是associate.py文件,完成彩色图像、深度图像、groundtruth的信息时间戳的对齐,注意groundtruth中的姿态为四元数(qx, qy, qz, qw)。
"""
The Kinect provides the color and depth images in an un-synchronized way.
This means that the set of time stamps from the color images do not intersect with those of the depth images. Therefore, we need some way of associating color images to depth images.

For this purpose, you can use the ''associate.py'' script. It reads the time stamps from the rgb.txt file and the depth.txt file, and joins them by finding the best matches.
"""

import argparse
import sys
import os
import numpy as np


def read_file_list(filename):
    """
    Reads a trajectory from a text file.

    File format:
    The file format is "stamp d1 d2 d3 ...", where stamp denotes the time stamp (to be matched)
    and "d1 d2 d3.." is arbitary data (e.g., a 3D position and 3D orientation) associated to this timestamp.

    Input:
    filename -- File name

    Output:
    dict -- dictionary of (stamp,data) tuples

    """
    file = open(filename)
    data = file.read()
    lines = data.replace(",", " ").replace("\t", " ").split("\n")
    list = [[v.strip() for v in line.split(" ") if v.strip() != ""] for line in lines if
            len(line) > 0 and line[0] != "#"]
    list = [(float(l[0]), l[1:]) for l in list if len(l) > 1]
    return dict(list)


def associate(first_list, second_list, offset, max_difference):
    """
    Associate two dictionaries of (stamp,data). As the time stamps never match exactly, we aim
    to find the closest match for every input tuple.

    Input:
    first_list -- first dictionary of (stamp,data) tuples
    second_list -- second dictionary of (stamp,data) tuples
    offset -- time offset between both dictionaries (e.g., to model the delay between the sensors)
    max_difference -- search radius for candidate generation

    Output:
    matches -- list of matched tuples ((stamp1,data1),(stamp2,data2))

    """
    first_keys = list(first_list)
    second_keys = list(second_list)
    potential_matches = [(abs(a - (b + offset)), a, b)
                         for a in first_keys
                         for b in second_keys
                         if abs(a - (b + offset)) < max_difference]
    potential_matches.sort()
    matches = []
    for diff, a, b in potential_matches:
        if a in first_keys and b in second_keys:
            first_keys.remove(a)
            second_keys.remove(b)
            matches.append((a, b))

    matches.sort()
    return matches


def read_groundtruth(groundtruth):
    with open(groundtruth, mode="r") as f:
        data = f.read()

    lines = data.replace(",", " ").replace("\t", " ").split("\n")
    list = [[v.strip() for v in line.split(" ") if v.strip() != ""] for line in lines if
            len(line) > 0 and line[0] != "#"]
    list = [(float(l[0]), l[1:]) for l in list if len(l) > 1]
    return dict(list)


def match_groundtruth(matches, groundtruth):
    rgbd_extrinsic = read_groundtruth(groundtruth)
    rgbd_extrinsic_l = np.array(list(rgbd_extrinsic.keys()))
    matches_l = np.array([i[0] for i in matches])

    matches_l = np.expand_dims(matches_l, axis=1)
    rgbd_extrinsic_l = np.expand_dims(rgbd_extrinsic_l, axis=0)

    diff = np.abs(matches_l - rgbd_extrinsic_l)
    closest_index = np.argmin(diff, axis=1)

    matches_with_groundtruth = []
    for _, index in enumerate(closest_index):
        matches_with_groundtruth.append([float(matches[_][0]), float(matches[_][1]), float(rgbd_extrinsic_l[0][index]),
                                         *rgbd_extrinsic[rgbd_extrinsic_l[0][index]]])
    return matches_with_groundtruth


if __name__ == '__main__':

    # parse command line
    parser = argparse.ArgumentParser(description='''
    This script takes two data files with timestamps and associates them
    ''')
    # 填写彩色图和深度图的txt地址
    parser.add_argument('--first_file', default="./rgbd_dataset_freiburg1_xyz/rgb.txt",
                        help='first text file (format: timestamp data)')
    parser.add_argument('--second_file', default="./rgbd_dataset_freiburg1_xyz/depth.txt",
                        help='second text file (format: timestamp data)')
    parser.add_argument('--groundtruth', default="./rgbd_dataset_freiburg1_xyz/groundtruth.txt",
                        help='second text file (format: timestamp data)')

    parser.add_argument('--first_only', help='only output associated lines from first file', action='store_true')
    parser.add_argument('--offset', help='time offset added to the timestamps of the second file (default: 0.0)',
                        default=0.0)
    parser.add_argument('--max_difference',
                        help='maximally allowed time difference for matching entries (default: 0.02)', default=0.02)
    args = parser.parse_args()

    first_list = read_file_list(args.first_file)
    second_list = read_file_list(args.second_file)

    matches = associate(first_list, second_list, float(args.offset), float(args.max_difference))

    matches = match_groundtruth(matches, args.groundtruth)

    # if args.first_only:
    #     for a, b in matches:
    #         print("%f %s" % (a, " ".join(first_list[a])))
    # else:
    #     for a, b in matches:
    #         print("%f %s %f %s" % (a, " ".join(first_list[a]), b - float(args.offset), " ".join(second_list[b])))
    # content = "%f %s %f %s %f %f\n" % (a, " ".join(first_list[a]), b - float(args.offset), " ".join(second_list[b]))

    # 设置关联后保存的txt文件
    with open("associate.txt", mode="w") as f:
        f.write("# rgb_timestamp rgb depth_timestamp depth groundtruth_timestamp tx, ty, tz, qx, qy, qz, qw\n")
        for a, b, groundtruth, tx, ty, tz, qx, qy, qz, qw in matches:
            content = f"{a} {first_list[a][0]} {b - float(args.offset)} {second_list[b][0]} {groundtruth} {tx} {ty} {tz} {qx} {qy} {qz} {qw}\n"
            f.write(content)
对其后会得到一个associate.txt的文件,该文件内容如下,对应的时间戳和对应的图片的姿态信息
# rgb_timestamp rgb depth_timestamp depth groundtruth_timestamp tx, ty, tz, qx, qy, qz, qw
1305031102.175304 rgb/1305031102.175304.png 1305031102.160407 depth/1305031102.160407.png 1305031102.1758 1.3405 0.6266 1.6575 0.6574 0.6126 -0.2949-0.3248
1305031102.211214 rgb/1305031102.211214.png 1305031102.226738 depth/1305031102.226738.png 1305031102.2159 1.3303 0.6256 1.6464 0.6579 0.6161 -0.2932-0.3189
1305031102.275326 rgb/1305031102.275326.png 1305031102.262886 depth/1305031102.262886.png 1305031102.2758 1.3160 0.6254 1.6302 0.6609 0.6199 -0.2893-0.3086
1305031102.311267 rgb/1305031102.311267.png 1305031102.295279 depth/1305031102.295279.png 1305031102.3158 1.3066 0.6256 1.6196 0.6621 0.6205 -0.2892-0.3050
1305031102.343233 rgb/1305031102.343233.png 1305031102.329195 depth/1305031102.329195.png 1305031102.3458 1.2991 0.6257 1.6118 0.6619 0.6204 -0.2916-0.3032
如下是点云的拼接代码段:
import open3d as o3d
import numpy as np
import matplotlib.pyplot as plt
import os


def txt_read(path):
    with open(path, mode="r") as f:
        data = f.read()

    lines = data.replace(",", " ").replace("\t", " ").split("\n")
    list = [[v.strip() for v in line.split(" ") if v.strip() != ""] for line in lines if
            len(line) > 0 and line[0] != "#"]

    return list


def get_pcd_from_rgbd(color_path, depth_path, o3d_intrinsic, T):
    depth = o3d.io.read_image(depth_path)
    color = o3d.io.read_image(color_path)
    # 将彩色图和深度图数据转换为open3d中的rgbd数据结构
    rgbd = o3d.geometry.RGBDImage.create_from_color_and_depth(color=color,
                                                              depth=depth,
                                                              depth_scale=5000,  # 实际距离与深度图的比值,该数据集为5000:1
                                                              depth_trunc=5.0,  # 由于深度相机采集到的远处深度距离不准确,所以裁剪掉远处的深度点
                                                              convert_rgb_to_intensity=False
                                                              # 是否将RGB图像转换为intensity图像,即没有颜色信息(灰度图像?)
                                                              )
    pcd: o3d.geometry.PointCloud = o3d.geometry.PointCloud.create_from_rgbd_image(image=rgbd,
                                                                                  # 设置相机的内参
                                                                                  intrinsic=o3d_intrinsic,
                                                                                  # 设置当前帧的外参信息
                                                                                  extrinsic=np.linalg.inv(T)
                                                                                  )
    return pcd


if __name__ == '__main__':
    rgbd_data = txt_read("associate.txt")
    # 相机的内参设置,PinholeCamera
    o3d_intrinsic = o3d.camera.PinholeCameraIntrinsic(width=640, height=480,
                                                      fx=517.306408, fy=516.469215,
                                                      cx=318.643040, cy=255.313989)

    frame_index = 0
    pcds = o3d.geometry.PointCloud()
    for rgb_timestamp, rgb, depth_timestamp, depth, groundtruth_timestamp, tx, ty, tz, qx, qy, qz, qw in rgbd_data:
        # 内参设置为open3d camera 的PinholeCamera,在open3d中暂时只支持的PinholeCamera


        # tum的姿态信息为四元数,这里将四元数转换成旋转矩阵
        rotation_matrix = o3d.geometry.get_rotation_matrix_from_quaternion(
            rotation=np.array([float(qw), float(qx), float(qy), float(qz)]))
        # 设置位置信息
        translate_matrix = np.array([tx, ty, tz])
        # T矩阵
        T = np.eye(4)
        T[:3, :3] = rotation_matrix
        T[:3, -1] = translate_matrix

        pcd = get_pcd_from_rgbd(os.path.join("rgbd_dataset_freiburg1_xyz", rgb),
                                os.path.join("rgbd_dataset_freiburg1_xyz", depth), o3d_intrinsic, T)

        pcds += pcd

        frame_index += 1
        print(f"{frame_index} of {len(rgbd_data)}")
        if frame_index % 20 == 0:
            pcds = pcds.voxel_down_sample(voxel_size=0.01)

    o3d.io.write_point_cloud("xyz.ply", pcds, write_ascii=False, compressed=False, print_progress=True)