版权声明:本文为博主原创文章,未经博主允许不得转载。 https://blog.csdn.net/wxflamy/article/details/79212770
安装依赖项
执行:
sudo apt-get install ros-kinetic-rgbd-launch ros-kinetic-openni2-camera ros-kinetic-openni2-launch进行测试
打开操作台终端(Ctrl+Alt+t):
执行:
roscore打开另一个操作台终端(Ctrl+Alt+t):
执行:
roslaunch openni2_launch openni2.launch新开一个操作台终端 (Ctrl+Alt+t):
执行:
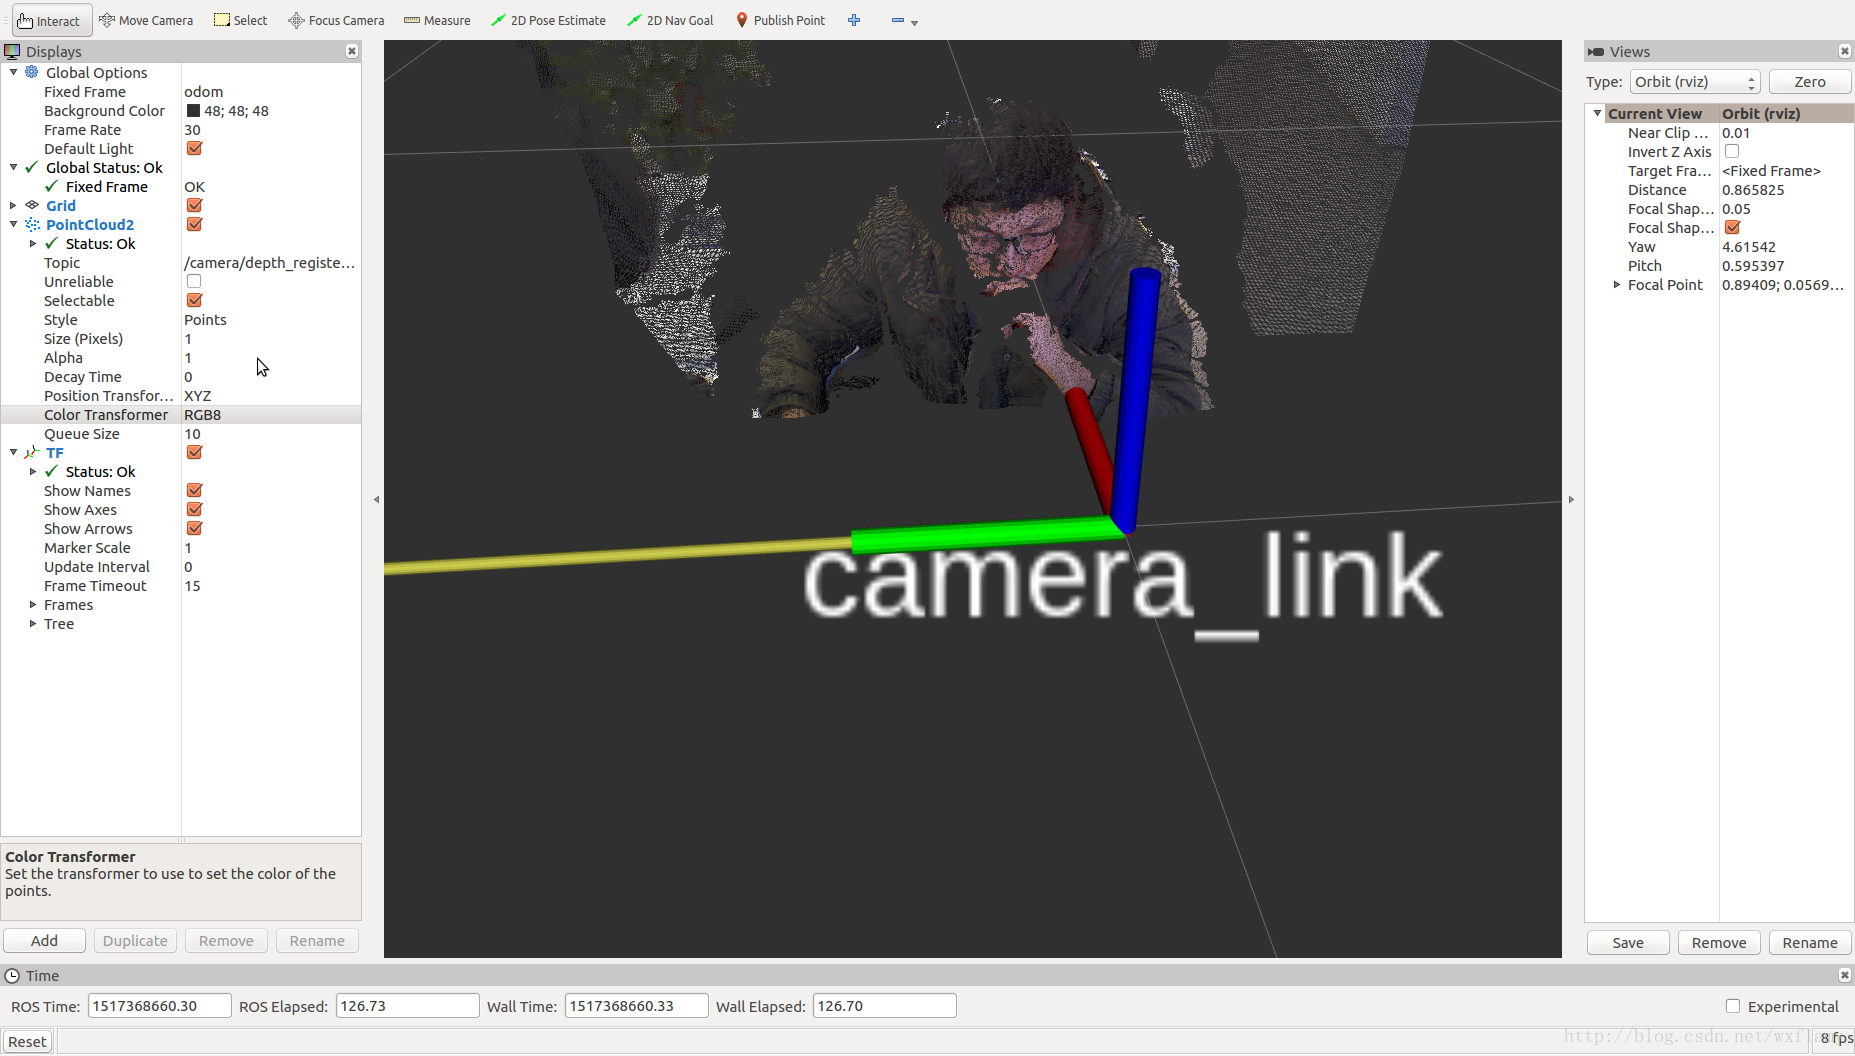
rviz添加点云CloudPoint2
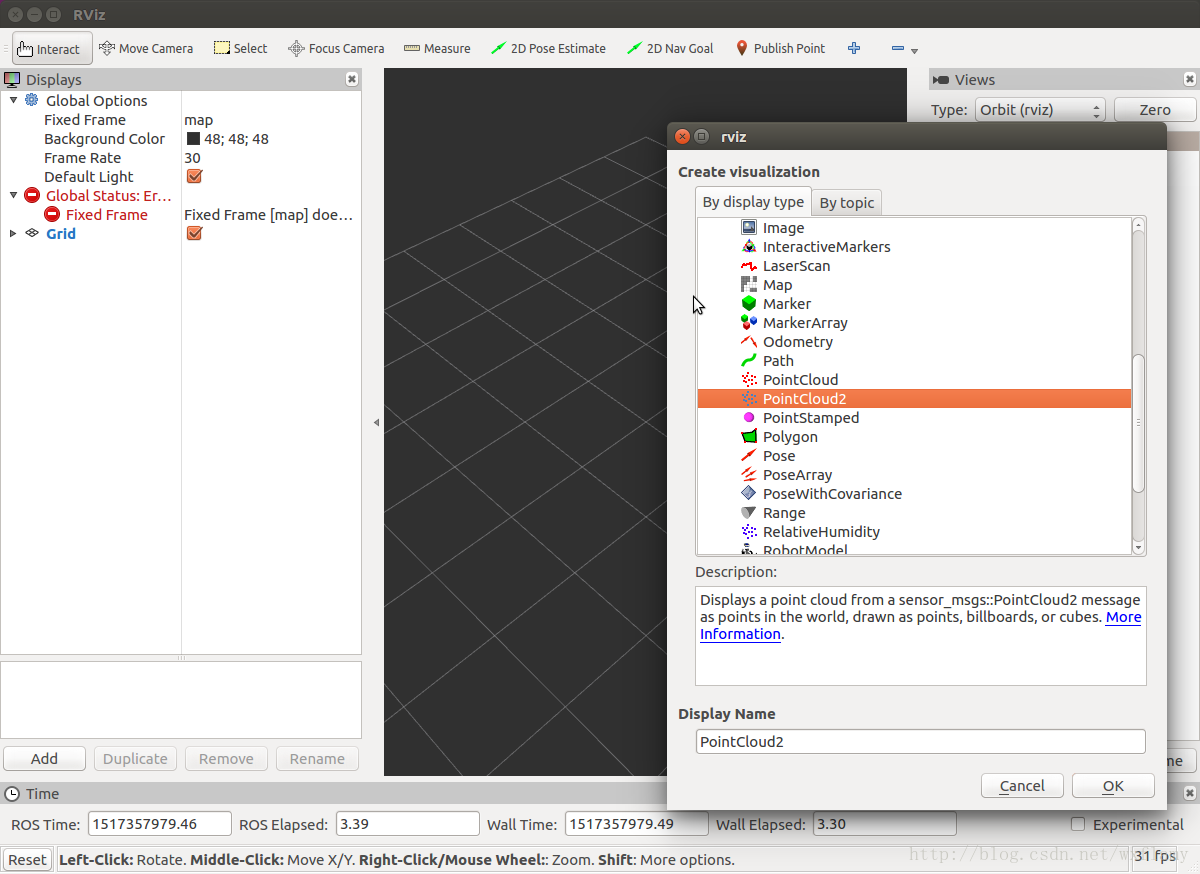
选好固定坐标系,选择topic,即可看到我点云的样子了。

调整一下,还能看到彩色的我
使用一下
首先安装pcl
    sudo add-apt-repository ppa:v-launchpad-jochen-sprickerhof-de/pcl
    sudo apt-get update
    sudo apt-get install libpcl1.7
下面是一段降采样的程序
#include <ros/ros.h>
#include <sensor_msgs/PointCloud2.h>
// PCL specific includes
 #include <pcl_conversions/pcl_conversions.h>
#include <pcl-1.7/pcl/point_cloud.h>
#include <pcl-1.7/pcl/point_types.h>
#include <pcl-1.7/pcl/filters/voxel_grid.h>
#include <pcl-1.7/pcl/io/pcd_io.h>

ros::Publisher pub;
void cloud_cb (const sensor_msgs::PointCloud2 &input)
{
    pcl::PointCloud<pcl::PointXYZ> cloud;
    pcl::PointCloud<pcl::PointXYZ> cloud_downsampled;
    sensor_msgs::PointCloud2 output;

    pcl::fromROSMsg(input, cloud);

    pcl::VoxelGrid<pcl::PointXYZ> voxelSampler;
    voxelSampler.setInputCloud(cloud.makeShared());
    voxelSampler.setLeafSize(0.01f, 0.01f, 0.01f);
    voxelSampler.filter(cloud_downsampled);

    pcl::toROSMsg(cloud_downsampled, output);
    //output.header.frame_id = "base_link";

    pub.publish(output);
}

int main (int argc, char** argv)
{
    // Initialize ROS
    ros::init (argc, argv, "c8_kinect");
    ros::NodeHandle nh;
    // Create a ROS subscriber for the input point cloud
    ros::Subscriber sub = nh.subscribe ("/camera/depth/points", 1, cloud_cb);
    // Create a ROS publisher for the output point cloud
    pub = nh.advertise<sensor_msgs::PointCloud2> ("output", 1);
    // Spin
    ros::spin ();
}
启动文件
<launch>
<include file="$(find openni2_launch)/launch/openni2.launch">
<!--arg name="config" value="true"/-->
</include>
<node name="rgbd_pub" pkg="tf" type="static_transform_publisher" args="1 0 0 0 0 0.70711 0.70711 /odom /camera_link 1000"/>
<node name="myxtion_node" pkg="xtion_pcl" type="c8_kinect"/>
<arg name="command_args" value="-d $(find xtion_pcl)/launch/xtion.rviz" />
<node name="rviz" pkg="rviz" type="rviz" respawn="false" args="$(arg command_args)" output="screen">
</node>
<!--node name="pcl_visualize_node" pkg="xtion_pcl" type="pcl_visualize"/-->
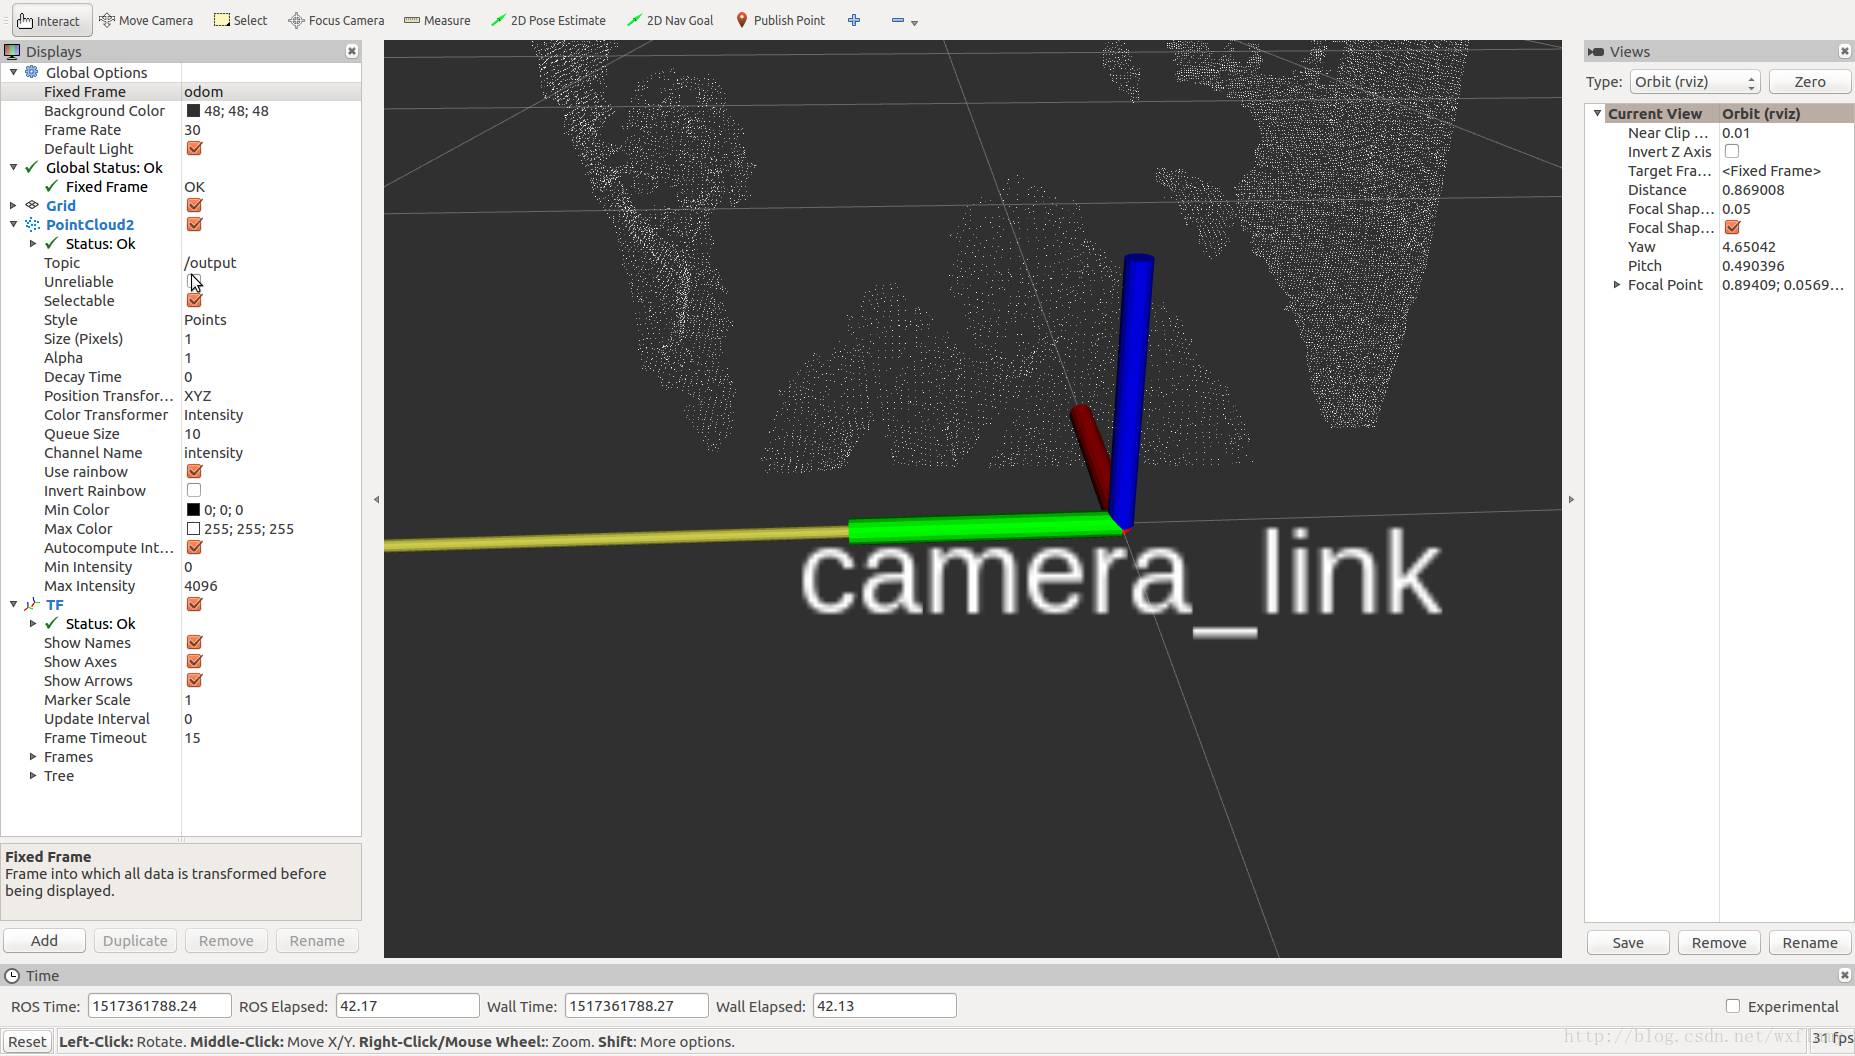
</launch>这就能看到采样后的我了
OpenCV的安装,官方文档:
https://docs.opencv.org/3.3.0/d7/d9f/tutorial_linux_install.html