首先,从github上下载源码
https://github.com/yanx27/Pointnet_Pointnet2_pytorch
也可以从百度网盘下载
链接:https://pan.baidu.com/s/1sgTYuqnBVC9p3bib450SOQ
提取码:gujd
再下载对应的测试数据
分类数据modelnet40_normal_resampled下载,放在目录data/modelnet40_normal_resampled/中
链接:https://pan.baidu.com/s/1OSjVP_1cRr2zowsdyLoK1A
提取码:9r7l
部件分割数据shapenetcore_partanno_segmentation_benchmark_v0_normal下载,放在目录data/shapenetcore_partanno_segmentation_benchmark_v0_normal/中
链接:https://pan.baidu.com/s/1VebwBPk6fEuAhff__T4Oag
提取码:h44m
语义分割数据Stanford3dDataset_v1.2_Aligned_Version下载(数据太大,需要可以私信我),放在目录data/s3dis/Stanford3dDataset_v1.2_Aligned_Version/中
修改源码
用Pycharm打开对应工程目录,运行一下train_classification.py,如果运行错误,则需要修改对应源码

然后就可以根据github上的说明进行测试啦
# ModelNet40
## Select different models in ./models

## e.g., pointnet2_ssg without normal features
python train_classification.py --model pointnet2_cls_ssg --log_dir pointnet2_cls_ssg
python test_classification.py --log_dir pointnet2_cls_ssg

## e.g., pointnet2_ssg with normal features
python train_classification.py --model pointnet2_cls_ssg --use_normals --log_dir pointnet2_cls_ssg_normal
python test_classification.py --use_normals --log_dir pointnet2_cls_ssg_normal

## e.g., pointnet2_ssg with uniform sampling
python train_classification.py --model pointnet2_cls_ssg --use_uniform_sample --log_dir pointnet2_cls_ssg_fps
python test_classification.py --use_uniform_sample --log_dir pointnet2_cls_ssg_fps

# ModelNet10
## Similar setting like ModelNet40, just using --num_category 10

## e.g., pointnet2_ssg without normal features
python train_classification.py --model pointnet2_cls_ssg --log_dir pointnet2_cls_ssg --num_category 10
python test_classification.py --log_dir pointnet2_cls_ssg --num_category 10
CUDA报错
任何的CUDA报错,都可以减小batch_size来解决
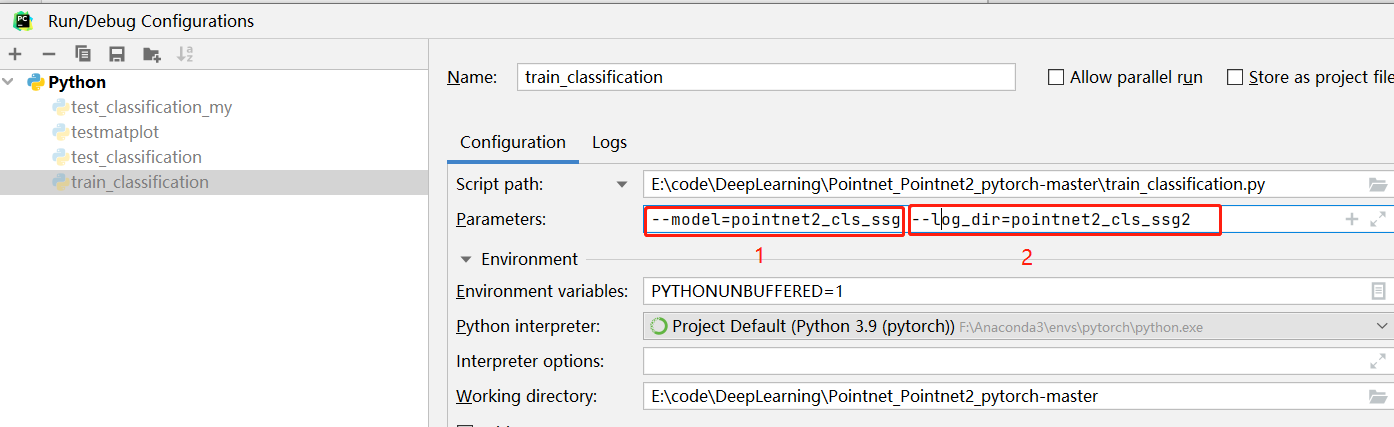
Pycharm参数设置
如果在Pycharm中直接运行py文件,设置参数的话,需要在IDE中进行,如下图所示

进入Edit Configurations之后,填写参数,每个参数用空格分开