基于pointNet++模型的个性化数据集训练测试及可视化[附源码]
1.制作个性化数据集
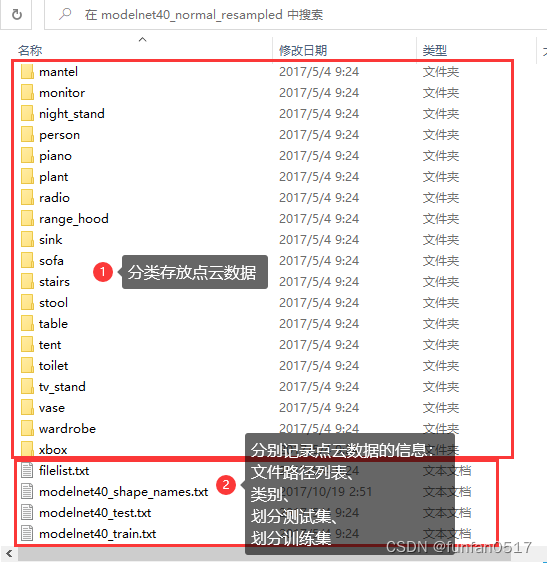
根据ModelNet40数据集来看,个性化数据集要准备分类点云数据和记录点云数据的配置文件。
1.1分类点云数据
1.1.1原数据集介绍
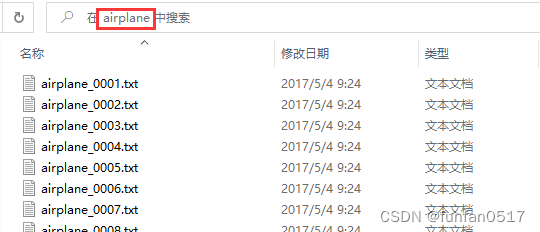
每个点云类别文件夹下有若干个txt的点云数据
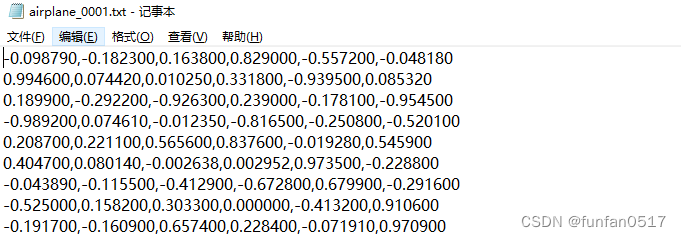
每个点云数据有若干行点数据,每行点数据包含x,y,z,nx,ny,nz等6个数据。
x、y、z为点云的空间坐标,nx、ny、nz为点云的法向量。
安装 CloudCompare软件可以打开txt点云文件

1.1.2制作个性化数据集
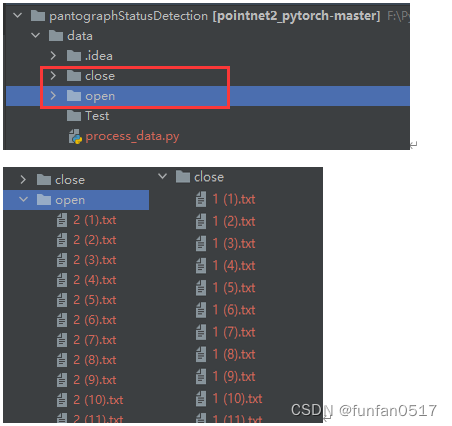
本次实验目标是检测受电弓开合状态,需要采集open和close两类点云数据,Test是一个存放最终真实无标签测试数据的空目录,process_data.py是一个自动生成数据集配置文件的脚本,后续会介绍
1.2 记录点云数据的配置文件
1.2.1原数据集介绍
除了分类点云数据外,还需要一些记录点云数据文件路径、类别、训练集、测试集的配置文件。
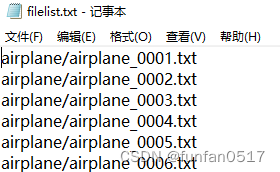
(1)filelist.txt记录了点云数据的相对文件路径
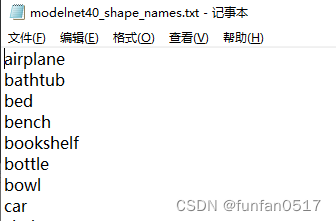
(2)modelnet40_shape_names.txt记录了全部类别
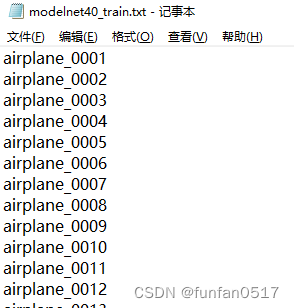
(3)modelnet40_train.txt记录了从数据集中划分的训练集
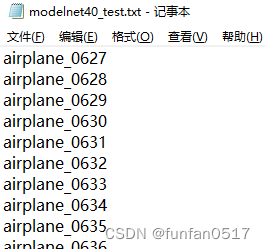
(4)modelnet40_test.txt记录了从数据集中划分的测试集
1.2.2制作个性化数据集
编写process_data.py数据集预处理脚本文件
import os
import random
import shutil
from pathlib import Path

# 获取当前程序执行的工作目录
current_directory = os.getcwd()
directory_name = os.path.basename(current_directory)
# 带类别标签的数据集所在目录
folder_paths = [Path(current_directory + "/open"), Path(current_directory + "/close")]

# 初始化目录中文件
test_folder_path = Path(current_directory + "/Test")
shutil.rmtree(test_folder_path)
os.mkdir(test_folder_path)
for folder_path in folder_paths:
    file_list = list(folder_path.glob("*"))
    for i, file_path in enumerate(file_list, start=1):
        new_file_name = f"{str(i).zfill(4)}{file_path.suffix}"
        new_file_path = folder_path / new_file_name
        if new_file_path.exists():
            continue
        file_path.rename(new_file_path)

# 生成以下目标文件(配置文件)
txt_file_path = Path(current_directory + "/filelist.txt")  # 记录全部带标签的数据集文件(带后缀名)
txt_file_path2 = Path(current_directory + f"/{directory_name}_train.txt")  # 记录全部带标签的训练文件(不带后缀名)
txt_file_path3 = Path(current_directory + f"/{directory_name}_test.txt")  # 记录全部带标签的测试文件(不带后缀名)
txt_file_path4 = Path(current_directory + f"/{directory_name}_shape_names.txt")  # 记录全部类别(不带后缀名)
txt_file_path5 = Path(current_directory + f"/{directory_name}_realtest.txt")  # 记录不带标签的真实测试文件(不带后缀名)
# 打开目标文件
with txt_file_path.open("w") as txt_file, txt_file_path2.open("w") as txt_file2, txt_file_path3.open(
        "w") as txt_file3, txt_file_path4.open("w") as txt_file4:
    for folder_path in folder_paths:
        folder_name = folder_path.name
        file_list = list(folder_path.glob("*"))
        random.shuffle(file_list)  # 随机打乱文件列表
        total_files = len(file_list)
        train_files_count = int(total_files * 0.8)  # 80% of the files for training
        for i, file_path in enumerate(file_list, start=1):
            new_file_name = f"{folder_name}_{str(i).zfill(4)}{file_path.suffix}"
            new_file_path = folder_path / new_file_name
            file_path.rename(new_file_path)  # 将数据集中的文件名重命名(类别_编号)
            txt_file.write(
                str(new_file_path.relative_to(os.path.dirname(folder_path))) + "\n")  # 将新文件的相对路径写入filelist.txt
            if i <= train_files_count:
                txt_file2.write(new_file_path.stem + "\n")  # 将前80%的训练数据(不包含后缀)写入_train.txt
            else:
                txt_file3.write(new_file_path.stem + "\n")  # 将后20%的测试数据(不包含后缀)写入_test.txt
        txt_file4.write(folder_name + "\n")  # 将文件夹名(类别名)写入_shape_names.txt

# 以下代码是生成真实测试数据Test目录(这里就是简单抽取训练集中的一些数据,标签是通过目录名称体现,这里可以认为这些数据不带标签)
# 从open目录中随机选择n个文件
n_test = 5
open_files = list(Path(current_directory + "/open").glob("*"))
selected_open_files = random.sample(open_files, n_test)
# 从close目录中随机选择n个文件
close_files = list(Path(current_directory + "/close").glob("*"))
selected_close_files = random.sample(close_files, n_test)
# 将选中的文件复制到Test目录中
test_folder_path = Path(current_directory + "/Test"