10.1 k近邻学习
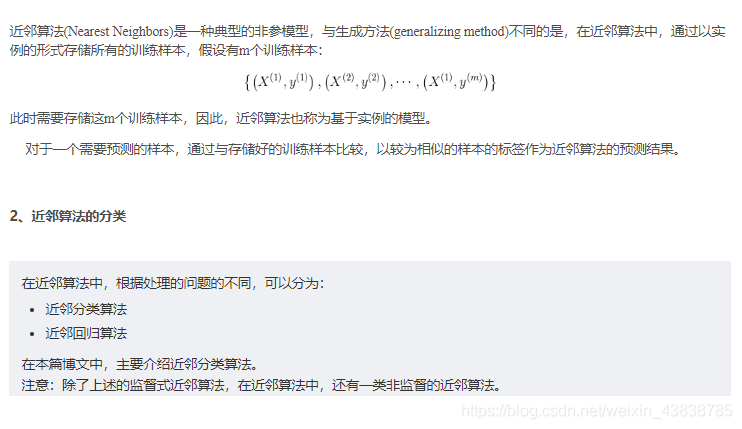
k近邻(k-Nearest Neighbor,简称kNN)学习是一种常用的监督学习方法。
二、近邻分类算法
1、近邻分类算法的概念
在近邻分类算法中,对于预测的数据,将其与训练样本进行比较,找到最为相似的K个训练样本,并以这K个训练样本中出现最多的标签作为最终的预测标签。
在近邻分类算法中,最主要的是K-近邻算法。
2、KNN算法概述
K-NN算法是最简单的分类算法,主要的思想是计算待分类样本与训练样本之间的差异性,并将差异按照由小到大排序,选出前面K个差异最小的类别,并统计在K个中类别出现次数最多的类别为最相似的类,最终将待分类样本分到最相似的训练样本的类中。与投票(Vote)的机制类似。
3、样本差异性

4、KNN算法的流程
求预测样本与训练样本之间的相似性
依据相似性排序
选择前K个最为相似的样本对应的类别
得到预测的分类结果
三、K-近邻算法实现
1、Python实现
以手写字体MNIST的识别为例,对于测试集中的每一个样本预测其类别,对于手写字体,如下图所示:
二. 数据源
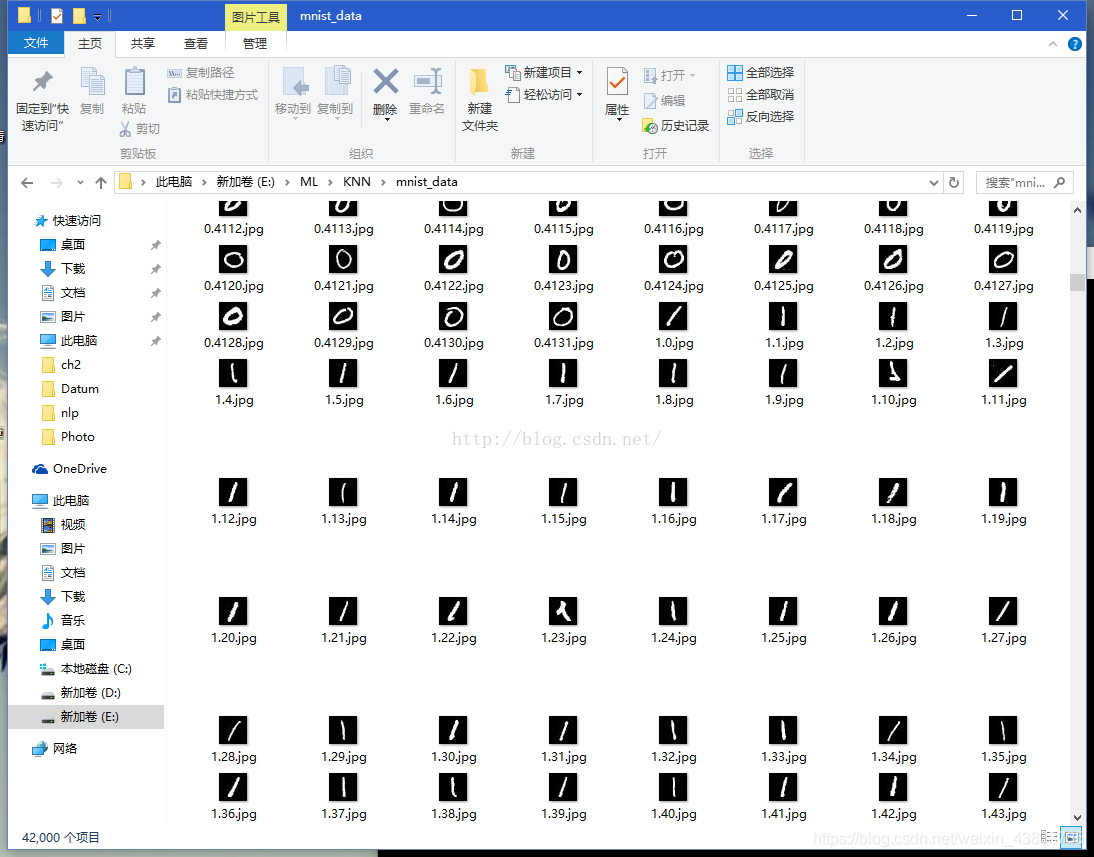
mnist数据集,包含42000张28*28的图片,可以从网盘下载http://pan.baidu.com/s/1kVi1nc7,下载完解压后如下图所示:
三. 处理方法
-
把图片读取到一个28*28的矩阵里,然后对图片进行一个简单的二值化,这里选择127为一个界限,大于127的像素点为1,小于等于127的像素点为0,二值化之后的手写数字如下图所示:
 ‘
‘ -
把28*28的矩阵直接转成一个784维的向量,直接去欧氏距离作为度量进行KNN算法,代码如下:
import numpy as np
from image import image2onebit as it
import sys
from tensorflow.examples.tutorials.mnist import input_data
import math
import datetime

#KNN算法主体:计算测试样本与每一个训练样本的距离
def get_index(train_data,test_data, i):
	#1、 np.argmin(np.sqrt(np.sum(np.square(test_data[i]-train_data),axis=1)))
	#2、a数组存入:测试样本与每一个训练样本的距离
	all_dist = np.sqrt(np.sum(np.square(test_data[i]-train_data),axis=1)).tolist()
	return all_dist

#KNN算法主体:计算查找最近的K个训练集所对应的预测值
def get_number(all_dist):
	all_number = []
	min_index = 0
	#print('距离列表:', all_dist,)
	for k in range(Nearest_Neighbor_number):
		# 最小索引值 = 最小距离的下标编号
		min_index = np.argmin(all_dist)
		#依据最小索引值(最小距离的下标编号),映射查找到预测值
		ss = np.argmax((train_label[min_index])).tolist()
		print('第',k+1,'次预测值:',ss)
		#将预测值改为字符串形式存入新元组bb中
		all_number = all_number + list(str(ss))
		#在距离数组中,将最小的距离值删去
		min_number = min(all_dist)
		xx = all_dist.index(min_number)
		del all_dist[xx]
	print('预测值总体结果:',all_number)
	return all_number

#KNN算法主体:在K个预测值中,求众数,找到分属最多的那一类,输出
def get_min_number(all_number):
	c = []
	#将string转化为int,传入新列表c
	for i in range(len(all_number)):
		c.append(int(all_number[i]))
	#求众数
	new_number = np.array(c)
	counts = np.bincount(new_number)
	return np.argmax(counts)


t1 = datetime.datetime.now()      #计时开始
print('说明:训练集数目取值范围在[0,60000],K取值最好<10\n' )
train_sum = int(input('输入训练集数目:'))
Nearest_Neighbor_number = int(input('选取最邻近的K个值,K='))

#依照文件名查找,读取训练与测试用的图片数据集
mnist = input_data.read_data_sets("./MNIST_data", one_hot=True)
#取出训练集数据、训练集标签
train_data, train_label = mnist.train.next_batch(train_sum)

#调用自创模块内函数read_image():依照路径传入图片处理,将图片信息转换成numpy.array类型
x1_tmp = it.read_image("png/nnnn.png")
test_data = it.imageToArray(x1_tmp)
test_data = np.array(test_data)
#print('test_data',test_data)
#调用自创模块内函数show_ndarray():用字符矩阵打印图片
it.show_ndarray(test_data)

#KNN算法主体
all_dist = get_index(train_data,test_data,0)
all_number = get_number(all_dist)
min_number = get_min_number(all_number )
print('最后的预测值为:',min_number)

t2=datetime.datetime.now()
print('耗 时 = ',t2-t1)
"C:\Program Files\Python36\pythonw.exe" C:/Users/88304/Desktop/监督学习——KNN算法/28x28+图片+KNN算法手写数字识别/A+自己做的/28x28+图片+KNN算法手写数字识别.py
C:\Program Files\Python36\lib\site-packages\tensorflow\python\framework\dtypes.py:519: FutureWarning: Passing (type, 1) or '1type' as a synonym of type is deprecated; in a future version of numpy, it will be understood as (type, (1,)) / '(1,)type'.
  _np_qint8 = np.dtype([("qint8", np.int8, 1)])
C:\Program Files\Python36\lib\site-packages\tensorflow\python\framework\dtypes.py:520: FutureWarning: Passing (type, 1) or '1type' as a synonym of type is deprecated; in a future version of numpy, it will be understood as (type, (1,)) / '(1,)type'.
  _np_quint8 = np.dtype([("quint8", np.uint8, 1)])
C:\Program Files\Python36\lib\site-packages\tensorflow\python\framework\dtypes.py:521: FutureWarning: Passing (type, 1) or '1type' as a synonym of type is deprecated; in a future version of numpy, it will be understood as (type, (1,)) / '(1,)type'.
  _np_qint16 = np.dtype([("qint16", np.int16, 1)])
C:\Program Files\Python36\lib\site-packages\tensorflow\python\framework\dtypes.py:522: FutureWarning: Passing (type, 1) or '1type' as a synonym of type is deprecated; in a future version of numpy, it will be understood as (type, (1,)) / '(1,)type'.
  _np_quint16 = np.dtype([("quint16", np.uint16, 1)])
C:\Program Files\Python36\lib\site-packages\tensorflow\python\framework\dtypes.py:523: FutureWarning: Passing (type, 1) or '1type' as a synonym of type is deprecated; in a future version of numpy, it will be understood as (type, (1,)) / '(1,)type'.
  _np_qint32 = np.dtype([("qint32", np.int32, 1)])
C:\Program Files\Python36\lib\site-packages\tensorflow\python\framework\dtypes.py:528: FutureWarning: Passing (type, 1) or '1type' as a synonym of type is deprecated; in a future version of numpy, it will be understood as (type, (1,)) / '(1,)type'.
  np_resource = np.dtype([("resource", np.ubyte, 1)])
说明:训练集数目取值范围在[0,60000],K取值最好<10

输入训练集数目:60000
选取最邻近的K个值,K=20
WARNING:tensorflow:From C:/Users/88304/Desktop/监督学习——KNN算法/28x28+图片+KNN算法手写数字识别/A+自己做的/28x28+图片+KNN算法手写数字识别.py:55: read_data_sets (from tensorflow.contrib.learn.python.learn.datasets.mnist) is deprecated and will be removed in a future version.
Instructions for updating:
Please use alternatives such as official/mnist/dataset.py from tensorflow/models.
Extracting ./MNIST_data\train-images-idx3-ubyte.gz
WARNING:tensorflow:From C:\Program Files\Python36\lib\site-packages\tensorflow\contrib\learn\python\learn\datasets\mnist.py:260: maybe_download (from tensorflow.contrib.learn.python.learn.datasets.base) is deprecated and will be removed in a future version.
Instructions for updating:
Please write your own downloading logic.
WARNING:tensorflow:From C:\Program Files\Python36\lib\site-packages\tensorflow\contrib\learn\python\learn\datasets\mnist.py:262: extract_images (from tensorflow.contrib.learn.python.learn.datasets.mnist) is deprecated and will be removed in a future version.
Instructions for updating:
Please use tf.data to implement this functionality.
WARNING:tensorflow:From C:\Program Files\Python36\lib\site-packages\tensorflow\contrib\learn\python\learn\datasets\mnist.py:267: extract_labels (from tensorflow.contrib.learn.python.learn.datasets.mnist) is deprecated and will be removed in a future version.
Instructions for updating:
Please use tf.data to implement this functionality.
WARNING:tensorflow:From C:\Program Files\Python36\lib\site-packages\tensorflow\contrib\learn\python\learn\datasets\mnist.py:110: dense_to_one_hot (from tensorflow.contrib.learn.python.learn.datasets.mnist) is deprecated and will be removed in a future version.
Instructions for updating:
Please use tf.one_hot on tensors.
Extracting ./MNIST_data\train-labels-idx1-ubyte.gz
Extracting ./MNIST_data\t10k-images-idx3-ubyte.gz
Extracting ./MNIST_data\t10k-labels-idx1-ubyte.gz
WARNING:tensorflow:From C:\Program Files\Python36\lib\site-packages\tensorflow\contrib\learn\python\learn\datasets\mnist.py:290: DataSet.__init__ (from tensorflow.contrib.learn.python.learn.datasets.mnist) is deprecated and will be removed in a future version.
Instructions for updating:
Please use alternatives such as official/mnist/dataset.py from tensorflow/models.
0000000000000000000000000000
0000000000000000000000000000
0000000000000000000000000000
0000000000000000000000000000
0000000111111000111000000000
0000000111111111111000000000
0000000111111111111000000000
0000000111111111111000000000
0000000111000000000000000000
0000000111000000000000000000
0000000111000000000000000000
0000000111000000000000000000
0000000111111000000000000000
0000000111111111111000000000
0000000011111111111000000000
0000000000001111111000000000
0000000000000000111000000000
0000000000000001111000000000
0000000000000001111000000000
0000000000000111111000000000
0000001111101111110000000000
0000001111111111100000000000
0000001111111111000000000000
0000000011111110000000000000
0000000000000000000000000000
0000000000000000000000000000
0000000000000000000000000000
0000000000000000000000000000
第 1 次预测值: 5
第 2 次预测值: 2
第 3 次预测值: 5
第 4 次预测值: 1
第 5 次预测值: 3
第 6 次预测值: 7
第 7 次预测值: 7
第 8 次预测值: 0
第 9 次预测值: 2
第 10 次预测值: 4
第 11 次预测值: 4
第 12 次预测值: 7
第 13 次预测值: 0
第 14 次预测值: 9
第 15 次预测值: 0
第 16 次预测值: 3
第 17 次预测值: 9
第 18 次预测值: 0
第 19 次预测值: 7
第 20 次预测值: 6
预测值总体结果: ['5', '2', '5', '1', '3', '7', '7', '0', '2', '4', '4', '7', '0', '9', '0', '3', '9', '0', '7', '6']
最后的预测值为: 0
耗 时 =  0:00:15.862405
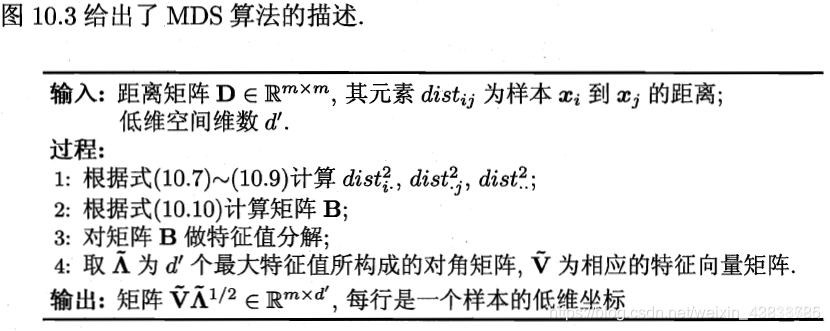
10.2 低维嵌入
 代码实现:
代码实现:
sklearn.manifold.MDS(n_components=2,metric=True,n_init=4,max_iter=300,verbose=0,eps=0.001,n_jobs=1,random_state=None,dissimilarity=’euclidean’)
##自己实现:
def MDS(X,n_component=None):
	dist = np.zeros((X.shape[0],X.shape[0],))
	m = dist.shape[0]
	B = np.zeros((X.shape[0],X.shape[0],))
 	#计算距离矩阵,大小为m*m
	for i in range(m):
    for j in range(m):
        #得到距离矩阵
        dist[i,j] = np.linalg.norm(X[i] - X[j])
	#计算内积矩阵,大小为m*m
	for i in range(m):
    	for j in range(m):
        	B[i,j] = -(np.square(dist[i,j]) - np.square(dist[i,:]).sum()/ m - np.square(dist[:,j]).sum()/ m + np.square(dist.reshape(1,-1)).sum()/ m**2)
	V,lamda = np.linalg.eig(B)
	V = np.diag(V)
	Z = np.dot(np.sqrt(V),lamda.T)
	return Z
10.3 主成分分析
一种常用的降维方法
PCA的Python实现:
##Python实现PCA
import numpy as np
def pca(X,k):#k is the components you want
#mean of each feature
n_samples, n_features = X.shape
mean=np.array([np.mean(X[:,i]) for i in range(n_features)])
#normalization
norm_X=X-mean
#scatter matrix
scatter_matrix=np.dot(np.transpose(norm_X),norm_X)
#Calculate the eigenvectors and eigenvalues
eig_val, eig_vec = np.linalg.eig(scatter_matrix)
eig_pairs = [(np.abs(eig_val[i]), eig_vec[:,i]) for i in range(n_features)]
# sort eig_vec based on eig_val from highest to lowest
eig_pairs.sort(reverse=True)
# select the top k eig_vec
feature=np.array([ele[1] for ele in eig_pairs[:k]])
#get new data
data=np.dot(norm_X,np.transpose(feature))
return data
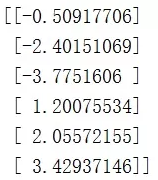
X = np.array([[-1, 1], [-2, -1], [-3, -2], [1, 1], [2, 1], [3, 2]])
print(pca(X,1))
上面代码实现了对数据X进行特征的降维。结果如下:
(2)用sklearn的PCA与我们的PCA做个比较:
##用sklearn的PCA
from sklearn.decomposition import PCA
import numpy as np
X = np.array([[-1, 1], [-2, -1], [-3, -2], [1, 1], [2, 1], [3, 2]])
pca=PCA(n_components=1)pca.fit(X)
print(pca.transform(X))
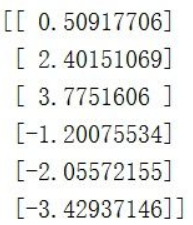
搞了半天结果不是很一样啊!分析一下吧!
sklearn中的PCA是通过svd_flip函数实现的,sklearn对奇异值分解结果进行了一个处理,因为uiσivi=(-ui)σi(-vi),也就是u和v同时取反得到的结果是一样的,而这会导致通过PCA降维得到不一样的结果(虽然都是正确的)。具体了解可以看参考文章9或者自己分析一下sklearn中关于PCA的源码。
10.4 核化线性降维
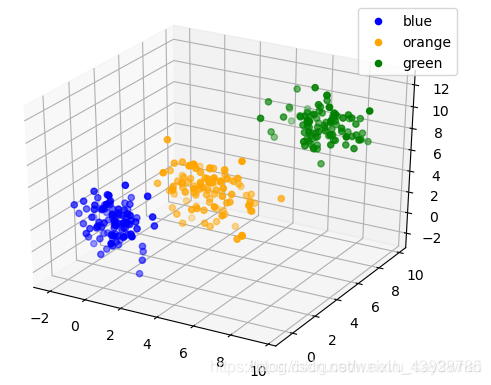
主要是在传统的PCA中加入了kernel。传统的PCA使用的是线性变换,为此(Schoelkopf et al. 1998)在传统的PCA中引进了kernel的技巧,本文的主要参考文献为MLAPP,参考的是第14章的第四小节,算法如下:
from matplotlib import cm
from mpl_toolkits.mplot3d import Axes3D
import matplotlib.pyplot as plt
import numpy as np
np.random.seed(1234)
from scipy.spatial.distance import pdist,squareform,cdist
fig=plt.figure()
ax=fig.gca(projection="3d")
#三组数据的均值
mean_list=([0,1,2],[4,3,5],[7,8,9])
#三组数据的方差
cov=np.array([[2,0,0],[0,1,0],[0,0,3]],dtype=np.float32)
#用来控制方差大小的参数
cita=[0.5,0.8,0.5]
sample=list()
for mean,cita in zip(mean_list,cita):
#采样出三组数据
data=np.random.multivariate_normal(mean,cov=cita*cov,size=100)
sample.append(data)
label=["blue","orange","green"]
for P,label in zip(sample,label):
ax.scatter(P[:,0],P[:,1],P[:,2],label=label,c=label)
ax.legend()
plt.show()
class KernelPCA:
def __init__(self,bandwidth,dim):
#定义核函数的带宽
self.bandwidth=bandwidth
#定义隐变量的维数
self.dim=dim
def fit(self,train_X):
self.size_train=train_X.shape[0]
self.train_X=train_X
dist=squareform(pdist(self.train_X))
K=self.rbf_kernel(dist)
self.one=np.ones((self.size_train,1),dtype=np.float32)
O=self.one.dot(self.one.T)/self.size_train
#K~
K_hat=K-O.dot(K)-K.dot(O)+O.dot((K.dot(O)))
D,U=np.linalg.eig(K_hat)
D=np.reshape(D,(self.size_train,))
self.V=U[:,:self.dim]/D[:self.dim]
def predict(self,data):
pred_size=data.shape[0]
O_x=np.ones((pred_size,1)).dot(self.one.T)/self.size_train
K_x=self.rbf_kernel(cdist(data,self.train_X))
#K~*
K_h=K_x-O_x.dot(K_x)-K_x.dot(O_x)+O_x.dot(K_x.dot(O_x))
z=K_h.dot(self.V)
return z
def rbf_kernel(self,X):
return np.exp(-X/(self.bandwidth**2))
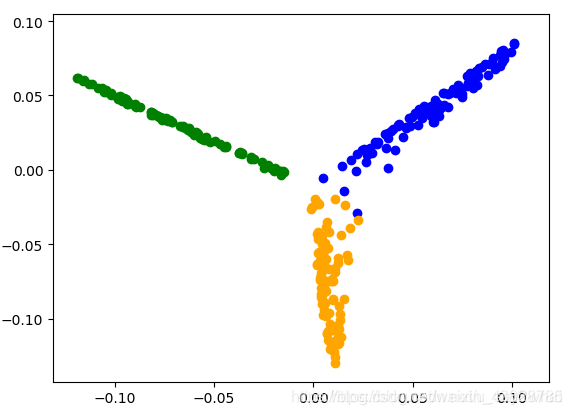
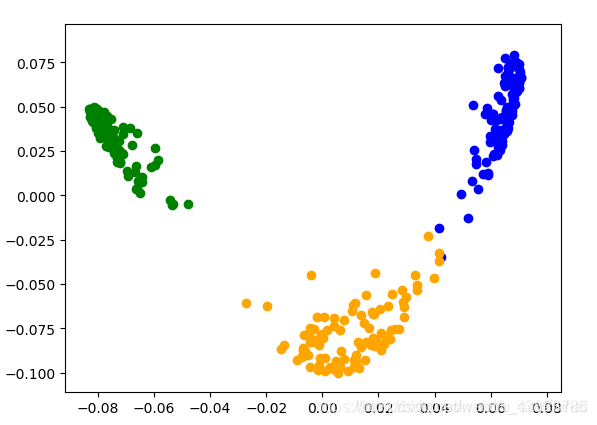
kp=KernelPCA(1,2)
#将三组数据连接起来
data=np.concatenate((sample[0],sample[1],sample[2]),axis=0)
kp.fit(data)
z=kp.predict(data)
a,b,c=np.split(z,3,axis=0)
latent_list=[a,b,c]
colors=["blue","orange","green"]
for z,color in zip(latent_list,colors):
plt.scatter(z[:,0],z[:,1],c=color)
plt.show()
带宽为1,经过映射后为:
当然你可以调节不同的带宽值,带宽为4时:
10.5 流形学习
流形学习假设所处理的数据点分布在嵌入于外维欧式空间的一个潜在的流形体上,或者说这些数据点可以构成这样一个潜在的流形体。

假设数据是均匀采样于一个高维欧氏空间中的低维流形,流形学习就是从高维采样数据中恢复低维流形结构,即找到高维空间中的低维流形,并求出相应的嵌入映射,以实现维数约简或者数据可视化。它是从观测到的现象中去寻找事物的本质,找到产生数据的内在规律。
PCA虽然灵活,快速,但是它对存在非线性关系的数据处理效果不太好。流形学习可以弥补这一缺点,流形学习是相对于PCA的另一种无监督学习算法,它将一个低维度流行嵌入到高维度空间来描述数据。
流形学习方法包括:多维度标度法(MDS),局部线性嵌入法(LLE),保距映射法(Isomap)
10.6 度量学习
度量学习(Metric Learning)也就是常说的相似度学习。如果需要计算两张图片之间的相似度,如何度量图片之间的相似度使得不同类别的图片相似度小而相同类别的图片相似度大(maximize the inter-class variations and minimize the intra-class variations)就是度量学习的目标。
例如如果我们的目标是识别人脸,那么就需要构建一个距离函数去强化合适的特征(如发色,脸型等);而如果我们的目标是识别姿势,那么就需要构建一个捕获姿势相似度的距离函数。为了处理各种各样的特征相似度,我们可以在特定的任务通过选择合适的特征并手动构建距离函数。然而这种方法会需要很大的人工投入,也可能对数据的改变非常不鲁棒。度量学习作为一个理想的替代,可以根据不同的任务来自主学习出针对某个特定任务的度量距离函数。
