以下链接是个人关于FSA-Net(头部姿态估算) 所有见解,如有错误欢迎大家指出,我会第一时间纠正。有兴趣的朋友可以加微信:a944284742相互讨论技术。若是帮助到了你什么,一定要记得点赞!因为这是对我最大的鼓励。
姿态估计1-00:FSA-Net(头部姿态估算)-目录-史上最新无死角讲解
前言
该篇博客,是最后一篇博客了,主要讲解模型的应用。不要奇怪,为什么没有对测试代码进行讲解。因为训练代码讲解得可以说是十分详细了,所以测试代码基本一看就懂,就没有不要讲解了。现在我们来看看应用代码,该代码位于demo文件夹下,本人要讲解的是其中的demo_FSANET_mtcnn.py。
代码复制
import os
import cv2
import sys
sys.path.append('..')


import numpy as np
from math import cos, sin
# from moviepy.editor import *
from lib.FSANET_model import *
from mtcnn.mtcnn import MTCNN

from keras import backend as K
from keras.layers import Average
from keras.models import Model


def draw_axis(img, yaw, pitch, roll, tdx=None, tdy=None, size=80):

    pitch = pitch * np.pi / 180
    yaw = -(yaw * np.pi / 180)
    roll = roll * np.pi / 180

    if tdx != None and tdy != None:
        tdx = tdx
        tdy = tdy
    else:
        height, width = img.shape[:2]
        tdx = width / 2
        tdy = height / 2

    # X-Axis pointing to right. drawn in red
    x1 = size * (cos(yaw) * cos(roll)) + tdx
    y1 = size * (cos(pitch) * sin(roll) + cos(roll)
                 * sin(pitch) * sin(yaw)) + tdy

    # Y-Axis | drawn in green
    #        v
    x2 = size * (-cos(yaw) * sin(roll)) + tdx
    y2 = size * (cos(pitch) * cos(roll) - sin(pitch)
                 * sin(yaw) * sin(roll)) + tdy

    # Z-Axis (out of the screen) drawn in blue
    x3 = size * (sin(yaw)) + tdx
    y3 = size * (-cos(yaw) * sin(pitch)) + tdy

    cv2.line(img, (int(tdx), int(tdy)), (int(x1), int(y1)), (0, 0, 255), 3)
    cv2.line(img, (int(tdx), int(tdy)), (int(x2), int(y2)), (0, 255, 0), 3)
    cv2.line(img, (int(tdx), int(tdy)), (int(x3), int(y3)), (255, 0, 0), 2)

    return img


def draw_results_mtcnn(detected, input_img, faces, ad, img_size, img_w, img_h, model, time_detection, time_network, time_plot):

    if len(detected) > 0:
        for i, d in enumerate(detected):
            #x1, y1, x2, y2, w, h = d.left(), d.top(), d.right() + 1, d.bottom() + 1, d.width(), d.height()
            if d['confidence'] > 0.95:
                x1, y1, w, h = d['box']

                x2 = x1+w
                y2 = y1+h

                xw1 = max(int(x1 - ad * w), 0)
                yw1 = max(int(y1 - ad * h), 0)
                xw2 = min(int(x2 + ad * w), img_w - 1)
                yw2 = min(int(y2 + ad * h), img_h - 1)

                faces[i, :, :, :] = cv2.resize(
                    input_img[yw1:yw2 + 1, xw1:xw2 + 1, :], (img_size, img_size))
                faces[i, :, :, :] = cv2.normalize(
                    faces[i, :, :, :], None, alpha=0, beta=255, norm_type=cv2.NORM_MINMAX)

                face = np.expand_dims(faces[i, :, :, :], axis=0)
                p_result = model.predict(face)
                print(p_result)
                face = face.squeeze()
                img = draw_axis(input_img[yw1:yw2 + 1, xw1:xw2 + 1, :],
                                p_result[0][0], p_result[0][1], p_result[0][2])

                input_img[yw1:yw2 + 1, xw1:xw2 + 1, :] = img

    cv2.imshow("result", cv2.resize(input_img,(112,112)))

    return input_img  # ,time_network,time_plot


def main():
    # 当前目录下创建一个img目录
    try:
        os.mkdir('./img')
    except OSError:
        pass

    # 设置为推断模式
    K.set_learning_phase(0)  # make sure its testing mode
    # face_cascade = cv2.CascadeClassifier('lbpcascade_frontalface_improved.xml')
    # 创建MTCNN用于人脸检测
    detector = MTCNN()

    # load model and weights,输入图片大小
    img_size = 64
    stage_num = [3, 3, 3]
    lambda_local = 1
    lambda_d = 1
    img_idx = 0
    detected = ''  # make this not local variable
    time_detection = 0
    time_network = 0
    time_plot = 0
    skip_frame = 5  # every 5 frame do 1 detection and network forward propagation
    ad = 0.6

    # Parameters
    num_capsule = 3
    dim_capsule = 16
    routings = 2
    stage_num = [3, 3, 3]
    lambda_d = 1
    num_classes = 3
    image_size = 64
    num_primcaps = 7*3
    m_dim = 5

    # 分别构建3种模型,就是论文说互补的3中模型,他们在于Scoring function的不同
    S_set = [num_capsule, dim_capsule, routings, num_primcaps, m_dim]

    # 1x1的卷积模型
    model1 = FSA_net_Capsule(image_size, num_classes,
                             stage_num, lambda_d, S_set)()

    # 方差模型
    model2 = FSA_net_Var_Capsule(
        image_size, num_classes, stage_num, lambda_d, S_set)()

    num_primcaps = 8*8*3
    S_set = [num_capsule, dim_capsule, routings, num_primcaps, m_dim]

    # 1.无1x1的卷积,也无方差
    model3 = FSA_net_noS_Capsule(
        image_size, num_classes, stage_num, lambda_d, S_set)()

    print('Loading models ...')


    # 加载3种模型的权重
    weight_file1 = '../pre-trained/300W_LP_models/fsanet_capsule_3_16_2_21_5/fsanet_capsule_3_16_2_21_5.h5'
    model1.load_weights(weight_file1)
    print('Finished loading model 1.')

    weight_file2 = '../pre-trained/300W_LP_models/fsanet_var_capsule_3_16_2_21_5/fsanet_var_capsule_3_16_2_21_5.h5'
    model2.load_weights(weight_file2)
    print('Finished loading model 2.')

    weight_file3 = '../pre-trained/300W_LP_models/fsanet_noS_capsule_3_16_2_192_5/fsanet_noS_capsule_3_16_2_192_5.h5'
    model3.load_weights(weight_file3)
    print('Finished loading model 3.')

    # 把3个模型整合到一起,取均值变成一个模型
    inputs = Input(shape=(64, 64, 3))
    x1 = model1(inputs)  # 1x1
    x2 = model2(inputs)  # var
    x3 = model3(inputs)  # w/o

    avg_model = Average()([x1, x2, x3])
    model = Model(inputs=inputs, outputs=avg_model)


    # capture video
    cap = cv2.VideoCapture(0)
    #print(cap.isOpened())
    cap.set(cv2.CAP_PROP_FRAME_WIDTH, 1024*1)
    cap.set(cv2.CAP_PROP_FRAME_HEIGHT, 768*1)

    print('Start detecting pose ...')
    detected_pre = []

    while True:
        # get video frame
        #ret, input_img = cap.read()
        input_img = cv2.imread('00028.jpg')

        #print(input_img)
        img_idx = img_idx + 1
        img_h, img_w, _ = np.shape(input_img)

        if img_idx == 1 or img_idx % skip_frame == 0:
            time_detection = 0
            time_network = 0
            time_plot = 0

            # detect faces using LBP detector
            gray_img = cv2.cvtColor(input_img, cv2.COLOR_BGR2GRAY)
            # detected = face_cascade.detectMultiScale(gray_img, 1.1)
            detected = detector.detect_faces(input_img)

            if len(detected_pre) > 0 and len(detected) == 0:
                detected = detected_pre

            faces = np.empty((len(detected), img_size, img_size, 3))

            input_img = draw_results_mtcnn(
                detected, input_img, faces, ad, img_size, img_w, img_h, model, time_detection, time_network, time_plot)
            cv2.imwrite('img/'+str(img_idx)+'.png', input_img)

        else:
            input_img = draw_results_mtcnn(
                detected, input_img, faces, ad, img_size, img_w, img_h, model, time_detection, time_network, time_plot)

        if len(detected) > len(detected_pre) or img_idx % (skip_frame*3) == 0:
            detected_pre = detected

        key = cv2.waitKey()


if __name__ == '__main__':
    main()
本人为了看效果,随便修改了一下代码,如果你的电脑接有摄像头,都不用做修改的,本人测试的00028.jpg图片如下:

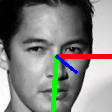
测试结果如下:

打印的角度结果如下:
[[-15.161048 -12.279645 3.4609969]]
yaw(偏航角-左右偏转角度), pitch(俯仰角-上下偏转角度)以及 roll(翻滚角-不好解释,自行百度)。我个人感觉很准确的,后续可以用他做正脸侧脸的数据筛选,人脸识别,表情识别,都有很大的用处。
