Scrapy爬取前程无忧(51job)python职位信息
开始是想做数据分析的,上网上找教程,看到相关博客我就跟着做,但是没数据就只能开始自己爬呗。顺便给51job的工作人员提提建议,我爬的时候Scrapy访问量开到128,relay仅有两秒,还以为会封ip。没想到只是改请求头就能万事大吉。。。这基本算是没有反扒机制吧。而且后面数据清洗的时候发现很多虚假的招聘广告,这个应该官方可以控制下吧。
灵感来源:https://www.jianshu.com/p/309493fe5c7b ,https://blog.csdn.net/lbship/article/details/79452459
简单分析
进入官网搜索python,跳转到:https://search.51job.com/list/000000%252C00,000000,0000,00,9,99,python,2,1.html,后面还有一长串不知道是什么的信息,经过测试没什么用。自主要的是.html前的数字,你可以改成2,就明白我的意思了。没有scrapy的可以先看这篇:https://www.imooc.com/learn/1017

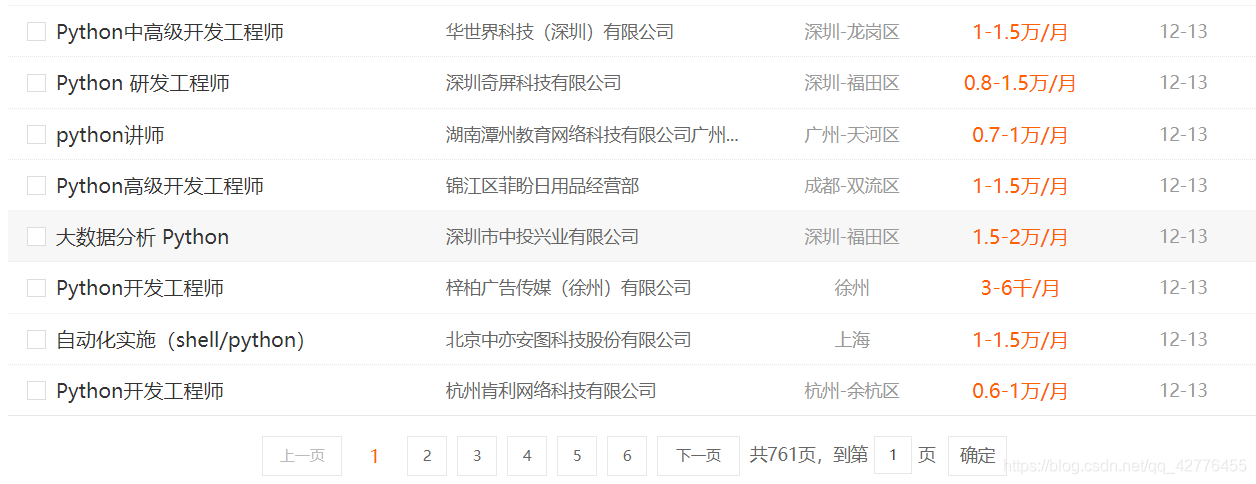
网页结构很清晰,parse()函数里xpath或者css拿到对应的列表信息,再解析每一条yield item,最后爬取完一页之后,判断是否为最后一页,跳到下一页继续爬取。
class JobspiderSpider(scrapy.Spider):
    name = 'jobSpider'
    allowed_domains = ['51job.com']
    start_urls = ['https://search.51job.com/list/000000,000000,0000,00,9,99,python,2,1.html']

    def parse(self, response):
        jobs = response.xpath('//*[@id="resultList"]/div[@class="el"]')
        item = S1JobobpypositionItem()

        for job in jobs:
            position = job.xpath('./p//a/@title').extract_first()
            company = job.xpath('./span[1]/a/@title').extract_first()
            location = job.xpath('./span[2]/text()').extract_first()
            salary = job.xpath('./span[3]/text()').extract_first()
            time = job.xpath('./span[4]/text()').extract_first()

            item['position'] = position
            item['company'] = company
            item['location'] = location
            item['salary'] = salary
            item['time'] = time

            print (item)
            yield item


        page_total = response.xpath('//*[@id="resultList"]//span[@class="td"]/text()').extract_first()

        next_page_url = response.css('#resultList li.bk a::attr(href)').extract()[-1]

        if next_page_url:
            yield scrapy.Request(url=next_page_url,callback=self.parse)
item里的数据在piplines中保存到mysql数据库(有关mysql数据库的链接:https://blog.csdn.net/qq_42776455/article/details/82959857 ):
class saveMysql(object):
    def __init__(self):
        self.client = pymysql.Connect(
                host='localhost',
                port=3306,
                user='root',
                passwd='root',
                db='51job',
                charset='utf8'
            )
        self.cursor = self.client.cursor()
    def process_item(self,item,spider):
        sql = 'insert into python_jobs (position,company,salary,location,time) values ("%s","%s","%s","%s","%s")'
        self.cursor.execute(sql % (item['position'],item['company'],item['salary'],item['location'],item['time']))
        self.client.commit()
    def close_spider(self, spider):
        self.cursor.close()
        self.client.close()
记得在settings里添加配置。
添加中间件构造请求头:https://blog.csdn.net/qq_42776455/article/details/83150012
结果:
