程序示例精选
C++ PCL点云局部颜色变换
如需安装运行环境或远程调试,见文章底部个人QQ名片,由专业技术人员远程协助!
前言
这篇博客针对《C++ PCL点云局部颜色变换》编写代码,代码整洁,规则,易读。 学习与应用推荐首选。
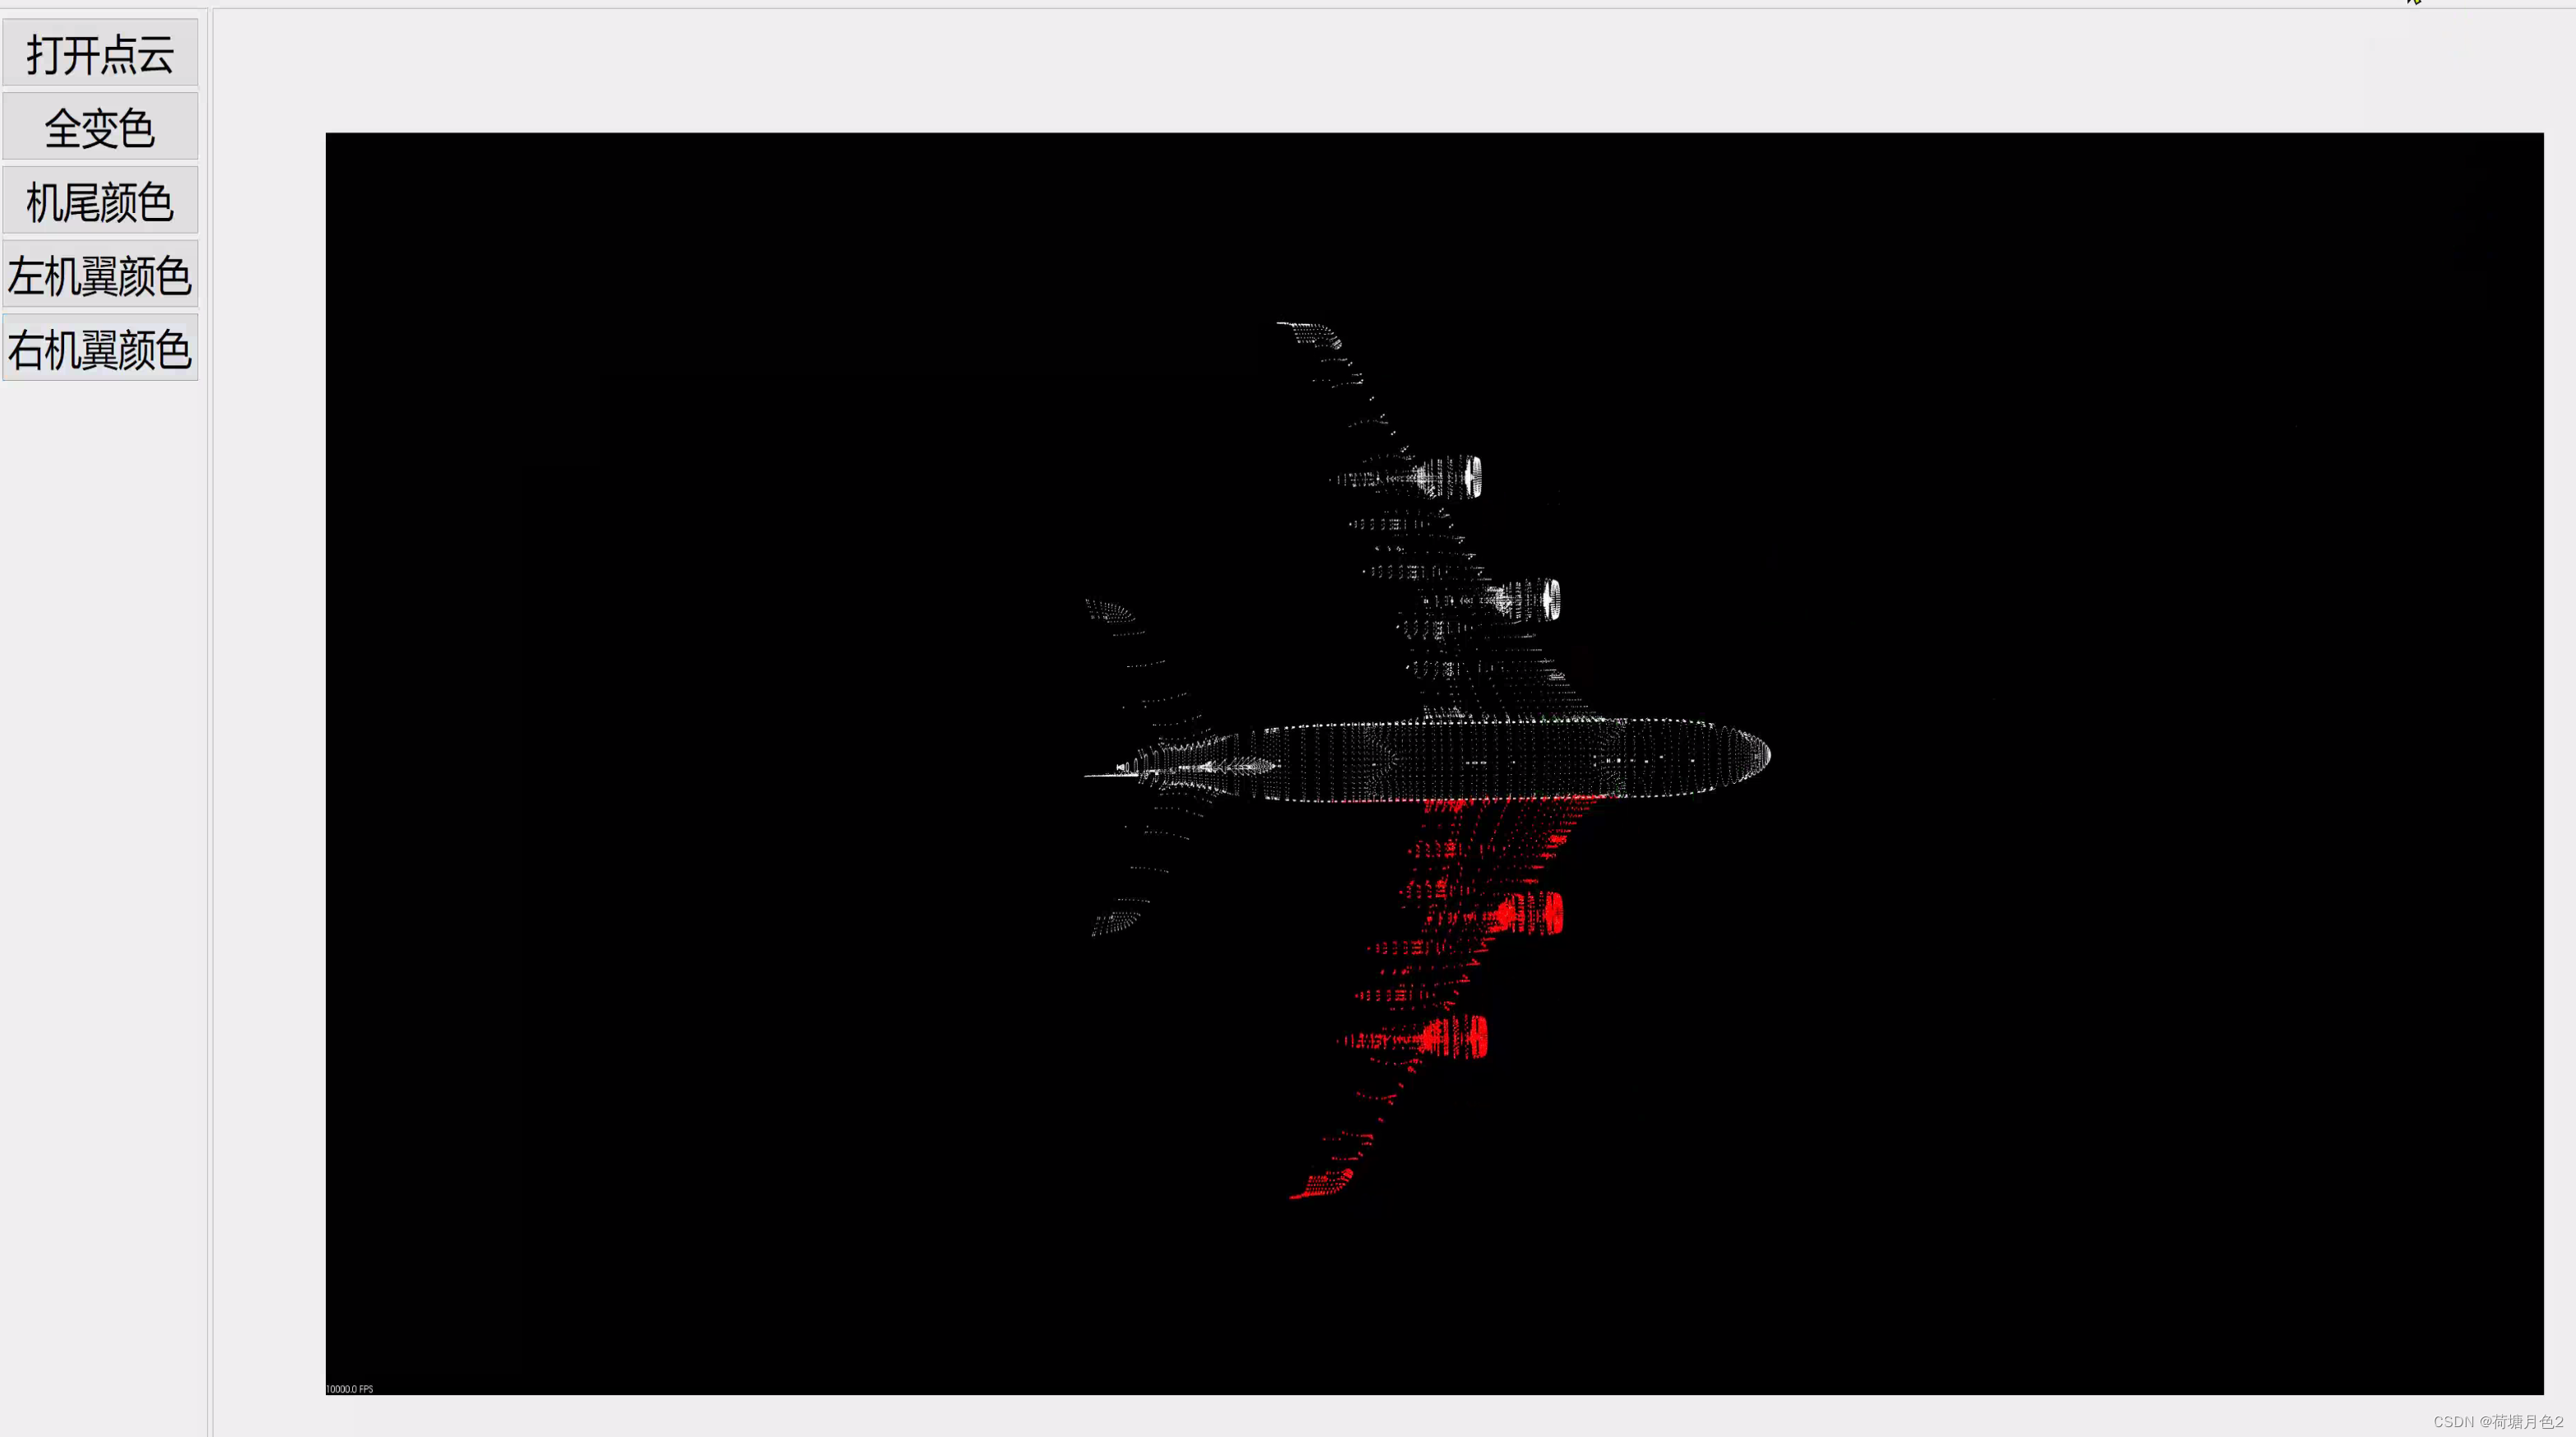
运行结果
文章目录
一、所需工具软件
二、使用步骤
1. 主要代码
2. 运行结果
三、在线协助
一、所需工具软件
1. VS2019, Qt
2. C++
二、使用步骤
代码如下(示例):
#include <iostream>
#include <vector>
#include <pcl/io/pcd_io.h>
#include <pcl/point_cloud.h>
#include <pcl/point_types.h>
#include <pcl/visualization/pcl_visualizer.h>

pcl::PointCloud<pcl::PointXYZ>::Ptr cloud(new pcl::PointCloud<pcl::PointXYZ>());
boost::shared_ptr<pcl::visualization::PCLVisualizer> viewer(new pcl::visualization::PCLVisualizer("viewer"));
pcl::PointCloud<pcl::PointXYZ>::Ptr clicked_points_3d(new pcl::PointCloud<pcl::PointXYZ>);
int num = 0;
unsigned char* pointmark;//点云分类标记


namespace
{


     #include<fstream>
     #include<string>
	void MarkSelectPointIndexToTxt(std::vector<int>& indices, std::string txtfilename)
	{


		std::fstream ofs(txtfilename, std::ios::out);
		if (ofs.is_open())
		{


			for (auto& index : indices)
			{


				ofs << std::to_string(index) << "\n";
			}

			ofs.flush();
			ofs.close();
			std::cout << "write" << txtfilename << "successfully" << std::endl;
		}

	}


}


void main()
{


	char path[100];
	sprintf_s(path, "Airplane_v1.pcd");
	if (pcl::io::loadPCDFile(path, *cloud))
	{


		std::cerr << "ERROR: Cannot open file " << std::endl;
		return;
	}
	pointmark = new unsigned char[cloud->size()];
	for (size_t i = 0; i < cloud->size(); i++)
	{


		pointmark[i] = 0;//初始化点云分类标识,0为未标记点
	}
	viewer->addPointCloud<pcl::PointXYZ>(cloud, "point");//添加显示点云
	clicked_points_3d->width = 0;//初始化点云个数

	std::vector<int> indices;
	//读尾巴的点
	//ReadPointIndexFromTxt(indices, "tail.txt");
	//读翅膀的点
	ReadPointIndexFromTxt(indices, "head.txt");
	//添加点云(去掉重复的点)
	int addcount = 0;//添加点计数
	for (int i = 0; i < indices.size(); ++i)
	{


		if (pointmark[indices[i]] == 0)
		{


			clicked_points_3d->points.push_back(cloud->points.at(indices[i]));
			addcount++;
			pointmark[indices[i]] = 1;//将点云标记为已圈选状态
		}
	}
	pcl::visualization::PointCloudColorHandlerCustom<pcl::PointXYZ> red(clicked_points_3d, 255, 0, 0);
	//每添加一次点云都要取一次别名,不然只能选择一次
	std::stringstream ss;
	std::string cloudName;
	ss << num++;
	ss >> cloudName;
	cloudName += "_cloudName";
	//添加点云,并设置其显示半径
	viewer->addPointCloud(clicked_points_3d, red, cloudName);
	viewer->setPointCloudRenderingProperties(pcl::visualization::PCL_VISUALIZER_POINT_SIZE, 2, cloudName);
	//viewer->registerAreaPickingCallback(pp_callback, (void*)&cloud);
	while (!viewer->wasStopped())
	{


		viewer->spinOnce(100);

	}
	delete[]pointmark;
}
运行结果

三、在线协助:
如需安装运行环境或远程调试,见文章底部个人 QQ 名片,由专业技术人员远程协助!
1)远程安装运行环境,代码调试
2)Visual Studio, Qt, C++, Python编程语言入门指导
3)界面美化
4)软件制作
当前文章连接:https://blog.csdn.net/alicema1111/article/details/132666851
个人博客主页:https://blog.csdn.net/alicema1111?type=blog
博主所有文章点这里:https://blog.csdn.net/alicema1111?type=blog
博主推荐:
Python人脸识别考勤打卡系统:
https://blog.csdn.net/alicema1111/article/details/133434445
Python果树水果识别:https://blog.csdn.net/alicema1111/article/details/130862842
Python+Yolov8+Deepsort入口人流量统计:https://blog.csdn.net/alicema1111/article/details/130454430
Python+Qt人脸识别门禁管理系统:https://blog.csdn.net/alicema1111/article/details/130353433
Python+Qt指纹录入识别考勤系统:https://blog.csdn.net/alicema1111/article/details/129338432
Python Yolov5火焰烟雾识别源码分享:https://blog.csdn.net/alicema1111/article/details/128420453
Python+Yolov8路面桥梁墙体裂缝识别:https://blog.csdn.net/alicema1111/article/details/133434445