在Shader纹理采样的运用中,灵活的对UV进行操作可以达到很多种很棒的效果,今天就来介绍一种简单的动画效果帧动画。
效果图:

用到的示例图:
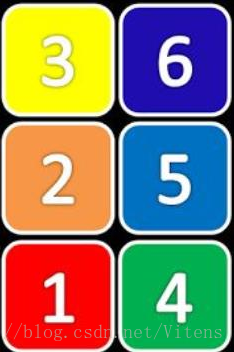
关键点就是对纹理采样中的缩放(Tiling)与偏移(Offset)的理解,如图:

正常情况下的采样效果:

帧动画要求每次只显示一小张图,然后练习跳转显示后续的图,所以每次UV的范围就不能在默认的0-1的范围。
如给定的这张图,宽为2,高为3,u的范围(Tiling的X属性)为 1/宽, v的范围(Tiling的Y属性)为1/高,设置看效果:
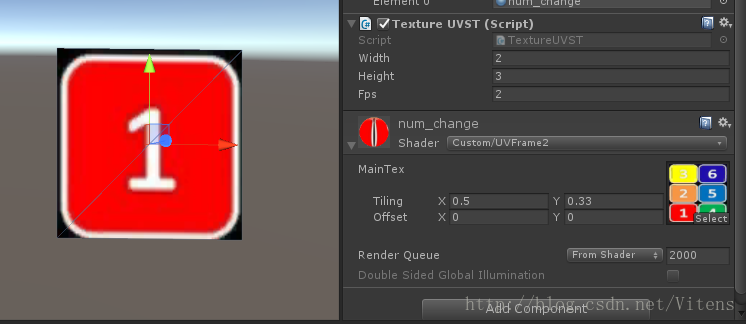
能采样到小图了,接下来就是通过代码控制偏移量,使每次的采样结果都是按照我们想要的顺序采样下去就ok了,至于是通过C#代码去动态修改偏移量还是Shader中去修改,都是一个目的就是随时间推移改变偏移量Offset。我这里采用C#来修改Offset值:
using System.Collections;
using UnityEngine;

public class TextureUVST : MonoBehaviour
{
    public int width;
    public int height;
    public int fps;

    int _index = 0;
    int _totalCount;
    float _uInterval;//u方向上偏移的单位间隔
    float _vInterval;//v方向上偏移的单位间隔
    Material _mat;

	void Start ()
    {
        _totalCount = width * height;
        _uInterval = 1f / width;
        _vInterval = 1f / height;
        _mat = GetComponent<MeshRenderer>().material;
        _mat.SetTextureScale("_MainTex", new Vector2(_uInterval, _vInterval));//固定的 所以设置一次就行了
        StartCoroutine(Play());
    }

    IEnumerator Play()
    {
        while (true)
        {
            yield return new WaitForSeconds(1f / fps);//等待设置的一帧时间

            //使用
            //_mat.SetTextureOffset("_MainTex", new Vector2(_index % width * _uInterval, 1 - _index / width * _vInterval - _vInterval));//362514  正常的左上开始, 左到右,上到下
            _mat.SetTextureOffset("_MainTex", new Vector2(_index / height * _uInterval, _index % height * _vInterval));//123456
            //_mat.SetTextureOffset("_MainTex", new Vector2(_index % width * _uInterval, _index / width * _vInterval));//142536
            //_mat.SetTextureOffset("_MainTex", new Vector2(_index / height * _uInterval, 1 - _index % height * _vInterval - _vInterval));//321654

            //累加
            _index++;
            _index %= _totalCount;
        }
    }
}
Shader简单的纹理采样代码:
// Upgrade NOTE: replaced tex2D unity_Lightmap with UNITY_SAMPLE_TEX2D

Shader "Custom/UVFrame2" {

	Properties{
		_MainTex("MainTex",2d) = ""{}
	}

	SubShader{
		pass
		{
			CGPROGRAM
			#pragma vertex vert
			#pragma fragment frag
			#include "unitycg.cginc"

			sampler2D _MainTex;
			float4 _MainTex_ST;

			struct v2f
			{
				float4 pos : POSITION;
				float2 uv : TEXCOORD0;
			};

			v2f vert(appdata_full v)
			{
				v2f o;
				o.pos = UnityObjectToClipPos(v.vertex);
				o.uv = TRANSFORM_TEX(v.texcoord, _MainTex);
				//o.uv = TRANSFORM_TEX(float4(_TilingX,_TilingY,_OffsetX,_OffsetY), _MainTex);
				return o;
			}

			fixed4 frag(v2f IN) :COLOR
			{
				fixed4 color = tex2D(_MainTex, IN.uv);

				return color;
			}

			ENDCG
		}
	}
}