前言
以前翻译了神经风格迁移的论文:一个艺术风格化的神经网络算法(A Neural Algorithm of Artistic Style)(译),这篇文章中会给出其基于Keras的实现。github上也有很多相关的实现,也有caffe、tensorflow等等框架的实现,如果感兴趣可以自行到github上搜索。出于学习的目的,我也是模仿别人开源在github上的代码,基于keras进行了实现。
程序中使用到了VGG16的预训练模型vgg16_weights_tf_dim_ordering_tf_kernels_notop.h5,可以自己到网上下载好放到~/.keras/models文件夹中。
所有模型都可以到百度网盘中下载:
https://pan.baidu.com/s/1geHmOpH#list/path=%2Fkeras%2Fkeras_weights
程序
不说废话了,上代码,代码中已有注释。
log.py:自定义终端的log信息打印格式
# *_*coding:utf-8 *_*
# author: 许鸿斌
# 邮箱:[email protected]

import logging
import sys

# 获取logger实例,如果参数为空则返回root logger
logger = logging.getLogger('Test')
# 指定logger输出格式
formatter = logging.Formatter('%(asctime)s %(levelname)-8s: %(message)s')
# 文件日志
# file_handler = logging.FileHandler("test.log")
# file_handler.setFormatter(formatter)  # 可以通过setFormatter指定输出格式
# 控制台日志
console_handler = logging.StreamHandler(sys.stdout)
console_handler.formatter = formatter  # 也可以直接给formatter赋值
# 为logger添加的日志处理器
# logger.addHandler(file_handler)
logger.addHandler(console_handler)
# 指定日志的最低输出级别,默认为WARN级别
logger.setLevel(logging.INFO)
neural_style_transfer.py:神经风格迁移的程序实现
# *_*coding:utf-8 *_*
# author: 许鸿斌
# 邮箱:[email protected]

# 自定义好终端信息打印的格式
from log import logger

import numpy as np
import time
import argparse

from scipy.misc import imsave
from scipy.optimize import fmin_l_bfgs_b
from keras.preprocessing.image import load_img, img_to_array
from keras.applications import vgg16
from keras import backend as K

# 配置参数
# base_image_path:内容图片路径
# style_reference_image_path:风格图片路径
# result_prefix:生成图片名前缀
# --iter:迭代次数,默认为10次,基本上10次就足够了,如果不行再加
# --content_weight:内容权重,调整loss中content_loss部分的权重,默认为0.025
# --style_weight:风格权重,调整loss中style_loss部分的权重,默认为1.0
# --tv_weight:整体方差权重,调整loss中total_variation_loss部分的权重,默认为1.0
parser = argparse.ArgumentParser(description="Neural Style Transfer(Keras)")
parser.add_argument('base_image_path', metavar='base', type=str, help='Path to the image to transform')
parser.add_argument('style_reference_image_path', metavar='ref', type=str, help='Path to the style reference image.')
parser.add_argument('result_prefix', metavar='res_prefix', type=str, help='Number of iterations to run.')
parser.add_argument('--iter', type=int, default=10, required=False, help='Number of iterations to run.')
parser.add_argument('--content_weight', type=float, default=0.025, required=False, help='Content weight')
parser.add_argument('--style_weight', type=float, default=1.0, required=False, help='Style Weight.')
parser.add_argument('--tv_weight', type=float, default=1.0, required=False, help='Total Variation Weight')

args = parser.parse_args()
base_image_path = args.base_image_path                          # 内容图片路径
style_reference_image_path = args.style_reference_image_path    # 风格图片路径
result_prefix = args.result_prefix                              # 生成图片文件名前缀
iterations = args.iter                                          # 迭代次数

# 几个不同loss的权重参数
total_variation_weight = args.tv_weight
style_weight = args.style_weight
content_weight = args.content_weight

width, height = load_img(base_image_path).size                  # 获取内容图片的尺寸
img_nrows = 400                                                 # 设定生成的图片的高度为400
img_ncols = int(width * img_nrows / height)                     # 与内容图片等比例,计算对应的宽度

# 图像预处理,使用keras导入图片,转为合适格式的Tensor
def preprocess_image(image_path):
    img = load_img(image_path, target_size=(img_nrows, img_ncols))
    img = img_to_array(img)
    img = np.expand_dims(img, axis=0)
    img = vgg16.preprocess_input(img)
    return img

# 图像后处理,将Tensor转换回图片
def deprocess_image(x):
    if K.image_data_format() == 'channels_first':
        x = x.reshape((3, img_nrows, img_ncols))
        x = x.transpose((1, 2, 0))
    else:
        x = x.reshape((img_nrows, img_ncols, 3))
    # Remove zero-center by mean pixel
    x[:, :, 0] += 103.939
    x[:, :, 1] += 116.779
    x[:, :, 2] += 123.68
    # 'BGR' -> 'RGB'
    x = x[:, :, ::-1]
    x = np.clip(x, 0, 255).astype('uint8')
    return x

# 读入图片
logger.info('Loading content image: {}'.format(base_image_path))
logger.info('Loading style image: {}'.format(style_reference_image_path))
base_image = K.variable(preprocess_image(base_image_path))
style_reference_image = K.variable(preprocess_image(style_reference_image_path))

# 创建生成图片的占位符
logger.info('Creating combination image.')
if K.image_data_format() == 'channels_first':
    combination_image = K.placeholder((1, 3, img_nrows, img_ncols))
else:
    combination_image = K.placeholder((1, img_nrows, img_ncols, 3))

# 将三个图片:内容图片、风格图片、生成图片,在batch的那个维度上拼到一起,对应的就是batch中第1、2、3个图像;后面用到时,直接通过batch那个维度的索引可以取出对应的结果。
logger.info('Concatenate content\\style\\combination images.')
input_tensor = K.concatenate([base_image, style_reference_image, combination_image], axis=0)

# 创建VGG16网络,输入为前面提到的三个图片,不包括VGG的全连接层,采用ImageNet下的预训练权重
model = vgg16.VGG16(input_tensor=input_tensor, weights='imagenet', include_top=False)
logger.info('Model VGG16 loaded.')

# 取出每一层的输出结果,字典的key为每层的名字,对应的value为该层输出的feature map
outputs_dict = dict([(layer.name, layer.output) for layer in model.layers])

# compute the neural style loss
# first we need to define 4 util functions

# 图像张量的gram矩阵,详细描述请参考原论文
def gram_matrix(x):
    assert K.ndim(x) == 3
    if K.image_data_format() == 'channels_first':
        features = K.batch_flatten(x)
    else:
        features = K.batch_flatten(K.permute_dimensions(x, (2,0,1)))
    gram = K.dot(features, K.transpose(features))
    return gram

# style loss:
# 从VGG16网络的特定层可以获取到风格图片和生成图片的特征图(feature map),
# 使用feature map计算gram矩阵,即计算出两张图片的风格特征。根据论文中的公式,计算出
# style loss,即两张图片风格特征的差异。
def style_loss(style, combination):
    assert K.ndim(style) == 3
    assert K.ndim(combination) == 3
    S = gram_matrix(style)
    C = gram_matrix(combination)
    channels = 3
    size = img_nrows * img_ncols
    return K.sum(K.square(S - C)) / (4. * (channels**2) * (size**2))

# content loss
# 内容图片与风格图片“内容”部分的差异
def content_loss(base, combination):
    return K.sum(K.square(combination - base))

# total variation loss:
# 第三个loss函数,用来表示生成图片的局部相干性
def total_variation_loss(x):
    assert K.ndim(x) == 4
    if K.image_data_format() == 'channels_first':
        a = K.square(x[:, :, :img_nrows-1, :img_ncols-1] - x[:, :, 1:, :img_ncols-1])
        b = K.square(x[:, :, :img_nrows-1, :img_ncols-1] - x[:, :, :img_nrows-1, 1:])
    else:
        a = K.square(x[:, :img_nrows-1, :img_ncols-1, :] - x[:, 1:, :img_ncols-1, :])
        b = K.square(x[:, :img_nrows-1, :img_ncols-1, :] - x[:, :img_nrows-1, 1:, :])
    return K.sum(K.pow(a+b, 1.25))

# 先计算content部分的loss
loss = K.variable(0.)   # loss初始化为0
layer_features = outputs_dict['block4_conv2']   # 取出'block4_conv2'层上的输出,0、1、2分别对应内容图片、风格图片、生成图片的feature map的索引
# 计算content loss只需要取出内容图片和生成图片计算得到的特征
base_image_features = layer_features[0, :, :, :]
combination_features = layer_features[2, :, :, :]
loss += content_weight * content_loss(base_image_features, combination_features) # 乘以content_loss对应的权重(content_weight),然后累加在总的loss上

# 计算style部分的loss
feature_layers = ['block1_conv1', 'block2_conv1', 'block3_conv1', 'block4_conv1', 'block5_conv1']
for layer_name in feature_layers:   # 遍历这5个层,5个层的style_loss加权平均,累加在总的loss上
    layer_features = outputs_dict[layer_name]   # 取出对应层的特征图(feature map)
    # 计算style loss只需要取出风格图片和生成图片计算得到的特征
    style_reference_features = layer_features[1, :, :, :]
    combination_features = layer_features[2, :, :, :]
    sl = style_loss(style_reference_features, combination_features)
    loss += (style_weight / len(feature_layers)) * sl   # 几个层的结果加权平均,再乘以style_loss对应的权重(style_weight),累加在总的loss上

loss += total_variation_weight * total_variation_loss(combination_image)    # 计算total_variation_loss,累加在总的loss上,得到最终的loss

# 计算生成图片关于loss的梯度
grads = K.gradients(loss, combination_image)

outputs = [loss]
if isinstance(grads, (list, tuple)):    # 判断是否是tuple或者list中的一种类型
    outputs += grads
else:
    outputs.append(grads)

# 生成一个可调用函数,输入为:[combination_image],输出为:outputs
f_outputs = K.function([combination_image], outputs)

# 计算loss和梯度
def eval_loss_and_grads(x):
    if K.image_data_format() == 'channels_first':
        x = x.reshape((1, 3, img_nrows, img_ncols))
    else:
        x = x.reshape((1, img_nrows, img_ncols, 3))
    outs = f_outputs([x])
    loss_value = outs[0]
    if len(outs[1:]) == 1:
        grad_values = outs[1].flatten().astype('float64')
    else:
        grad_values = np.array(outs[1:]).flatten().astype('float64')
    return loss_value, grad_values

# this Evaluator class makes it possible
# to compute loss and gradients in one pass
# while retrieving them via two separate functions,
# "loss" and "grads". This is done because scipy.optimize
# requires separate functions for loss and gradients,
# but computing them separately would be inefficient.
class Evaluator(object):
    def __init__(self):
        self.loss_value = None
        self.grads_values = None

    def loss(self, x):
        assert self.loss_value is None
        loss_value, grad_values = eval_loss_and_grads(x)
        self.loss_value = loss_value
        self.grad_values = grad_values
        return self.loss_value

    def grads(self, x):
        assert self.loss_value is not None
        grad_values = np.copy(self.grad_values)
        self.loss_value = None
        self.grad_values = None
        return grad_values

evaluator = Evaluator()

# 调整数据格式,减去像素均值
if K.image_data_format() == 'channels_first':
    x = np.random.uniform(0, 255, (1, 3, img_nrows, img_ncols)) - 128.
else:
    x = np.random.uniform(0, 255, (1, img_nrows, img_ncols, 3)) - 128.

# 使用L-BFGS算法来求解非约束优化问题,scipy中提供了实现,使用fmin_l_bfgs_b函数来求解前面得到的总的loss的最小值
for i in range(iterations):
    logger.info('Start iteration: {}'.format(i))
    start_time = time.time()
    x, min_val, info = fmin_l_bfgs_b(evaluator.loss, x.flatten(), fprime=evaluator.grads, maxfun=20)
    logger.info('Current loss value: {}'.format(min_val))
    # save current generated image
    img = deprocess_image(x.copy())
    fname = result_prefix + '_at_iteration_{}.png'.format(i)
    imsave(fname, img)
    end_time = time.time()
    logger.info('Image saved as {}'.format(fname))
    logger.info('Iteration {} completed in {}s.'.format(i, end_time-start_time))
运行
只要配置好keras等库的环境,上面的代码在python2或者python3均可运行。下面就以python3为例。
输入python3 neural_style_transfer.py:
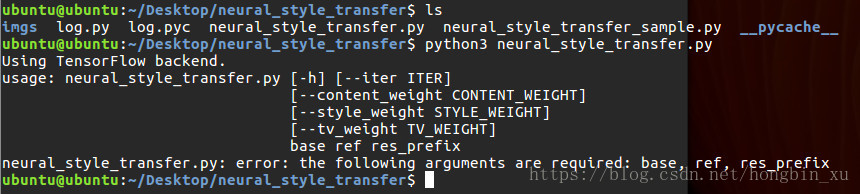
事先要准备好两张图片:内容图片、风格图片。
输入:python3 neural_style_transfer.py './imgs/1-content.jpg' './imgs/1-style.jpg' './imgs/result'
第一个为内容图片的路径,第二个为风格图片的路径,第三个为生成图片的前缀。
如图所示:
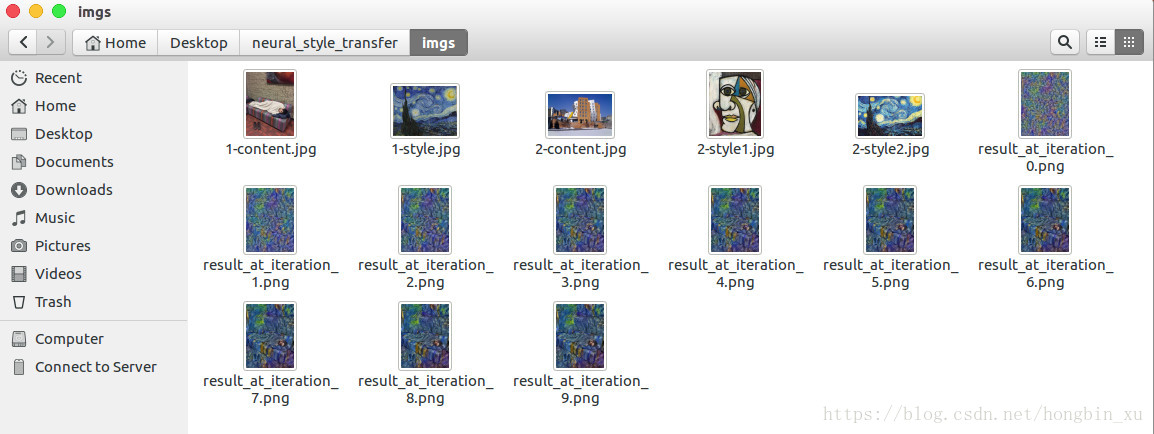
上面的例子中就是指定了目录中的1-content.jpg为内容图片,1-style.jpg为风格图片,对应着前缀为result_at_iteration_的图片为生成的图片。
运行时根据实际情况自行更改即可。
运行结果
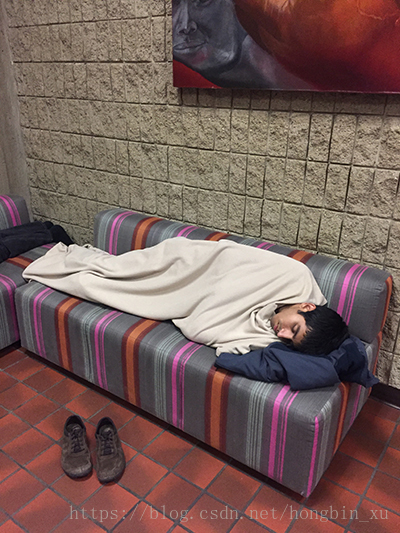
内容图片
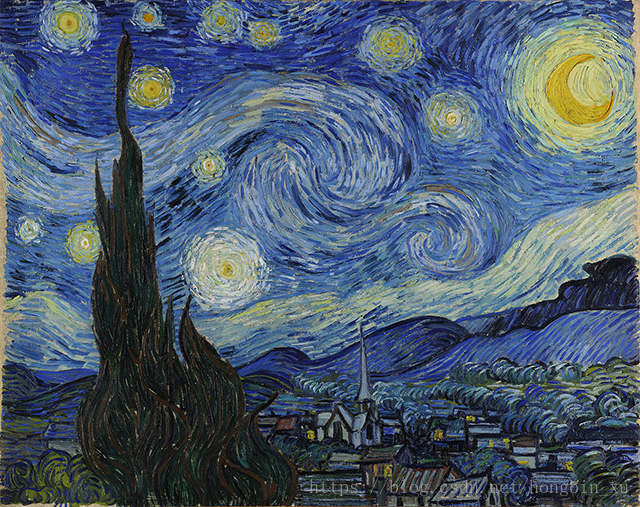
风格图片
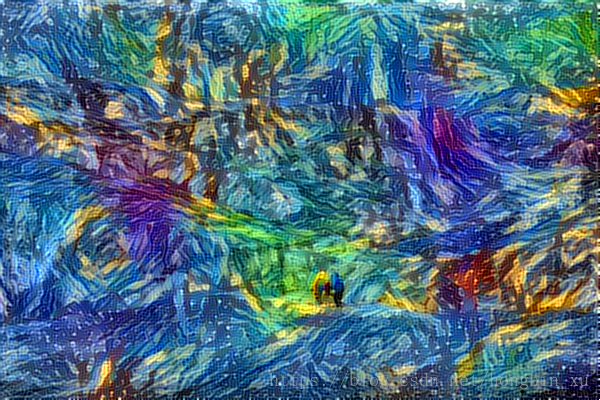
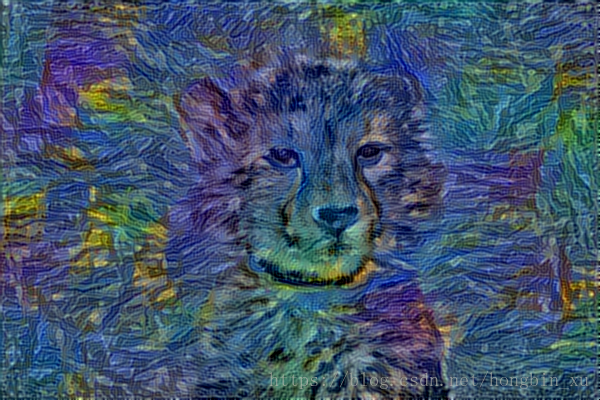
生成的结果(迭代9次):

其他的一些结果:
注:建议采用GPU运行,如果用CPU运行一般要2到3小时,使用GPU几分钟即可得到结果。另外也可以更改--iter,即迭代次数,为其他值,看看结果如何。其他参数也可以自行更改,观察实验结果。