版权声明:
- 本文原创发布于博客园"优梦创客"的博客空间(网址:
http://www.cnblogs.com/raymondking123/)以及微信公众号"优梦创客" - 您可以自由转载,但必须加入完整的版权声明!
shader final
PBR渲染
Vertex and Fragment Shader Instance
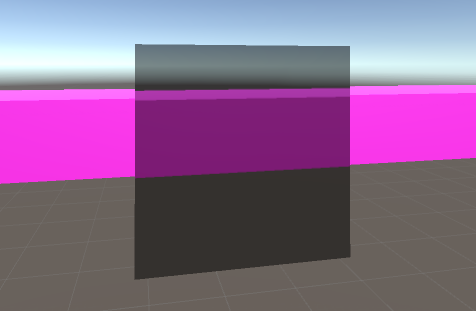
glass shader
1.屏幕透明
            // 计算每个顶点相关的属性(位置,纹理坐标)
            VertOutput vert(VertInput v)
            {
                VertOutput o;
                o.vertex = UnityObjectToClipPos(v.vertex);
                o.uvgrab = ComputeGrabScreenPos(o.vertex);
                // 传入一个投影空间中的顶点坐标,此方法会计算出该顶点坐标在整个摄像机
                // 此方法会以摄像机可视范围的左下角为纹理坐标0,0点,右上角为1,1点,计算出
                // 当前顶点位置对应的纹理坐标
                // 有了贴图的uv坐标之后就把贴图贴上去
                return o;
            }

            half4 frag(VertOutput i) : COLOR
            {
                // 将Unity光栅化阶段经过顶点插值得到的片元(像素)的属性进行计算,得到每个片元的颜色值
                return tex2Dproj(_GrabTexture,i.uvgrab) * 0.5;
                // tex2Dproj
            }
2.屏幕扭曲
bump map rgb当做xyz坐标来用的
computeGrabScreenPos
tex2dproj
struct VertInput
{
float4 vertex:POSITION;
float4 color:COLOR;
float2 texcoord:TEXCOORD;
// 一个是自身的纹理坐标,还有一个是grab贴图的坐标
};
struct VertOutput
{
float4 vertex:POSITION;
fixed4 color : COLOR;
float2 texcoord : TEXCOORD0; // _Maintex的纹理坐标
float4 uvgrab:TEXCOORD1; // BumpMap的纹理坐标
};
        // 计算每个顶点相关的属性(位置,纹理坐标)
        VertOutput vert(VertInput v)
        {
            VertOutput o;
            o.vertex = UnityObjectToClipPos(v.vertex);
            o.uvgrab = ComputeGrabScreenPos(o.vertex);
            // 传入一个投影空间中的顶点坐标,此方法会计算出该顶点坐标在整个摄像机
            // 此方法会以摄像机可视范围的左下角为纹理坐标0,0点,右上角为1,1点,计算出
            // 当前顶点位置对应的纹理坐标
            // 有了贴图的uv坐标之后就把贴图贴上去

            o.color = v.color;
            o.texcoord = v.texcoord;

            return o;
        }

        half4 frag(VertOutput i) : COLOR
        {
            // 将Unity光栅化阶段经过顶点插值得到的片元(像素)的属性进行计算,得到每个片元的颜色值

            half4 mainColor = tex2D(_MainTex, i.texcoord); //本身纹理采样
            half4 bump = tex2D(_BumpMap, i.texcoord); // 法线贴图采样扰动值
            half2 distortion = UnpackNormal(bump).rg;// 纹理值转换为法线值

            i.uvgrab.xy += distortion * distortion * _Magnitude; // 对uvgrab进行扰动
            fixed4 grabColor = tex2Dproj(_GrabTexture, i.uvgrab);// 玻璃背景后面的颜色

            return mainColor * grabColor;
        }

water shader
利用这种效果,可以对流动的水使用,也可以对火焰产生的空气流的冲击波进行模拟
Animated materials动画材质
_grabTexture // 抓取背景
_NoiseTex // 随机波纹
_CausticTex // 刻蚀纹理
float2 sinusoid(float2 x, float2 m, float2 M, float2 periodo)
{
float2 excursions = M - m;
float2 coefficiente = 3.1415 * 2.0 / periodo;
return excursions / 2.0 * (1.0 + sin(x * coefficiente)) + m;
}
half4 frag(VertOutput i) : COLOR
{
fixed4 noise = tex2D(_BumpMap,i.texcoord);
fixed4 mainColor = tex2D(_MainTex, i.texcoord);

            float time = _Time[1] * 0.5; // Time.time

            float2 waterDisplacement = sinusoid
            (
                float2(time , time) + noise.xy,
                float2(-_WaterMagnitude, -_WaterMagnitude),
                float2(_WaterMagnitude,_WaterMagnitude),
                float2(_WaterPeriod,_WaterPeriod)
            );//当前值,最小值,最大值,周期

            i.uvgrab.xy += waterDisplacement;
            fixed4 grabColor = tex2Dproj(_GrabTexture,i.uvgrab);
            fixed4 causticColor = tex2D(_CausticTex, i.texcoord.xy*0.25 + waterDisplacement * 5);

            return grabColor * mainColor * causticColor * _WaterColor;
        }

screen shader and image effects
image effect