这里主要总结一下车牌识别的总体思路,这里车牌区域提取采用的传统的图像处理的方法(转换颜色空间、开运算、闭运算、提取轮廓,包括利用一些启发性信息。。),分类用的是SVM,这个模型需要自己训练,主要是一些数字、字母、省份缩写的汉字,opencv自带svm方法训练即可,然后描述一下具体过程。。
总体流程
(1)训练字符分类器
(2)resize为固定大小
(3)高斯去噪
(4)转化为灰度图
(5)开运算
开运算与闭运算:https://blog.csdn.net/qq_41332469/article/details/89415429
(6)灰度图与开运算图加权求和
(7)转化为二值图像
(8)后利用Canny算法进行边缘检测
canny算子介绍:https://www.jianshu.com/p/2334bee37de5
(9)先开运算后闭运算使图像变为一个整体
(10)检测矩形框
(11)利用启发性信息过滤矩形框:矩形大小、宽高比、颜色
(12)利用直方图分割字符(阈值设定、边缘干扰、中间的分割点、铆钉的干扰)
训练字符和汉字分类器
	def train_svm(self):
		# 识别英文字母和数字
		self.model = SVM(C=1, gamma=0.5)
		# 识别中文
		self.modelchinese = SVM(C=1, gamma=0.5)
		if os.path.exists("svm.dat"):
			self.model.load("svm.dat")
		else:
			chars_train = []
			chars_label = []

			for root, dirs, files in os.walk("train\\chars2"):
				if len(os.path.basename(root)) > 1:
					continue
				root_int = ord(os.path.basename(root))
				for filename in files:
					filepath = os.path.join(root, filename)
					digit_img = cv2.imread(filepath)
					digit_img = cv2.cvtColor(digit_img, cv2.COLOR_BGR2GRAY)
					chars_train.append(digit_img)
					# chars_label.append(1)
					chars_label.append(root_int)

			chars_train = list(map(deskew, chars_train))
			chars_train = preprocess_hog(chars_train)
			# chars_train = chars_train.reshape(-1, 20, 20).astype(np.float32)
			chars_label = np.array(chars_label)
			print(chars_train.shape)
			self.model.train(chars_train, chars_label)
		if os.path.exists("svmchinese.dat"):
			self.modelchinese.load("svmchinese.dat")
		else:
			chars_train = []
			chars_label = []
			for root, dirs, files in os.walk("train\\charsChinese"):
				if not os.path.basename(root).startswith("zh_"):
					continue
				pinyin = os.path.basename(root)
				index = provinces.index(pinyin) + PROVINCE_START + 1  # 1是拼音对应的汉字
				for filename in files:
					filepath = os.path.join(root, filename)
					digit_img = cv2.imread(filepath)
					digit_img = cv2.cvtColor(digit_img, cv2.COLOR_BGR2GRAY)
					chars_train.append(digit_img)
					# chars_label.append(1)
					chars_label.append(index)
			chars_train = list(map(deskew, chars_train))
			chars_train = preprocess_hog(chars_train)
			# chars_train = chars_train.reshape(-1, 20, 20).astype(np.float32)
			chars_label = np.array(chars_label)
			print(chars_train.shape)
			self.modelchinese.train(chars_train, chars_label)
	# 将训练的模型存入文件
	def save_traindata(self):
		if not os.path.exists("svm.dat"):
			self.model.save("svm.dat")
		if not os.path.exists("svmchinese.dat"):
			self.modelchinese.save("svmchinese.dat")
识别过程
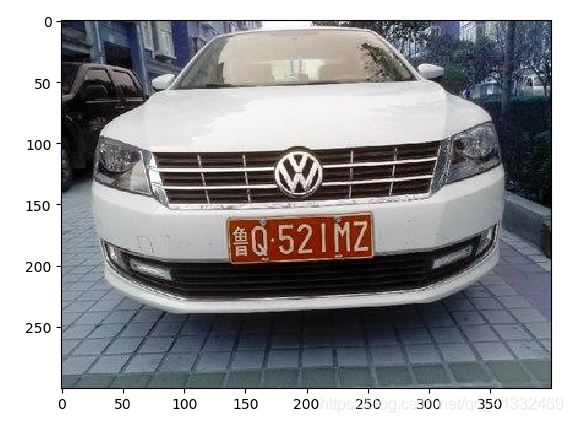
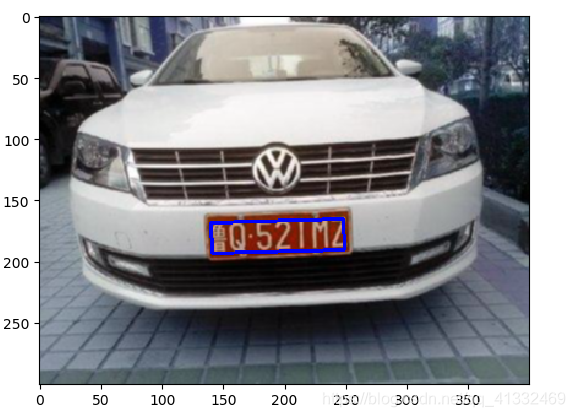
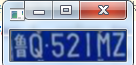
原图:

一、车牌定位
1、将图片转化为固定大小的尺寸;
if pic_width > MAX_WIDTH:
	resize_rate = MAX_WIDTH / pic_width
	img = cv2.resize(img, (MAX_WIDTH, int(pic_hight * resize_rate))
2、利用高斯去噪
img = cv2.GaussianBlur(img, (blur, blur), 0)
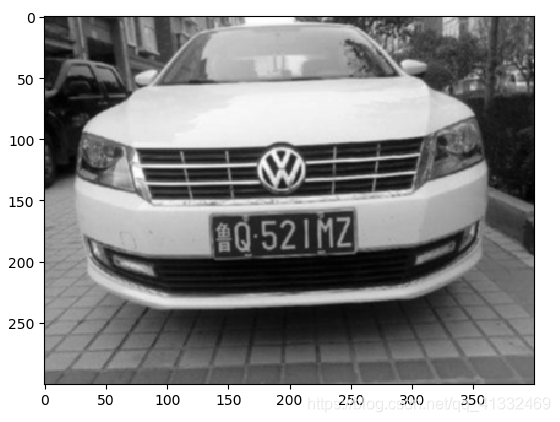
3、转换颜色空间为灰度图片
img = cv2.cvtColor(img, cv2.COLOR_BGR2GRAY)
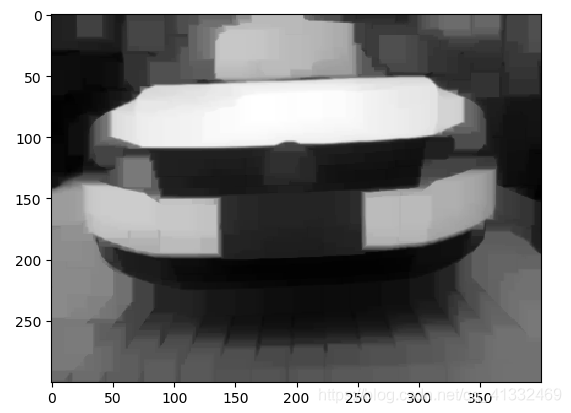
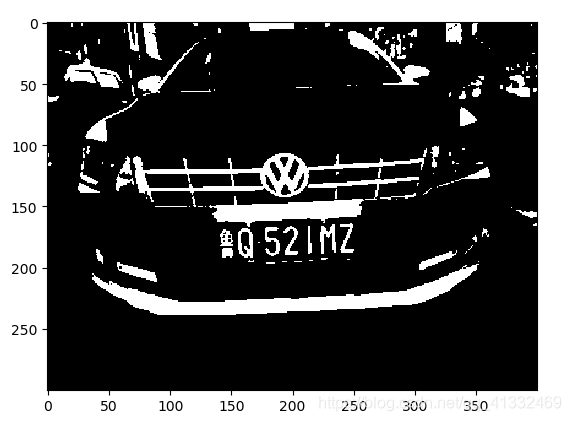
4、开运算
kernel = np.ones((20, 20), np.uint8)
img_opening = cv2.morphologyEx(img, cv2.MORPH_OPEN, kernel)    # 开运算
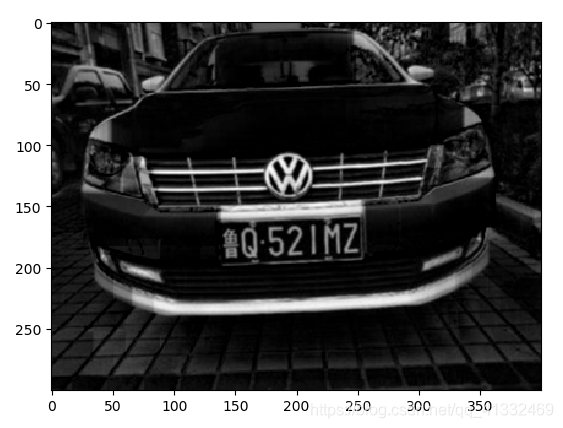
5、灰度图与开运算图加权求和
img_opening = cv2.addWeighted(img, 1, img_opening, -1, 0)
6、 转化为二值图像
ret, img_thresh = cv2.threshold(img_opening, 0, 255, cv2.THRESH_BINARY + cv2.THRESH_OTSU) # 转化为二值图像
7、后利用Canny算法进行边缘检测
img_edge = cv2.Canny(img_thresh, 100, 200)
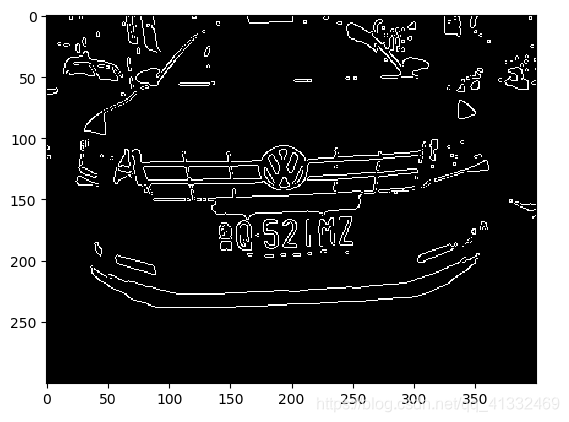
8、先开运算后闭运算使图像变为一个整体
kernel = np.ones((self.cfg["morphologyr"], self.cfg["morphologyc"]), np.uint8)
img_edge1 = cv2.morphologyEx(img_edge, cv2.MORPH_CLOSE, kernel)
img_edge2 = cv2.morphologyEx(img_edge1, cv2.MORPH_OPEN, kernel)
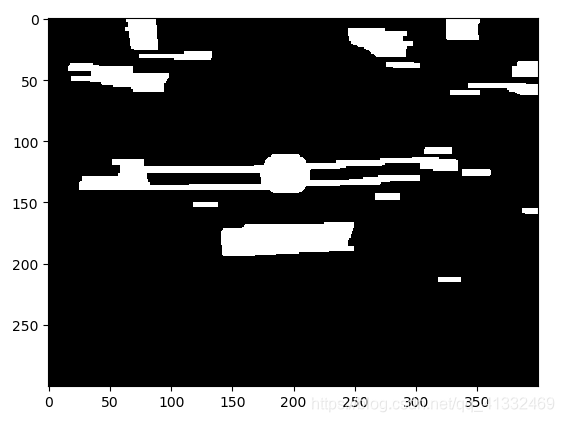
9、查找图像边缘整体形成的矩形区域,可能有很多,车牌就在其中一个矩形区域中
image, contours, hierarchy = cv2.findContours(img_edge2, cv2.RETR_TREE, cv2.CHAIN_APPROX_SIMPLE)
10、排除面积较小的矩形区域
contours = [cnt for cnt in contours if cv2.contourArea(cnt) > Min_Area] # 将太小的边框删除
11、利用宽高比排除非车牌区域
car_contours = []
for cnt in contours:
	rect = cv2.minAreaRect(cnt)
	area_width, area_height = rect[1]
	if area_width < area_height:
		area_width, area_height = area_height, area_width
	wh_ratio = area_width / area_height
	# print(wh_ratio)
	# 要求矩形区域长宽比在2到5.5之间,2到5.5是车牌的长宽比,其余的矩形排除
	if wh_ratio > 2 and wh_ratio < 5.5:
		car_contours.append(rect)
		box = cv2.boxPoints(rect)
		box = np.int0(box)
这张图比较简单,实际这个时候已经将车牌区域找到
 12、有的时候拍的照片不是很正,矩形区域可能是倾斜的矩形,需要矫正
for rect in car_contours:
	if rect[2] > -1 and rect[2] < 1:  # 创造角度,使得左、高、右、低拿到正确的值
		angle = 1
	else:
		angle = rect[2]
	rect = (rect[0], (rect[1][0] + 5, rect[1][1] + 5), angle)  # 扩大范围,避免车牌边缘被排除

	box = cv2.boxPoints(rect)
	heigth_point = right_point = [0, 0]
	left_point = low_point = [pic_width, pic_hight]
	for point in box:
		if left_point[0] > point[0]:
			left_point = point
		if low_point[1] > point[1]:
			low_point = point
		if heigth_point[1] < point[1]:
			heigth_point = point
		if right_point[0] < point[0]:
			right_point = point

	if left_point[1] <= right_point[1]:  # 正角度
		new_right_point = [right_point[0], heigth_point[1]]
		pts2 = np.float32([left_point, heigth_point, new_right_point])  # 字符只是高度需要改变
		pts1 = np.float32([left_point, heigth_point, right_point])
		M = cv2.getAffineTransform(pts1, pts2)
		dst = cv2.warpAffine(oldimg, M, (pic_width, pic_hight))
		point_limit(new_right_point)
		point_limit(heigth_point)
		point_limit(left_point)
		card_img = dst[int(left_point[1]):int(heigth_point[1]), int(left_point[0]):int(new_right_point[0])]
		card_imgs.append(card_img)
		cv2.imshow("card", card_img)
		cv2.waitKey(0)
	elif left_point[1] > right_point[1]:  # 负角度

		new_left_point = [left_point[0], heigth_point[1]]
		pts2 = np.float32([new_left_point, heigth_point, right_point])  # 字符只是高度需要改变
		pts1 = np.float32([left_point, heigth_point, right_point])
		M = cv2.getAffineTransform(pts1, pts2)
		dst = cv2.warpAffine(oldimg, M, (pic_width, pic_hight))
		point_limit(right_point)
		point_limit(heigth_point)
		point_limit(new_left_point)
		card_img = dst[int(right_point[1]):int(heigth_point[1]), int(new_left_point[0]):int(right_point[0])]
		card_imgs.append(card_img)
		cv2.imshow("card", card_img)
		cv2.waitKey(0)
13、使用颜色定位,排除不是车牌的矩形,目前只识别蓝、绿、黄车牌
colors = []
for card_index, card_img in enumerate(card_imgs):
	green = yellow = blue = black = white = 0
	card_img_hsv = cv2.cvtColor(card_img, cv2.COLOR_BGR2HSV)   # 对card_img进行颜色转换,转换为HSV颜色空间
	# 有转换失败的可能,原因来自于上面矫正矩形出错
	if card_img_hsv is None:
		continue
	row_num, col_num = card_img_hsv.shape[:2]
	card_img_count = row_num * col_num

          # 统计当前框中的各种颜色的像素个数,最终大于总像素个数的一般,即为牌照的颜色。。
	for i in range(row_num):
		for j in range(col_num):
			H = card_img_hsv.item(i, j, 0)
			S = card_img_hsv.item(i, j, 1)
			V = card_img_hsv.item(i, j, 2)
			if 11 < H <= 34 and S > 34:  # 图片分辨率调整
				yellow += 1
			elif 35 < H <= 99 and S > 34:  # 图片分辨率调整
				green += 1
			elif 99 < H <= 124 and S > 34:  # 图片分辨率调整
				blue += 1

			if 0 < H < 180 and 0 < S < 255 and 0 < V < 46:
				black += 1
			elif 0 < H < 180 and 0 < S < 43 and 221 < V < 225:
				white += 1
	color = "no"  # 设置color默认值为‘no’,如果符合黄、绿、蓝其中一种,就修改color值

	limit1 = limit2 = 0
	if yellow * 2 >= card_img_count:
		color = "yellow"
		limit1 = 11
		limit2 = 34  # 有的图片有色偏偏绿
	elif green * 2 >= card_img_count:
		color = "green"
		limit1 = 35
		limit2 = 99
	elif blue * 2 >= card_img_count:
		color = "blue"
		limit1 = 100
		limit2 = 124  # 有的图片有色偏偏紫
	elif black + white >= card_img_count * 0.7:  # TODO
		color = "bw"
	print('当前矩形框颜色为:', color)
	colors.append(color)
	print(blue, green, yellow, black, white, card_img_count)
	# cv2.imshow("color", card_img)
	# cv2.waitKey(0)
	if limit1 == 0:
		continue
14、以上为确定车牌颜色,以下为根据车牌颜色再定位,缩小边缘非车牌边界
xl, xr, yh, yl = self.accurate_place(card_img_hsv, limit1, limit2, color)
if yl == yh and xl == xr:
	continue
need_accurate = False
if yl >= yh:
	yl = 0
	yh = row_num
	need_accurate = True
if xl >= xr:
	xl = 0
	xr = col_num
	need_accurate = True
card_imgs[card_index] = card_img[yl:yh, xl:xr] if color != "green" or yl < (yh - yl) // 4 else card_img[yl - ( yh - yl) // 4:yh, xl:xr]
if need_accurate:  # 可能x或y方向未缩小,需要再试一次
	card_img = card_imgs[card_index]
	card_img_hsv = cv2.cvtColor(card_img, cv2.COLOR_BGR2HSV)
	xl, xr, yh, yl = self.accurate_place(card_img_hsv, limit1, limit2, color)
	if yl == yh and xl == xr:
		continue
	if yl >= yh:
		yl = 0
		yh = row_num
	if xl >= xr:
		xl = 0
		xr = col_num
card_imgs[card_index] = card_img[yl:yh, xl:xr] if color != "green" or yl < (yh - yl) // 4 else card_img[yl - (yh - yl) // 4:yh, xl:xr]
16、车牌找到
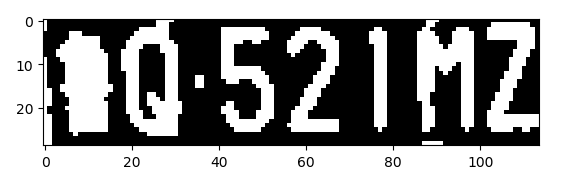
二、车牌区域字符识别
1、转化为灰度图,再转化为二值图,增加字符和背景的对比度
gray_img = cv2.cvtColor(card_img, cv2.COLOR_BGR2GRAY)
ret, gray_img = cv2.threshold(gray_img, 0, 255, cv2.THRESH_BINARY + cv2.THRESH_OTSU)
2、查找水平直方图波峰,用来确定当前图片中车牌的主区域。。
x_histogram = np.sum(gray_img, axis=1)
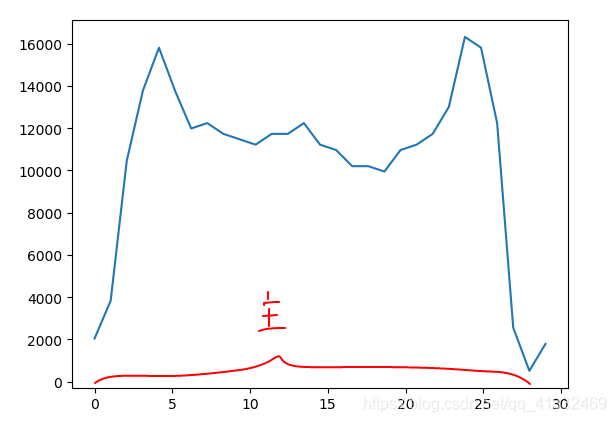 3、查找垂直直方图波峰
y_histogram = np.sum(gray_img, axis=0)
 4、查找波峰
# 根据设定的阈值和图片直方图,找出波峰,用于分隔字符;threshold = (y_min + y_average) / 5
def find_waves(threshold, histogram):
	up_point = -1  # 上升点
	is_peak = False
	if histogram[0] > threshold:
		up_point = 0
		is_peak = True
	wave_peaks = []
	for i, x in enumerate(histogram):
		if is_peak and x < threshold:
			if i - up_point > 2:
				is_peak = False
				wave_peaks.append((up_point, i))
		elif not is_peak and x >= threshold:
			is_peak = True
			up_point = i
	if is_peak and up_point != -1 and i - up_point > 4:
		wave_peaks.append((up_point, i))
	return wave_peaks
找到的波峰:
[(0, 16), (18, 32), (35, 38), (41, 53), (56, 68), (75, 79), (86, 99), (102, 113)]
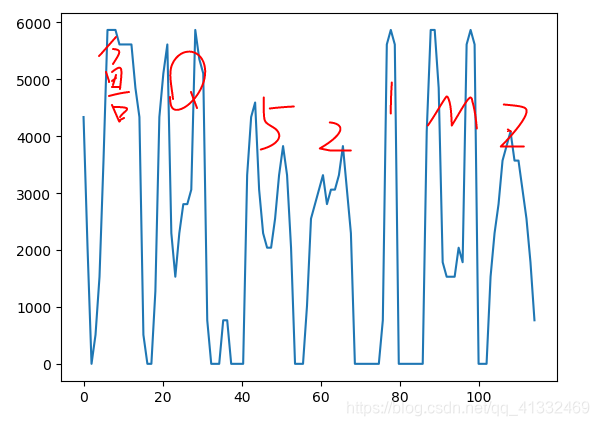
5、对波峰过滤
# 判断是否是左侧车牌边缘
if wave_peaks[0][1] - wave_peaks[0][0] < max_wave_dis / 3 and wave_peaks[0][0] == 0:
	wave_peaks.pop(0)
# 去除车牌上的分隔点
point = wave_peaks[2]
if point[1] - point[0] < max_wave_dis / 3:
	point_img = gray_img[:, point[0]:point[1]]
	if np.mean(point_img) < 255 / 5:
		wave_peaks.pop(2)
6、分离字符
part_cards = seperate_card(gray_img, wave_peaks)
# 根据找出的波峰,分隔图片,从而得到逐个字符图片
def seperate_card(img, waves):
	part_cards = []
	for wave in waves:
		part_cards.append(img[:, wave[0]:wave[1]])
	return part_cards
7、分类器预测字符
for i, part_card in enumerate(part_cards):
	# 可能是固定车牌的铆钉
	if np.mean(part_card) < 255 / 5:
		print("a point")
		continue
	part_card_old = part_card
	w = abs(part_card.shape[1] - SZ) // 2

	part_card = cv2.copyMakeBorder(part_card, 0, 0, w, w, cv2.BORDER_CONSTANT, value=[0, 0, 0])
	part_card = cv2.resize(part_card, (SZ, SZ), interpolation=cv2.INTER_AREA)

	# part_card = deskew(part_card)
	part_card = preprocess_hog([part_card])
	if i == 0:
		resp = self.modelchinese.predict(part_card)
		charactor = provinces[int(resp[0]) - PROVINCE_START]
	else:
		resp = self.model.predict(part_card)
		charactor = chr(resp[0])
	# 判断最后一个数是否是车牌边缘,假设车牌边缘被认为是1
	if charactor == "1" and i == len(part_cards) - 1:
		if part_card_old.shape[0] / part_card_old.shape[1] >= 7:  # 1太细,认为是边缘
			continue
	predict_result.append(charactor)
8、运行结果
