目录
一:EasyPR开源库 ubuntu下配置
1.确定好工程路径
如/root/Qt_workspace/omo220315_001
2.将/opt/EasyPR/model 的 model文件夹 拷贝到 上述的Qt工程目录下
3.修改Qt pro
注意点:需要加 \ 再加配置文件

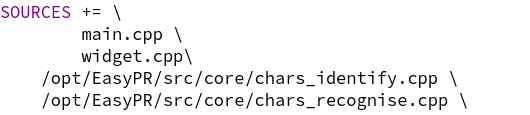
   /opt/EasyPR/src/core/chars_identify.cpp \
    /opt/EasyPR/src/core/chars_recognise.cpp \
    /opt/EasyPR/src/core/chars_segment.cpp \
    /opt/EasyPR/src/core/core_func.cpp \
    /opt/EasyPR/src/core/feature.cpp \
    /opt/EasyPR/src/core/params.cpp \
    /opt/EasyPR/src/core/plate_detect.cpp \
    /opt/EasyPR/src/core/plate_judge.cpp \
    /opt/EasyPR/src/core/plate_locate.cpp \
    /opt/EasyPR/src/core/plate_recognize.cpp \
    /opt/EasyPR/src/train/ann_train.cpp \
    /opt/EasyPR/src/train/annCh_train.cpp \
    /opt/EasyPR/src/train/create_data.cpp \
    /opt/EasyPR/src/train/svm_train.cpp \
    /opt/EasyPR/src/train/train.cpp \
    /opt/EasyPR/src/util/kv.cpp \
    /opt/EasyPR/src/util/program_options.cpp \
    /opt/EasyPR/src/util/util.cpp \
    /opt/EasyPR/thirdparty/LBP/helper.cpp \
    /opt/EasyPR/thirdparty/LBP/lbp.cpp \
    /opt/EasyPR/thirdparty/mser/mser2.cpp \
    /opt/EasyPR/thirdparty/svm/corrected_svm.cpp \
    /opt/EasyPR/thirdparty/textDetect/erfilter.cpp \
    /opt/EasyPR/thirdparty/xmlParser/xmlParser.cpp


    /opt/EasyPR/include/easypr/core/character.hpp \
    /opt/EasyPR/include/easypr/core/chars_identify.h \
    /opt/EasyPR/include/easypr/core/chars_recognise.h \
    /opt/EasyPR/include/easypr/core/chars_segment.h \
    /opt/EasyPR/include/easypr/core/core_func.h \
    /opt/EasyPR/include/easypr/core/feature.h \
    /opt/EasyPR/include/easypr/core/params.h \
    /opt/EasyPR/include/easypr/core/plate.hpp \
    /opt/EasyPR/include/easypr/core/plate_detect.h \
    /opt/EasyPR/include/easypr/core/plate_judge.h \
    /opt/EasyPR/include/easypr/core/plate_locate.h \
    /opt/EasyPR/include/easypr/core/plate_recognize.h \
    /opt/EasyPR/include/easypr/train/ann_train.h \
    /opt/EasyPR/include/easypr/train/annCh_train.h \
    /opt/EasyPR/include/easypr/train/create_data.h \
    /opt/EasyPR/include/easypr/train/svm_train.h \
    /opt/EasyPR/include/easypr/train/train.h \
    /opt/EasyPR/include/easypr/util/kv.h \
    /opt/EasyPR/include/easypr/util/program_options.h \
    /opt/EasyPR/include/easypr/util/switch.hpp \
    /opt/EasyPR/include/easypr/util/util.h \
    /opt/EasyPR/include/easypr/api.hpp \
    /opt/EasyPR/include/easypr/config.h \
    /opt/EasyPR/include/easypr/version.h \
    /opt/EasyPR/include/easypr.h \
    /opt/EasyPR/test/accuracy.hpp \
    /opt/EasyPR/test/chars.hpp \
    /opt/EasyPR/test/config.hpp \
    /opt/EasyPR/test/plate.hpp \
    /opt/EasyPR/test/result.hpp \
    /opt/EasyPR/thirdparty/LBP/helper.hpp \
    /opt/EasyPR/thirdparty/LBP/lbp.hpp \
    /opt/EasyPR/thirdparty/mser/mser2.hpp \
    /opt/EasyPR/thirdparty/svm/precomp.hpp \
    /opt/EasyPR/thirdparty/textDetect/erfilter.hpp \
    /opt/EasyPR/thirdparty/xmlParser/xmlParser.h


INCLUDEPATH +=/usr/local/include/
LIBS+=/usr/local/lib/libopencv_world.so

INCLUDEPATH += /opt/EasyPR/include/

DISTFILES += \
    model/ann_chinese.xml \
    model/ann.xml \
    model/annCh.xml \
    model/svm_hist.xml
此时点击生成,可能还会有报错,在thirdparty前 加上 ../即可 ,一个一个慢慢加,大概有4处
![]()
![]()
![]()
![]()
运行一下工程,有窗口运行,就代表配置成功
当然,你看到了 如下 /opt/EasyPR 和 Other files生成 ,也代表你配置成功了

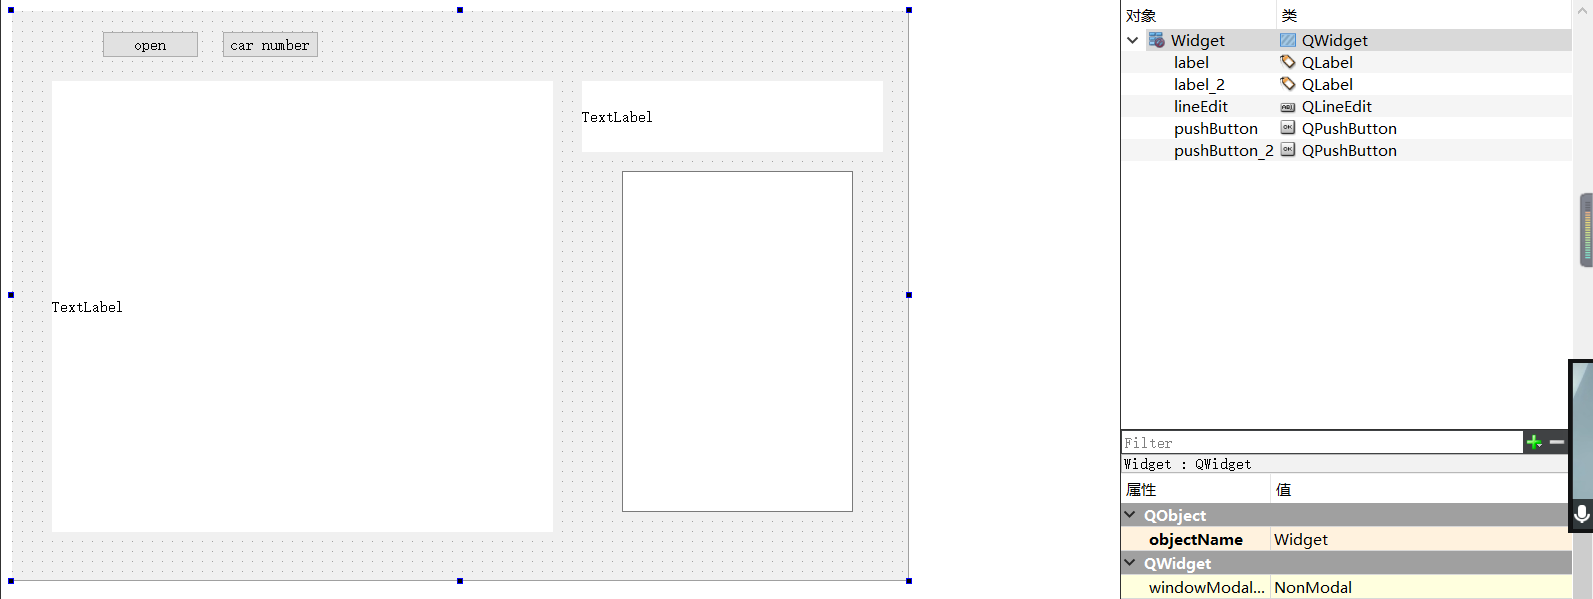
二:车牌识别UI绘制
三:车牌识别代码实现
类PlayerVideoThread
#ifndef PLAYERVIDEOTHREAD_H
#define PLAYERVIDEOTHREAD_H
#include <QDebug>
#include <QThread>
#include <opencv2/opencv.hpp>

using namespace cv;

class PlayerVideoThread : public QThread
{
    Q_OBJECT
public:
    PlayerVideoThread(char *videopath);
    void run();
private:
    VideoCapture cap;
    Mat frame;
signals:
    void frameVideo(Mat frame);
};

#endif // PLAYERVIDEOTHREAD_H
#include "playervideothread.h"


PlayerVideoThread::PlayerVideoThread(char *videopath)
    :QThread ()
{
    if(cap.open(videopath))
    {
        qDebug()<<"open video success";
    }

}
void PlayerVideoThread::run()
{
    while(cap.read(frame))
    {
       emit frameVideo(frame);
       msleep(40);
    }

}
类 widget
#ifndef WIDGET_H
#define WIDGET_H

#include <QWidget>
#include <QDebug>
#include <easypr.h>
#include <opencv2/opencv.hpp>
#include "playervideothread.h"

using namespace easypr;
using namespace cv;

namespace Ui {
class Widget;
}

class Widget : public QWidget
{
    Q_OBJECT

public:
    explicit Widget(QWidget *parent = nullptr);
    ~Widget();

private slots:
    void on_pushButton_clicked();

    void on_pushButton_2_clicked();

private:
    Ui::Widget *ui;
    CPlateRecognize pr;
    VideoCapture cap;
    vector<CPlate> plateVec;
    Mat frame;
    CPlate plate;
    Mat plateMat;
    PlayerVideoThread *playerVideoThread;
protected:
    void paintEvent(QPaintEvent *e);
public slots:
    void updateImage(Mat img);

};

#endif // WIDGET_H
#include "widget.h"
#include "ui_widget.h"

Widget::Widget(QWidget *parent) :
    QWidget(parent),
    ui(new Ui::Widget)
{
    ui->setupUi(this);
    pr.setDetectType(PR_DETECT_CMSER|PR_DETECT_COLOR);
    pr.setMaxPlates(4);
    pr.setResultShow(false);
}

Widget::~Widget()
{
    delete ui;
}

void Widget::on_pushButton_clicked()
{
    this->playerVideoThread = new PlayerVideoThread ("./video/car_input.mp4");
    connect(this->playerVideoThread,SIGNAL(frameVideo(Mat)),this,SLOT(updateImage(Mat)),Qt::BlockingQueuedConnection);
    this->playerVideoThread->start();
}

void Widget::on_pushButton_2_clicked()
{
   Mat car_number;
   int result = pr.plateRecognize(this->frame,plateVec);
   qDebug()<<"result ="<<result;

   if(result == 0)
   {
       plate = plateVec.at(0); //car info
       plateMat = plate.getPlateMat(); //car number info
       cvtColor(plateMat,car_number,CV_BGR2RGB);
       cvtColor(car_number,car_number,CV_BGR2RGB);

       QImage q_image = QImage(car_number.data,car_number.cols,car_number.rows,QImage::Format_RGB888);
       ui->label_2->setPixmap(QPixmap::fromImage(q_image));
       ui->label_2->setScaledContents(true);

       string str_car_num = plateVec[0].getPlateStr();
       QString q_str = QString::fromLocal8Bit(str_car_num.c_str());
       ui->lineEdit->clear();
       ui->lineEdit->insert(q_str);

   }

   plateVec.clear();

}

void Widget::paintEvent(QPaintEvent *e)
{
   QImage q_image = QImage(frame.data,frame.cols,frame.rows,QImage::Format_RGB888);
   ui->label->setPixmap(QPixmap::fromImage(q_image));
   ui->label->setScaledContents(true);
}

void Widget::updateImage(Mat img)
{
  this->frame = img.clone();
  cvtColor(frame,frame,CV_BGR2RGB);
  this->update();
}
主入口测试
#include "widget.h"
#include <QApplication>
#include <easypr.h>

using namespace easypr;

int main(int argc, char *argv[])
{
    QApplication a(argc, argv);
    Widget w;
    w.show();

    return a.exec();
}
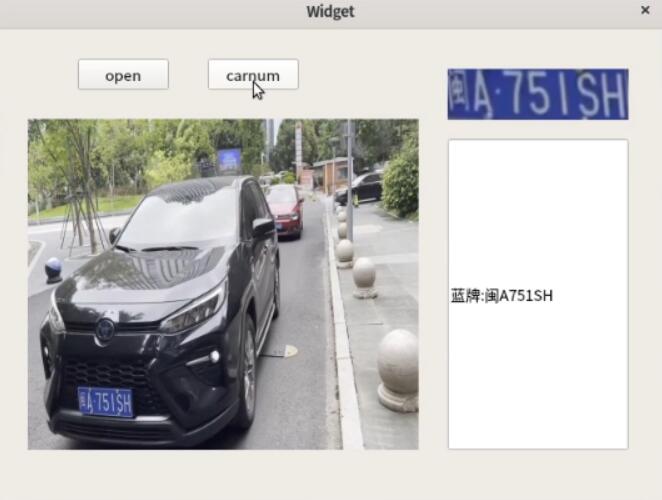
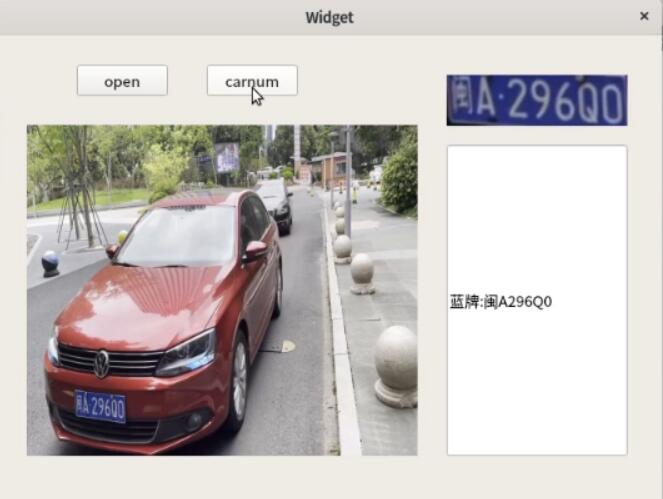
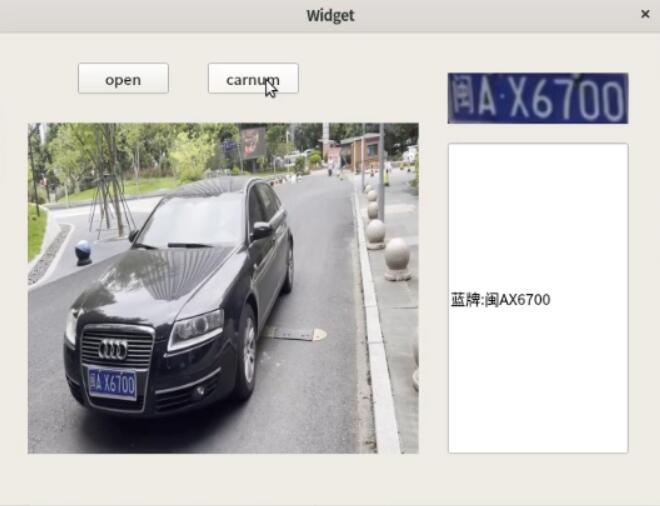
四:车牌识别成果展示
当车牌靠近缓冲带时候,点击carnum 即可车牌识别