参考链接:https://blog.csdn.net/xu1129005165/article/details/83143024
https://blog.csdn.net/weixin_40799950/article/details/81911877
https://blog.csdn.net/wajsy/article/details/81304587
一、安装ork
方法1:
export DISTRO=kinetic
sudo apt-get install libopenni-dev ros-${DISTRO}-catkin ros-${DISTRO}-ecto* ros-${DISTRO}-opencv-candidate ros-${DISTRO}-moveit-msgs
sudo apt-get install ros-indigo-object-recognition-*
方法2:
在catkin_ws/srcwen文件夹下面
git clone http://github.com/wg-perception/object_recognition_msgs
git clone http://github.com/wg-perception/object_recognition_ros
git clone http://github.com/wg-perception/object_recognition_ros_visualization
git clone http://github.com/wg-perception/object_recognition_core
git clone http://github.com/wg-perception/linemod
git clone http://github.com/wg-perception/ork_renderer
cd ../ && catkin_make
问题
编译过程中遇到下面的问题:
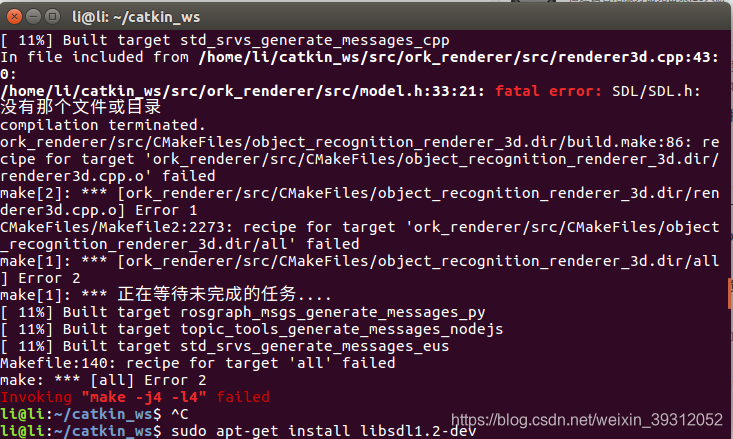
解决方法:参考链接:https://blog.csdn.net/qq_21334991/article/details/78709414
sudo apt-get install libsdl1.2-dev
二、下载ork_tutorials
在catkin_ws/src文件夹下下载ork_tutorials包
git clone https://github.com/wg-perception/ork_tutorials
进入ork_tutorials/data文件夹下,执行
rosrun object_recognition_core object_add.py -n "coke " -d "A universal can of coke" --commit
该命令向数据库中添加一个条目,运行后会给出一个ID号,该号码即为随后添加模型的ID
运行如下命令:
rosrun object_recognition_core mesh_add.py <YOUR_OBJECT_ID> <path to ork_tutorials/data/coke.stl> --commit

 例如:rosrun object_recognition_core mesh_add.py ae8089cf1d0ddddfccd621c913000aa5 /home/li/catkin_ws/src/ork_tutorials/data/coke.stl --commit
此命令将模型上传到添加的条目中
注:路径可以根据终端打开位置调整为相对路径
三、安装CouchDB(用于查看上传到数据库中的模型)
ORK 是一套以 template matching 方法為主的辨识工具,也就是說,他会把感測器看到的物体跟资料库中的物体比對,夠相似的就算是辨识成功,所以我們接著要來处理资料库。首先要安裝 CouchDB 這個工具
书上给的命令是:
sudo pip install git+https://github.com/couchapp/couchapp.git
问题1:编译过程中遇到sudo pip命令不存在的问题,我解决问题的参考链接是https://blog.csdn.net/fcku_88/article/details/84191288
问题2:env: “pip”: 没有那个文件或目录
我的解决方法是打开官网https://github.com/couchapp/couchapp.git;找到readme文件;
按照以下步骤安装
    $ curl -O https://bootstrap.pypa.io/get-pip.py
    $ sudo python get-pip.py
    $ pip install couchapp
执行上面的命令,即可,权限问题,在前面添加sudo
安装完后运行如下命令:
rosrun object_recognition_core push.sh
会显示网站信息,将其复制到浏览器中,即可显示上传的模型。
注:在没有翻墙功能的情况下,浏览器无法显示模型,根据链接中的方法即可解决:
https://blog.csdn.net/lingchen2348/article/details/82987075
四、训练模型
在catkin_ws下运行命令,记住source一下:
rosrun object_recognition_core training -c `rospack find object_recognition_linemod`/conf/training.ork
五、源文件更改
本文使用的传感器是realsense D435传感器,原功能包默认的是Kinect系列传感器,因此需要对相关的话题进行更改:
首先打开D435功能包realsense-development/,打开readme文件找到显示话题的部分如下:
### Published Topics
The published topics differ according to the device and parameters.
After running the above command with D435i attached, the following list of topics will be available (This is a partial list. For full one type `rostopic list`):
- /camera/color/camera_info
- /camera/color/image_raw
- /camera/depth/camera_info
- /camera/depth/image_rect_raw
- /camera/extrinsics/depth_to_color
上面四个topic即为要用到的话题名
启动如下命令:
roslaunch realsense2_camera rs_camera.launch
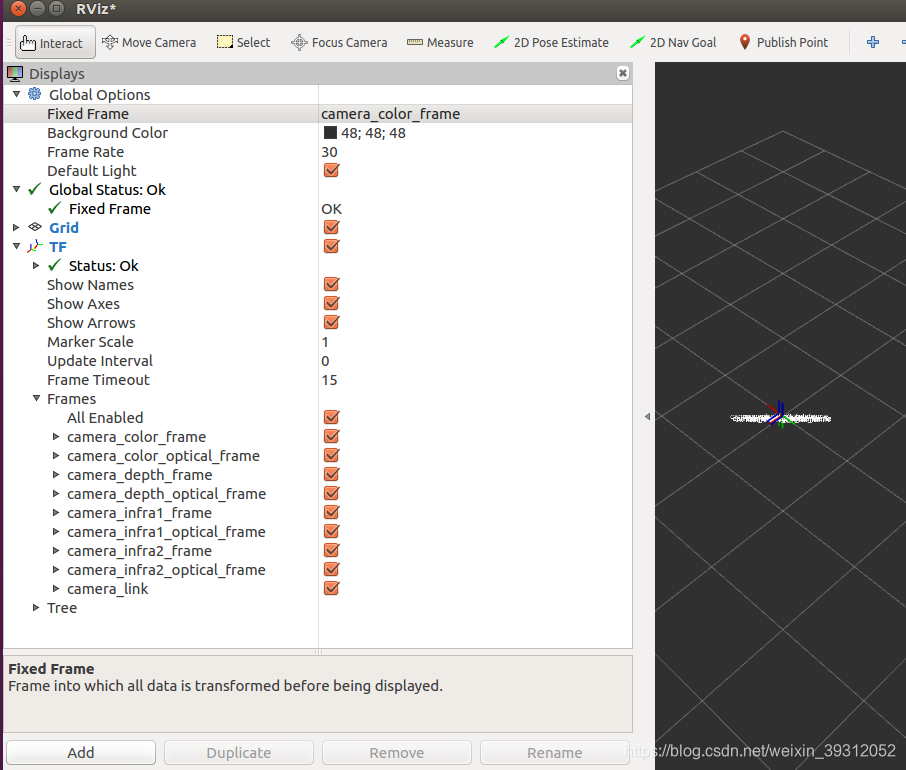
rviz
如图所示:记录frames名称:
 打开catkin_ws/src/linemod/conf中的detection.ros.ork文件
找到相关的代码:
  rgb_frame_id: 'camera_rgb_optical_frame'
  rgb_image_topic: '/camera/rgb/image_rect_color'
  rgb_camera_info: '/camera/rgb/camera_info'
  depth_frame_id: 'camera_depth_optical_frame'
  depth_image_topic: '/camera/depth_registered/image_raw'
  depth_camera_info: '/camera/depth_registered/camera_info'
修改为:
 parameters:
    rgb_frame_id: 'camera_color_frame'
    rgb_image_topic: '/camera/color/image_raw'
    rgb_camera_info: '/camera/color/camera_info'
    depth_frame_id: 'camera_depth_frame'
    depth_image_topic: '/camera/depth/image_rect_raw'
    depth_camera_info: '/camera/depth/camera_info'
即可实现linemod功能包话题的订阅
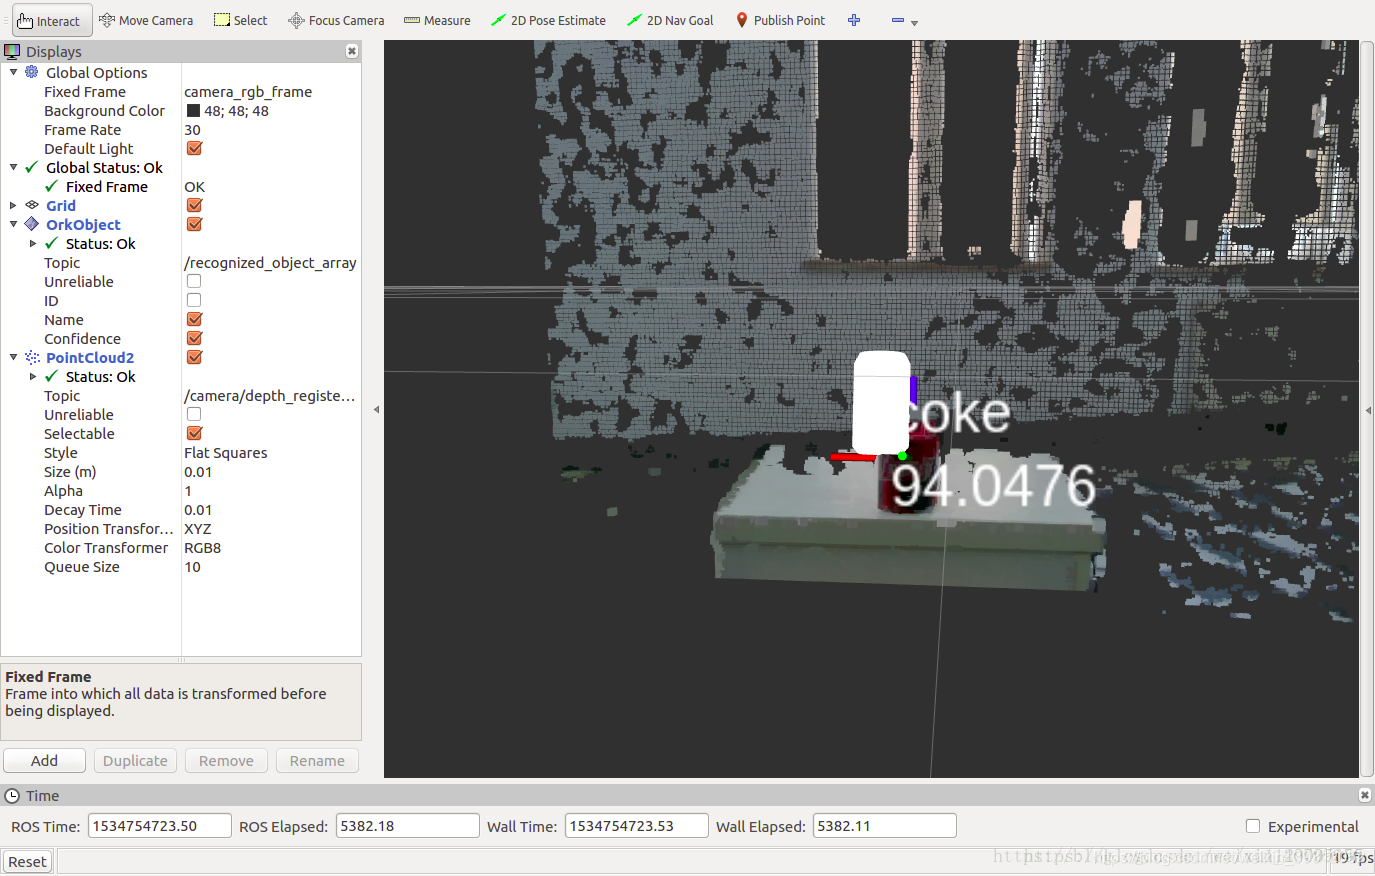
六、物体识别
按顺序运行如下命令:
启动D435:
roslaunch realsense2_camera rs_camera.launch filters:=pointcloud
启动linemod方法:
rosrun object_recognition_core detection -c `rospack find object_recognition_linemod`/conf/detection.ros.ork
启动rviz
rviz
界面如图所示: