首先加载一张地图作为示例
rosrun map_server map_server xxx.yaml

可以得到如下图的地图信息:

在对应的yaml文件中,存储的信息为:
image: a314.pgm
resolution: 0.050000
origin: [-20.000000, -20.000000, 0.000000]
negate: 0
occupied_thresh: 0.65
free_thresh: 0.196
我们首先看一下与地图相关的消息:
地图元信息:
nav_msgs/MapMetaData Message
# This hold basic information about the characterists of the OccupancyGrid
# The time at which the map was loaded
time map_load_time
# The map resolution [m/cell]
float32 resolution
# Map width [cells]
uint32 width
# Map height [cells]
uint32 height
# The origin of the map [m, m, rad].  This is the real-world pose of the
# cell (0,0) in the map.
geometry_msgs/Pose origin
占据栅格信息
nav_msgs/OccupancyGrid Message
# This represents a 2-D grid map, in which each cell represents the probability of  #概率栅格
# occupancy.
Header header
#MetaData for the map
MapMetaData info  #包含地图元数据信息
# The map data, in row-major order, starting with (0,0).  Occupancy     #以行的顺序存储
# probabilities are in the range [0,100].  Unknown is -1.
int8[] data
这里需要注意的是:
geometry_msgs/Pose origin
The origin of the map [m, m, rad]. This is the real-world pose of the cell (0,0) in the map.
即为左下角 像素在地图坐标系中的坐标,在像素坐标系中,左下角为像素(0,0)的坐标
通过占据栅格信息信息中的 int8[] data ,我们知道,data为一个向量,这个向量的大小为栅格的宽度×栅格的高度,栅格地图的设置方法如下:
   nav_msgs::OccupancyGrid map_;
   map_.header.frame_id = "map";
    map_.info.height =400; //假设高度为400个像素
    map_.info.width =200;// 宽度为200个像素
    map_.info.resolution = 0.05; // 分辨率为5cm/pixel
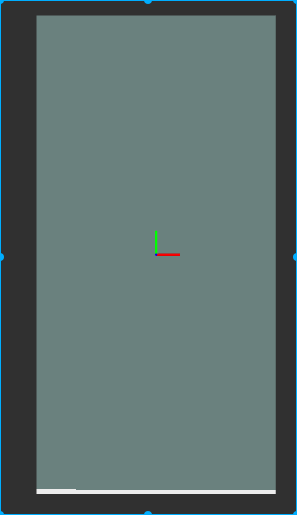
设置的结果如下:

那么如何让地图对称呢?这就需要设置左下角像素在地图坐标系中的坐标
 map_.info.origin.position.x = - map_.info.width* map_.info.resolution;   // 这里为整数除法!所以都是以像素的左下角为坐标原点
    map_.info.origin.position.y =- map_.info.height* map_.info.resolution;
    map_.info.origin.orientation.x=0;
    map_.info.origin.orientation.y=0;
    map_.info.origin.orientation.z=0;
    map_.info.origin.orientation.w = 1.0;
效果如下:
map_.info.origin.position.x = -200/2* map_.info.resolution;
map_.info.origin.position.y =- 400/2* map_.info.resolution;
map_.info.origin.orientation.x=0;
map_.info.origin.orientation.y=0;
map_.info.origin.orientation.z=0;
map_.info.origin.orientation.w = 1.0;
map_.data.assign( 200*400, -1); // 对所有栅格赋值,-1为未知
接下来的问题是如何修改某一个栅格的值。
通过上述可知,栅格地图的存储结构为一个向量,向量的大小为宽度*高度
这些栅格是从左下角为0,以行主的顺序,逐渐增加。
简单地说,左下角的索引为0,左下角右侧的栅格索引为1,第200个栅格为左下角北侧的像素,
这里从0开始,逐渐遍历每个栅格,效果如下图:
则要设置(1,0)栅格的方法为
index = 1*200 + 0
设置(i,j)栅格的方法为:
index = j* width + i;
好,铺垫完成,我们开始主题,如何获取地图坐标系中的某一个点的像素坐标。
首先,由于左下角像素相对于地图坐标系的坐标为:
map_.info.origin.position.x = -200/2* map_.info.resolution;
map_.info.origin.position.y =- 400/2* map_.info.resolution;
则地图坐标系相对于左下角的像素坐标为
index = 200* 200 +100
以地图的像素坐标为坐标原点,假设机器人的位置为(1,0.23)
则,机器人所在的地图像素坐标系的栅格为:
1/分辨率 = 1/0.05 =20
0.23/分辨率 = 0.23/0.05 = 4.6
也就是在第20个和第4个栅格中,那么只需要把地图像素坐标和机器人在地图像素坐标中的值相加即可:
(100+20,200+4)
index =204*200+120
画出map所在的栅格和机器人所在的栅格效果图如下:

整个代码如下,需要发布激光话题才可以显示地图原点
#include <ros/ros.h>
#include <nav_msgs/OccupancyGrid.h>
#include <sensor_msgs/LaserScan.h>
#include <iostream>
using namespace std;
int i=0;
int w=4;
int h =3;
ros::Publisher map_publisher;
nav_msgs::OccupancyGrid map_;
void handleLaserScan(sensor_msgs::LaserScan msg)
{

   map_.data.at(w*h/2+w/2) =0;
    map_publisher.publish(map_);

}

void initMap();
int main(int argc, char **argv)
{
  ros::init(argc, argv, "local_map");
  ros::NodeHandle nh;
  initMap();


  ros::Subscriber scanHandler = nh.subscribe<sensor_msgs::LaserScan>("scan", 1, handleLaserScan);

  map_publisher = nh.advertise<nav_msgs::OccupancyGrid>("local_map", 1, true);

  ros::spin();
}

void initMap()
{
    map_.header.frame_id = "map";
    map_.info.height =h;
    map_.info.width = w;
    map_.info.resolution = 1;
    map_.info.origin.position.x = -w/2* map_.info.resolution;
    map_.info.origin.position.y =- h/2* map_.info.resolution;

    map_.info.origin.orientation.x=0;
    map_.info.origin.orientation.y=0;
    map_.info.origin.orientation.z=0;
    map_.info.origin.orientation.w = 1.0;
    map_.data.assign( w*h, -1);

}