最近在搞kinect v1和kinect v2两个设备,趟了很多的坑,这里详细记录一下
1.设备
首先要了解两个设备,下图中是v1。

下面这个图是v2

针对kinect v1 v2的比较这个博客说的非常详细 https://www.cnblogs.com/TracePlus/p/4136297.html ,给32个赞
2.USB接口
kinect v1用usb2.0及3.0,而看kinect v2只能用usb3.0。下面介绍如何区分USB2.0和3.0
1.查看端口颜色,USB2.0为黑色,USB3.0为蓝色,如下图

2.可以用lsusb命令查看设备的类型,因为USB3.0的接口可以连接1.0,1.1,2.0,3.0的设备。使用命令lsusb如下
ubuntu@ubuntu-ThinkPad-X220:~/source$ lsusb
Bus 002 Device 003: ID 046d:c534 Logitech, Inc. Unifying Receiver
Bus 002 Device 002: ID 8087:0024 Intel Corp. Integrated Rate Matching Hub
Bus 002 Device 001: ID 1d6b:0002 Linux Foundation 2.0 root hub
Bus 001 Device 005: ID 04f2:b217 Chicony Electronics Co., Ltd Lenovo Integrated Camera (0.3MP)
Bus 001 Device 004: ID 0a5c:217f Broadcom Corp. BCM2045B (BDC-2.1)
Bus 001 Device 003: ID 147e:2016 Upek Biometric Touchchip/Touchstrip Fingerprint Sensor
Bus 001 Device 002: ID 8087:0024 Intel Corp. Integrated Rate Matching Hub
Bus 001 Device 001: ID 1d6b:0002 Linux Foundation 2.0 root hub
有两个总线,总线1上挂载了5个设备,ID后面是厂商id和设备id,还有详细描述
然后用lusb -t命令查看对应设备的详细信息
ubuntu@computerOfLei:~$ lsusb -t
/:  Bus 02.Port 1: Dev 1, Class=root_hub, Driver=xhci_hcd/6p, 5000M
    |__ Port 3: Dev 4, If 0, Class=Hub, Driver=hub/1p, 5000M
        |__ Port 1: Dev 5, If 0, Class=Vendor Specific Class, Driver=, 5000M
        |__ Port 1: Dev 5, If 1, Class=Vendor Specific Class, Driver=, 5000M
        |__ Port 1: Dev 5, If 2, Class=Audio, Driver=snd-usb-audio, 5000M
        |__ Port 1: Dev 5, If 3, Class=Audio, Driver=snd-usb-audio, 5000M
/:  Bus 01.Port 1: Dev 1, Class=root_hub, Driver=xhci_hcd/12p, 480M
    |__ Port 3: Dev 19, If 0, Class=Hub, Driver=hub/1p, 480M
    |__ Port 5: Dev 2, If 0, Class=Human Interface Device, Driver=usbhid, 1.5M
    |__ Port 6: Dev 3, If 0, Class=Human Interface Device, Driver=usbhid, 1.5M
    |__ Port 6: Dev 3, If 1, Class=Human Interface Device, Driver=usbhid, 1.5M
usb1.0的速度是12MBit/s,2.0是480MBit/s,3.0是5000MBit/s,注意是bit而不是byte
遇到的坑:因为kinect v1 v2都会显示三个设备,如果lsusb只显示一个设备,那说明你把v2连接到USB2.0的端口上了。
ubuntu@computerOfLei:~$ lsusb
Bus 002 Device 005: ID 045e:02c4 Microsoft Corp.
3.权限
连接到usb上,需要设置挂载节点的读写权限,v2如下
ubuntu@computerOfLei:/etc/udev/rules.d$ cat 90-kinect2.rules
# this file belongs in /etc/udev/rules.d/
# ATTR{product}=="Kinect2"
SUBSYSTEM=="usb", ATTR{idVendor}=="045e", ATTR{idProduct}=="02c4", MODE="0666"
SUBSYSTEM=="usb", ATTR{idVendor}=="045e", ATTR{idProduct}=="02d8", MODE="0666"
SUBSYSTEM=="usb", ATTR{idVendor}=="045e", ATTR{idProduct}=="02d9", MODE="0666"
对于v1来说,只需要加上 02ae,02b0 和 02ad就可以了,修改文件后别忘了执行命令
sudo service udev restart然后插拔设备
4.OpenNi兼容性
kinect是微软的设备,故专门有kinect.dll,而linux上只有专家开发出来的适配驱动。目前在网上的资料看,OpenNi兼容不了v2,而v2驱动都是由OpenNi2开发的,没有用OpenNi开发的。故对于v1设备,只需要安装OpenNi就可以了,而对于v2设备,则需要安装OpenNi2。
5.kinect v1驱动安装
由三个组件 OpenNi,NITE,SensorKinect ,安装过程如下
OpenNi:
git clone https://github.com/OpenNI/OpenNI openni
cd openni
sudo ./install.sh
输出如下:
        Installing OpenNI
        ****************************

        copying shared libraries...OK
        copying executables...OK
        copying include files...OK
        creating database directory...OK
        registering module 'libnimMockNodes.so'...OK
        registering module 'libnimCodecs.so'...OK
        registering module 'libnimRecorder.so'...OK
        Installing .Net wrappers...
        Package exported to: /usr/lib/mono/2.0/OpenNI.net.dll -> ../gac/OpenNI.net/1.5.4.0__6b43d0c6cf74ee7f/OpenNI.net.dll
        Installed Bin/OpenNI.net.dll into the gac (/usr/lib/mono/gac)
        creating java bindings directory...OK
        Installing java bindings...OK

        *** DONE ***
SensorKinect:
git clone https://github.com/ph4m/SensorKinect.git
cd SensorKinect
git checkout unstable
cd Platform/Linux/CreateRedist/
chmod +x RedistMaker
./RedistMaker
cd ../Redist/Sensor-Bin-Linux-x64-v5.1.2.1/
chmod +x install.sh
sudo ./install.sh
NITE:
https://github.com/PrimeSense/Sensor.git其余的安装步骤也可参考: http://blog.csdn.net/u013453604/article/details/48013959
运行:
cd 到这个目录下 OpenNI-Bin-Dev-Linux-x64-v1.5.7.10/Samples/Bin/x64-Release
$ ./NiViewer
或者安装过pcl后可以执行
pcl_openni_viewer遇到的问题:No devices connected
可参考如下链接,里面讲的非常详细
http://www.pcl-users.org/Can-t-use-Kinect-in-Ubuntu14-04-td4033666.html
也讲了很多异常场景,都是针对v1的。
6.kinect v2驱动安装
只有一个组件libfreenect2,源码:https://github.com/OpenKinect/libfreenect2,其中Readme.md讲的十分明白,介绍了在windows(visual stuio),MacOS X ,Linux三种操作系统下的安装方式,只需要仔细按照步骤一步步来即可。其中(optional)我只安装了openni2,注意最好每个软件都安装成功,有失败的要搞定。
运行:
./build/bin/Protonect遇到的坑:
glfw error xxx The request client API version is unavailable运行时遇到这个问题,当时就蒙了,在网上找,这种问题很少发生。当时找到一个博客讲在设置->软件和更新->附加驱动中选择NVIDIA驱动,而电脑中的附加驱动空空如野。然后在网上找一个攻略手动安装NVIDIA驱动。结果安装失败,又出现问题如下:
登录界面输入密码后黑屏一下又弹回登录界面。使用命令Ctrl+Alt+F1进入只命令行界面,查看.xsession-error文件,出现了“extension GLX missing on display 0”错误,应该是安装NVIDIA驱动出现问,然后我用命令
sudo prime-select intel 然后我就怀疑是不是安装的gl组件有问题,将libglfw3-dev libglfw3都卸载掉
sudo apt-get remove libglfwsudo apt-cache search opengl
再后来我就看 cat download_debs_trusty.sh 文件,发现有些组件对amd64和 i386进行了区分,有些没有,那就明白有些软件是通用的。
再然后看到数字3,就怀疑是不是显卡不支持opengl3,然后就用命令
ubuntu@computerOfLei:~$ lspci | grep -i vga
00:02.0 VGA compatible controller: Intel Corporation Device 1906 (rev 07)
看到了vga控制器,然后用命令查看该
ubuntu@computerOfLei:~$ glxinfo | grep -i opengl
OpenGL vendor string: Intel Open Source Technology Center
OpenGL renderer string: Intel Corporation Device 1906 (rev 07)
OpenGL core profile version string: 3.3 (Core Profile) Mesa 11.2.0
OpenGL core profile shading language version string: 3.30
OpenGL core profile context flags: (none)
OpenGL core profile profile mask: core profile
OpenGL core profile extensions:
OpenGL version string: 3.0 Mesa 11.2.0
OpenGL shading language version string: 1.30
OpenGL context flags: (none)
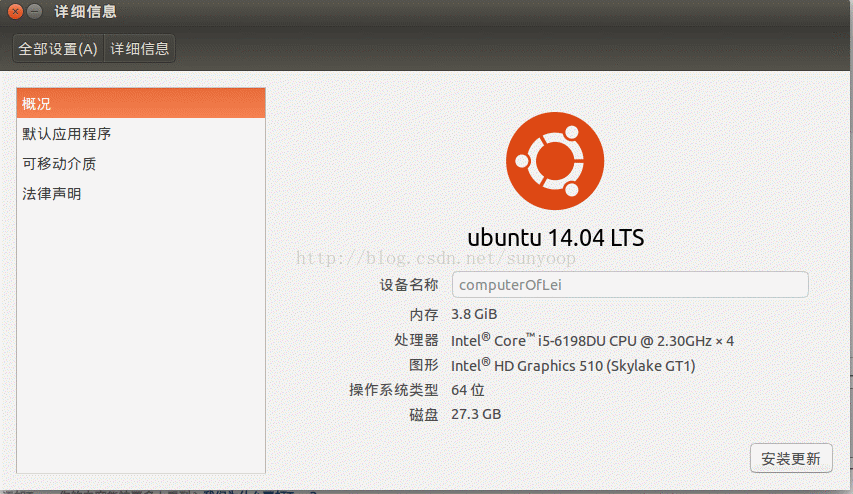
OpenGL extensions:看到了version string 3.0 ,这可以支持3.0。然后我看设置->详细信息,发现图形还是显示Intel Corporation Device 1906 。就怀疑是不是显卡支持gl3.0但驱动不支持,
然后就点击详细信息界面的安装更新,之后图形显示 Intel(R) HD Graphics 510 (Skylake GT1),如下图
这然后再运行用例,就可以将kinect v2的图像显示出来了。
好辛苦~~~