Spring Boot集成Swagger2
Swagger 介绍
Swagger2是一款RESTFUL接口的文档在线自动生成和功能测试功能软件
Swagger 是一个规范和完整的框架,用于生成、描述、调用和可视化 RESTful 风格的 Web 服务。总体目标是使客户端和文件系统作为服务器以同样的速度来更新。文件的方法,参数和模型紧密集成到服务器端的代码,允许API来始终保持同步。Swagger 让部署管理和使用功能强大的API从未如此简单
添加入Swagger2的依赖
<dependency>
	<groupId>io.springfox</groupId>
	<artifactId>springfox-swagger2</artifactId>
	<version>2.8.0</version>
</dependency>
<dependency>
	<groupId>io.springfox</groupId>
	<artifactId>springfox-swagger-ui</artifactId>
	<version>2.8.0</version>
</dependency>
configuration
@Configuration
@EnableSwagger2
public class SwaggerConfig {

    @Bean
    public Docket docket(){
        return new Docket(DocumentationType.SWAGGER_2)
                .groupName("demo")
                .apiInfo(getApiInfo())
                .select()
                //设置basePackage会将包下的所有被@Api标记类的所有方法作为api
                .apis(RequestHandlerSelectors.basePackage("com.example.demo.controller"))
                //只有标记了@ApiOperation的方法才会暴露出给swagger
                .apis(RequestHandlerSelectors.withMethodAnnotation(ApiOperation.class))
                .paths(PathSelectors.regex("/api/.*")).build();
    }

    private ApiInfo getApiInfo(){
        return new ApiInfoBuilder()
                .title("API接口文档")
                .description("swagger2 demo api")
                .termsOfServiceUrl("http://localhost/swagger-ui.html")
                .version("1.0")
                .contact(new Contact("Kiana", "http://localhost/swagger-ui.html", "[email protected]"))
                .build();
    }

}
apis(RequestHandlerSelectors.basePackage(“com.example.demo.controller”))
会将包下的所有被@Api标记的类带有@RequestMapping或者XxxMapping都会给暴露给swagger
apis(RequestHandlerSelectors.withMethodAnnotation(ApiOperation.class))
只有在类上使用@Api注解标注并且在方法上使用@ApiOperation注解才会暴露给swagger,这种方式没有包名的限制,可以将需要暴露的接口分散到各个包里,只要类上有@Api注解方法上有@ApiOperation注解就能暴露出来,如果不想暴露出来就不用使用这两个注解
Swagger 各注解说明
@RequestMapping("/api/v1.0/video")
@RestController
@Api(value = "video API", tags = "video", description = "视频相关接口")
public class VideoController
@Api用来标识Class
@ApiOperation(value = "获取视频流", notes = "获取视频流信息")
@ApiResponses({
    @ApiResponse(code = 200, message = "success"),
    @ApiResponse(code = 10001, message = "secret_key与token不符合"),
    @ApiResponse(code = 10002, message = "视频流类型错误", response = Exception.class)
})
@PostMapping("/getVideo")
public String getVideo(@ApiParam(name = "secret_key", value = "秘钥", required = true) @RequestParam String secret_key,
                       @ApiParam(name = "token", value = "token", required = true) @RequestParam String token,
                       @ApiParam(name = "type", value = "流类型", required = true) @RequestParam String type){
    return "{'type': " + type + ", 'url': 'rtmp://localhost/video', 'urlHD': 'rtmp://localhost/hd/video'}";
}
@ApiOperation(value = “接口方法的名称”, notes = “备注说明”)
@ApiParam(name = “参数名称”, value = “备注说明”, required = 是否必须):标注在方法的参数上 用于描述参数的名称、备注、是否必须等信息
@ApiImplicitParams: 用于包含多个@ApiImplicitParam
@ApiResponse(code = 0, message = “success”),
- code:响应码,例如400
- message:信息,一般是对code的描述
- response:抛出异常的类
@ApiOperation(value = "修改视频流", notes = "修改视频流信息")
@ApiImplicitParams({
    @ApiImplicitParam(dataTypeClass = String.class, paramType = "header", name = "id", value = "id标识", required = true),
    @ApiImplicitParam(dataTypeClass = String.class, paramType = "query", name = "url", value = "高清视频流", required = true),
    @ApiImplicitParam(dataTypeClass = String.class, paramType = "path", name = "type", value = "视频流类型", required = true),
    @ApiImplicitParam(dataTypeClass = String.class, paramType = "body", name = "hdurl", value = "超清视频流", required = true)
})
@PutMapping("/update")
public String updateVideo(@RequestHeader String id, @RequestParam String url, @PathVariable String type, @RequestBody String hdurl){
    return "{'id': " + id + ", 'url':" + url + ", 'type':" + type + ", 'hdurl':" + hdurl +"}";
}
@ApiImplicitParam用于描述方法的参数,标注在方法上,和@ApiParam功能一样,只是标注的位置不同而已
- paramType:参数类型,即参数放在哪个地方
- header–>请求参数的获取:@RequestHeader,参数放在请求头
- query–>请求参数的获取:@RequestParam,参数追加在url后面
- path(用于restful接口)–>请求参数的获取:@PathVariable
- body 使用@RequestBody接收数据 POST有效,参数放在请求体中
- name:参数名
- dataType:参数的数据类型
- required:参数是否必须传
- value:参数的描述
- defaultValue:参数的默认值
@ApiImplicitParams: 用于包含多个@ApiImplicitParam
    @ApiModelProperty(value = "当前页", required = true)
    private Integer page;

    @ApiModelProperty(value = "每页记录数", required = true)
    private Integer pageSize;
@ApiModel:描述一个Model的信息(这种一般用在post创建的时候,使用@RequestBody这样的场景,请求参数无法使用@ApiImplicitParam注解进行描述的时候)
@ApiModelProperty:描述一个model的属性
- value 参数名称
- required 是否必须 boolean
- hidden 是否隐藏 boolean
@ApiIgnore:用于或略该接口,不生成该接口的文档
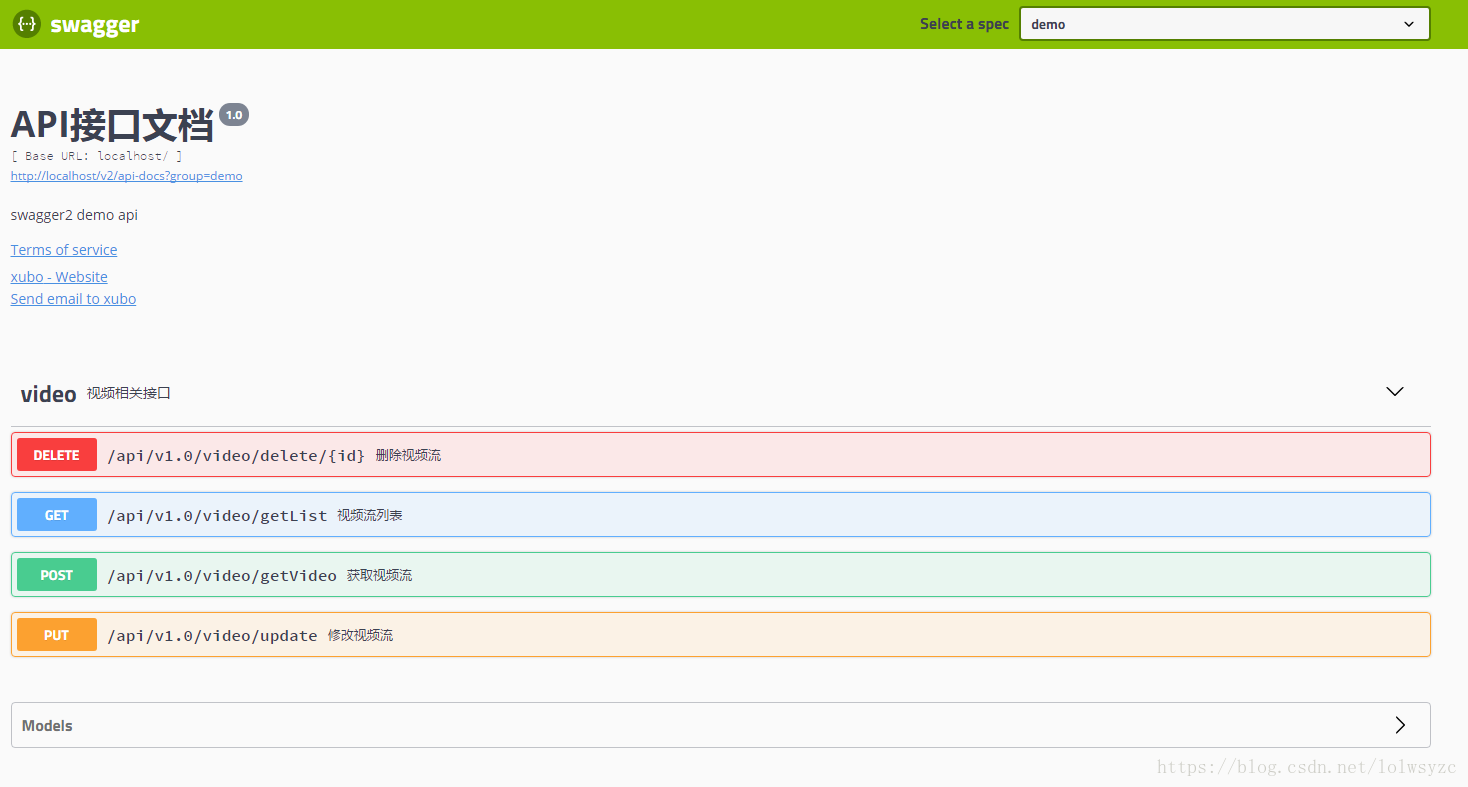
测试
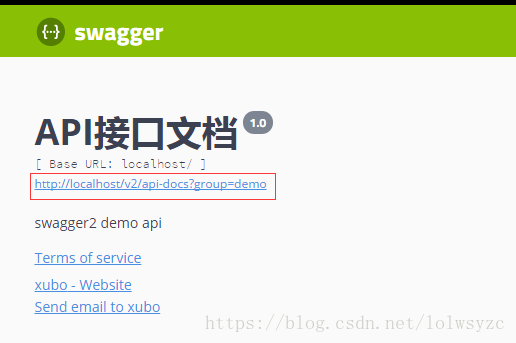
启动项目后访问http://localhost/swagger-ui.html
注意:swagger可能不兼容IE和FireFox,可以使用Chrome访问
swagger 聚合多个项目
当有多个项目接口需要生产接口文档时,swagger可以做到将多个项目合并到一个swagger上,这样便于接口的使用,高版本的可以通过SwaggerResourcesProvider接口来实现
@Component
@Primary
public class DocumentationConfiguration implements SwaggerResourcesProvider {
    @Override
    public List<SwaggerResource> get() {
        List<SwaggerResource> list = new ArrayList<>();
        list.add(getSwaggerResource("视频API-V1.0", "/v2/api-docs?group=demo", "2.0"));
        list.add(getSwaggerResource("视频API-V2.0", "/v2/api-docs?group=demo", "2.0"));
        return list;
    }

    private SwaggerResource getSwaggerResource(String name, String url, String version){
        SwaggerResource swaggerResource = new SwaggerResource();
        swaggerResource.setName(name);
        swaggerResource.setUrl(url);
        swaggerResource.setSwaggerVersion(version);
        return swaggerResource;
    }
}
实现SwaggerResourcesProvider接口中的get()方法即可完成,
name: 页面上select的option
url: 其他项目swagger的docs的url
version: docs文件中的swagger属性,默认2.0
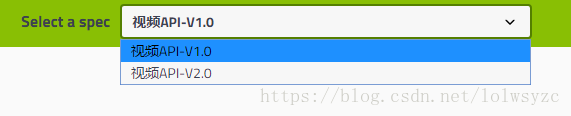
整合多个项目swagger的效果:
选择选项卡就能访问不同的api
跨域问题
通常情况下不同的项目部署在不同的服务器上,这样访问综合的swagger时就造成了跨域访问的问题,
要解决这种跨域,则配置CORS,设置允许跨域请求的地址、请求头、请求到的方法等配置
全局配置
@Configuration
public class CORSConfiguration {
	@Bean
	public CorsFilter corsFilter() {
		UrlBasedCorsConfigurationSource source = new UrlBasedCorsConfigurationSource();
		CorsConfiguration corsConfiguration = new CorsConfiguration();
		// 1 设置访问源地址
		corsConfiguration.addAllowedOrigin("*");
		// 2 设置访问源请求头
		corsConfiguration.addAllowedHeader("*");
		// 3 设置访问源请求方法
		corsConfiguration.addAllowedMethod("*");
		// 4 对接口配置跨域设置
		source.registerCorsConfiguration("/**", corsConfiguration);
		return new CorsFilter(source);
	}
}
@Configuration
public class WebMvcConfiguration implements WebMvcConfigurer {
	@Override
	public void addCorsMappings(CorsRegistry registry) {
	registry.addMapping("/**")
	.allowedOrigins("*")
	.allowedMethods("GET", "POST", "PUT", "DELETE", "OPTIONS", "PATCH")
	.allowCredentials(true)
	.maxAge(3600);
	}
}
单个配置
如果只需要将一个类中的相关接口进行跨域,可以使用@CrossOrigin注解,标记在class上