这是一个方便的接口生成工具,并且他能提供接口单元测试,下面就介绍一下使用方式
1. 先在你的工程当中引用到两个jar,这里使用maven
<dependency>
     <groupId>io.springfox</groupId>
     <artifactId>springfox-swagger-ui</artifactId>
     <version>2.9.2</version>
</dependency>
<dependency>
     <groupId>io.springfox</groupId>
     <artifactId>springfox-swagger2</artifactId>
     <version>2.9.2</version>
</dependency>
2. 写swagger的配置文件
import io.swagger.annotations.ApiOperation;
import org.springframework.context.annotation.Bean;
import org.springframework.context.annotation.Configuration;
import springfox.documentation.builders.ApiInfoBuilder;
import springfox.documentation.builders.PathSelectors;
import springfox.documentation.builders.RequestHandlerSelectors;
import springfox.documentation.service.ApiInfo;
import springfox.documentation.service.ApiKey;
import springfox.documentation.spi.DocumentationType;
import springfox.documentation.spring.web.plugins.Docket;
import springfox.documentation.swagger2.annotations.EnableSwagger2;

import java.util.ArrayList;
import java.util.List;

@Configuration
@EnableSwagger2
public class Swagger2Configuration {

    /**
     * @author wujiaxing
     * <p>
     * 使用Swagger2只需三步
     * 1、导入Swaggerr依赖
     * 2、配置Docket的bean
     * 3、使用@Api等注解修饰
     * </p>
     */
    @Configuration
    @EnableSwagger2
    public class SwaggerConfig {

        @Bean
        public Docket createRestApi() {
            return new Docket(DocumentationType.SWAGGER_2)
                    //基本信息
                    .apiInfo(apiInfo())
                    //固定写法
                    .select()
                    // 两种方式
                    // 第一种:方法需要有ApiOperation注解才能生存接口文档,withMethodAnnotation(ApiOption.class),或者class带注解withClassAnnotation
                    // 第二种:定义一个扫描包位置,在目标包里面的所有带ApiOperation注释的都应用,RequestHandlerSelectors.basePackage("目标包名")
                    .apis(RequestHandlerSelectors.withMethodAnnotation(ApiOperation.class))
                    // 路径使用any风格
                    .paths(PathSelectors.any())
                    .build()
                    // 如何保护我们的Api,有三种验证(ApiKey, BasicAuth, OAuth)
                    .securitySchemes(security());
        }

        /**
         * 接口文档详细信息
         *
         * @return
         */
        private ApiInfo apiInfo() {
            return new ApiInfoBuilder().title("标题").description("这是一个描述").termsOfServiceUrl("http://www.localhost:8080").version("1.0.0").build();
        }

        private List<ApiKey> security() {
            ArrayList<ApiKey> apiKeys = new ArrayList<>();
            apiKeys.add(new ApiKey("token", "token", "header"));
            return apiKeys;
        }
    }
}
3. 最后如果是配置了必须有ApiOperation的注解才使用就需要在方法上添加注解, 如果是扫描包的形式,就不需要添加任何的注解
    @ApiOperation("hello2")
    @PostMapping(value = "/t2")
    public String hello3(@RequestParam String a){
        return "Test Hello3";
    }
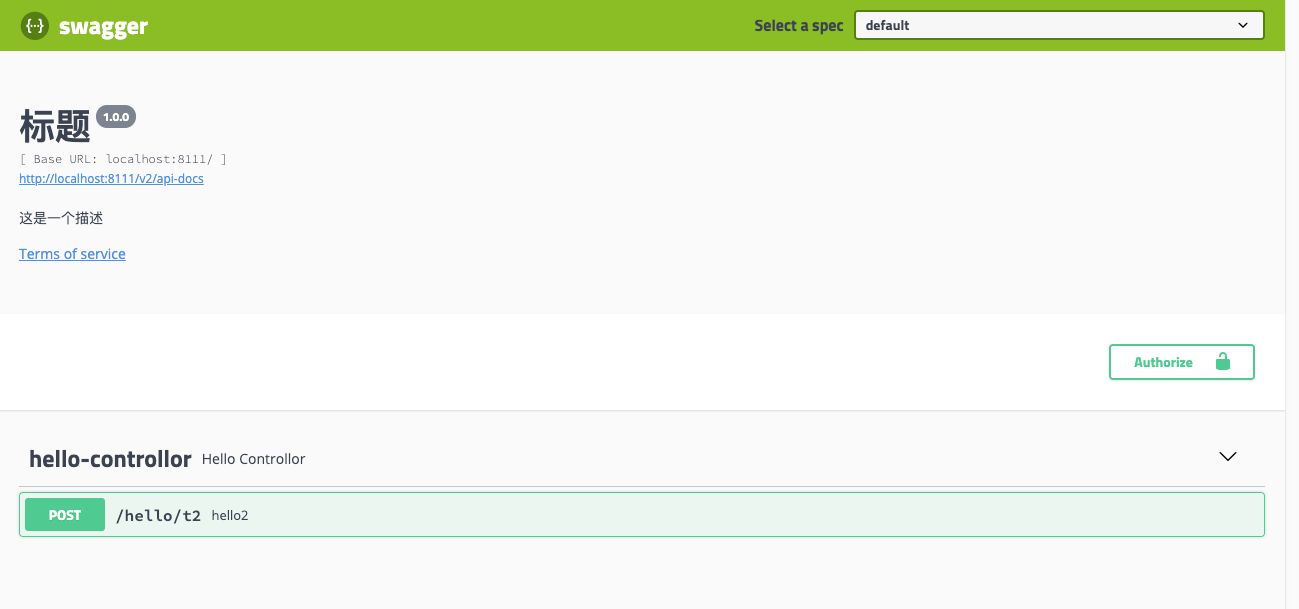
4. 测试效果,启动工程后,可以通过登录工程的swagger-ui.html地址查看结果如图
扫描二维码关注公众号,回复:
8299671 查看本文章
