本文分为三大部分,第一部分是介绍怎么加载.pb模型也就是怎么加载训练好的模型,第二部分是介绍怎么在Iception基础上面训练自己的模型即进行Inception迁移学习,第三部分是剖析一下源码
第一部分:
首先可以去下载Google 开发的Inception-v3
下载地址http://download.tensorflow.org/models/image/imagenet/inception-2015-12-05.tgz
下载解压为(我的是解压在in文件夹下):

其中.pb结尾的就是Inception模型
然后使用:
import tensorflow as tf
import os

dir="in"
if not os.path.exists(dir):
    os.makedirs(dir)

dir=os.path.join(dir,'classify_image_graph_def.pb')

with tf.Session() as sess:
    with tf.gfile.FastGFile(dir ,'rb') as f:
        graph_def=tf.GraphDef()
        graph_def.ParseFromString(f.read())
        tf.import_graph_def(graph_def,name='')
    writer=tf.summary.FileWriter('logs',sess.graph)
就加载了其模型可以在tensorboard中看到:
其中系列mix就是一个个Inception模块,我们可以选择其中两个打开看看

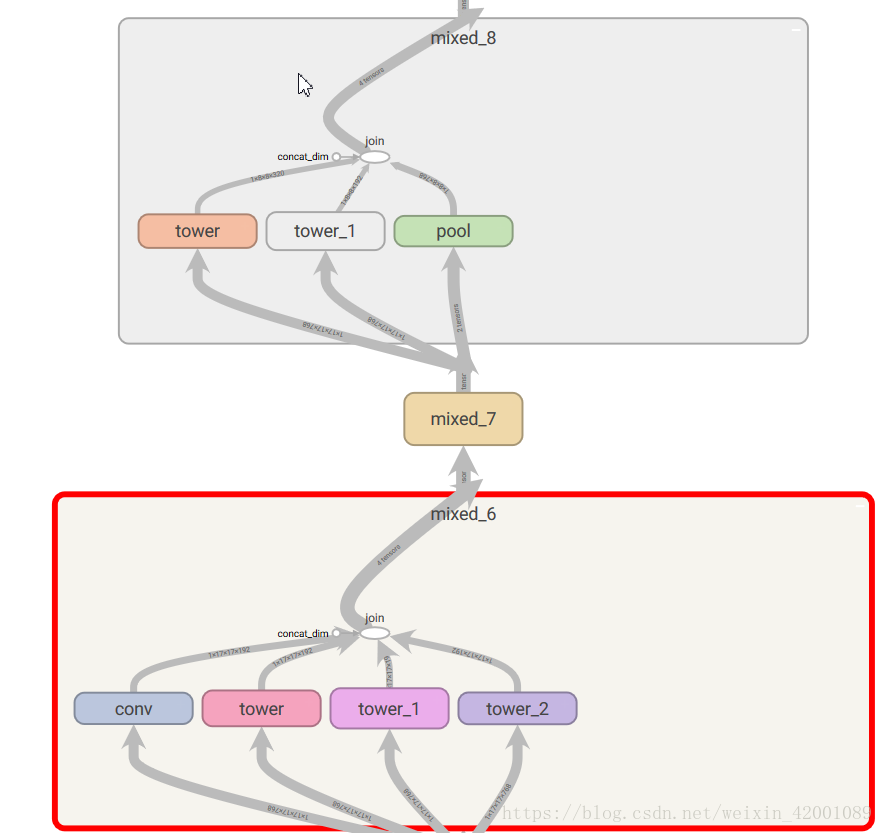
有了这个已经训练好的模型,我们可以在此模型基础上进行一些列实验学习!!!!!!
比如进行一个简单的图片识别学习:
inception解压后可以看到两个文件分别为:
imagenet_2012_challenge_label_map_proto.pbtxtimagenet_synset_to_human_label_map.txt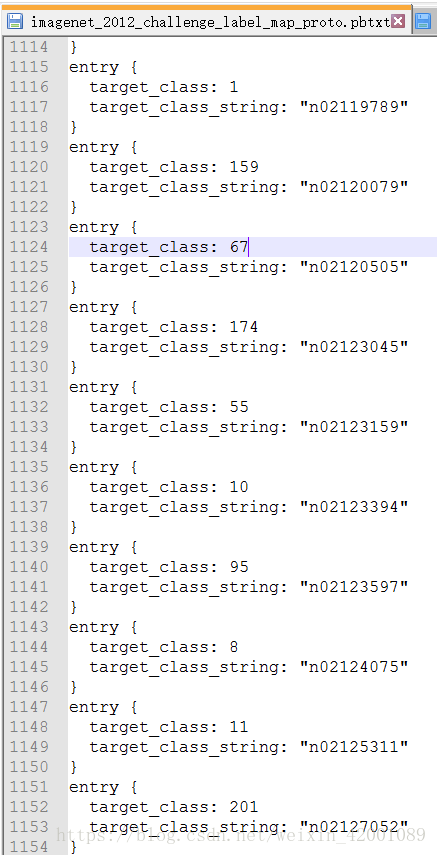

第一个文件代表类别,第二个就是所属类别的具体名称,比如cat,dog的等等,两个表的连接桥梁就是类似"n02119789",
demo中
#模型预处理类的主要工作就是要将
target_class和类别名对应起来
即self.name[1]=kit fox, Vulpes macrotis
对于Inception模型,我们可以看到输入
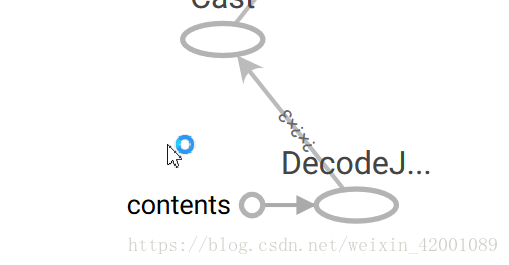
所以demo中对应
image_input=sess.graph.get_tensor_by_name('DecodeJpeg/contents:0')输出为:

对应代码为:
sotmax=sess.graph.get_tensor_by_name('softmax:0')总共有1000中分类
最后将完整代码附上:
import tensorflow as tf
import os
import numpy as np


inception_model="in"
image_path='image/'

#模型预处理类
class Data_preprocessing(object):

    def __init__(self,label_indexes_path=None,label_name_path=None):
        if not label_indexes_path:
            label_indexes_path=os.path.join(inception_model,'imagenet_2012_challenge_label_map_proto.pbtxt')
        if not label_name_path:
            label_name_path=os.path.join(inception_model,'imagenet_synset_to_human_label_map.txt')
        self.name=self.load_connection(label_indexes_path,label_name_path)


    def load_connection(self,label_indexes_path,label_name_path):

        proto_ascii_lines=tf.gfile.GFile(label_indexes_path).readlines()
        label_indexes={}
        for line in proto_ascii_lines:

            if line.startswith('  target_class:'):
                target_class = int(line.split(': ')[1])
            if line.startswith('  target_class_string:'):
                target_class_string = line.split(': ')[1]
                label_indexes[target_class]=target_class_string[1:-2]

        proto_ascii=tf.gfile.GFile(label_name_path).readlines()
        label_name={}
        for line in proto_ascii:
            line.strip('\n')
            item_spilt=line.split('\t')
            label_name[item_spilt[0]]=item_spilt[1]

        label_indexes_to_name={}
        for Key,Val in label_indexes.items():
            label_indexes_to_name[Key]=label_name[Val]

        return label_indexes_to_name

    def id_to_name(self,id):
        if id not in self.name:
            return ' '
        return self.name[id]


#加载Inception模型

dir="in"
if not os.path.exists(dir):
    os.makedirs(dir)

dir=os.path.join(dir,'classify_image_graph_def.pb')
with tf.gfile.FastGFile(dir ,'rb') as f:
    graph_def=tf.GraphDef()
    graph_def.ParseFromString(f.read())
    tf.import_graph_def(graph_def,name='')


#预测

with tf.Session() as sess:
    image_input=sess.graph.get_tensor_by_name('DecodeJpeg/contents:0')
    sotmax=sess.graph.get_tensor_by_name('softmax:0')

    for rootdir,childdir,files in os.walk(image_path):
        for file in files:
            image_data = tf.gfile.FastGFile(os.path.join(rootdir,file),'rb').read()
            predctions=sess.run(sotmax,feed_dict={image_input:image_data})
            predctions=np.squeeze(predctions)

            #排序:取预测最高的三种类型
            top_n=predctions.argsort()[-3:][::-1]
            label_of_name=Data_preprocessing()
            print('%s::::',os.path.join(rootdir,file))
            for id in top_n:
                print('%s of score is %f'% (label_of_name.id_to_name(id),predctions[id]))

            print('--------------------------------------')
检验一下结果:


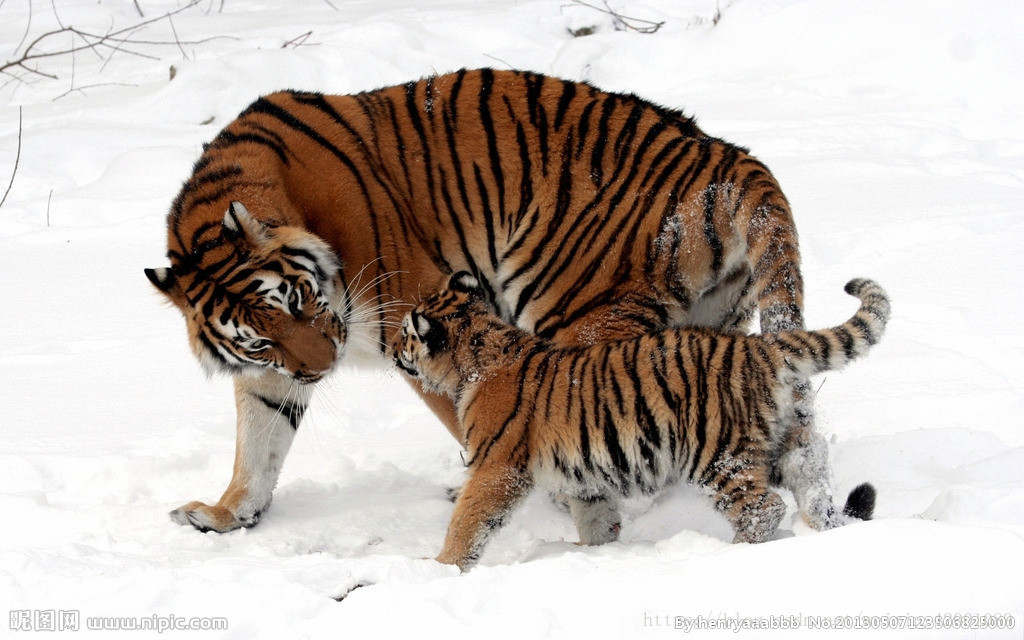


对应的结果分别是:
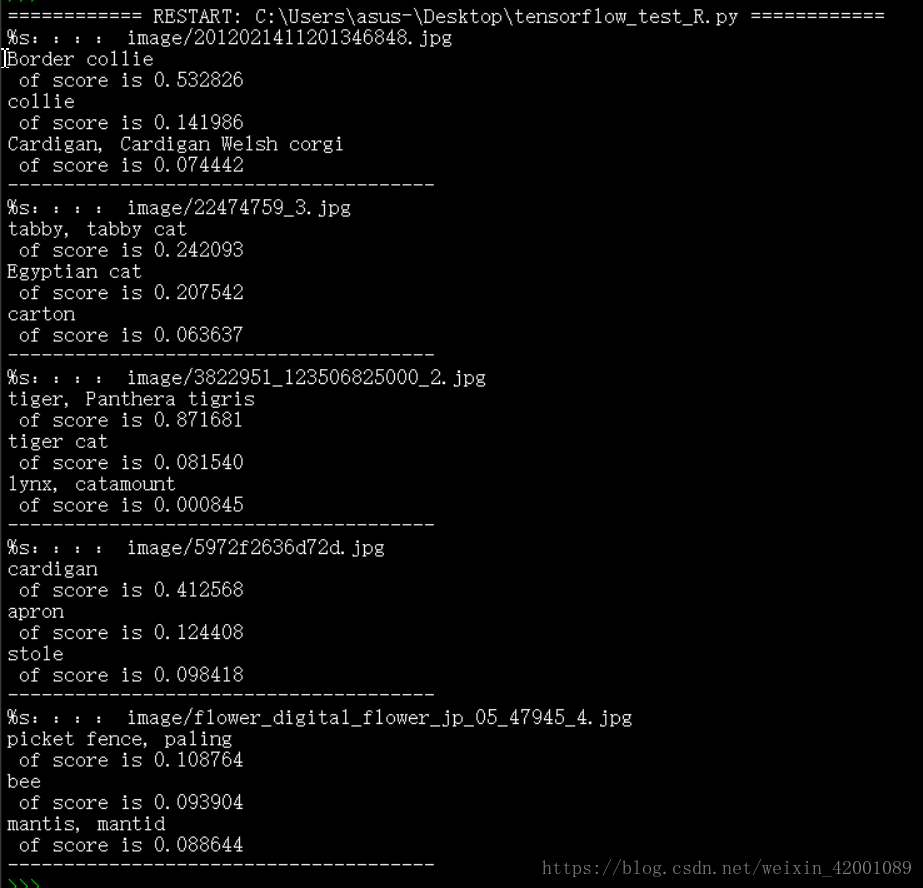
可以看到猫啦狗啦虎啦这些常见的物体可以较好预测,至于赵丽颖哈哈哈,不说了自己看吧
第二部分:
正如上面看到的赵丽颖预测结果不尽人意,怎么办呢?那就是要训练适合自己的模型,当然不是自己从头开始写所有代码,我们是要在Inception模型基础上面训练自己的模型,即迁移学习,关于迁移学习大体有两种思路(看下图),其实倒数第二层(pool_3)就是Inception最后一层,一种思路是冻结包括pool_3以及前面所有层,只改变最后一层softmax,假如我们要预测的种类是3类,那么我们改变softmax,使之输出为3就可以了,这种思路可以这样理解,就是利用Inception的输出(就是提取了图片的特征值),来训练我们最后一层,所以整个demo训练的权值只是最后一层,前面所有层的权值沿用Inception已经训练好的(如果您愿意,可以在pool_3后加各种神经网络,实现各种各样的目的),第二种思路就是不冻结前面所有层,训练整个神经网络图权值,可以想象的就是第二种思路训练后的模型性能更好,但是需要的计算资源也越多(通常在GPU上面),本部分采用第一种思路
下面来说一下具体步骤:(文章结尾有完整的代码供下载)
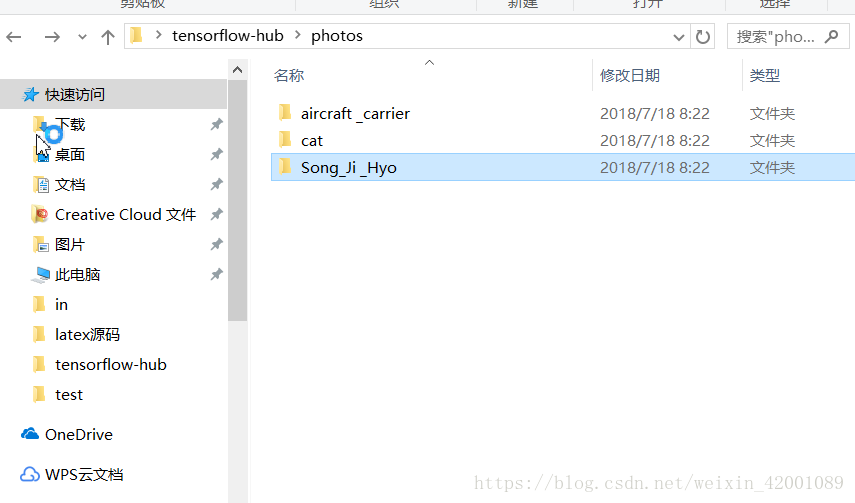
(1)准备数据集
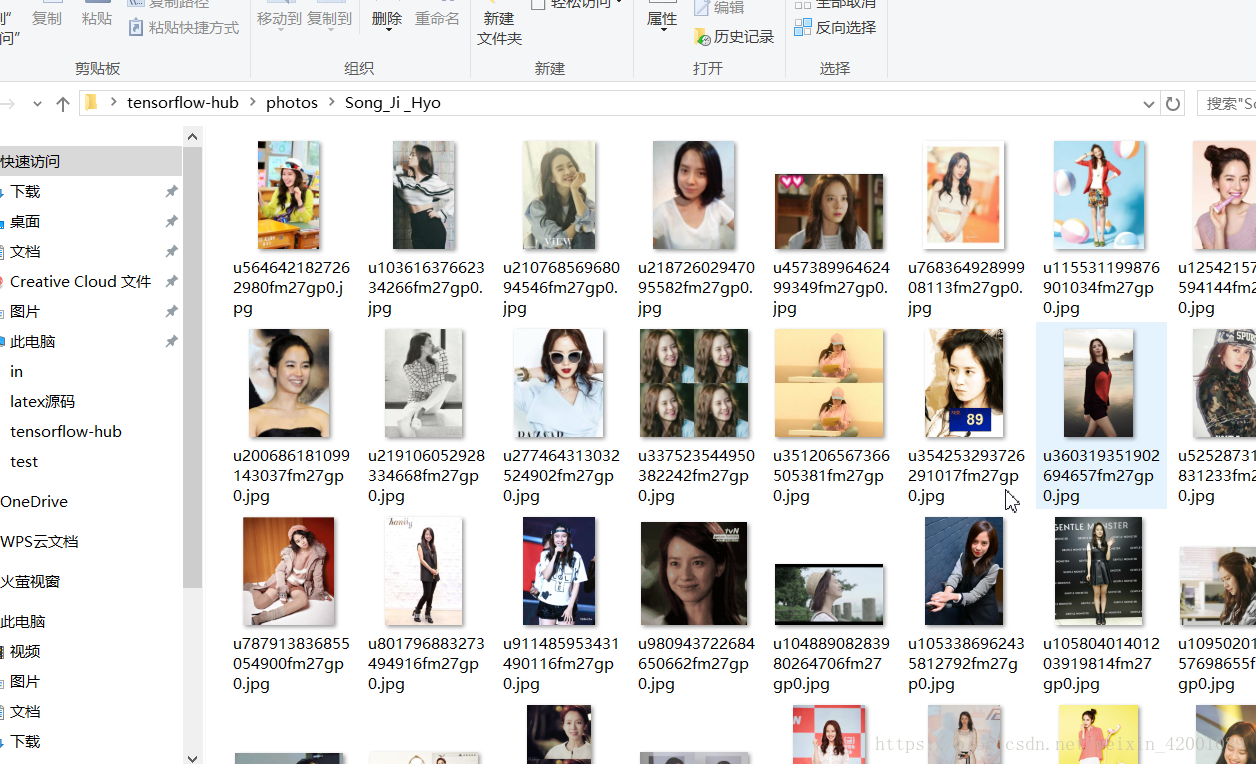
博主这里准备了三类,宋智孝(runningman粉丝,哈哈),小猫,航空母舰三个文件夹如下:
每个文件夹下面有150张图片
也可以去http://www.robots.ox.ac.uk/~vgg/data/下载数据集
(2)训练
下载tensorflow-hub,tensorflow版本至少1.7以上才兼容
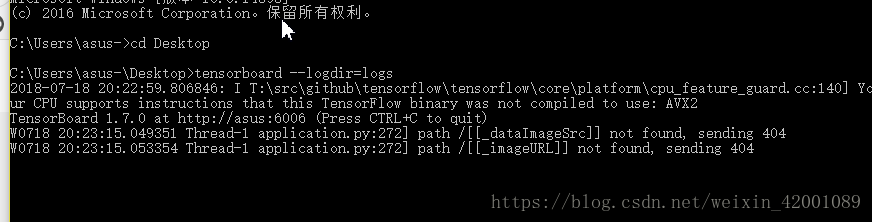
pip install "tensorflow>=1.7.0"pip install tensorflow-hub这里写了一个脚本(mytrain.bat)
python C:/Users/asus-/Desktop/tensorflow-hub/retrain.py ^
--bottleneck_dir C:/Users/asus-/Desktop/tensorflow-hub/bottleneck ^
--how_many_training_steps 20 ^
--saved_model_dir C:/Users/asus-/Desktop/tensorflow-hub/model/ ^
--output_graph C:/Users/asus-/Desktop/tensorflow-hub/output_graph.pb ^
--output_labels C:/Users/asus-/Desktop/tensorflow-hub/output/output_labels.txt ^
--image_dir C:/Users/asus-/Desktop/tensorflow-hub/photos/ ^
pause
--bottleneck_dir就是说上面Inception模块输出的特征值这里指定存放位置,训练完可以看到:
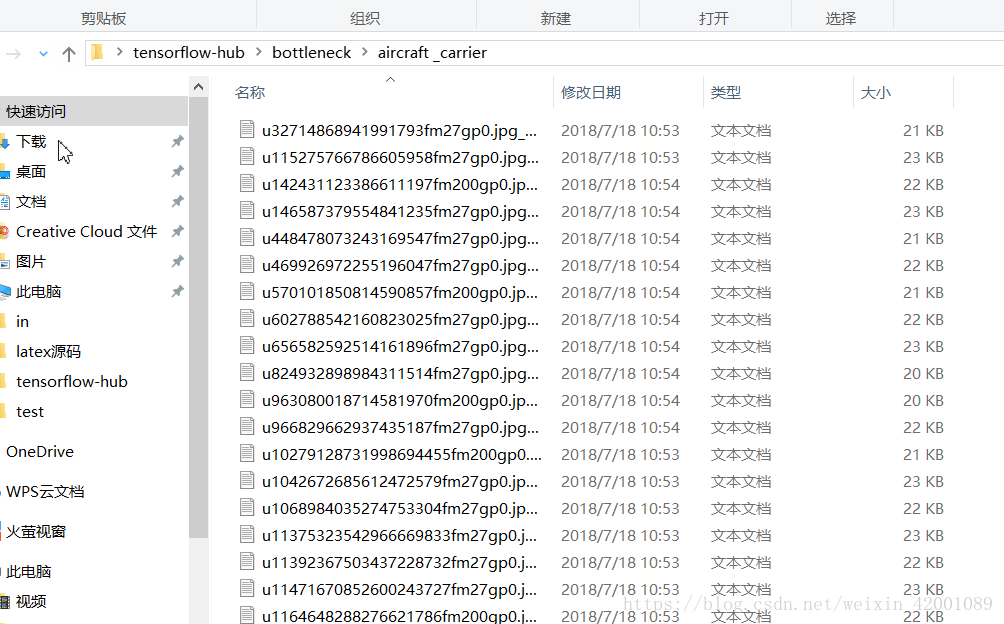
其中记录的就是每张图片的特征值,整个网络的训练的过程就是先得到这些特征值,再用这些值来训练最后一层的权值
--how_many_training_steps是训练20次
--output_graph训练后输出模型的位置
--output_labels训练后输出标签的位置(我们这里是三类)

--image_dir图片位置
传入这些参数后就可以运行retrain.py了
(3)验证
将要验证的图片放到一个文件夹下:

运行(test.py)
import tensorflow as tf
import os
import numpy as np


image_path='C:/Users/asus-/Desktop/tensorflow-hub/test/'

lines = tf.gfile.GFile('C:/Users/asus-/Desktop/tensorflow-hub/output/output_labels.txt').readlines()
uid_to_human = {}
#一行一行读取数据
for uid,line in enumerate(lines) :
    #去掉换行符
    line=line.strip('\n')
    uid_to_human[uid] = line

def id_to_string(node_id):
    if node_id not in uid_to_human:
        return ''
    return uid_to_human[node_id]

input_height = 299
input_width = 299
input_mean = 0
input_std = 255


def read_tensor_from_image_file(file_name,input_height=299,input_width=299,input_mean=0,input_std=255):
  input_name = "file_reader"
  output_name = "normalized"
  file_reader = tf.read_file(file_name, input_name)
  if file_name.endswith(".png"):
    image_reader = tf.image.decode_png(
        file_reader, channels=3, name="png_reader")
  elif file_name.endswith(".gif"):
    image_reader = tf.squeeze(
        tf.image.decode_gif(file_reader, name="gif_reader"))
  elif file_name.endswith(".bmp"):
    image_reader = tf.image.decode_bmp(file_reader, name="bmp_reader")
  else:
    image_reader = tf.image.decode_jpeg(file_reader, channels=3, name="jpeg_reader")
  float_caster = tf.cast(image_reader, tf.float32)
  dims_expander = tf.expand_dims(float_caster, 0)
  resized = tf.image.resize_bilinear(dims_expander, [input_height, input_width])
  normalized = tf.divide(tf.subtract(resized, [input_mean]), [input_std])
  sess = tf.Session()
  result = sess.run(normalized)

  return result


with tf.Session() as sess:

    with tf.gfile.FastGFile('C:/Users/asus-/Desktop/tensorflow-hub/output_graph.pb', 'rb') as f:
        graph_def = tf.GraphDef()
        graph_def.ParseFromString(f.read())
        tf.import_graph_def(graph_def, name='')
    writer=tf.summary.FileWriter('C:/Users/asus-/Desktop/logs',sess.graph)


with tf.Session() as sess:
    #图片输入
    image_input=sess.graph.get_tensor_by_name('Placeholder:0')
    #预测输出
    softmax=sess.graph.get_tensor_by_name('final_result:0')

    for rootdir,childdir,files in os.walk(image_path):
        for file in files:
            t = read_tensor_from_image_file(os.path.join(rootdir,file),input_height=input_height,input_width=input_width,input_mean=input_mean,input_std=input_std)

            predctions=sess.run(softmax,feed_dict={image_input:t})
            predctions=np.squeeze(predctions)
            #[::-1]是将结果逆序
            top_n=predctions.argsort()[::-1]

            print('%s::::',os.path.join(rootdir,file))
            for id in top_n:
                print('%s of score is %f'% (id_to_string(id),predctions[id]))

            print('--------------------------------------')
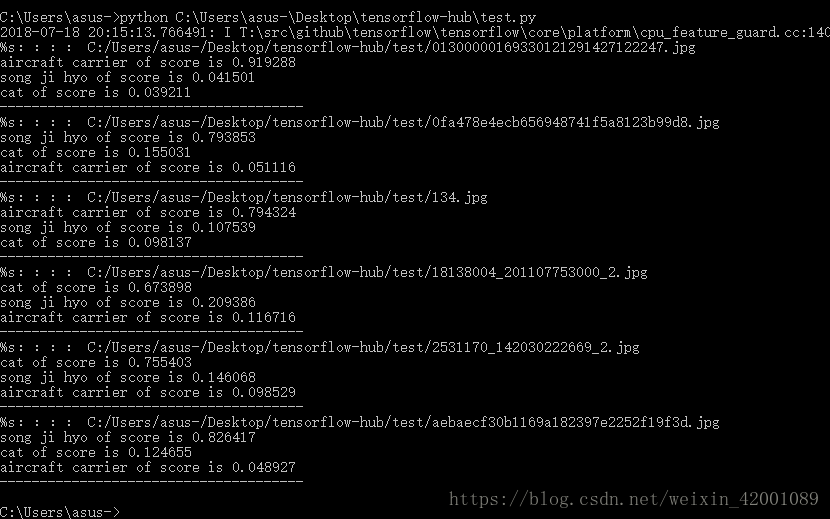
可以看到结果还不错(虽然只训练了20次,不过之所以结果好也是由于这三个种类相差较大,如果我们做的是区分人脸,恐怕就没这么好的结果了)
同时logs中记录了神经网络图:

可以看到final_retrain_ops就是我们后面加入的自己的层
第三部分:
上面只是按部就班的进行机械操作,下面来看一下源码:
(1)首先看一下retrain.py中几个关键函数:
run_bottleneck_on_image函数就是将图像数据输入给上面的图,返回bottleneck_values,说白了就是提取特征值,bottleneck花瓶瓶颈值得就是Inception(倒数第二层的输出)
get_or_create_bottleneck读取图像的特征值
add_final_retrain_ops就是定义自己的层,我们着重看一下:
def add_final_retrain_ops(class_count, final_tensor_name, bottleneck_tensor,
                          quantize_layer, is_training):
  """Adds a new softmax and fully-connected layer for training and eval.

  We need to retrain the top layer to identify our new classes, so this function
  adds the right operations to the graph, along with some variables to hold the
  weights, and then sets up all the gradients for the backward pass.

  The set up for the softmax and fully-connected layers is based on:
  https://www.tensorflow.org/tutorials/mnist/beginners/index.html

  Args:
    class_count: Integer of how many categories of things we're trying to
        recognize.
    final_tensor_name: Name string for the new final node that produces results.
    bottleneck_tensor: The output of the main CNN graph.
    quantize_layer: Boolean, specifying whether the newly added layer should be
        instrumented for quantization with TF-Lite.
    is_training: Boolean, specifying whether the newly add layer is for training
        or eval.

  Returns:
    The tensors for the training and cross entropy results, and tensors for the
    bottleneck input and ground truth input.
  """
  batch_size, bottleneck_tensor_size = bottleneck_tensor.get_shape().as_list()
  assert batch_size is None, 'We want to work with arbitrary batch size.'
  with tf.name_scope('input'):
    bottleneck_input = tf.placeholder_with_default(
        bottleneck_tensor,
        shape=[batch_size, bottleneck_tensor_size],
        name='BottleneckInputPlaceholder')

    ground_truth_input = tf.placeholder(
        tf.int64, [batch_size], name='GroundTruthInput')

  # Organizing the following ops so they are easier to see in TensorBoard.
  layer_name = 'final_retrain_ops'
  with tf.name_scope(layer_name):
    with tf.name_scope('weights'):
      initial_value = tf.truncated_normal(
          [bottleneck_tensor_size, class_count], stddev=0.001)
      layer_weights = tf.Variable(initial_value, name='final_weights')
      variable_summaries(layer_weights)

    with tf.name_scope('biases'):
      layer_biases = tf.Variable(tf.zeros([class_count]), name='final_biases')
      variable_summaries(layer_biases)

    with tf.name_scope('Wx_plus_b'):
      logits = tf.matmul(bottleneck_input, layer_weights) + layer_biases
      tf.summary.histogram('pre_activations', logits)

  final_tensor = tf.nn.softmax(logits, name=final_tensor_name)

  # The tf.contrib.quantize functions rewrite the graph in place for
  # quantization. The imported model graph has already been rewritten, so upon
  # calling these rewrites, only the newly added final layer will be
  # transformed.
  if quantize_layer:
    if is_training:
      tf.contrib.quantize.create_training_graph()
    else:
      tf.contrib.quantize.create_eval_graph()

  tf.summary.histogram('activations', final_tensor)

  # If this is an eval graph, we don't need to add loss ops or an optimizer.
  if not is_training:
    return None, None, bottleneck_input, ground_truth_input, final_tensor

  with tf.name_scope('cross_entropy'):
    cross_entropy_mean = tf.losses.sparse_softmax_cross_entropy(
        labels=ground_truth_input, logits=logits)

  tf.summary.scalar('cross_entropy', cross_entropy_mean)

  with tf.name_scope('train'):
    optimizer = tf.train.GradientDescentOptimizer(FLAGS.learning_rate)
    train_step = optimizer.minimize(cross_entropy_mean)

  return (train_step, cross_entropy_mean, bottleneck_input, ground_truth_input,
          final_tensor)
其中initial_value = tf.truncated_normal([bottleneck_tensor_size, class_count], stddev=0.001)中可以看到bottleneck_tensor_size就是倒数第二层输出列数,class_count就是对应我们输出列表
logits = tf.matmul(bottleneck_input, layer_weights) + layer_biases
cross_entropy_mean = tf.losses.sparse_softmax_cross_entropy(labels=ground_truth_input, logits=logits)
就是对应的矩阵相乘和定义loss函数
optimizer = tf.train.GradientDescentOptimizer(FLAGS.learning_rate)
train_step = optimizer.minimize(cross_entropy_mean)
就是对应的优化器,可以看到这里是选择的一般梯度下降
module_spec = hub.load_module_spec(FLAGS.tfhub_module)就是加载了模型,
顺着找tfhub_module可以看到:
parser.add_argument(
'--tfhub_module',
type=str,
default=(
'https://tfhub.dev/google/imagenet/inception_v3/feature_vector/1'),
help="""\
Which TensorFlow Hub module to use.
See https://github.com/tensorflow/hub/blob/r0.1/docs/modules/image.md
for some publicly available ones.\
""")
默认会从https://tfhub.dev/google/imagenet/inception_v3/feature_vector/1下载
注意:如果采用默认下载需要翻墙
然后就是一些 parser.add_argument,也就是我们在运行mytrain.bat脚本时可以传入的可控参数,关于每一个具体意思都有详细介绍可以去看一下
(2)再来看一下test.py
id_to_string就是将类别名和key(数字)对应起来
导入模型后我们需要知道feed的输入名和输出名,说白了就是我们应该从哪个口喂数据以及从哪里得到预测结果,关于这一点这样做:先从tensorboard从得到网络图即
import tensorflow as tf
import os
import numpy as np


with tf.Session() as sess:

    with tf.gfile.FastGFile('C:/Users/asus-/Desktop/tensorflow-hub/output_graph.pb', 'rb') as f:
        graph_def = tf.GraphDef()
        graph_def.ParseFromString(f.read())
        tf.import_graph_def(graph_def, name='')
    writer=tf.summary.FileWriter('C:/Users/asus-/Desktop/logs',sess.graph)
可以得到输入和输出,所以才有了以下demo
#图片输入
image_input=sess.graph.get_tensor_by_name('Placeholder:0')
#预测输出
softmax=sess.graph.get_tensor_by_name('final_result:0')
再者就是输入输出格式,输出格式我们知道了,就是3个类别的key(按概率从小到大),输入可以看到是如下:

其中read_tensor_from_image_file函数就是将图片转化为输入要求的格式:
其中函数中主要就是tf.image.resize_bilinear对图片进行缩放,关于这里可以参考:
http://wiki.jikexueyuan.com/project/tensorflow-zh/api_docs/python/image.html
(关于这一部分也可以看https://www.bilibili.com/video/av20542427/?p=29教程,注意视频的讲解代码github已经迁移到https://github.com/tensorflow/hub)
结尾
第二部分代码:https://github.com/Mryangkaitong/tensorflow
参考资料
https://blog.csdn.net/bleedingfight/article/details/80768306