在写这篇文章前,我要先吐槽一下老版本的AssetBundle打包,其它方面我都没意见, 在打依赖包的处理上简直反人类,导致很多人宁愿资源冗余也不愿意做依赖包。不过在新版本的打包方式面前,这个问题已经不存在了。
下面是个人写的打包方法
public static class ABBuilder
{
[MenuItem("Build/Build AB")]
static void Build()
{
// 是否打包所有资源(true表示Assets文件下所有"AssetBundle"属性不为空的资源文件都会被打包)
bool buildAll = true;
// 这三个参数必选,其中outputPath路径必须存在
string outputPath = Application.dataPath + "/abOutput/";
BuildTarget platform = BuildTarget.Android;
BuildAssetBundleOptions option = BuildAssetBundleOptions.None;
// 这一个参数可选
List<AssetBundleBuild> abbList = new List<AssetBundleBuild>();
// 如果不选择打包所有资源,就必须自己指定打包内容(下面纯属示范)
if (!buildAll)
{
AssetBundleBuild abb = new AssetBundleBuild();
abb.assetBundleName = "ab1";
abb.assetBundleVariant = "";
abb.assetNames = new string[] { "Assets/Res/1.png", "Assets/Res/2.png" };
abbList.Add(abb);
abb = new AssetBundleBuild();
abb.assetBundleName = "ab2";
abb.assetBundleVariant = "";
abb.assetNames = new string[] { "Assets/Res/1.prefab", "Assets/Res/2.prefab" };
abbList.Add(abb);
}
// 打包
if (buildAll)
{
BuildPipeline.BuildAssetBundles(outputPath, option, platform);
}
else
{
BuildPipeline.BuildAssetBundles(outputPath, abbList.ToArray(), option, platform);
}
}
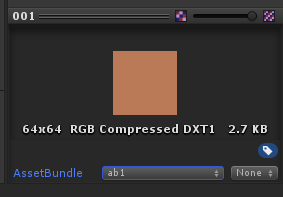
}这张图给出的是替资源文件设置“AssetBundle”属性的地方
如果启动上面的代码并打包完成,会在abOutput文件夹下生成6个文件(无视meta文件),分别为
其中ab1和ab2文件,就是我们游戏中要用到的assetbundle。那么abOutput是什么,3个manifest又是什么?abOutput
abOutput.manifest
ab1
ab1.manifest
ab2
ab2.manifest
所有的manifest文件可以拖到文本编辑器里查看,明显可以看出ab1和ab2对应的manifest文件存储的是ab1和ab2的内容列表与依赖包列表,而abOutput.manifest记录的是其它assetbundle列表与每个assetbundle的依赖包列表,也就是说它是一个依赖信息总表。
而abOutput这个assetbundle文件就包含了一个资源,即总表abOutput.manifest,这个唯一资源的名字叫做“assetbundlemanifest”。
接下来所有的manifest文件都可以删除了,留下无后缀的assetbundle文件即可。
再说下如何使用这个依赖信息总表,运行游戏的时候,先载入这个总表所在的assetbundle,然后读取它的唯一资源,也就是manifest文件,保存起来,之后但凡需要载入assetbundle时,都要先检查该manifest,获得该assetbundle的依赖项,然后先载入所有被其依赖的assetbundle,再载入该assetbundle。
下面是个人写的一个简要的读取assetbundle的方法
public static class ABLoader
{
	static public string abPath = Application.dataPath + "/abOutput/";
	static public string abManifestName = "abOutput";

	static AssetBundleManifest _manifest = null;
	static Dictionary<string, AssetBundle> _abDic = new Dictionary<string, AssetBundle>();

	static public AssetBundle LoadAssetBundle(string abName)
	{
		if (_manifest == null)
		{
			AssetBundle mfab = AssetBundle.LoadFromFile(abPath + abManifestName);
			_manifest = mfab.LoadAsset("assetbundlemanifest") as AssetBundleManifest;
		}

		// 载入所有依赖包
		foreach (var abNameDependency in _manifest.GetAllDependencies(abName))
		{
			if (!_abDic.ContainsKey(abNameDependency))
			{
				_abDic[abNameDependency] = AssetBundle.LoadFromFile(abPath + abNameDependency);
			}
		}
		AssetBundle ab = AssetBundle.LoadFromFile(abPath + abName);
		_abDic[abName] = ab;
		return ab;
	}

	static public void UnloadAssetBundle(string abName)
	{
		if (_abDic.ContainsKey(abName))
		{
			_abDic[abName].Unload(false);
			_abDic.Remove(abName);
		}
	}

	static public void UnloadAllAssetBundles()
	{
		foreach (var ab in _abDic.Values)
		{
			ab.Unload(false);
		}
		_abDic.Clear();
	}
}
最后写下我猜测的整个内部打包流程,未经验证仅供参考:
1. 开发者调用打包函数
2. 如果是打包所有资源,即无 AssetBundleBuild[] 参数的版本,Unity就会遍历整个Assets文件夹,根据每个资源文件的“assetbundle”属性(存储在meta中),自动生成AssetBundleBuild[] 数据(纯属瞎猜)
3. Unity为每个ab创建一个manifest,写入资源列表
4. Unity依次读取每个ab的每个资源,遇到依赖资源的时候就从所有manifest中查找对应资源,一旦找到就在该manifest中记录依赖ab的名字
5. Unity逐个打包,对于每个有依赖的资源,如果依赖资源也在某个ab中,就不写入该包中,否则一同写入
6. 把所有的manifest文件的内容整合到一个与文件夹同名的manifest文件中,然后再创建一个同名ab,把该manifest写入
7. 完成打包
上面的打包或者读包的代码都是示范代码,不适合直接使用。不过了解API的基本用法,再研究下内部原理,实现功能时自然就能信手拈来。