1. 什么是RHCS:
RHCS是Red Hat Cluster Suite的缩写,也就是红帽子集群套件,RHCS是一个能够提供高可用性、
高可靠性、负载均衡、存储共享且经济廉价的集群工具集合,它将集群系统中三大集群架构融合一体
,可以给web应用、数据库应用等提供安全、稳定的运行环境。

更确切的说,RHCS是一个功能完备的集群应用解决方案,它从应用的前端访问到后端的数据存储都提供了
一个行之有效的集群架构实现,通过RHCS提供的这种解决方案,不但能保证前端应用持久、稳定的提供服
务,同时也保证了后端数据存储的安全。
 RHCS提供了集群系统中三种集群构架,分别是高可用性集群、负载均衡集群、存储集群。
2. RHCS提供的三个核心功能:
高可用集群是RHCS的核心功能。当应用程序出现故障,或者系统硬件、网络出现故障时,应用可以通过RHCS
提供的高可用性服务管理组件自动、快速从一个节点切换到另一个节点,节点故障转移功能对客户端来说是透
明的,从而保证应用持续、不间断的对外提供服务,这就是RHCS高可用集群实现的功能。

RHCS通过LVS(Linux Virtual Server)来提供负载均衡集群,而LVS是一个开源的、功能强大的基于IP的
负载均衡技术,LVS由负载调度器和服务访问节点组成,通过LVS的负载调度功能,可以将客户端请求平均的
分配到各个服务节点,同时,还可以定义多种负载分配策略,当一个请求进来时,集群系统根据调度算法来
判断应该将请求分配到哪个服务节点,然后,由分配到的节点响应客户端请求,同时,LVS还提供了服务节点
故障转移功能,也就是当某个服务节点不能提供服务时,LVS会自动屏蔽这个故障节点,接着将失败节点从集
群中剔除,同时将新来此节点的请求平滑的转移到其它正常节点上来;而当此故障节点恢复正常后,LVS又会
自动将此节点加入到集群中去。而这一系列切换动作,对用户来说,都是透明的,通过故障转移功能,保证了
服务的不间断、稳定运行。
RHCS通过GFS文件系统来提供存储集群功能,GFS是Global File System的缩写,它允许多个服务同时去读写一个单一的
3.集群中的相关术语:
1.节点(node)
    运行集群进程的一个独立主机,称为节点,节点是HA的核心组成部分,每个节点上运行着操作系统和集群软件服务,
    在集群中,节点有主次之分,分别称为主节点和备用/备份节点,每个节点拥有唯一的主机名,并且拥有属于自己的
    一组资源,例如,磁盘、文件系统、网络地址和应用服务等。主节点上一般运行着一个或多个应用服务。而备用节点
    一般处于监控状态。
2.资源(resource)
资源是一个节点可以控制的实体,并且当节点发生故障时,这些资源能够被其它节点接管
3.事件(event)
也就是集群中可能发生的事情,例如节点系统故障、网络连通故障、网卡故障、应用程序故障等。这些事件都会导致节
点的资源发生转移,HA的测试也是基于这些事件来进行的。
4.动作(action)
事件发生时HA的响应方式,动作是由shell脚步控制的,例如,当某个节点发生故障后,备份节点将通过事先设定好
的执行脚本进行服务的关闭或启动。进而接管故障节点的资源
4.集群的大致结构:

//最上层是LVS负载均衡层,中间一层是Real Server层,就是服务节点部分,最后一层是共享存储层,
主要用于给GFS文件系统提供共享存储空间。
5.在server1和server4作为nginx端(进行高可用的搭建):
首先进行yum源的扩展为了安装软件包:


为了节省资源可以同时在server1安装ricci和luci:
[root@server1 yum.repos.d]# yum install ricci luci -y 
[root@server1 yum.repos.d]# passwd ricci  给ricci添加密码
Changing password for user ricci.
New password:
BAD PASSWORD: it is based on a dictionary word
BAD PASSWORD: is too simple
Retype new password:
passwd: all authentication tokens updated successfully.
[root@server1 yum.repos.d]# /etc/init.d/ricci start  启动服务
Starting system message bus:                               [  OK  ]
Starting oddjobd:                                          [  OK  ]
generating SSL certificates...  done
Generating NSS database...  done
Starting ricci:                                            [  OK  ]
[root@server1 yum.repos.d]# chkconfig ricci on  开机自动启动
[root@server1 yum.repos.d]# chkconfig luci on   开机自动启动
[root@server1 yum.repos.d]# /etc/init.d/luci start  开启luci服务会给你提供一个网址直接复制就可以使用浏览器访问
Adding following auto-detected host IDs (IP addresses/domain names), corresponding to `server1' address, to the configuration of self-managed certificate `/var/lib/luci/etc/cacert.config' (you can change them by editing `/var/lib/luci/etc/cacert.config', removing the generated certificate `/var/lib/luci/certs/host.pem' and restarting luci):
    (none suitable found, you can still do it manually as mentioned above)

Generating a 2048 bit RSA private key
writing new private key to '/var/lib/luci/certs/host.pem'
Start luci...                                              [  OK  ]
Point your web browser to https://server1:8084 (or equivalent) to access luci
[root@server1 yum.repos.d]# date  保证时间同步
Fri Aug  3 09:29:28 CST 2018
[root@server1 yum.repos.d]# vim /etc/hosts  添加解析方便使用域名调用
[root@server1 yum.repos.d]# cat /etc/hosts
127.0.0.1   localhost localhost.localdomain localhost4 localhost4.localdomain4
::1         localhost localhost.localdomain localhost6 localhost6.localdomain6
172.25.254.7 server1
172.25.254.2 server2
172.25.254.3 server3
#172.25.254.4 server4
172.25.254.5 server4
172.25.254.6 server6
#172.25.254.7 server7
在server4安装ricci:
[root@server4 yum.repos.d]# yum install -y ricci
[root@server4 yum.repos.d]# /etc/init.d/ricci start  开启服务
Starting ricci:
[root@server4 yum.repos.d]# chkconfig ricci on  开机自启动
[root@server4 yum.repos.d]# vim /etc/hosts  添加解析可以直接通过名字调用
[root@server4 yum.repos.d]# cat /etc/hosts
127.0.0.1   localhost localhost.localdomain localhost4 localhost4.localdomain4
::1         localhost localhost.localdomain localhost6 localhost6.localdomain6
172.25.254.7 server1
172.25.254.2 server2
172.25.254.3 server3
172.25.254.4 server4
172.25.254.5 server5
172.25.254.6 server6
#172.25.254.7 server7
在真机添加解析:
[root@foundation84 images]# vim /etc/hosts  添加解析
[root@foundation84 images]# cat /etc/hosts
127.0.0.1   localhost localhost.localdomain localhost4 localhost4.localdomain4
::1         localhost localhost.localdomain localhost6 localhost6.localdomain6
172.25.254.250  content.example.com
172.25.254.121  www.westos.com news.westos.com music.westos.com login.westos.com
172.25.254.100 www.westos.org bbs.westos.org
172.25.254.5 www.westos.org
172.25.254.5 server4
172.25.254.7 server1
[root@foundation84 images]# ping server1  可以直接ping的通域名
PING server1 (172.25.254.7) 56(84) bytes of data.
64 bytes from server1 (172.25.254.7): icmp_seq=1 ttl=64 time=0.147 ms
64 bytes from server1 (172.25.254.7): icmp_seq=2 ttl=64 time=0.082 ms
^C
--- server1 ping statistics ---
2 packets transmitted, 2 received, 0% packet loss, time 999ms
rtt min/avg/max/mdev = 0.082/0.114/0.147/0.034 ms
[root@foundation84 images]# ping server4
PING server4 (172.25.254.5) 56(84) bytes of data.
64 bytes from www.westos.org (172.25.254.5): icmp_seq=1 ttl=64 time=0.124 ms
64 bytes from www.westos.org (172.25.254.5): icmp_seq=2 ttl=64 time=0.088 ms
^C
在网页建立集群:
登陆用户为luci所在的主机:

点击创建用户节点:

添加用户密码保证服务是开机自动启动的不然会出错:

等待即可:

会自动断开连接需要我们重新连接即可


用户节点添加成功:

用命令查看当前工作状态:
[root@server1 ~]# clustat  用户节点添加成功
Cluster Status for westos_ha @ Fri Aug  3 09:50:52 2018
Member Status: Quorate

 Member Name                             ID   Status
 ------ ----                             ---- ------
 server1                                     1 Online, Local
 server4                                     2 Online
在网页集群节点添加其他服务:
添加域:


添加一个虚拟IP保证未被占用:


扫描二维码关注公众号,回复:
2612149 查看本文章

在server4和server1验证nginx以及脚本:
在server4:
[root@server4 ~]# cd /usr/local/  进入nginx的默认目录
[root@server4 local]# ls
bin  games    keepalived  lib64    nginx  share
etc  include  lib         libexec  sbin   src
[root@server4 local]# scp -r nginx/ server1:/usr/local/  将nginx传到server4的默认目录下
root@server1's password:
error.log                                     100%  934     0.9KB/s   00:00
access.log                                    100%  637     0.6KB/s   00:00
nginx.pid                                     100%    5     0.0KB/s   00:00
nginx                                         100%  837KB 837.3KB/s   00:00
index.html                                    100%  612     0.6KB/s   00:00
test.html                                     100%    4     0.0KB/s   00:00
50x.html                                      100%  537     0.5KB/s   00:00
fastcgi_params.default                        100% 1007     1.0KB/s   00:00
win-utf                                       100% 3610     3.5KB/s   00:00
nginx.conf.default                            100% 2656     2.6KB/s   00:00
nginx.conf                                    100%  465     0.5KB/s   00:00
fastcgi_params                                100% 1007     1.0KB/s   00:00
koi-win                                       100% 2223     2.2KB/s   00:00
mime.types.default                            100% 3957     3.9KB/s   00:00
fastcgi.conf.default                          100% 1077     1.1KB/s   00:00
koi-utf                                       100% 2837     2.8KB/s   00:00
mime.types                                    100% 3957     3.9KB/s   00:00
uwsgi_params.default                          100%  664     0.7KB/s   00:00
scgi_params                                   100%  636     0.6KB/s   00:00
fastcgi.conf                                  100% 1077     1.1KB/s   00:00
scgi_params.default                           100%  636     0.6KB/s   00:00
uwsgi_params                                  100%  664     0.7KB/s   00:00
[root@server4 local]# cd nginx/conf/
[root@server4 conf]# nginx   可以正常开启关闭nginx
[root@server4 conf]# nginx -s stop
[root@server4 conf]# cd /etc/init.d/  这里的脚本是自己编写的控制nginx服务的脚本
[root@server4 init.d]# ls
auditd            haldaemon       lvm2-monitor  postfix      rpcidmapd
blk-availability  halt            messagebus    quota_nld    rpcsvcgssd
clvmd             ip6tables       modclusterd   rdisc        rsyslog
cman              ipmievd         netconsole    restorecond  sandbox
corosync          iptables        netfs         rgmanager    saslauthd
corosync-notifyd  keepalived      network       rhnsd        single
cpglockd          killall         nfs           rhsmcertd    sshd
crond             libvirt-guests  nfslock       ricci        udev-post
functions         luci            nginx         rpcbind      winbind
gfs2              lvm2-lvmetad    oddjobd       rpcgssd
[root@server4 init.d]# chmod +x nginx    赋予执行权限
[root@server4 init.d]# /etc/init.d/nginx start  可以打开服务
Starting nginx:                                            [  OK  ]
[root@server4 init.d]# /etc/init.d/nginx reload  可以重载服务
Reloading nginx:                                           [  OK  ]
[root@server4 init.d]# /etc/init.d/nginx stop  可以关闭服务,最后测试完了记得关闭nginx不然会抢占资源
Stopping nginx:                                            [  OK  ]
[root@server4 init.d]# /etc/init.d/nginx status  可以查看nginx状态
nginx is stopped
在server1测试nginx:
[root@server1 ~]# cd /usr/local/  已经传递成功
[root@server1 local]# ls
bin               fastcgi_temp  lib      nginx       share
client_body_temp  games         lib64    proxy_temp  src
conf              html          libexec  sbin        uwsgi_temp
etc               include       logs     scgi_temp
[root@server1 local]# cd nginx/
[root@server1 nginx]# ls
client_body_temp  fastcgi_temp  logs        sbin       uwsgi_temp
conf              html          proxy_temp  scgi_temp
[root@server1 nginx]# cd logs/
[root@server1 logs]# ls
access.log  error.log  nginx.pid
[root@server1 logs]# ln -s /usr/local/nginx/sbin/nginx /sbin/   制作软链接
[root@server1 logs]# nginx
nginx: [emerg] getpwnam("nginx") failed in /usr/local/nginx/conf/nginx.conf:1
[root@server1 logs]# useradd -M -d /usr/local/nginx/ nginx  建立nginx用户组
[root@server1 logs]# id nginx
uid=500(nginx) gid=500(nginx) groups=500(nginx)
[root@server1 logs]# nginx   可以正常开启关闭nginx服务
[root@server1 logs]# nginx -s stop
[root@server1 logs]# cd /etc/init.d/  这里的脚本是自己编写的控制nginx服务的脚本
[root@server1 init.d]# ls
auditd            functions  libvirt-guests  network    restorecond  rpcsvcgssd
blk-availability  gfs2       luci            nfs        rgmanager    rsyslog
clvmd             haldaemon  lvm2-lvmetad    nfslock    rhnsd        sandbox
cman              halt       lvm2-monitor    nginx      rhsmcertd    saslauthd
corosync          ip6tables  messagebus      oddjobd    ricci        single
corosync-notifyd  ipmievd    modclusterd     postfix    rpcbind      sshd
cpglockd          iptables   netconsole      quota_nld  rpcgssd      udev-post
crond             killall    netfs           rdisc      rpcidmapd    winbind
[root@server1 init.d]# chmod +x nginx  赋予执行权限
[root@server1 init.d]# /etc/init.d/nginx start  可以打开服务
Starting nginx:                                            [  OK  ]
[root@server1 init.d]# /etc/init.d/nginx reload  可以重载服务
Reloading nginx:                                           [  OK  ]
[root@server1 init.d]# /etc/init.d/nginx stop   可以关闭服务,最后测试完了记得关闭nginx不然会抢占资源
Stopping nginx:                                            [  OK  ]
[root@server1 init.d]# /etc/init.d/nginx status   可以查看nginx状态
nginx is stopped
在网页加入脚本搭建高可用:
添加脚本:


在集群中添加虚拟IP和nginx


进行高可用和负载均衡的测试,这两个功能是独立的
高可用测试:
[root@server1 init.d]# clustat  server1工作状态
Cluster Status for westos_ha @ Fri Aug  3 10:33:57 2018
Member Status: Quorate

 Member Name                             ID   Status
 ------ ----                             ---- ------
 server1                                     1 Online, Local, rgmanager
 server4                                     2 Online, rgmanager

 Service Name                   Owner (Last)                   State
 ------- ----                   ----- ------                   -----
 service:nginx                  server1                        started

在server1关闭nginx,会自动跳转到server4:
[root@server1 init.d]# /etc/init.d/nginx stop  关闭nginx
Stopping nginx:                                            [  OK  ]
[root@server1 init.d]# clustat
Cluster Status for westos_ha @ Fri Aug  3 11:10:15 2018
Member Status: Quorate

 Member Name                             ID   Status
 ------ ----                             ---- ------
 server1                                     1 Online, Local, rgmanager
 server4                                     2 Online, rgmanager

 Service Name                   Owner (Last)                   State
 ------- ----                   ----- ------                   -----
 service:nginx                  server1                        started
[root@server1 init.d]# clustat   跳转到server4
Cluster Status for westos_ha @ Fri Aug  3 11:10:19 2018
Member Status: Quorate

 Member Name                             ID   Status
 ------ ----                             ---- ------
 server1                                     1 Online, Local, rgmanager
 server4                                     2 Online, rgmanager

 Service Name                   Owner (Last)                   State
 ------- ----                   ----- ------                   -----
service:nginx (server4) recoverable 
在网页输入172.25.254.100测试可以看到nginx的主页面:

负载均衡测试是打开两个后端服务器的阿帕其就可以测试:
server4作为调度器,在文件中写入负载均衡:
[root@server4 init.d]# cd /usr/local/nginx/conf/
[root@server4 conf]# cat nginx.conf   写入两个后端服务器的IP进行负载均衡
user nginx nginx;
worker_processes  1;
worker_cpu_affinity 01;

#error_log  logs/error.log;
#error_log  logs/error.log  notice;
#error_log  logs/error.log  info;

#pid        logs/nginx.pid;


events {
    worker_connections  47356;
}


http {

    upstream westos{
    server 172.25.254.2:80;
    server 172.25.254.3:80;
}
    server {
        listen       80;
        server_name  www.westos.org;

        location / {
            proxy_pass http://westos;
        }
}
}
后端服务器打开阿帕其拥有访问目录:


在网页进行测试可以正常轮询:


配置fence仲裁机制,为了避免一个节点在down掉之后重新加载起来会出现异常:
为什么使用fence’设备?
如果集群中一个节点通信失效,那么集群中的其他节点必须能够保证将已经失效的节点与其正在访问的共享资源
(比如共享存储)隔离开,出问题的集群节点 本身无法做到这一点,因为该集群节点在此时可能已经失去响应
(例如发生hung机),因此需要通过外部机制来实现这一点。这种方法被称为带有fence代理的隔离。
不配置隔离设备,我们没有办法知道之前断开连接的集群节点使用的资源是否已经被释放掉。如果我们没有配置
隔离代理(或者设备),系统可能错误的认为集群节点已经释放了它的资源,这将会造成数据损坏和丢失。 没有
配置隔离设备,数据的完整性就不能够被保证,集群配置将不被支持。
当隔离动作正在进行中时,不允许执行其他集群操作。这包括故障转移服务和获取GFS文件系统或GFS2文件系统的
新锁。 在隔离动作完成之前或在该集群节点已经重启并且重新加入集群之前,集群不能恢复正常运行。
隔离代理(或设备)是一个外部设备,这个设备可以被集群用于限制异常节点对共享存储的访问(或者硬重启此集群节点。
fence设备如何实现?
利用libvitr,构建模拟fence。libvirt可以管理虚拟机的开关。
在真机配置fence:
[root@foundation84 ~]# cat /etc/yum.repos.d/rhel-source.repo   在真机扩展yum源
[rhel-source]
name=Red Hat Enterprise Linux $releasever - $basearch - Source
baseurl=http://172.25.254.84/source6.5
enabled=1
gpgcheck=1
gpgkey=file:///etc/pki/rpm-gpg/RPM-GPG-KEY-redhat-release

[HighAvailability]
name=HighAvailability
baseurl=http://172.25.254.84/source6.5/HighAvailability
gpgcheck=0

[LoadBalancer]
name=LoadBalancer
baseurl=http://172.25.254.84/source6.5/LoadBalancer
gpgcheck=0

[ResilientStorage]
name=ResilientStorage
baseurl=http://172.25.254.84/source6.5/ResilientStorage
gpgcheck=0

[ScalableFileSystem]
name=ScalableFileSystem
baseurl=http://172.25.254.84/source6.5/ScalableFileSystem
gpgcheck=0

[root@foundation84 ~]# rpm -qa |grep fence 查找软件包
[root@foundation84 ~]# yum install fence-virtd-multicast.x86_64 fence-virt
fence-virtd-libvirt.x86_64    fence-virtd.x86_64
fence-virtd-multicast.x86_64  fence-virt.x86_64
fence-virtd-serial.x86_64
[root@foundation84 ~]# yum install fence-virtd-multicast.x86_64 fence-virtd.x86_64 fence-virtd-libvirt.x86_64 -y  安装所需要的服务
[root@foundation84 ~]# fence_virtd -c  进行fence的初始化
Module search path [/usr/lib64/fence-virt]:

Available backends:
    libvirt 0.1
Available listeners:
    multicast 1.2

Listener modules are responsible for accepting requests
from fencing clients.

Listener module [multicast]:

The multicast listener module is designed for use environments
where the guests and hosts may communicate over a network using
multicast.

The multicast address is the address that a client will use to
send fencing requests to fence_virtd.

Multicast IP Address [225.0.0.12]:

Using ipv4 as family.

Multicast IP Port [1229]:

Setting a preferred interface causes fence_virtd to listen only
on that interface.  Normally, it listens on all interfaces.
In environments where the virtual machines are using the host
machine as a gateway, this *must* be set (typically to virbr0).
Set to 'none' for no interface.

Interface [virbr0]: br0

The key file is the shared key information which is used to
authenticate fencing requests.  The contents of this file must
be distributed to each physical host and virtual machine within
a cluster.

Key File [/etc/cluster/fence_xvm.key]:

Backend modules are responsible for routing requests to
the appropriate hypervisor or management layer.

Backend module [libvirt]:

Configuration complete.

=== Begin Configuration ===
backends {
    libvirt {
        uri = "qemu:///system";
    }

}

listeners {
    multicast {
        port = "1229";
        family = "ipv4";
        interface = "br0";
        address = "225.0.0.12";
        key_file = "/etc/cluster/fence_xvm.key";
    }

}

fence_virtd {
    module_path = "/usr/lib64/fence-virt";
    backend = "libvirt";
    listener = "multicast";
}

=== End Configuration ===
Replace /etc/fence_virt.conf with the above [y/N]? 
[root@foundation84 ~]# mkdir /etc/cluster/  建立默认目录
[root@foundation84 ~]# ls
1209122243c61a928080eda1b4.jpg  initial-setup-ks.cfg
57d11069bcf0e.jpg               Music
aa                              Pictures
anaconda-ks.cfg                 Public
Desktop                         python-iniparse-0.4-9.el7.noarch.rpm
Documents                       rhel-server-7.1-x86_64-dvd.iso
Downloads                       Templates
Firefox_wallpaper.png           Videos
foundation-config-post.log      xfl
hostset.sh                      yum-metadata-parser-1.1.4-10.el7.x86_64.rpm
[root@foundation84 ~]# cd /etc/cluster/
[root@foundation84 cluster]# ls
[root@foundation84 cluster]# dd if=/dev/urandom of=fence_xvm.key bs=128 count=1 生成文件
1+0 records in
1+0 records out
128 bytes (128 B) copied, 0.000143483 s, 892 kB/s
[root@foundation84 cluster]# ll fence_xvm.key
-rw-r--r--. 1 root root 128 Aug  3 11:32 fence_xvm.key
[root@foundation84 cluster]# systemctl restart fence_virtd  重启服务
[root@foundation84 cluster]# ls
fence_xvm.key
[root@foundation84 cluster]# scp fence_xvm.key server1:/etc/cluster/  将生成的文件传递到server1和server4
The authenticity of host 'server1 (172.25.254.7)' can't be established.
RSA key fingerprint is 72:d4:25:cc:f0:a5:32:80:82:ce:d6:ae:09:28:45:2b.
Are you sure you want to continue connecting (yes/no)? yes
Warning: Permanently added 'server1' (RSA) to the list of known hosts.
root@server1's password:
fence_xvm.key                                 100%  128     0.1KB/s   00:00
[root@foundation84 cluster]# scp fence_xvm.key server4:/etc/cluster/
The authenticity of host 'server4 (172.25.254.5)' can't be established.
RSA key fingerprint is 72:d4:25:cc:f0:a5:32:80:82:ce:d6:ae:09:28:45:2b.
Are you sure you want to continue connecting (yes/no)? yes
Warning: Permanently added 'server4' (RSA) to the list of known hosts.
root@server4's password:
fence_xvm.key                                 100%  128     0.1KB/s   00:00
[root@foundation84 cluster]# 
在server1和server4查看fence_xvm.key是否传递成功:


在网页搭建登陆集群进行配置:
添加fence名字任意:


点击节点添加fence:

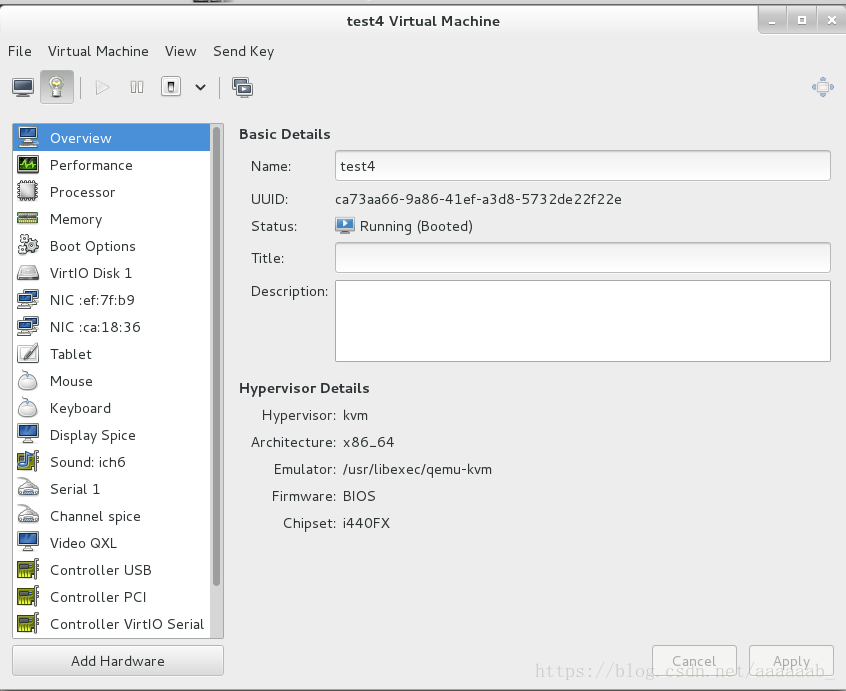
点击Add Fence Instance,选择之前设置好的vmfence,输入Domain(虚拟服务器的UUID),在另一个server4上做同样操作,名称fence2,Domain为server4的;


测试fence将正在工作的机子使用命令down掉就会断电重启:
[root@server1 cluster]# clustat
Cluster Status for westos_ha @ Fri Aug  3 14:01:53 2018
Member Status: Quorate

 Member Name                             ID   Status
 ------ ----                             ---- ------
 server1                                     1 Online, Local, rgmanager
 server4                                     2 Online, rgmanager

 Service Name                   Owner (Last)                   State
 ------- ----                   ----- ------                   -----
 service:nginx                  server4                        started
[root@server1 cluster]# fence_node server4
存储利用一个后端服务器作存储的演示:
将server2作为后端添加一块8G磁盘:


配置后端server2:
[root@serve2 ~]# fdisk -l  用命令查看设备是否添加成功

Disk /dev/vda: 21.5 GB, 21474836480 bytes
16 heads, 63 sectors/track, 41610 cylinders
Units = cylinders of 1008 * 512 = 516096 bytes
Sector size (logical/physical): 512 bytes / 512 bytes
I/O size (minimum/optimal): 512 bytes / 512 bytes
Disk identifier: 0x0003f3af

   Device Boot      Start         End      Blocks   Id  System
/dev/vda1   *           3        1018      512000   83  Linux
Partition 1 does not end on cylinder boundary.
/dev/vda2            1018       41611    20458496   8e  Linux LVM
Partition 2 does not end on cylinder boundary.

Disk /dev/vdb: 8589 MB, 8589934592 bytes
16 heads, 63 sectors/track, 16644 cylinders
Units = cylinders of 1008 * 512 = 516096 bytes
Sector size (logical/physical): 512 bytes / 512 bytes
I/O size (minimum/optimal): 512 bytes / 512 bytes
Disk identifier: 0x00000000


Disk /dev/mapper/VolGroup-lv_root: 19.9 GB, 19906166784 bytes
255 heads, 63 sectors/track, 2420 cylinders
Units = cylinders of 16065 * 512 = 8225280 bytes
Sector size (logical/physical): 512 bytes / 512 bytes
I/O size (minimum/optimal): 512 bytes / 512 bytes
Disk identifier: 0x00000000


Disk /dev/mapper/VolGroup-lv_swap: 1040 MB, 1040187392 bytes
255 heads, 63 sectors/track, 126 cylinders
Units = cylinders of 16065 * 512 = 8225280 bytes
Sector size (logical/physical): 512 bytes / 512 bytes
I/O size (minimum/optimal): 512 bytes / 512 bytes
Disk identifier: 0x00000000

[root@serve2 ~]# yum install scsi-*  安装服务
[root@serve2 ~]# vim /etc/tgt/targets.conf 编写配置文件写入nginx的IP
[root@serve2 ~]# /etc/init.d/tgtd start  开启服务
Starting SCSI target daemon:                               [  OK  ]
[root@serve2 ~]# tgt-admin -s 查看可以看到/dev/vdb
Target 1: iqn.2018-08.com.example:server.target1
    System information:
        Driver: iscsi
        State: ready
    I_T nexus information:
    LUN information:
        LUN: 0
            Type: controller
            SCSI ID: IET     00010000
            SCSI SN: beaf10
            Size: 0 MB, Block size: 1
            Online: Yes
            Removable media: No
            Prevent removal: No
            Readonly: No
            Backing store type: null
            Backing store path: None
            Backing store flags:
        LUN: 1
            Type: disk
            SCSI ID: IET     00010001
            SCSI SN: beaf11
            Size: 8590 MB, Block size: 512
            Online: Yes
            Removable media: No
            Prevent removal: No
            Readonly: No
            Backing store type: rdwr
            Backing store path: /dev/vdb
            Backing store flags:
    Account information:
    ACL information:
        172.25.254.5
        172.25.254.7
保证server1和server4同步,这就是存储的意义:
在server1进行配置在server4可以相应的同步:
[root@server1 cluster]# yum install iscsi-* 安装服务
[root@server1 cluster]# iscsiadm -m discovery -t st -p 172.25.254.2
Starting iscsid:                                           [  OK  ]
172.25.254.2:3260,1 iqn.2018-08.com.example:server.target1
[root@server1 cluster]# iscsiadm -m node -l
Logging in to [iface: default, target: iqn.2018-08.com.example:server.target1, portal: 172.25.254.2,3260] (multiple)
Login to [iface: default, target: iqn.2018-08.com.example:server.target1, portal: 172.25.254.2,3260] successful.
[root@server1 cluster]# fdisk -l  查看磁盘

Disk /dev/vda: 21.5 GB, 21474836480 bytes
16 heads, 63 sectors/track, 41610 cylinders
Units = cylinders of 1008 * 512 = 516096 bytes
Sector size (logical/physical): 512 bytes / 512 bytes
I/O size (minimum/optimal): 512 bytes / 512 bytes
Disk identifier: 0x0003f3af

   Device Boot      Start         End      Blocks   Id  System
/dev/vda1   *           3        1018      512000   83  Linux
Partition 1 does not end on cylinder boundary.
/dev/vda2            1018       41611    20458496   8e  Linux LVM
Partition 2 does not end on cylinder boundary.

Disk /dev/mapper/VolGroup-lv_root: 19.9 GB, 19906166784 bytes
255 heads, 63 sectors/track, 2420 cylinders
Units = cylinders of 16065 * 512 = 8225280 bytes
Sector size (logical/physical): 512 bytes / 512 bytes
I/O size (minimum/optimal): 512 bytes / 512 bytes
Disk identifier: 0x00000000


Disk /dev/mapper/VolGroup-lv_swap: 1040 MB, 1040187392 bytes
255 heads, 63 sectors/track, 126 cylinders
Units = cylinders of 16065 * 512 = 8225280 bytes
Sector size (logical/physical): 512 bytes / 512 bytes
I/O size (minimum/optimal): 512 bytes / 512 bytes
Disk identifier: 0x00000000


Disk /dev/sda: 8589 MB, 8589934592 bytes
64 heads, 32 sectors/track, 8192 cylinders
Units = cylinders of 2048 * 512 = 1048576 bytes
Sector size (logical/physical): 512 bytes / 512 bytes
I/O size (minimum/optimal): 512 bytes / 512 bytes
Disk identifier: 0x00000000

[root@server1 cluster]# /etc/init.d/clvmd status
clvmd (pid  1292) is running...
Clustered Volume Groups: (none)
Active clustered Logical Volumes: (none)
[root@server1 cluster]# lvs
  LV      VG       Attr       LSize   Pool Origin Data%  Move Log Cpy%Sync Convert
  lv_root VolGroup -wi-ao----  18.54g
  lv_swap VolGroup -wi-ao---- 992.00m
[root@server1 cluster]# pvcreate /dev/sda
  Physical volume "/dev/sda" successfully created
[root@server1 cluster]# pvs  可以同步查看
  PV         VG       Fmt  Attr PSize  PFree
  /dev/sda            lvm2 a--   8.00g 8.00g
/dev/vda2 VolGroup lvm2 a-- 19.51g 0 
[root@server1 cluster]#  vgs
  VG        #PV #LV #SN Attr   VSize  VFree
  VolGroup    1   2   0 wz--n- 19.51g    0
  clustervg   1   0   0 wz--nc  8.00g 8.00g
[root@server1 cluster]# lvcreate -L 4G -n demo clustervg
  Logical volume "demo" created
[root@server1 cluster]# lvs
  LV      VG        Attr       LSize   Pool Origin Data%  Move Log Cpy%Sync Convert
  lv_root VolGroup  -wi-ao----  18.54g
  lv_swap VolGroup  -wi-ao---- 992.00m
  demo    clustervg -wi-a-----   4.00g
[root@server1 cluster]# mkfs.ext4 /dev/clustervg/demo
mke2fs 1.41.12 (17-May-2010)
Filesystem label=
OS type: Linux
Block size=4096 (log=2)
Fragment size=4096 (log=2)
Stride=0 blocks, Stripe width=0 blocks
262144 inodes, 1048576 blocks
52428 blocks (5.00%) reserved for the super user
First data block=0
Maximum filesystem blocks=1073741824
32 block groups
32768 blocks per group, 32768 fragments per group
8192 inodes per group
Superblock backups stored on blocks:
    32768, 98304, 163840, 229376, 294912, 819200, 884736

Writing inode tables: done
Creating journal (32768 blocks): done
Writing superblocks and filesystem accounting information: done

This filesystem will be automatically checked every 30 mounts or
180 days, whichever comes first.  Use tune2fs -c or -i to override.
在server4进行配置:
[root@server4 ~]# yum install iscsi-*
[root@server4 ~]# iscsiadm -m discovery -t st -p 172.25.254.2
Starting iscsid:                                           [  OK  ]
172.25.254.2:3260,1 iqn.2018-08.com.example:server.target1
[root@server4 ~]# iscsiadm -m node -l
Logging in to [iface: default, target: iqn.2018-08.com.example:server.target1, portal: 172.25.254.2,3260] (multiple)
Login to [iface: default, target: iqn.2018-08.com.example:server.target1, portal: 172.25.254.2,3260] successful.
[root@server4 ~]# cat /proc/partitions
major minor  #blocks  name

 252        0   20971520 vda
 252        1     512000 vda1
 252        2   20458496 vda2
 253        0   19439616 dm-0
 253        1    1015808 dm-1
   8        0    8388608 sda
[root@server4 ~]# pvs  可以同步查看
  PV         VG       Fmt  Attr PSize  PFree
  /dev/sda            lvm2 a--   8.00g 8.00g
  /dev/vda2  VolGroup lvm2 a--  19.51g    0
[root@server4 ~]# vgcreate clustervg /dev/sda
  Clustered volume group "clustervg" successfully created
[root@server4 ~]# lvs
  LV      VG        Attr       LSize   Pool Origin Data%  Move Log Cpy%Sync Convert
  lv_root VolGroup  -wi-ao----  18.54g
  lv_swap VolGroup  -wi-ao---- 992.00m
  demo    clustervg -wi-a-----   4.00g
[root@server4 ~]# lvs
  LV      VG        Attr       LSize   Pool Origin Data%  Move Log Cpy%Sync Convert
  lv_root VolGroup  -wi-ao----  18.54g
  lv_swap VolGroup  -wi-ao---- 992.00m
demo clustervg -wi-a----- 4.00g 
在网页删除nginx服务:


在server1和server4配置mysql进行存储的效果查看:
在server1:
[root@server1 cluster]# yum install mysql -y
[root@server1 cluster]# yum install mysql-server -y
[root@server1 cluster]# ll /var/lib/mysql/
total 0
[root@server1 cluster]# ll -d /var/lib/mysql/
drwxr-xr-x 2 mysql mysql 4096 Aug  9  2013 /var/lib/mysql/
[root@server1 cluster]# cd /var/lib/mysql/
[root@server1 mysql]# ls
[root@server1 mysql]# ll -d .
drwxr-xr-x 2 mysql mysql 4096 Aug  9  2013 .
[root@server1 mysql]# mount /dev/clustervg/demo /var/lib/mysql/
[root@server1 mysql]# df
Filesystem                   1K-blocks    Used Available Use% Mounted on
/dev/mapper/VolGroup-lv_root  19134332 1158484  17003868   7% /
tmpfs                           251136   25656    225480  11% /dev/shm
/dev/vda1                       495844   33465    436779   8% /boot
/dev/mapper/clustervg-demo     4128448  139256   3779480   4% /var/lib/mysql
[root@server1 mysql]# ll -d /var/lib/mysql/
drwxr-xr-x 3 root root 4096 Aug  3 14:54 /var/lib/mysql/
[root@server1 mysql]# chown mysql.mysql /var/lib/mysql/
[root@server1 mysql]# df
Filesystem                   1K-blocks    Used Available Use% Mounted on
/dev/mapper/VolGroup-lv_root  19134332 1158484  17003868   7% /
tmpfs                           251136   25656    225480  11% /dev/shm
/dev/vda1                       495844   33465    436779   8% /boot
/dev/mapper/clustervg-demo     4128448  139256   3779480   4% /var/lib/mysql
[root@server1 mysql]# ll -d /var/lib/mysql/
drwxr-xr-x 3 mysql mysql 4096 Aug  3 14:54 /var/lib/mysql/
[root@server1 mysql]# /etc/init.d/mysqld start
Initializing MySQL database:  Installing MySQL system tables...
OK
Filling help tables...
OK

To start mysqld at boot time you have to copy
support-files/mysql.server to the right place for your system

PLEASE REMEMBER TO SET A PASSWORD FOR THE MySQL root USER !
To do so, start the server, then issue the following commands:

/usr/bin/mysqladmin -u root password 'new-password'
/usr/bin/mysqladmin -u root -h server1 password 'new-password'

Alternatively you can run:
/usr/bin/mysql_secure_installation

which will also give you the option of removing the test
databases and anonymous user created by default.  This is
strongly recommended for production servers.

See the manual for more instructions.

You can start the MySQL daemon with:
cd /usr ; /usr/bin/mysqld_safe &

You can test the MySQL daemon with mysql-test-run.pl
cd /usr/mysql-test ; perl mysql-test-run.pl

Please report any problems with the /usr/bin/mysqlbug script!

                                                           [  OK  ]
Starting mysqld:                                           [  OK  ]
[root@server1 mysql]# cd -
/etc/cluster
[root@server1 cluster]# ls
cluster.conf  cman-notify.d  fence_xvm.key
[root@server1 cluster]# cd ..
[root@server1 etc]# cd /var/lib/mysql/
[root@server1 mysql]# ls
ibdata1  ib_logfile0  ib_logfile1  lost+found  mysql  mysql.sock  test
[root@server1 mysql]# cd
[root@server1 ~]# /etc/init.d/mysqld stop
Stopping mysqld:                                           [  OK  ]
[root@server1 ~]# df
Filesystem                   1K-blocks    Used Available Use% Mounted on
/dev/mapper/VolGroup-lv_root  19134332 1158488  17003864   7% /
tmpfs                           251136   25656    225480  11% /dev/shm
/dev/vda1                       495844   33465    436779   8% /boot
/dev/mapper/clustervg-demo     4128448  160724   3758012   5% /var/lib/mysql
[root@server1 ~]# umount /var/lib/mysql/
[root@server1 ~]# df
Filesystem                   1K-blocks    Used Available Use% Mounted on
/dev/mapper/VolGroup-lv_root  19134332 1158488  17003864   7% /
tmpfs                           251136   25656    225480  11% /dev/shm
/dev/vda1                       495844   33465    436779   8% /boot
在server4:
[root@server4 ~]# yum install mysql-server
[root@server4 ~]# df
Filesystem                   1K-blocks    Used Available Use% Mounted on
/dev/mapper/VolGroup-lv_root  19134332 1224436  16937916   7% /
tmpfs                           251136   25656    225480  11% /dev/shm
/dev/vda1                       495844   33465    436779   8% /boot
[root@server4 ~]# mount /dev/clustervg/demo /var/lib/mysql/
[root@server4 ~]# df
Filesystem                   1K-blocks    Used Available Use% Mounted on
/dev/mapper/VolGroup-lv_root  19134332 1224428  16937924   7% /
tmpfs                           251136   25656    225480  11% /dev/shm
/dev/vda1                       495844   33465    436779   8% /boot
/dev/mapper/clustervg-demo     4128448  160724   3758012   5% /var/lib/mysql
[root@server4 ~]# ll -d /var/lib/mysql/
drwxr-xr-x 5 mysql mysql 4096 Aug  3 15:09 /var/lib/mysql/
[root@server4 ~]# cd /var/lib/mysql/
[root@server4 mysql]# ls
ibdata1  ib_logfile0  ib_logfile1  lost+found  mysql  test
[root@server4 mysql]# /etc/init.d/mysqld start
Starting mysqld:                                           [  OK  ]
[root@server4 mysql]# /etc/init.d/mysqld stop
Stopping mysqld:                                           [  OK  ]
[root@server4 mysql]# cd
[root@server4 ~]# umount /var/lib/mysql/
[root@server4 ~]# df
Filesystem                   1K-blocks    Used Available Use% Mounted on
/dev/mapper/VolGroup-lv_root  19134332 1224436  16937916   7% /
tmpfs                           251136   25656    225480  11% /dev/shm
/dev/vda1                       495844   33465    436779   8% /boot
在网页搭建mysql:


依次添加策略:


在server1查看:
[root@server1 ~]# clustat  查看为server1正在工作
Cluster Status for westos_ha @ Fri Aug  3 15:23:56 2018
Member Status: Quorate

 Member Name                             ID   Status
 ------ ----                             ---- ------
 server1                                     1 Online, Local, rgmanager
 server4                                     2 Online, rgmanager

 Service Name                   Owner (Last)                   State
 ------- ----                   ----- ------                   -----
 service:mysql                  server1                        started
[root@server1 ~]# mysql  可以登陆mysql
Welcome to the MySQL monitor.  Commands end with ; or \g.
Your MySQL connection id is 2
Server version: 5.1.71 Source distribution

Copyright (c) 2000, 2013, Oracle and/or its affiliates. All rights reserved.

Oracle is a registered trademark of Oracle Corporation and/or its
affiliates. Other names may be trademarks of their respective
owners.

Type 'help;' or '\h' for help. Type '\c' to clear the current input statement.
mysql> show databases;  可以查看数据库
+---------------------+
| Database            |
+---------------------+
| information_schema  |
| #mysql50#lost+found |
| mysql               |
| test                |
+---------------------+
4 rows in set (0.00 sec)

mysql> quit
Bye
[root@server1 ~]# cd /var/lib/mysql/  可以进入mysql的默认目录
[root@server1 mysql]# ll
total 20504
-rw-rw---- 1 mysql mysql 10485760 Aug  3 15:11 ibdata1
-rw-rw---- 1 mysql mysql  5242880 Aug  3 15:20 ib_logfile0
-rw-rw---- 1 mysql mysql  5242880 Aug  3 15:08 ib_logfile1
drwx------ 2 mysql mysql    16384 Aug  3 14:54 lost+found
drwx------ 2 mysql mysql     4096 Aug  3 15:08 mysql
srwxrwxrwx 1 mysql mysql        0 Aug  3 15:20 mysql.sock
drwx------ 2 mysql mysql     4096 Aug  3 15:08 test
在网页切换运行状态为server4:

[root@server4 ~]# clustat   查看当前工作是server4
Cluster Status for westos_ha @ Fri Aug  3 15:31:28 2018
Member Status: Quorate

 Member Name                             ID   Status
 ------ ----                             ---- ------
 server1                                     1 Online
 server4                                     2 Online, Local, rgmanager

 Service Name                   Owner (Last)                   State
 ------- ----                   ----- ------                   -----
 service:mysql                  server4                        started
[root@server4 ~]# df  可以自动挂载
Filesystem                   1K-blocks    Used Available Use% Mounted on
/dev/mapper/VolGroup-lv_root  19134332 1224456  16937896   7% /
tmpfs                           251136   25656    225480  11% /dev/shm
/dev/vda1                       495844   33465    436779   8% /boot
/dev/mapper/clustervg-demo     4128448  160724   3758012   5% /var/lib/mysql
[root@server4 ~]# mysql    可以登陆数据库
Welcome to the MySQL monitor.  Commands end with ; or \g.
Your MySQL connection id is 2
Server version: 5.1.71 Source distribution

Copyright (c) 2000, 2013, Oracle and/or its affiliates. All rights reserved.

Oracle is a registered trademark of Oracle Corporation and/or its
affiliates. Other names may be trademarks of their respective
owners.

Type 'help;' or '\h' for help. Type '\c' to clear the current input statement.
mysql> show databases;  可以看到数据库
+---------------------+
| Database            |
+---------------------+
| information_schema  |
| #mysql50#lost+found |
| mysql               |
| test                |
+---------------------+
4 rows in set (0.00 sec)

mysql> quit
Bye
[root@server4 ~]# quit
-bash: quit: command not found
[root@server4 ~]# ll /var/lib/mysql/  可以进入mysql的默认目录
total 20504
-rw-rw---- 1 mysql mysql 10485760 Aug  3 15:27 ibdata1
-rw-rw---- 1 mysql mysql  5242880 Aug  3 15:29 ib_logfile0
-rw-rw---- 1 mysql mysql  5242880 Aug  3 15:08 ib_logfile1
drwx------ 2 mysql mysql    16384 Aug  3 14:54 lost+found
drwx------ 2 mysql mysql     4096 Aug  3 15:08 mysql
srwxrwxrwx 1 mysql mysql        0 Aug  3 15:29 mysql.sock
drwx------ 2 mysql mysql     4096 Aug  3 15:08 test
[root@server4 ~]# 
集群文件系统的存储配置:
集群化文件系统,通过集群心跳同步文件,集群文件系统是指运行在多台计算机之上,之间通过某种方式相互
通信从而将集群内所有存储空间资源整合、虚拟化并对外提供文件访问服务的文件系统。其与NTFS、EXT等本
地文件系统的目的不同,前者是为了扩展性,后者运行在单机环境,纯粹管理块和文件之间的映射以及文件属性。
集群文件系统分为多类,按照对存储空间的访问方式,可分为共享存储型集群文件系统和分布式集群文件系统,
前者是多台计算机识别到同样的存储空间,并相互协调共同管理其上的文件,又被称为共享文件系统;后者则是
每台计算机各自提供自己的存储空间,并各自协调管理所有计算机节点中的文件。
在网页删除mysql的文件系统:


在server4当前运行端:
[root@server4 ~]# clustat  查看运行状态server4运行
Cluster Status for westos_ha @ Fri Aug  3 16:03:25 2018
Member Status: Quorate

 Member Name                             ID   Status
 ------ ----                             ---- ------
 server1                                     1 Online
 server4                                     2 Online, Local, rgmanager

 Service Name                   Owner (Last)                   State
 ------- ----                   ----- ------                   -----
 service:mysql                  server4                        started
[root@server4 ~]# df  查看挂载
Filesystem                   1K-blocks    Used Available Use% Mounted on
/dev/mapper/VolGroup-lv_root  19134332 1224496  16937856   7% /
tmpfs                           251136   25656    225480  11% /dev/shm
/dev/vda1                       495844   33465    436779   8% /boot
/dev/mapper/clustervg-demo     4128448  160724   3758012   5% /var/lib/mysql
[root@server4 ~]# lvextend -l +1023 /dev/clustervg/demo  扩展逻辑卷
  Extending logical volume demo to 8.00 GiB
  Logical volume demo successfully resized
[root@server4 ~]# resize2fs /dev/clustervg/demo    扩展整个系统
resize2fs 1.41.12 (17-May-2010)
Filesystem at /dev/clustervg/demo is mounted on /var/lib/mysql; on-line resizing required
old desc_blocks = 1, new_desc_blocks = 1
Performing an on-line resize of /dev/clustervg/demo to 2096128 (4k) blocks.
The filesystem on /dev/clustervg/demo is now 2096128 blocks long.
[root@server4 ~]# mkfs.gfs2 -j 3 -p lock_dlm -t westos_ha:mygfs2 /dev/clustervg/demo  #-j 日志 -t  名称:标签 -p集群锁格式化
This will destroy any data on /dev/clustervg/demo.
It appears to contain: symbolic link to `../dm-2'

Are you sure you want to proceed? [y/n] y

Device:                    /dev/clustervg/demo
Blocksize:                 4096
Device Size                8.00 GB (2096128 blocks)
Filesystem Size:           8.00 GB (2096126 blocks)
Journals:                  3
Resource Groups:           32
Locking Protocol:          "lock_dlm"
Lock Table:                "westos_ha:mygfs2"
UUID:                      49deb1f4-cf17-ace8-506d-506dc941cc1b

[root@server4 ~]# gfs2_tool sb /dev/clustervg/demo all  查看信息
  mh_magic = 0x01161970
  mh_type = 1
  mh_format = 100
  sb_fs_format = 1801
  sb_multihost_format = 1900
  sb_bsize = 4096
  sb_bsize_shift = 12
  no_formal_ino = 2
  no_addr = 23
  no_formal_ino = 1
  no_addr = 22
  sb_lockproto = lock_dlm
  sb_locktable = westos_ha:mygfs2
  uuid = 49deb1f4-cf17-ace8-506d-506dc941cc1b
[root@server4 ~]# vim /etc/fstab 编辑挂载文件
[root@server4 ~]# mount -a  刷新
[root@server4 ~]# df  挂载成功
Filesystem                              1K-blocks                 Used Available Use% Mounted on
/dev/mapper/VolGroup-lv_root             19134332              1224508  16937844   7% /
tmpfs                                      251136                25656    225480  11% /dev/shm
/dev/vda1                                  495844                33465    436779   8% /boot
/dev/mapper/clustervg-demo   73786976294838074368 73786976294829983256   8091112 100% /var/lib/mysql
[root@server4 ~]# cd /var/lib/mysql/
[root@server4 mysql]# ls
[root@server4 mysql]# /etc/init.d/mysqld start  打开mysqld
Starting mysqld:                                           [  OK  ]
[root@server4 mysql]# mysql  可以正常登陆
Welcome to the MySQL monitor.  Commands end with ; or \g.
Your MySQL connection id is 4
Server version: 5.1.71 Source distribution

Copyright (c) 2000, 2013, Oracle and/or its affiliates. All rights reserved.

Oracle is a registered trademark of Oracle Corporation and/or its
affiliates. Other names may be trademarks of their respective
owners.

Type 'help;' or '\h' for help. Type '\c' to clear the current input statement.

mysql> quit  可以退出
Bye
[root@server4 mysql]# 
在Server1:
[root@server1 ~]# vim /etc/fstab 与server4同步让其自动挂载
[root@server1 ~]# mount -a  刷新
[root@server1 ~]# df  挂载成功
Filesystem                   1K-blocks    Used Available Use% Mounted on
/dev/mapper/VolGroup-lv_root  19134332 1177968  16984384   7% /
tmpfs                           251136   28736    222400  12% /dev/shm
/dev/vda1                       495844   33465    436779   8% /boot
/dev/mapper/clustervg-demo     8383552  397148   7986404   5% /var/lib/mysql
[root@server1 ~]# vgs 查看逻辑卷组
  VG        #PV #LV #SN Attr   VSize  VFree
  VolGroup    1   2   0 wz--n- 19.51g    0
  clustervg   1   1   0 wz--nc  8.00g    0
[root@server1 ~]# lvs 查看逻辑卷
  LV      VG        Attr       LSize   Pool Origin Data%  Move Log Cpy%Sync Convert
  lv_root VolGroup  -wi-ao----  18.54g
  lv_swap VolGroup  -wi-ao---- 992.00m
demo clustervg -wi-ao---- 8.00g 