回顾Ray的三层架构,包括Ray AIR、Ray Core、Ray Clusters。
下面将依次介绍在Ray Clusters、Ray AIR、Ray Rllib中启动Ray的对应服务。

1.Ray cluster (本机启动)
Ray Clusters支持计算机本地启动或AWS等远程启动。
要开始使用Ray,请安装、导入并初始化Ray。
下列代码为Linux Anaconda环境中启动Ray的本地cluster。
conda create -n RayLocalCluster python=3.7
conda activate RayLocalCluster
pip install ray
在python环境中,输入以下代码初始化ray
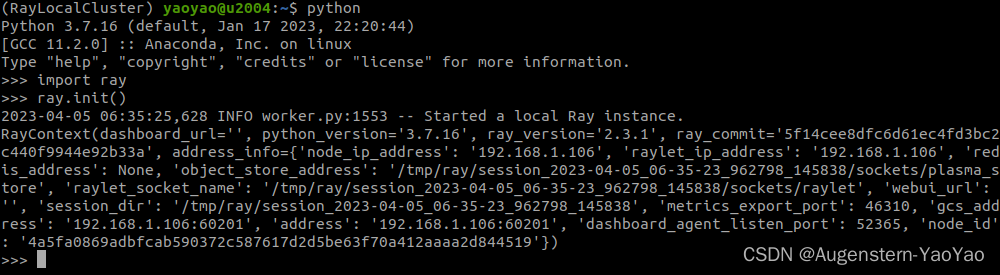
import ray
ray.init()
将出现
... INFO worker.py:1509 -- Started a local Ray instance.
View the dashboard at 127.0.0.1:8265 ...
如下图所示。
2.Ray AIR
要使用Ray的AIR运行时,请安装带有可选额外AIR包的Ray:
pip install "ray[air]"如果在Anaconda中安装,使用pip install "ray[air]" 安装。
下列代码中,xgboost_ray为Ray训练神经网络所需的求解器,ipykernel 用于vscode内调用ipython notebook。
conda create -n RayAIR python=3.7
conda activate RayAIR
pip install "ray[air]"
pip install xgboost_ray
pip install ipykernel -i https://pypi.tuna.tsinghua.edu.cn/simple
以breast_cancer数据集为例,通过Ray读取csv格式的数据集,并将数据集拆分为训练集、验证集与测试集。
import ray

# Load data.
dataset = ray.data.read_csv("s3://anonymous@air-example-data/breast_cancer.csv")

# Split data into train and validation.
train_dataset, valid_dataset = dataset.train_test_split(test_size=0.3)

# Create a test dataset by dropping the target column.
test_dataset = valid_dataset.drop_columns(cols=["target"])
使用预处理器对数据进行预处理:
# Create a preprocessor to scale some columns.
from ray.data.preprocessors import StandardScaler

preprocessor = StandardScaler(columns=["mean radius", "mean texture"])
使用XGBoost训练神经网络
pip install xgboost_ray使用XGBoostTrainer训练模型
from ray.air.config import ScalingConfig
from ray.train.xgboost import XGBoostTrainer

trainer = XGBoostTrainer(
    scaling_config=ScalingConfig(
        # Number of workers to use for data parallelism.
        num_workers=15,
        # Whether to use GPU acceleration.
        # 疑似因为没有安装cuda无法顺利调用
        use_gpu=False,
        # Make sure to leave some CPUs free for Ray Data operations.
        _max_cpu_fraction_per_node=0.9,
    ),
    label_column="target",
    num_boost_round=20, # 控制XGBoost训练轮数的参数,它表示要执行的提升迭代次数(也称为弱学习器的数量)
    params={
        # XGBoost specific params
        "objective": "binary:logistic",
        # "tree_method": "gpu_hist",  # uncomment this to use GPUs.
        "eval_metric": ["logloss", "error"],
    },
    datasets={"train": train_dataset, "valid": valid_dataset},
    preprocessor=preprocessor,
)
result = trainer.fit()
print(result.metrics)
因为数据集很小,计算过程很快,几秒钟完成。过程与结果的输出如下图。

配置调参
from ray import tune

param_space = {"params": {"max_depth": tune.randint(1, 9)}}
metric = "train-logloss"
使用Ray Tune运行超参数调整以找到最佳模型
from ray.tune.tuner import Tuner, TuneConfig
tuner = Tuner(
trainer,
param_space=param_space,
tune_config=TuneConfig(num_samples=5, metric=metric, mode="min"),
)
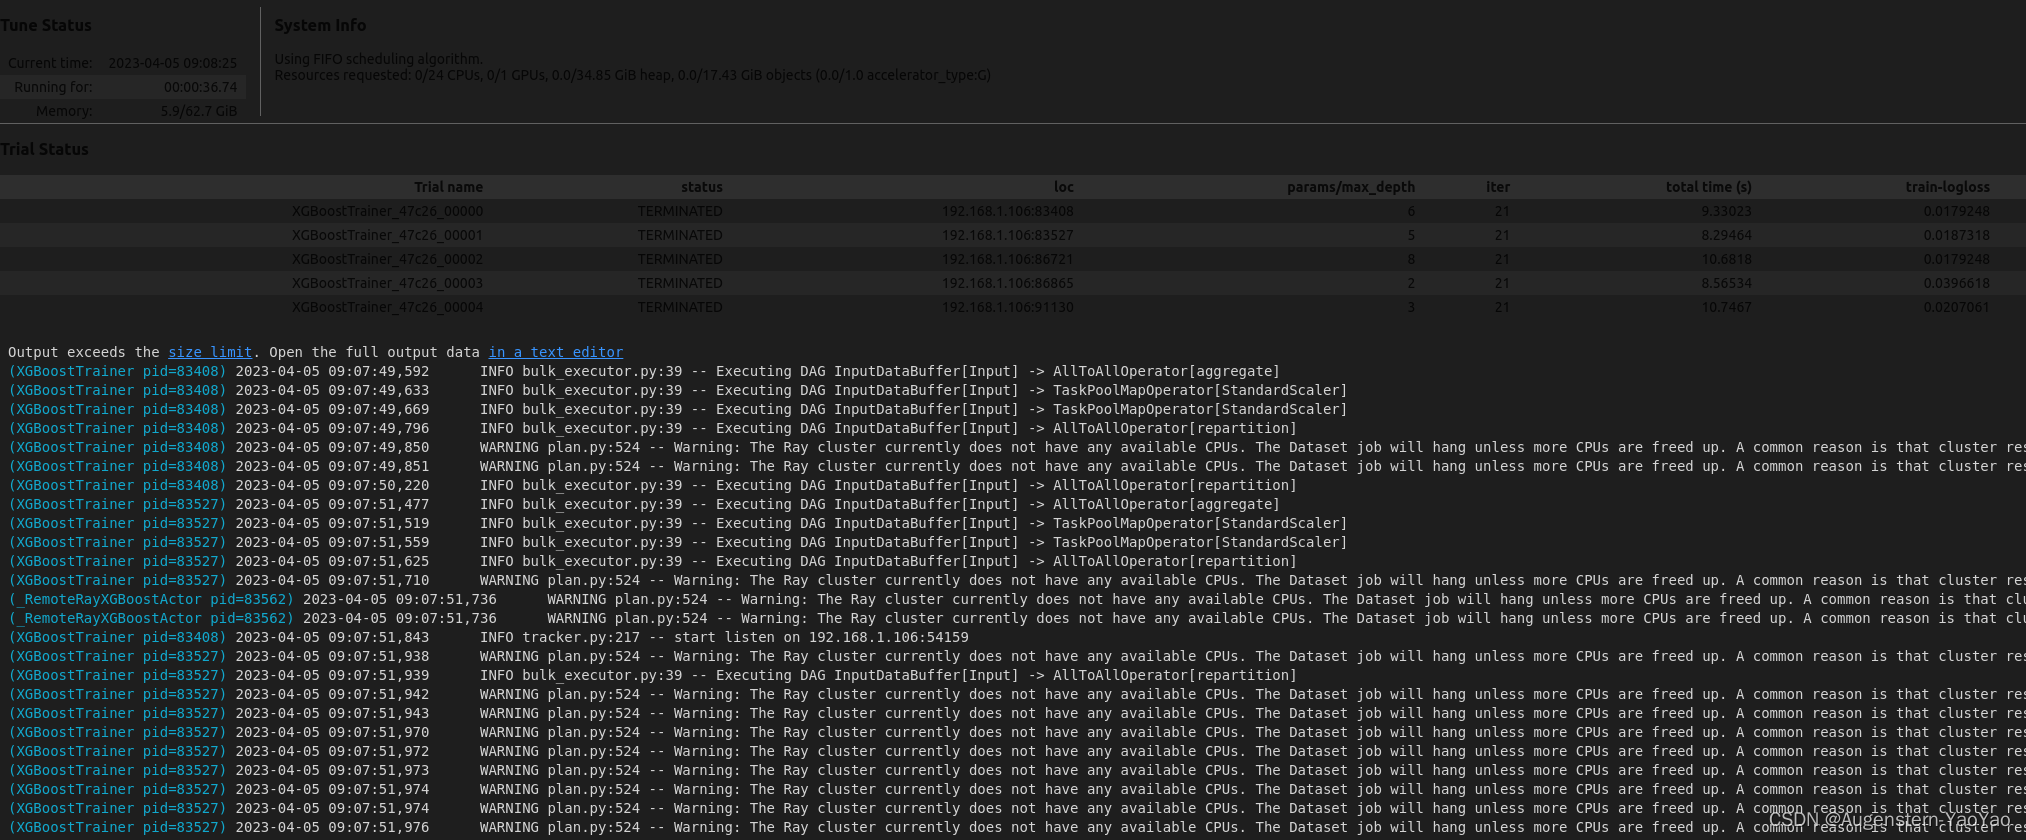
result_grid = tuner.fit()
best_result = result_grid.get_best_result()
print("Best result:", best_result)过程与结果的输出如下图。
使用BatchPredictor对训练好的模型进行批量预测
from ray.train.batch_predictor import BatchPredictor
from ray.train.xgboost import XGBoostPredictor

# You can also create a checkpoint from a trained model using
# `XGBoostCheckpoint.from_model`.
checkpoint = best_result.checkpoint

batch_predictor = BatchPredictor.from_checkpoint(checkpoint, XGBoostPredictor)

predicted_probabilities = batch_predictor.predict(test_dataset)
predicted_probabilities.show()
过程与结果的输出如下
2023-04-05 09:08:25,139	INFO bulk_executor.py:39 -- Executing DAG InputDataBuffer[Input] -> TaskPoolMapOperator[MapBatches(<lambda>)]
...
{'predictions': 0.9964613318443298}
{'predictions': 0.9938202500343323}
{'predictions': 0.0035424428060650826}
...
{'predictions': 0.0035424428060650826}
通过比较具有不同超参数的神经网络的prediction性能,以选择最优的结果。