一.概述
最近疏于写博客,接下来会陆续更新这段时间OpenGLES的一些开发过程。
前两篇OpenGLES的博客讲解了怎样使用OpenGLES实现相机普通预览和多宫格滤镜
在相机实现过程中,虽然使用到了纹理,但只是在生成一个纹理之后,使用纹理去创建SurfaceTexture,然后再用SurfaceTexture创建Surface,并没有使用纹理进行图片渲染,也就是纹理贴图。
之前的博文《OpenGL:纹理》中使用OpenGL实现了正方形箱子的纹理贴图,而且也详细介绍了纹理的生成、纹理坐标、设置过滤、环绕方式等。
本篇博客要讲解是OpenGLES的纹理贴图,两者原理其实是一样的,但是本篇博客更偏向于实际应用。
以下主要是代码演示,跟随代码注释了解实现过程。
二.Render类:
public class ImgRender implements GLSurfaceView.Renderer {
    private final String TAG = ImgRender.class.getSimpleName();

    private final Context mContext;

    private float vertexData[] = {
            -1f, -1f,  //左下
            1f, -1f,   //右下
            -1f, 1f,   //左上
            1f, 1f,    //右上
    };

    //Android 纹理原点在左上角
    private float textureData[] = {
            0.0f, 1.0f,  //左上
            1.0f, 1.0f,  //右上
            0.0f, 0.0f,  //左下
            1.0f, 0.0f,  //右下
    };

    //shader程序/渲染器
    private int shaderProgram;
    //纹理id
    private int[] textureId = new int[1];
    //顶点坐标
    private int aPosition;
    //纹理坐标
    private int aTexCoord;
    //采样器
    private int sampler;
    //顶点数据缓存
    private FloatBuffer vertexBuffer;
    //纹理数据缓存
    private FloatBuffer textureBuffer;
    //一个顶点有几个数据
    private int VERTEX_POSITION_SIZE = 2;
    //一个纹理点有几个数据
    private int TEXTURE_POSITION_SIZE = 2;

    public ImgRender(Context context) {
        mContext = context;
    }

    @Override
    public void onSurfaceCreated(GL10 gl, EGLConfig config) {
        Log.v(TAG, "onSurfaceCreated()");
        glClearColor(0.0f, 0.0f, 0.0f, 1.0f);
        initGLES();
    }

    public void initGLES() {
        Log.v(TAG, "initGLES!");

        /************** 着色器程序/渲染器 **************/
        //创建并连接 着色器程序
        shaderProgram = ShaderUtils.createAndLinkProgram(mContext,
                "img_vertex_shader.glsl",
                "img_fragtment_shader.glsl");
        if (shaderProgram == 0) {
            Log.v(TAG, "create And Link ShaderProgram Fail!");
            return;
        }
        //使用着色器源程序
        glUseProgram(shaderProgram);

        /************** 着色器变量 **************/
        //从着色器程序中获取各个变量
        aPosition = glGetAttribLocation(shaderProgram, "aPosition");
        aTexCoord = glGetAttribLocation(shaderProgram, "aTexCoord");
        sampler = glGetUniformLocation(shaderProgram, "sampler");
        //将片段着色器的采样器(纹理属性:sampler)设置为0号单元
        glUniform1i(sampler, 0);

        vertexBuffer = ShaderUtils.getFloatBuffer(vertexData);
        textureBuffer = ShaderUtils.getFloatBuffer(textureData);

        //创建纹理对象
        glGenTextures(textureId.length, textureId, 0);

        TextureUtils.LoadTexture(mContext, textureId[0], R.drawable.bg2);
    }

    @Override
    public void onSurfaceChanged(GL10 gl, int width, int height) {
        Log.v(TAG, "onSurfaceChanged(): " + width + " x " + height);

        glViewport(0, 0, width, height);
    }

    @Override
    public void onDrawFrame(GL10 gl) {
        //Log.v(TAG, "onDrawFrame()");
        glClear(GL_COLOR_BUFFER_BIT);

        /********* 顶点操作 **********/
        glEnableVertexAttribArray(aPosition);
        glEnableVertexAttribArray(aTexCoord);

        glVertexAttribPointer(aPosition, VERTEX_POSITION_SIZE, GL_FLOAT, false, 2 * 4, vertexBuffer);
        glVertexAttribPointer(aTexCoord, TEXTURE_POSITION_SIZE, GL_FLOAT, false, 2 * 4, textureBuffer);

        /********* 纹理操作:激活、绑定 **********/
        glActiveTexture(GL_TEXTURE);
        glBindTexture(GL_TEXTURE_2D, textureId[0]);

        /********* 绘制 **********/
        //绘制vertexData.length/2即4个点
        glDrawArrays(GL_TRIANGLE_STRIP, 0, vertexData.length / 2);
        /********* 纹理操作:解除绑定 **********/
        glBindTexture(GL_TEXTURE_2D, 0);

        //关闭顶点数组的句柄
        glDisableVertexAttribArray(aPosition);
        glDisableVertexAttribArray(aTexCoord);
    }
}
三.ShaderUtils相关函数:
3.1 createAndLinkProgram()
    /*
     * 创建和链接着色器程序
     * 参数:顶点着色器、片段着色器程序ResId
     * 返回:成功创建、链接了顶点和片段着色器的着色器程序Id
     */
    public static int createAndLinkProgram(Context context, String vertexShaderFN, String fragShaderFN) {
        //创建着色器程序
        int shaderProgram = glCreateProgram();
        if (shaderProgram == 0) {
            Log.e(TAG, "Failed to create shaderProgram ");
            return 0;
        }

        //获取顶点着色器对象
        int vertexShader = loadShader(GL_VERTEX_SHADER, loadShaderSource(context, vertexShaderFN));
        if (0 == vertexShader) {
            Log.e(TAG, "Failed to load vertexShader");
            return 0;
        }

        //获取片段着色器对象
        int fragmentShader = loadShader(GL_FRAGMENT_SHADER, loadShaderSource(context, fragShaderFN));
        if (0 == fragmentShader) {
            Log.e(TAG, "Failed to load fragmentShader");
            return 0;
        }

        //绑定顶点着色器到着色器程序
        glAttachShader(shaderProgram, vertexShader);
        //绑定片段着色器到着色器程序
        glAttachShader(shaderProgram, fragmentShader);

        //链接着色器程序
        glLinkProgram(shaderProgram);
        //检查着色器链接状态
        int[] linked = new int[1];
        glGetProgramiv(shaderProgram, GL_LINK_STATUS, linked, 0);
        if (linked[0] == 0) {
            glDeleteProgram(shaderProgram);
            Log.e(TAG, "Failed to link shaderProgram");
            return 0;
        }

        return shaderProgram;
    }
3.2 getFloatBuffer()
    public static FloatBuffer getFloatBuffer(float[] array) {
        //将顶点数据拷贝映射到 native 内存中,以便opengl能够访问
        FloatBuffer buffer = ByteBuffer
                .allocateDirect(array.length * BYTES_PER_FLOAT)//直接分配 native 内存,不会被gc
                .order(ByteOrder.nativeOrder())//和本地平台保持一致的字节序(大/小头)
                .asFloatBuffer();//将底层字节映射到FloatBuffer实例,方便使用

        buffer.put(array)//将顶点拷贝到 native 内存中
                .position(0);//每次 put position 都会 + 1,需要在绘制前重置为0

        return buffer;
    }
四.TextureUtils相关函数
4.1 LoadTexture()
    //纹理Id由外部传入
    public static void LoadTexture(Context context, int textureId, int bitmapResId) {
        //绑定纹理:将纹理放到当前单元的 GL_TEXTURE_BINDING_EXTERNAL_OES 目标对象中
        glBindTexture(GL_TEXTURE_2D, textureId);
        //配置纹理:过滤方式
        glTexParameterf(GL_TEXTURE_2D, GL_TEXTURE_MIN_FILTER, GL_NEAREST);
        glTexParameterf(GL_TEXTURE_2D, GL_TEXTURE_MAG_FILTER, GL_LINEAR);
        glTexParameterf(GL_TEXTURE_2D, GL_TEXTURE_WRAP_S, GL_CLAMP_TO_EDGE);
        glTexParameterf(GL_TEXTURE_2D, GL_TEXTURE_WRAP_T, GL_CLAMP_TO_EDGE);

        /************* bitmap **************/
        //获取图片的 bitmap
        Bitmap bitmap = BitmapFactory.decodeResource(context.getResources(), bitmapResId);
        //绑定 bitmap 到textureIds[1]纹理
        GLUtils.texImage2D(GL_TEXTURE_2D, 0, bitmap, 0);
        bitmap.recycle();//用完及时回收

        //解绑纹理 指的是离开对 纹理的配置,进入下一个状态
        glBindTexture(GL_TEXTURE_2D, 0);
    }
五.着色器代码
5.1 img_vertex_shader.glsl
#version 300 es

layout (location = 0) in vec4 aPosition;         //把顶点坐标给这个变量, 确定要画画的形状
layout (location = 1) in vec4 aTexCoord;         //接收纹理坐标,接收采样器采样图片的坐标

//传给片元着色器 像素点
out vec2 vTexCoord;

void main()
{
    //内置变量 gl_Position ,我们把顶点数据赋值给这个变量 opengl就知道它要画什么形状了
    gl_Position = aPosition;
    vTexCoord = aTexCoord.xy;
}
5.2 img_fragtment_shader.glsl
#version 300 es
#extension GL_OES_EGL_image_external_essl3 : require
precision mediump float;

in vec2 vTexCoord; //纹理坐标,图片当中的坐标点

uniform sampler2D sampler;  //图片,采样器

out vec4 outColor;

void main(){
    outColor = texture(sampler, vTexCoord);
}
六.Render、GLSurfaceView等实现过程
GLRender及其在GLSurfaceView中的设置:
mGLSurfaceView = rootView.findViewById(R.id.gl_SurfaceView);
//设置GLES版本
mGLSurfaceView.setEGLContextClientVersion(3);
//创建Render对象,并将其设置到GLSurfaceView
mImgRender = new ImgRender(getActivity());
mGLSurfaceView.setRenderer(mImgRender);
mGLSurfaceView.setRenderMode(GLSurfaceView.RENDERMODE_CONTINUOUSLY);
还有GLSurfeaceView在Activity或Fragment中的加载,这些常规操作的代码就不再详细演示了。根据自己实际开发过程实现就行。
七.注意点
1.片段着色器中采样器的使用
有一点需要注意的是,在之前实现相机预览的片段着色器代码中,使用的采样器是:
uniform samplerExternalOES sCameraTexture;
现在渲染图片时使用的采样器是:
uniform sampler2D sampler;
在实现OpenGLES纹理贴图过程中,最初直接延用了实现相机预览时的采样器samplerExternalOES,但是图片始终无法渲染成功。
这是因为"采样器:samplerExternalOES"是OpenGLES中专门用来采样YUV数据的,所以在实现相机预览时要使用它,但是渲染图片时,就要用常规的"采样器Sampler2D"了。
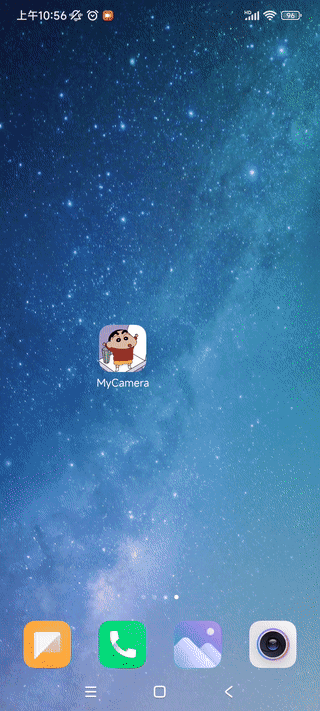
八.最终效果
使用了一张宇宙星空图,请忽略"打开应用,点击按钮"过程。
最后那张宇宙星空图的呈现,就是本次OpenGLES博文所要实现的纹理贴图的最终效果: