前言
光源是能够发出光的物体或设备,它能够发出光线,使我们看到周围的环境和物体。常见的光源包括太阳、灯泡、蜡烛、火把、手电筒等。根据发光方式不同,光源可以分为自发光源和非自发光源。自发光源是指能够自行发出光线的物体,如太阳等;而非自发光源是指需要外部能量刺激才能发出光线的物体,如灯泡、荧光棒等。
一、光源
1.光源
在Three.js中,提供了不同类型的光源,每种光源的不同之处在于其照射场景的方式和效果。下面是常用的几种类型的光源以及它们的说明:
-
点光源(THREE.PointLight):将光源放置在场景中的一个点上,向所有方向发出光线。常用于模拟灯泡、蜡烛等点源光照射的效果。
-
平行光源(THREE.DirectionalLight):将光源设置为无限远,向着所有方向照射光线,常用于模拟太阳光的照射效果。
-
聚光灯光源(THREE.SpotLight):将光源放置在场景中的一个点上,向特定方向照射光线,可以通过控制聚光灯的角度和范围,模拟出不同的效果。常用于模拟手电筒、舞台灯光等效果。
-
环境光(THREE.AmbientLight):将光源设置为环境光,不会产生任何阴影。它会均匀地照亮场景中的所有物体,常用于为场景增加一定的亮度。
-
半球光(THREE.HemisphereLight):将光源设置为半球光源,用于模拟室外环境中的天空光和地面反射光。可以控制地面颜色和天空颜色,使场景更加逼真。
-
面光源 (THREE.AreaLight):散发光线的平面,不是一个点。
-
镜面眩光(THREE.LensFlare): 不是光源,但是可以为光源添加眩光效果。
以上就是常用的几种灯光类型和它们的说明,不同的灯光类型可以组合使用,实现更加丰富的场景效果。
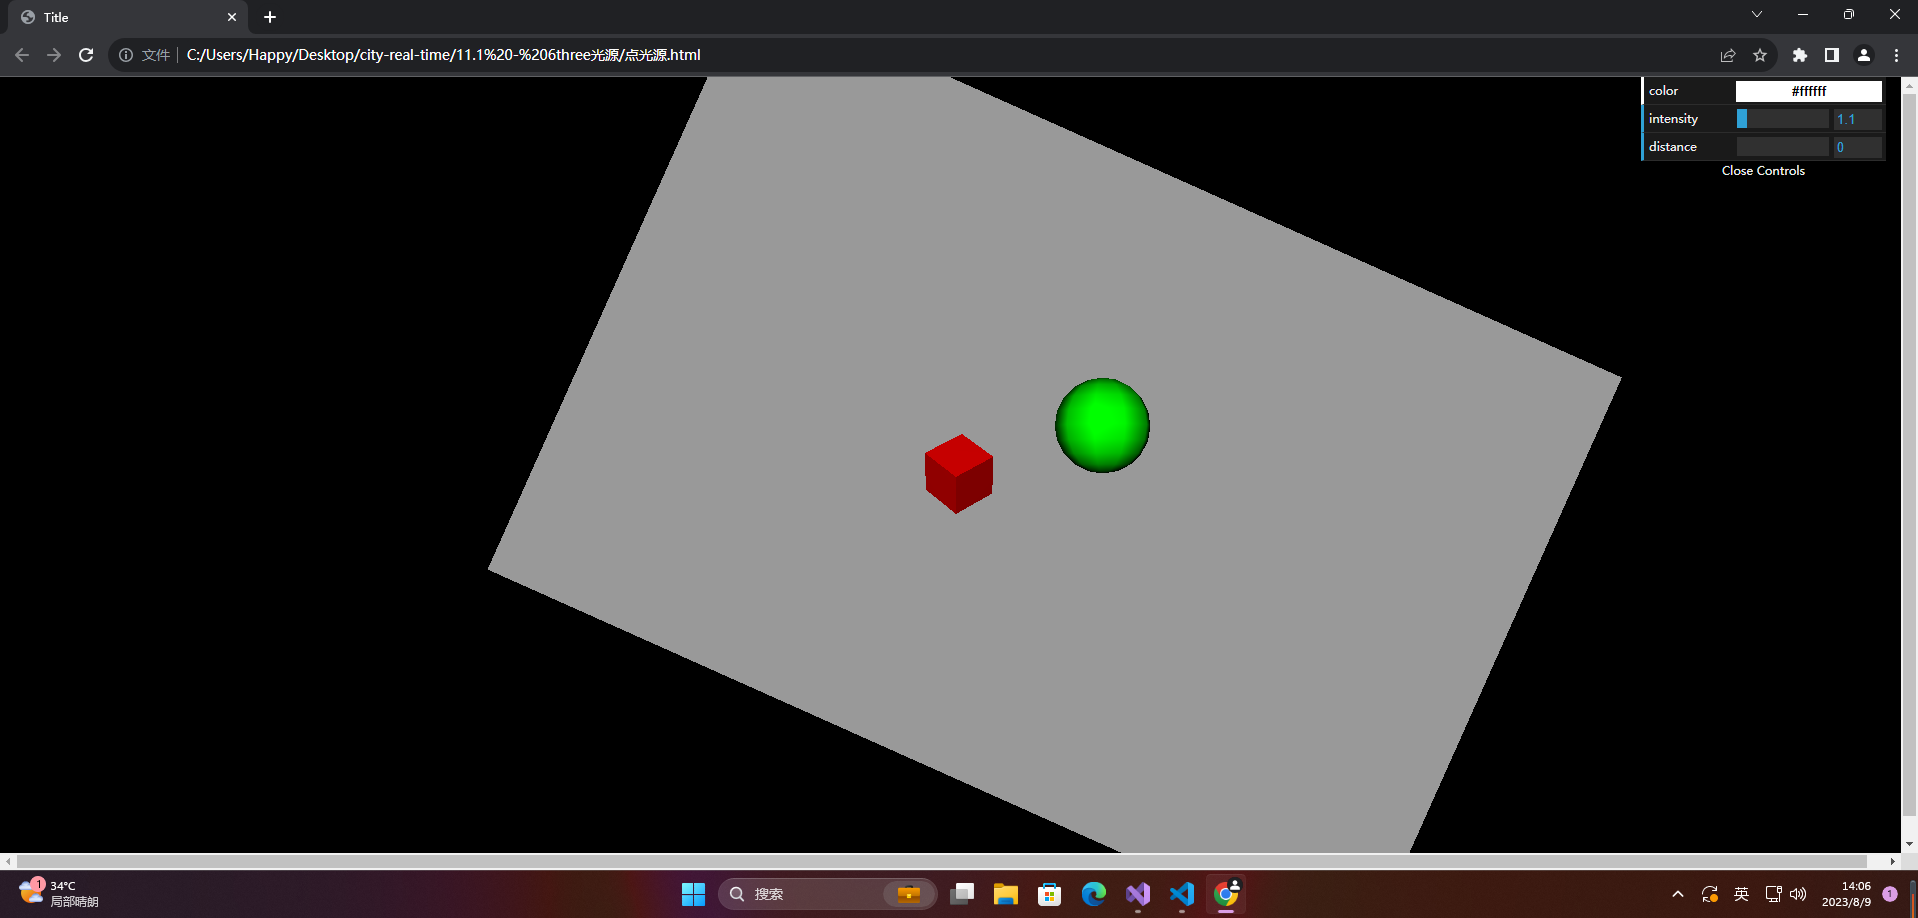
1.1 点光源
在Three.js中,THREE.PointLight表示一个点光源,它向所有方向发出光线。以下是THREE.PointLight的参数及其含义:
- color:光源的颜色,默认值为0xffffff(白色)。
- intensity:光源的强度,默认值为1,可以调整光源的亮度。
- distance:光源的可照射距离,默认值为0,表示光源照射距离无限远。
- position:光源的位置,默认值为(0,0,0)。
- castShadow:一个布尔值,表示是否启用点光源的阴影功能。默认值为 false,表示不产生阴影。如果需要为场景中的物体产生阴影,需要将其设置为 true。
其中,position表示光源在场景中的位置,可以通过x、y、z三个属性分别指定。例如:
<!DOCTYPE html>
<html lang="en">
<head>
  <meta charset="UTF-8">
  <title>Title</title>
  <style>
    *{


      margin: 0;
      padding: 0;
    }
  </style>
  <script src="../lib/three/three.js"></script>
  <script src="../lib/three/dat.gui.js"></script>
  <script src="../controls/index.js"></script>
</head>
<body>

</body>
</html>

<script>
  // 创建一个场景
  const scene = new THREE.Scene();

  // 创建一个相机 视点
  const camera = new THREE.PerspectiveCamera(45, window.innerWidth / window.innerHeight, 1, 1000);
  // 设置相机的位置
  camera.position.set(0,0,20);

  // 创建一个渲染器
  const renderer = new THREE.WebGLRenderer();
  // 设置渲染器尺寸
  renderer.setSize(window.innerWidth, window.innerHeight);

  document.body.appendChild(renderer.domElement);

  // 添加一个立方体
  // 定义了一个立方体的对象
  const cubeGeometry = new THREE.BoxGeometry(1, 1, 1);

  // 创建材质
  const cubeMaterial = new THREE.MeshLambertMaterial({

     color: 0xff0000, wireframe: false });

  const cube = new THREE.Mesh(cubeGeometry, cubeMaterial);

  // 添加到场景里
  scene.add(cube);

  // 添加一个球体
  const sphereGeometry = new THREE.SphereGeometry(1,10,10);
  const sphereMaterial = new THREE.MeshLambertMaterial({

     color: 0x00ff00, wireframe: false });
  const sphere = new THREE.Mesh(sphereGeometry, sphereMaterial);

  sphere.position.x = 3;
  sphere.position.y = 1;

  scene.add(sphere);

  // 添加一个平面,用来接收阴影
  const planeGeometry = new THREE.PlaneGeometry(20,30);
  const planeMaterial = new THREE.MeshBasicMaterial({

     color: 0x999999 });
  const plane = new THREE.Mesh(planeGeometry, planeMaterial);

  plane.rotateZ(20);
  plane.position.z = -10;
  plane.position.x = 3;

  scene.add(plane);

  // 添加环境光
  const ambientLight = new THREE.AmbientLight(0x000000);
  scene.add(ambientLight);

  // 添加灯光
  const pointLight = new THREE.PointLight(0xffffff);
  pointLight.position.set(-10,10,90);
  scene.add(pointLight);

  // 让两个三维物体 产生阴影,球体立方体,  使用平面接收阴影
  cube.castShadow = true;
  sphere.castShadow = true;
  // 使用平面接收阴影
  plane.receiveShadow = true;
  // 设置灯光开启阴影
  pointLight.castShadow = true;
  renderer.shadowMapEnabled = true;

  initControls(pointLight);
  const animation = () => {


    cube.rotation.x += 0.01;
    cube.rotation.y += 0.01;

    // 渲染
    renderer.render(scene, camera);

    requestAnimationFrame(animation);
  }
  animation()
</script>
1.2 平行光
在Three.js中,平行光是一种类型的光源,它是一种无限远的、平行的光线。平行光属性包括:
-
color:平行光的颜色,默认值为白色(0xffffff)。
-
intensity:平行光的强度,默认值为1。
-
position:三维向量,表示平行光的位置,默认值为{x: 0, y: 0, z: 1},即朝着z轴正方向。
-
target:三维向量,表示平行光的朝向,默认值为{x: 0, y: 0, z: 0},即朝向原点。
-
shadow:平行光的阴影属性,可以通过设置其属性来开启或关闭平行光的阴影效果。shadow属性包括:
-
castShadow:是否产生阴影,默认为false。
-
shadowMapWidth:阴影贴图的宽度,默认为512。
-
shadowMapHeight:阴影贴图的高度,默认为512。
-
shadowBias:阴影偏移量,默认为0。
-
shadowCameraNear:阴影相机近平面,默认为1。
-
shadowCameraFar:阴影相机远平面,默认为1000。
-
shadowCameraLeft:阴影相机左侧截面,默认为-500。
-
shadowCameraRight:阴影相机右侧截面,默认为500。
-
shadowCameraTop:阴影相机顶部截面,默认为500。
-
shadowCameraBottom:阴影相机底部截面,默认为-500。
-
平行光的属性可以通过修改THREE.DirectionalLight类的实例对象的属性来进行设置,例如:
<!DOCTYPE html>
<html lang="en">
<head>
  <meta charset="UTF-8">
  <title>Title</title>
  <style>
    *{


      margin: 0;
      padding: 0;
    }
  </style>
  <script src="../lib/three/three.js"></script>
  <script src="../lib/three/dat.gui.js"></script>
  <script src="../controls/index.js"></script>
</head>
<body>

</body>
</html>

<script>
  // 创建一个场景
  const scene = new THREE.Scene();

  // 创建一个相机 视点
  const camera = new THREE.PerspectiveCamera(45, window.innerWidth / window.innerHeight, 1, 1000);
  // 设置相机的位置
  camera.position.set(0,0,20);

  // 创建一个渲染器
  const renderer = new THREE.WebGLRenderer();
  // 设置渲染器尺寸
  renderer.setSize(window.innerWidth, window.innerHeight);

  document.body.appendChild(renderer.domElement);

  // 添加一个立方体
  // 定义了一个立方体的对象
  const cubeGeometry = new THREE.BoxGeometry(1, 1, 1);

  // 创建材质
  const cubeMaterial = new THREE.MeshLambertMaterial({

     color: 0xff0000, wireframe: false });

  const cube = new THREE.Mesh(cubeGeometry, cubeMaterial);

  // 添加到场景里
  scene.add(cube);

  // 添加一个球体
  const sphereGeometry = new THREE.SphereGeometry(1,10,10);
  const sphereMaterial = new THREE.MeshLambertMaterial({

     color: 0x00ff00, wireframe: false });
  const sphere = new THREE.Mesh(sphereGeometry, sphereMaterial);

  sphere.position.x = 3;
  sphere.position.y = 1;

  scene.add(sphere);

  // 添加一个平面,用来接收阴影
  const planeGeometry = new THREE.PlaneGeometry(20,30);
  const planeMaterial = new THREE.MeshBasicMaterial({

     color: 0x999999 });
  const plane = new THREE.Mesh(planeGeometry, planeMaterial);

  plane.rotateZ(20);
  plane.position.z = -10;
  plane.position.x = 3;

  scene.add(plane);

  // 添加环境光
  const ambientLight = new THREE.AmbientLight(0x000000);
  scene.add(ambientLight);

  // 添加灯光
  const directionalLight = new THREE.DirectionalLight(0xffffff);
  directionalLight.position.set(-10,10,90);
  scene.add(directionalLight);

  // 让两个三维物体 产生阴影,球体立方体,  使用平面接收阴影
  cube.castShadow = true;
  sphere.castShadow = true;
  // 使用平面接收阴影
  plane.receiveShadow = true;
  // 设置灯光开启阴影
  directionalLight.castShadow = true;
  renderer.shadowMapEnabled = true;

  directionalLight.shadowCameraLeft = -50;
  directionalLight.shadowCameraRight = 50;
  directionalLight.shadowCameraTop = 50;
  directionalLight.shadowCameraBottom = -50;
  directionalLight.shadowCameraNear = 2;
  directionalLight.shadowCameraFar = 200;

  directionalLight.shadowMapWidth = 4096;
  directionalLight.shadowMapHeight = 4096;

  initControls(directionalLight);
  const animation = () => {


    cube.rotation.x += 0.01;
    cube.rotation.y += 0.01;

    // 渲染
    renderer.render(scene, camera);

    requestAnimationFrame(animation);
  }
  animation()
</script>

1.3 聚光灯
在Three.js中,聚光灯是一种特殊的光源,它模拟了一个类似于手电筒的效果。聚光灯有以下几个属性:
-
color:聚光灯的颜色,默认值为0xffffff。
-
intensity:聚光灯的强度,即光照的亮度。默认值为1.0。
-
distance:聚光灯的最大照射距离,即光线可以到达的最远距离。如果设为0,则表示距离无限远。默认值为0。
-
angle:聚光灯的发散角度,即光线向四周散射的角度。默认值为Math.PI/3。
-
exponent:沿着光照距离的衰退量。默认值为10。
-
target:聚光灯的目标对象。如果设置了目标对象,聚光灯会对准目标对象。
-
position:聚光灯的位置。
-
lookAt:聚光灯的方向,即它指向的目标点。
可以通过以下代码创建一个带有聚光灯的场景:
<!DOCTYPE html>
<html lang="en">
<head>
  <meta charset="UTF-8">
  <title>Title</title>
  <style>
    *{


      margin: 0;
      padding: 0;
    }
  </style>
  <script src="../lib/three/three.js"></script>
  <script src="../lib/three/dat.gui.js"></script>
  <script src="../controls/index.js"></script>
</head>
<body>

</body>
</html>

<script>
  // 创建一个场景
  const scene = new THREE.Scene();

  // 创建一个相机 视点
  const camera = new THREE.PerspectiveCamera(45, window.innerWidth / window.innerHeight, 1, 1000);
  // 设置相机的位置
  camera.position.set(0,0,20);

  // 创建一个渲染器
  const renderer = new THREE.WebGLRenderer();
  // 设置渲染器尺寸
  renderer.setSize(window.innerWidth, window.innerHeight);

  document.body.appendChild(renderer.domElement);

  // 添加一个立方体
  // 定义了一个立方体的对象
  const cubeGeometry = new THREE.BoxGeometry(1, 1, 1);

  // 创建材质
  const cubeMaterial = new THREE.MeshLambertMaterial({

       color: 0xff0000, wireframe: false });

  const cube = new THREE.Mesh(cubeGeometry, cubeMaterial);

  // 添加到场景里
  scene.add(cube);

  // 添加一个球体
  const sphereGeometry = new THREE.SphereGeometry(1,10,10);
  const sphereMaterial = new THREE.MeshLambertMaterial({

       color: 0x00ff00, wireframe: false });
  const sphere = new THREE.Mesh(sphereGeometry, sphereMaterial);

  sphere.position.x = 3;
  sphere.position.y = 1;

  scene.add(sphere);

  // 添加一个平面,用来接收阴影
  const planeGeometry = new THREE.PlaneGeometry(20,30);
  const planeMaterial = new THREE.MeshBasicMaterial({

       color: 0x999999 });
  const plane = new THREE.Mesh(planeGeometry, planeMaterial);

  plane.rotateZ(20);
  plane.position.z = -10;
  plane.position.x = 3;

  scene.add(plane);

  // 添加灯光
  const spotLight = new THREE.SpotLight(0xffffff);
  spotLight.position.set(-10,10,90);
  scene.add(spotLight);
  spotLight.shadowMapWidth = 4096;
  spotLight.shadowMapHeight = 4096;

  // 让两个三维物体 产生阴影,球体立方体,  使用平面接收阴影
  cube.castShadow = true;
  sphere.castShadow = true;
  // 使用平面接收阴影
  plane.receiveShadow = true;
  // 设置灯光开启阴影
  spotLight.castShadow = true;
  renderer.shadowMapEnabled = true;

  initControls(spotLight);

  const animation = () => {


    cube.rotation.x += 0.01;
    cube.rotation.y += 0.01;

    // 渲染
    renderer.render(scene, camera);

    requestAnimationFrame(animation);
  }
  animation()
</script>
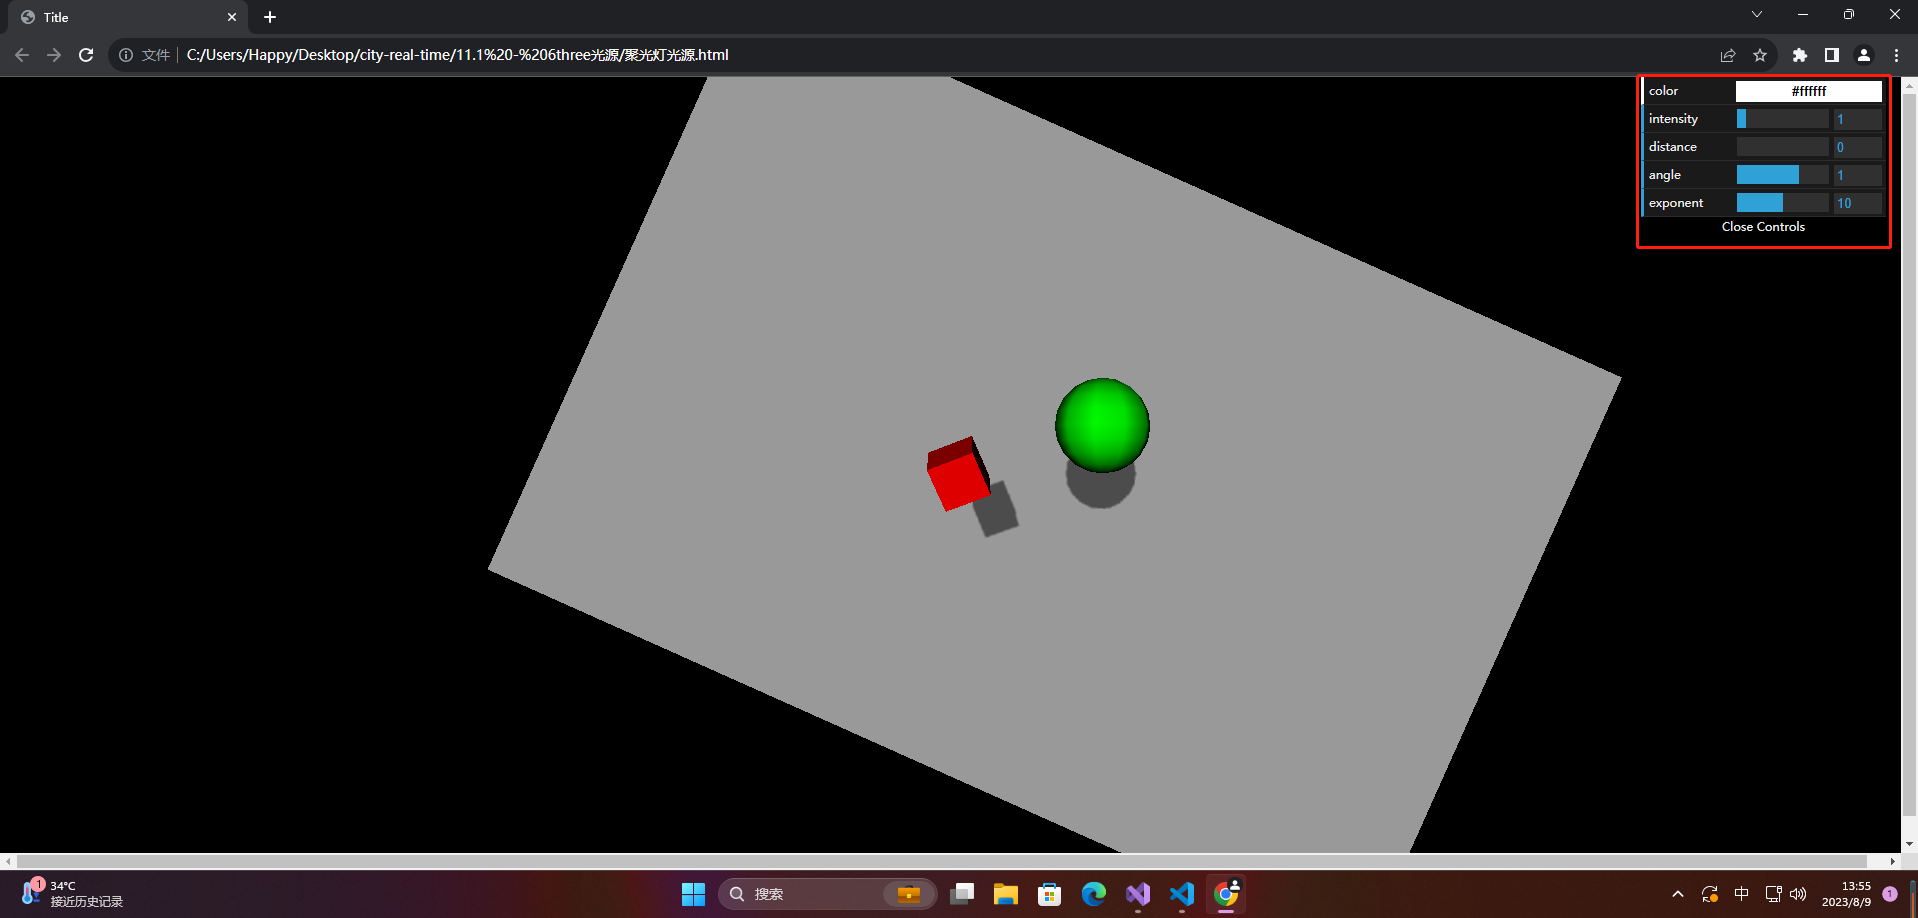
可以通过修改聚光灯的属性值,来调整光照的效果。
1.4 环境光
环境光是一种全局光源,它会使场景中的所有物体同等受到光照影响。在Three.js中,可以使用THREE.AmbientLight类来创建环境光。
环境光有以下属性:
- color:光的颜色,默认为白色,可以使用CSS颜色值或RGB颜色值来定义。
示例代码:
<!DOCTYPE html>
<html lang="en">
<head>
  <meta charset="UTF-8">
  <title>Title</title>
  <style>
    *{


      margin: 0;
      padding: 0;
    }
  </style>
  <script src="../lib/three/three.js"></script>
  <script src="../lib/three/dat.gui.js"></script>
  <script src="../controls/index.js"></script>
</head>
<body>

</body>
</html>

<script>
  // 创建一个场景
  const scene = new THREE.Scene();

  // 创建一个相机 视点
  const camera = new THREE.PerspectiveCamera(45, window.innerWidth / window.innerHeight, 1, 1000);
  // 设置相机的位置
  camera.position.set(0,0,20);

  // 创建一个渲染器
  const renderer = new THREE.WebGLRenderer();
  // 设置渲染器尺寸
  renderer.setSize(window.innerWidth, window.innerHeight);

  document.body.appendChild(renderer.domElement);

  // 添加一个立方体
  // 定义了一个立方体的对象
  const cubeGeometry = new THREE.BoxGeometry(1, 1, 1);

  // 创建材质
  const cubeMaterial = new THREE.MeshLambertMaterial({

       color: 0xff0000, wireframe: false });

  const cube = new THREE.Mesh(cubeGeometry, cubeMaterial);

  // 添加到场景里
  scene.add(cube);

  // 添加一个球体
  const sphereGeometry = new THREE.SphereGeometry(1,10,10);
  const sphereMaterial = new THREE.MeshLambertMaterial({

       color: 0x00ff00, wireframe: false });
  const sphere = new THREE.Mesh(sphereGeometry, sphereMaterial);

  sphere.position.x = 3;
  sphere.position.y = 1;

  scene.add(sphere);

  // 添加一个平面,用来接收阴影
  const planeGeometry = new THREE.PlaneGeometry(20,30);
  const planeMaterial = new THREE.MeshBasicMaterial({

       color: 0x999999 });
  const plane = new THREE.Mesh(planeGeometry, planeMaterial);

  plane.rotateZ(20);
  plane.position.z = -10;
  plane.position.x = 3;

  scene.add(plane);

  // 添加环境光
  const ambientLight = new THREE.AmbientLight(0x000000);
  scene.add(ambientLight);

  // 添加灯光
  const spotLight = new THREE.SpotLight(0xffffff);
  spotLight.position.set(-10,10,90);
  scene.add(spotLight);

  // 让两个三维物体 产生阴影,球体立方体,  使用平面接收阴影
  cube.castShadow = true;
  sphere.castShadow = true;
  // 使用平面接收阴影
  plane.receiveShadow = true;
  // 设置灯光开启阴影
  spotLight.castShadow = true;
  renderer.shadowMapEnabled = true;

  initControls(ambientLight);
  const animation = () => {


    cube.rotation.x += 0.01;
    cube.rotation.y += 0.01;

    // 渲染
    renderer.render(scene, camera);

    requestAnimationFrame(animation);
  }
  animation()
</script>
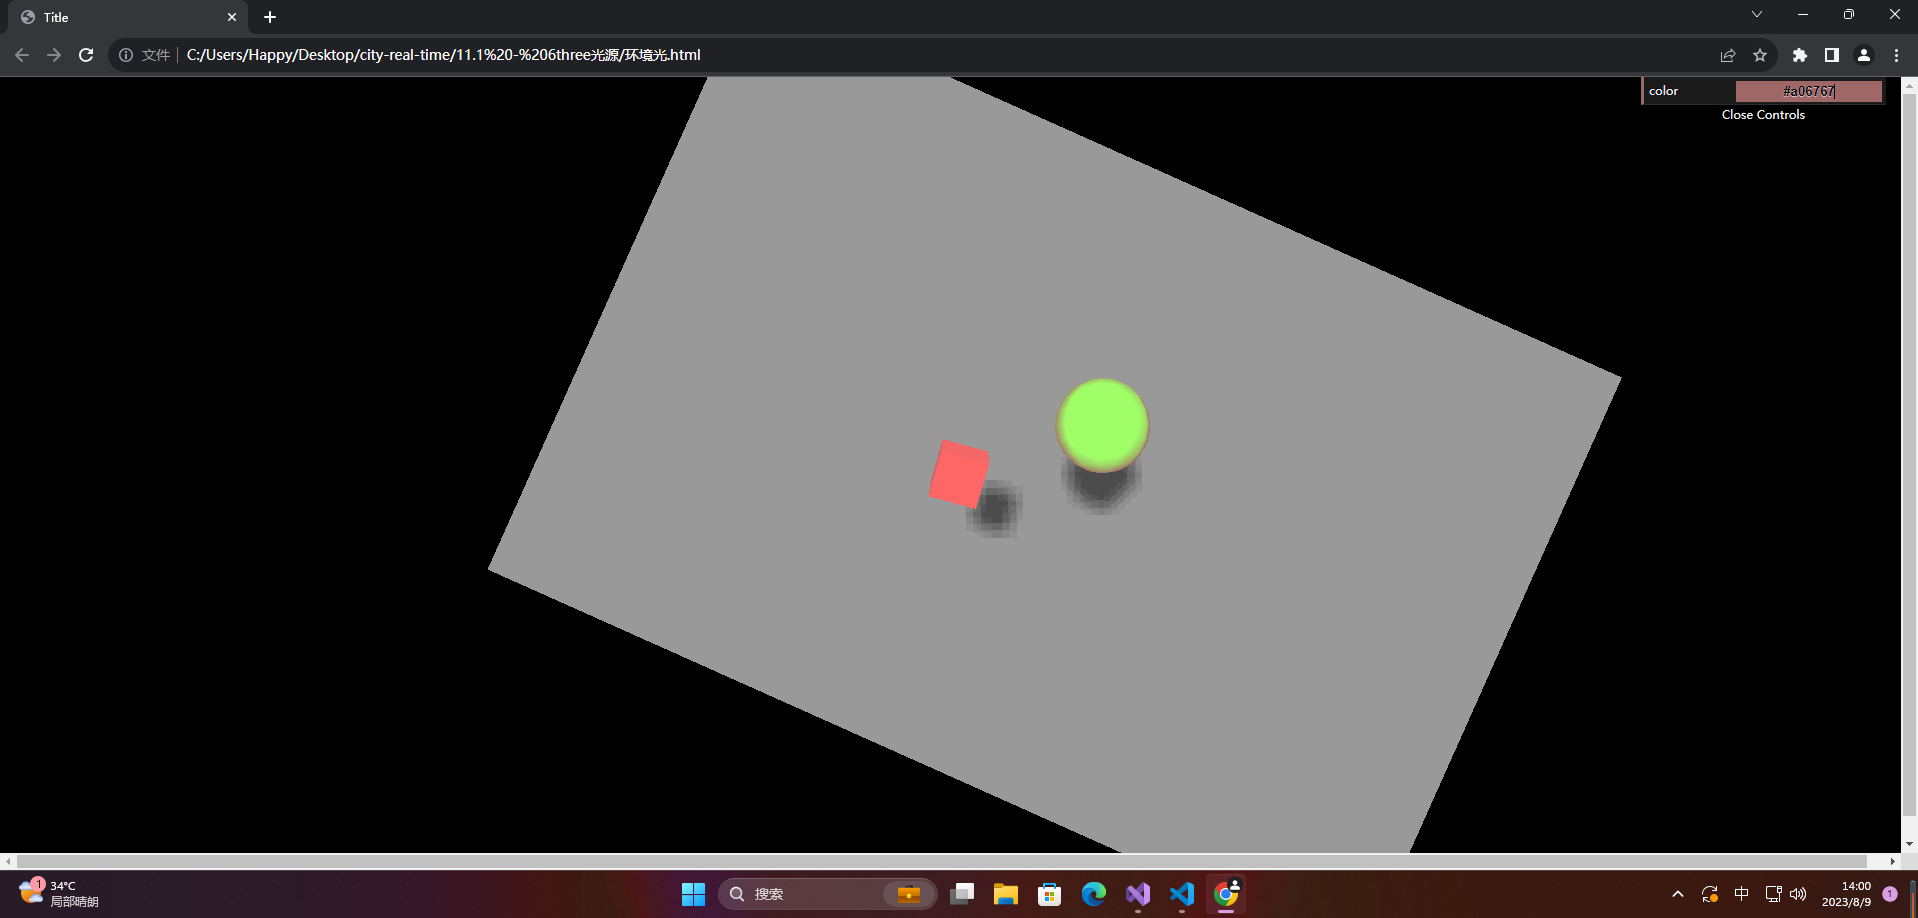
场景中的所有物体都会受到该环境光的影响,使场景更加真实。
1.5 半球光
半球光是三维场景中一种常用的光源,它模拟了天空的光照,在室外场景中使用效果非常好。在Three.js中,半球光是通过THREE.HemisphereLight对象来实现的。
HemisphereLight有两个参数:天空颜色(skyColor)和地面颜色(groundColor)。其中天空颜色指的是天空的颜色,地面颜色指的是地面反射到物体上的颜色。可以通过以下代码创建一个半球光:
<!DOCTYPE html>
<html lang="en">
<head>
  <meta charset="UTF-8">
  <title>Title</title>
  <style>
    *{


      margin: 0;
      padding: 0;
    }
  </style>
  <script src="../lib/three/three.js"></script>
  <script src="../lib/three/dat.gui.js"></script>
  <script src="../controls/index.js"></script>
</head>
<body>

</body>
</html>

<script>
  // 创建一个场景
  const scene = new THREE.Scene();

  // 创建一个相机 视点
  const camera = new THREE.PerspectiveCamera(45, window.innerWidth / window.innerHeight, 1, 1000);
  // 设置相机的位置
  camera.position.set(0,0,20);

  // 创建一个渲染器
  const renderer = new THREE.WebGLRenderer();
  // 设置渲染器尺寸
  renderer.setSize(window.innerWidth, window.innerHeight);

  document.body.appendChild(renderer.domElement);

  // 添加一个立方体
  // 定义了一个立方体的对象
  const cubeGeometry = new THREE.BoxGeometry(1, 1, 1);

  // 创建材质
  const cubeMaterial = new THREE.MeshLambertMaterial({

     color: 0xff0000, wireframe: false });

  const cube = new THREE.Mesh(cubeGeometry, cubeMaterial);

  // 添加到场景里
  scene.add(cube);

  // 添加一个球体
  const sphereGeometry = new THREE.SphereGeometry(1,10,10);
  const sphereMaterial = new THREE.MeshLambertMaterial({

     color: 0x00ff00, wireframe: false });
  const sphere = new THREE.Mesh(sphereGeometry, sphereMaterial);

  sphere.position.x = 3;
  sphere.position.y = 1;

  scene.add(sphere);

  // 添加一个平面,用来接收阴影
  const planeGeometry = new THREE.PlaneGeometry(20,30);
  const planeMaterial = new THREE.MeshBasicMaterial({

     color: 0x999999 });
  const plane = new THREE.Mesh(planeGeometry, planeMaterial);

  plane.rotateZ(20);
  plane.position.z = -10;
  plane.position.x = 3;

  scene.add(plane);

  // 添加环境光
  const ambientLight = new THREE.AmbientLight(0x000000);
  scene.add(ambientLight);

  // 添加灯光
  const hemisphereLight = new THREE.HemisphereLight(0xff00ff, 0x00ff00);
  hemisphereLight.position.set(-10,10,30);
  scene.add(hemisphereLight);

  // 让两个三维物体 产生阴影,球体立方体,  使用平面接收阴影
  cube.castShadow = true;
  sphere.castShadow = true;
  // 使用平面接收阴影
  plane.receiveShadow = true;
  // 设置灯光开启阴影

  initControls(hemisphereLight);
  const animation = () => {


    cube.rotation.x += 0.01;
    cube.rotation.y += 0.01;

    hemisphereLight.position.z -= 0.1;

    // 渲染
    renderer.render(scene, camera);

    requestAnimationFrame(animation);
  }
  animation()
</script>

二、dat.gui.js
1.基本使用
dat.gui.js是一个JavaScript库,用于创建简单的用户界面(GUI),使用户能够轻松地调整变量和参数。它可以用于在浏览器中创建交互式体验,例如游戏、可视化和艺术作品。
下面是使用dat.gui.js的简单步骤:
-
引入dat.gui.js库,可以通过CDN链接或下载到本地。
-
创建GUI对象
var gui = new dat.GUI();
- 添加控件
var obj = {


  variable1: value1,
  variable2: value2
};

// 添加一个滑动条
gui.add(obj, 'variable1', 0, 100);

// 添加一个复选框
gui.add(obj, 'variable2').listen();

// 添加一个按钮
gui.add(obj, 'functionName');
- 监听控件变化
gui.add(obj, 'variable').onChange(function(value) {


  // 在这里添加要执行的函数
});
- 控制控件的显示和隐藏
// 隐藏控件
gui.hide();

// 显示控件
gui.show();
以上是使用dat.gui.js的一些基本步骤,如果需要深入了解更多方法和属性,可以参考官方文档。
2.相关封装
const basicType = {


  color: {


    method: 'addColor',
    getValue: item => item.color.getStyle(),
    setValue: (item, value) => item.color.setStyle(value),
  },
  groundColor: {


    method: 'addColor',
    getValue: item => item.groundColor.getStyle(),
    setValue: (item, value) => item.groundColor.setStyle(value),
  },
  intensity: {


    extends: [0, 10],
    getValue: item => item.intensity,
    setValue: (item, value) => item.intensity = +value,
  },
  distance: {


    extends: [0, 2],
    getValue: item => item.distance,
    setValue: (item, value) => item.distance = +value,
  },
  angle: {


    extends: [0, Math.PI / 2],
    getValue: item => item.angle,
    setValue: (item, value) => item.angle = +value,
  },
  exponent: {


    extends: [0, 20],
    getValue: item => item.exponent,
    setValue: (item, value) => item.exponent = +value,
  },
  opacity: {


    extends: [0,1],
    getValue: item => item.opacity,
    setValue: (item, value) => item.opacity = +value,
  },
  transparent: {


    getValue: item => item.transparent,
    setValue: (item, value) => item.transparent = value,
  },
  wireframe: {


    getValue: item => item.wireframe,
    setValue: (item, value) => item.wireframe = value,
  },
  visible: {


    getValue: item => item.visible,
    setValue: (item, value) => item.visible = value,
  },
  cameraNear: {


    extends: [0, 50],
    getValue: (item, camera) => camera.near,
    setValue: (item, value, camera) => camera.near = value,
  },
  cameraFar: {


    extends: [50, 1000],
    getValue: (item, camera) => camera.far,
    setValue: (item, value, camera) => camera.far = value,
  },
  side: {


    extends: [['front', 'back', 'double']],
    getValue: () => 'front',
    setValue: (item, value) => {


      switch(value) {


        case 'front':
          item.side = THREE.FrontSide;
          break;
        case 'back':
          item.side = THREE.BackSide;
          break;
        case 'double':
          item.side = THREE.DoubleSide;
          break;
      }
    },
  },
  // 材料的环境颜色
  ambient: {


    method: 'addColor',
    getValue: (item) => item.ambient.getHex(),
    setValue: (item, value, camera) => item.ambient = new THREE.Color(value),
  },
  // 物体材料本身发出的颜色
  emissive: {


    method: 'addColor',
    getValue: (item) => item.emissive.getHex(),
    setValue: (item, value, camera) => item.emissive = new THREE.Color(value),
  },
  // 设置高亮部分的颜色
  specular: {


    method: 'addColor',
    getValue: (item) => item.specular.getHex(),
    setValue: (item, value, camera) => item.specular = new THREE.Color(value),
  },
  // 设置高亮部分的亮度
  shininess: {


    extends: [0, 100],
    getValue: (item) => item.shininess,
    setValue: (item, value, camera) => item.shininess = value,
  },
  red: {


    extends: [0, 1],
    getValue: (item) => item.uniforms.r.value,
    setValue: (item, value, camera) => item.uniforms.r.value = value,
  },
  alpha: {


    extends: [0, 1],
    getValue: (item) => item.uniforms.a.value,
    setValue: (item, value, camera) => item.uniforms.a.value = value,
  },
  dashSize: {


    extends: [0, 5],
    getValue: (item) => item.dashSize,
    setValue: (item, value, camera) => item.dashSize = +value,
  },
  gapSize: {


    extends: [0, 5],
    getValue: (item) => item.gapSize,
    setValue: (item, value, camera) => item.gapSize = +value,
  },
  width: getMeshValue([0, 20], 'width'),
  height: getMeshValue([0, 20], 'height'),
  widthSegments: getMeshValue([0, 20], 'widthSegments'),
  heightSegments:getMeshValue([0, 20], 'heightSegments'),
  radius:getMeshValue([1, 20], 'radius'),
  segments:getMeshValue([3, 80], 'segments'),
  thetaStart:getMeshValue([0, Math.PI * 2], 'thetaStart'),
  thetaLength:getMeshValue([0, Math.PI * 2], 'thetaLength'),
  depth:getMeshValue([0, 20], 'depth'),
  depthSegments:getMeshValue([0, 20], 'depthSegments'),
  phiStart: getMeshValue([0, Math.PI * 2], 'phiStart'),
  phiLength: getMeshValue([0, Math.PI * 2], 'phiLength'),
  radiusTop: getMeshValue([-20, 20], 'radiusTop'),
  radiusBottom: getMeshValue([-20, 20], 'radiusBottom'),
  radialSegments: getMeshValue([1, 60], 'radialSegments'),
  openEnded: getMeshValue([], 'openEnded'),
  tube: getMeshValue([1, 6], 'tube'),
  arc: getMeshValue([0, Math.PI * 2], 'arc'),
  tubularSegments: getMeshValue([1, 20], 'tubularSegments'),
  heightScale: getMeshValue([0, 5], 'heightScale'),
  p: getMeshValue([1, 10], 'p'),
  q: getMeshValue([1, 10], 'q'),
  detail: getMeshValue([0, 5], 'detail'),
  size: getMeshValue([1, 10], 'size'),
  bevelThickness: getMeshValue([1, 30], 'bevelThickness'),
  bevelSize: getMeshValue([1, 30], 'bevelSize'),
  bevelEnabled: getMeshValue([], 'bevelEnabled'),
  bevelSegments: getMeshValue([1, 30], 'bevelSegments'),
  curveSegments: getMeshValue([1, 30], 'curveSegments'),
  steps: getMeshValue([1, 10], 'steps'),
}

const vertices = [
  1,1,1,-1,-1,1,-1,1,-1,1,-1,-1,
]

const indices = [
  2,1,0,0,3,2,1,3,0,2,3,1
]

function createMaterial(geometry) {


  const lambert = new THREE.MeshLambertMaterial({

     color: 0xff0000 })
  const basic = new THREE.MeshBasicMaterial({

     wireframe: true })

  return THREE.SceneUtils.createMultiMaterialObject(geometry, [
    lambert,
    basic
  ])
}

const textOptions = {


  size: 1,
  height: 1,
  weight: 'normal',
  font: 'helvetiker',
  bevelThickness: 1,
  bevelSize: 1,
  bevelEnabled: false,
  bevelSegments: 1,
  curveSegments: 1,
  steps: 1,
}

const roundValue = {


  width: 1,
  height: 1,
  depth: 1,
  widthSegments: 1,
  heightSegments: 1,
  depthSegments: 1,
  radialSegments: 1,
  tubularSegments: 1,
  detail: 1,
  size: 1,
  bevelSegments: 1,
  curveSegments: 1,
  steps: 1,
}

const isPolyhedron = item => item.type === 'PolyhedronGeometry';
const isFont = item => item.type === 'TextGeometry';

function removeAndAdd(item, value, camera, mesh, scene, controls) {


  const {

    x, y, z} = mesh.pointer.rotation;

  scene.remove(mesh.pointer);
  const arg = [];

  for (const key in controls) {


    if (roundValue[key]) {


      controls[key] = ~~controls[key];
    }
    arg.push(controls[key])
  }

  if (isPolyhedron(item)) {


    arg.unshift(vertices, indices);
  }

  if (isFont(item)) {


    mesh.pointer = createMaterial(new THREE[item.type]('THREE', Object.assign(textOptions, controls)))
  } else {


    mesh.pointer = createMaterial(new THREE[item.type](...arg))
  }

  mesh.pointer.rotation.set(x, y, z);
  scene.add(mesh.pointer);
}

function getMeshValue(extend, name) {


  return {


    extends: extend,
    getValue: (item, camera, mesh) => isFont(item) && textOptions[name] !== undefined ? textOptions[name] : mesh.children[0].geometry.parameters[name],
    setValue: (...arg) => removeAndAdd(...arg),
  }
}

const itemType = {


  SpotLight: ['color', 'intensity', 'distance', 'angle', 'exponent'],// 聚光灯
  AmbientLight: ['color'], // 环境光
  PointLight: ['color', 'intensity', 'distance'], // 点光源
  DirectionalLight: ['color', 'intensity'], // 平行光
  HemisphereLight: ['skyColor', 'groundColor', 'intensity'], // 半球光
  MeshBasicMaterial: ['color', 'opacity', 'transparent', 'wireframe', 'visible'],
  MeshDepthMaterial: ['wireframe', 'cameraNear', 'cameraFar'],
  MeshNormalMaterial: ['opacity', 'transparent', 'wireframe', 'visible', 'side'],
  MeshLambertMaterial: ['opacity', 'transparent', 'wireframe', 'visible', 'side', 'ambient', 'emissive', 'color'],
  MeshPhongMaterial: ['opacity', 'transparent', 'wireframe', 'visible', 'side', 'ambient', 'emissive', 'color', 'specular', 'shininess'],
  ShaderMaterial: ['red', 'alpha'],
  LineBasicMaterial: ['color'],
  LineDashedMaterial: ['dashSize', 'gapSize'],
  PlaneGeometry: ['width', 'height', 'widthSegments', 'heightSegments'],
  PlaneBufferGeometry: ['width', 'height', 'widthSegments', 'heightSegments'],
  CircleGeometry: ['radius', 'segments', 'thetaStart', 'thetaLength'],
  BoxGeometry: ['width', 'height', 'depth', 'widthSegments', 'heightSegments', 'depthSegments'],
  SphereGeometry: ['radius', 'widthSegments', 'heightSegments', 'phiStart', 'phiLength', 'thetaStart', 'thetaLength'],
  CylinderGeometry: ['radiusTop', 'radiusBottom', 'height', 'radialSegments', 'heightSegments', 'openEnded'],
  TorusGeometry: ['radius', 'tube', 'radialSegments', 'tubularSegments', 'arc'],
  TorusKnotGeometry: ['radius', 'tube', 'radialSegments', 'tubularSegments', 'p', 'q', 'heightScale'],
  PolyhedronGeometry: ['radius', 'detail'],
  TetrahedronGeometry: ['radius', 'detail'],
  OctahedronGeometry: ['radius', 'detail'],
  IcosahedronGeometry: ['radius', 'detail'],
  TextGeometry: ['size', 'bevelThickness', 'bevelSize', 'bevelEnabled', 'bevelSegments', 'curveSegments', 'steps'],
}

function initControls(item, camera, mesh, scene) {


  console.log(item);
  const typeList = itemType[item.type];
  const controls = {

    };
  if (!typeList || !typeList.length) {


    return;
  }
  const gui = new dat.GUI();

  for (let i = 0; i < typeList.length; i++) {


    const child = basicType[typeList[i]];
    if (child) {


      //controls[typeList[i]] = child.getValue(item, camera, mesh.pointer);

      controls[typeList[i]] = child.getValue(item, camera,null);

      const childExtends = child.extends || [];

      gui[child.method || 'add'](controls, typeList[i], ...childExtends).onChange((value) => {


        child.setValue(item, value, camera, mesh, scene, controls);
      });
    }
  }
}