本系列博客为记录笔者在学习GAMES101课程时遇到的问题与思考。
一、基础题
本次作业的目的是为了让我们熟悉三角形栅格化的相关操作,通过Assignment2.pdf可以知道本次作业的任务是填充完整两个函数
static bool insideTriangle():测试点是否在三角形内。rasterize_triangle():执行三角形栅格化算法
-
首先我们要将作业1的get_projection_matrix() 函数拷贝至作业2的对应函数中去,其中需要注意一个点是要把
zNear = -zNear;和zFar = -zFar;给注释掉,否则最后得到的三角形会是相反的;究其原因是因为闫教授上课说到的,做深度测试的时候我们需要转换一个观念,那就是深度值小的离我们近,而深度值大的算是离我们远,但是作业0的相关函数都是我们朝向z轴负方向看去的,也就是说深度值越大的数其实是离我们越近的。 -
再讲解insideTriangle() 函数,照例先分析函数参数含义:
x/y:表示需要测试点的x/y坐标_v:通过观察Triangle.cpp文件可知,_v是一个三维矢量,但是每一维都是一个三维矢量,表示三角形的三个顶点坐标Triangle::Triangle() { v[0] << 0,0,0; v[1] << 0,0,0; v[2] << 0,0,0; color[0] << 0.0, 0.0, 0.0; color[1] << 0.0, 0.0, 0.0; color[2] << 0.0, 0.0, 0.0; tex_coords[0] << 0.0, 0.0; tex_coords[1] << 0.0, 0.0; tex_coords[2] << 0.0, 0.0; }
闫教授讲课时提到过,判断一个点是否在三角形能有一种方法就是,用这个点与三角形三个顶点相连形成三个向量,再让这三个顶点依次相连也会形成三个向量,再让对应顶点的向量相互叉乘,会得到三个数,若这三个数符号相同则表示这个点在三角形内部,由此可以直接写出insideTriangle() 函数:
static bool insideTriangle(float x, float y, const Vector3f* _v) { // TODO : Implement this function to check if the point (x, y) is inside the triangle represented by _v[0], _v[1], _v[2] Eigen::Vector3f point(x, y, 0); Eigen::Vector3f side1, side2, side3; side1 << _v[1] - _v[0]; side2 << _v[2] - _v[1]; side3 << _v[0] - _v[2]; // calculate the cross of two vector float z1 = ((point - _v[0]).cross(side1)).z(); float z2 = ((point - _v[1]).cross(side2)).z(); float z3 = ((point - _v[2]).cross(side3)).z(); // Determine if the sybol is the same if ((z1 > 0 && z2 > 0 && z3 > 0) || (z1 < 0 && z2 < 0 && z3 < 0)) return true; return false; } -
再分析rasterize_triangle() 函数,其中形参
t是Triangle类型,也就是上面提到过的Triangle.cpp文件中的代码。
闫教授说栅格化的时候有一种办法就是,框出这个三角形所占空间的一个立方体,也就是这个这个立方体是恰好包围住这个三角形,然后遍历这个立方体内的每一个像素进行深度测试,来决定是否对这个像素进行染色。void rst::rasterizer::rasterize_triangle(const Triangle& t) { auto v = t.toVector4(); // TODO : Find out the bounding box of current triangle. // iterate through the pixel and find if the current pixel is inside the triangle // If so, use the following code to get the interpolated z value. //auto[alpha, beta, gamma] = computeBarycentric2D(x, y, t.v); //float w_reciprocal = 1.0/(alpha / v[0].w() + beta / v[1].w() + gamma / v[2].w()); //float z_interpolated = alpha * v[0].z() / v[0].w() + beta * v[1].z() / v[1].w() + gamma * v[2].z() / v[2].w(); //z_interpolated *= w_reciprocal; // TODO : set the current pixel (use the set_pixel function) to the color of the triangle (use getColor function) if it should be painted. Eigen::Vector2f min_p, max_p; min_p.x() = MIN(MIN(v[0].x(), v[1].x()), v[2].x()); min_p.y() = MIN(MIN(v[0].y(), v[1].y()), v[2].y()); max_p.x() = MAX(MAX(v[0].x(), v[1].x()), v[2].x()); max_p.y() = MAX(MAX(v[0].y(), v[1].y()), v[2].y()); for (int i = min_p.x(); i <= max_p.x(); i++) { for (int j = min_p.y(); j <= max_p.y(); j++) { if(insideTriangle(i, j, t.v)) { auto[alpha, beta, gamma] = computeBarycentric2D(i, j, t.v); float w_reciprocal = 1.0/(alpha / v[0].w() + beta / v[1].w() + gamma / v[2].w()); float z_interpolated = alpha * v[0].z() / v[0].w() + beta * v[1].z() / v[1].w() + gamma * v[2].z() / v[2].w(); z_interpolated *= w_reciprocal; if (z_interpolated < depth_buf[get_index(i, j)]) { set_pixel(Eigen::Vector3f((float)i, (float)j, z_interpolated), t.getColor()); depth_buf[get_index(i, j)] = z_interpolated; } } } } }其中
min_p和max_p分别代表三角形中x/y的最小值和最大值,因此取出这两个点之后围成的立方体可以恰好包围整个三角形。由此可以遍历整个立方体,判断空间中的每一个像素。上述代码中的双层
for循环就是遍历了整个空间,而每当遍历一个像素点时需要判断这个点是否在三角形内,如果不在三角形内的话就根本不需要进行染色操作,因为我们的目的只是染色整个三角形。随后这四行代码是用差值的方法得到了其深度值,因为有关的内容尚未在课程中涉及,所以框架已经处理好了这一部分,直接调用即可。
auto[alpha, beta, gamma] = computeBarycentric2D(i, j, t.v);
float w_reciprocal = 1.0/(alpha / v[0].w() + beta / v[1].w() + gamma / v[2].w());
float z_interpolated = alpha * v[0].z() / v[0].w() + beta * v[1].z() / v[1].w() + gamma * v[2].z() / v[2].w();
z_interpolated *= w_reciprocal;
最后是判断深度值是否小于该像素点的深度,若小于说明该三角形离我们更近,会遮蔽其后的三角形,所以需要更新该像素点的颜色,再更新该像素点的深度,对应
if (z_interpolated < depth_buf[get_index(i, j)]) { set_pixel(Eigen::Vector3f((float)i, (float)j, z_interpolated), t.getColor()); depth_buf[get_index(i, j)] = z_interpolated; }若一切进行顺利的话,运行run2.sh函数应该会出现如下图像:

如果放大该图片可以发现有明显的锯齿状,这就是闫教授上课提到的Jaggies!,至此基础题完成,提高题就是让我们完成Antialiasing反锯齿。

二、提高题
1、使用SMAA消除锯齿
MSAA的原理(详情见GAMES101_Lecture_06.pdf第63页)就是将一个像素点分为2×2四个点,一个像素点的颜色不该由像素的中心是否在三角形内而全盘否定,而是看四个点中有几个点在三角形内而进行色彩的平均,这样的话就可以模糊三角形的边界,达到反锯齿的目的。
if (MSAA) {


    std::vector<Eigen::Vector2f> super_sample_step {


        {

    0.25, 0.25},
        {

    0.75, 0.25},
        {

    0.25, 0.75},
        {

    0.75, 0.75},
    };
    for (int i = min_p.x(); i <= max_p.x(); i++) {


        for (int j = min_p.y(); j <= max_p.y(); j++) {


            int cnt = 0;
            for (int k = 0; k < 4; k++) {


                if (insideTriangle((float)i + super_sample_step[k][0], (float)j + super_sample_step[k][1], t.v)) {


                    cnt++;
                }
            }
            if (cnt != 0) {


                auto[alpha, beta, gamma] = computeBarycentric2D(i, j, t.v);
                float w_reciprocal = 1.0/(alpha / v[0].w() + beta / v[1].w() + gamma / v[2].w());
                float z_interpolated = alpha * v[0].z() / v[0].w() + beta * v[1].z() / v[1].w() + gamma * v[2].z() / v[2].w();
                z_interpolated *= w_reciprocal;
                if(z_interpolated < depth_buf[get_index(i, j)]){


                    set_pixel(Eigen::Vector3f((float)i, (float)j, z_interpolated), t.getColor() * cnt / 4.0);
                    depth_buf[get_index(i, j)] = z_interpolated;
                }

            }
        }
    }
}
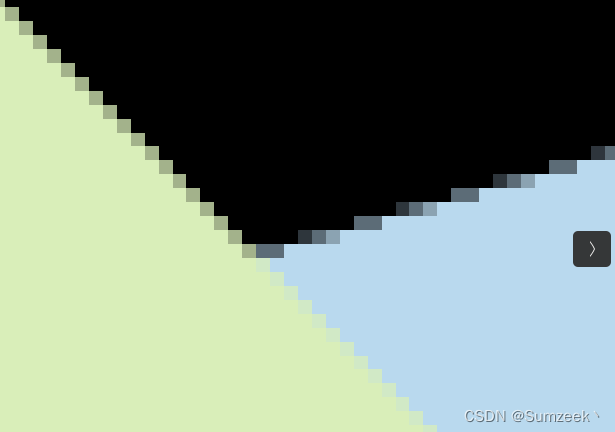
运行此代码可以发现,确实做到了抗锯齿的效果,但是出现了不正常黑边。通过长时间的查阅资料以及分析才知道,因为黑边的出现是因为刚开始渲染绿色三角形的时候,在边缘时是用绿色跟黑色进行色彩平均的,在边缘时黑色像素点占比比较大,所以绿色三角形的边缘会出现比较暗淡的黑边,当渲染蓝色三角形时,由于蓝色三角形距离比较远,没有通过深度测试,所以最后看起来会是绿色三角形的边缘有黑边。

2、优化SMAA操作
其实也怪自己没有仔细阅读Assignment2.pdf中的内容,闫教授已经提示我们了对于像素内的每一个样本都需要维护它自己的深度值,即每一个像素都需要维护一个 sample list。这样子的话最后在渲染蓝色三角形的时候就会与绿色三角形的黑边进行平均,使得色彩的过渡更加平滑。
首先对于每一个像素点都创建一个二维的vector矢量数组用于维护这个像素点的sample list,在rasterizer.hpp中创建相应的二维vector矢量数组:
bool MSAA = true;
std::vector<Eigen::Vector3f> frame_buf;
std::vector<std::vector<Eigen::Vector3f>> sample_list_frame_buf;

std::vector<float> depth_buf;
std::vector<std::vector<float>> sample_list_depth_buf;
其中frame_buf和depth_buf是原来框架中有的,sample_list_frame_buf和sample_list_depth_buf是自己创建的维护数组。创建完成之后还需要更改rasterizer.cpp中对应的初始化函数rasterizer()和清理函数clear():
void rst::rasterizer::clear(rst::Buffers buff)
{


    if ((buff & rst::Buffers::Color) == rst::Buffers::Color)
    {


        std::fill(frame_buf.begin(), frame_buf.end(), Eigen::Vector3f{

    0, 0, 0});
        if (MSAA) {


            std::fill(sample_list_frame_buf.begin(), sample_list_frame_buf.end(), std::vector<Eigen::Vector3f>(4, {

    0, 0, 0}));
        }
    }
    if ((buff & rst::Buffers::Depth) == rst::Buffers::Depth)
    {


        std::fill(depth_buf.begin(), depth_buf.end(), std::numeric_limits<float>::infinity());
        if (MSAA) {


            std::fill(sample_list_depth_buf.begin(), sample_list_depth_buf.end(), std::vector<float>(4, std::numeric_limits<float>::infinity()));
        }
    }
}

rst::rasterizer::rasterizer(int w, int h) : width(w), height(h)
{


    frame_buf.resize(w * h);
    depth_buf.resize(w * h);
    if (MSAA) {


        sample_list_frame_buf.resize(w * h);
        for (auto& row : sample_list_frame_buf) {


            row.resize(4);
        }
        sample_list_depth_buf.resize(w * h);
        for (auto& row : sample_list_depth_buf) {


            row.resize(4);
        }
    }
}
最后再更改MSAA代码,使得每次判断四个点时都进行深度测试,更新sample_list_frame_buf和sample_list_depth_buf矢量数组,最后再进行四个点的色彩平均,这样就可以实现较为平滑的边缘过渡。
    if (MSAA) {


        std::vector<Eigen::Vector2f> super_sample_step {


            {

    0.25, 0.25},
            {

    0.75, 0.25},
            {

    0.25, 0.75},
            {

    0.75, 0.75},
        };
        for (int i = min_p.x(); i <= max_p.x(); i++) {


            for (int j = min_p.y(); j <= max_p.y(); j++) {


                int cnt = 0;
                float minDepth = FLT_MAX;
                for (int k = 0; k < 4; k++) {


                    if (insideTriangle((float)i + super_sample_step[k][0], (float)j + super_sample_step[k][1], t.v)) {


                        auto[alpha, beta, gamma] = computeBarycentric2D(i, j, t.v);
                        float w_reciprocal = 1.0/(alpha / v[0].w() + beta / v[1].w() + gamma / v[2].w());
                        float z_interpolated = alpha * v[0].z() / v[0].w() + beta * v[1].z() / v[1].w() + gamma * v[2].z() / v[2].w();
                        z_interpolated *= w_reciprocal;
                        if (z_interpolated < minDepth) {


                            minDepth = z_interpolated;
                        }
                        if (z_interpolated < sample_list_depth_buf[get_index(i, j)][k]) {


                            sample_list_depth_buf[get_index(i, j)][k] = z_interpolated;
                            sample_list_frame_buf[get_index(i, j)][k] = t.getColor();
                        }
                        cnt++;
                    }
                }
                if (cnt != 0) {


                    Eigen::Vector3f color = {

    0, 0, 0};
                    for (int k = 0; k < 4; k++) {


                        color += sample_list_frame_buf[get_index(i, j)][k];
                    }
                    set_pixel(Eigen::Vector3f((float)i, (float)j, minDepth), color / 4.0);
                    depth_buf[get_index(i, j)] = minDepth;
                }
            }
        }
    }
运行后得到结果:
至此作业2完成