本文主要是提供几个写UE插件的实例,借此来了解在UE里使用C++创建自定义插件的做法:
- 写一个使场景变暗的简单插件
- 写一个自定义窗口,展示项目里所有的动画资产
写一个使场景变暗的简单插件
参考:Unreal Engine 5 - Writing Plugins in C++
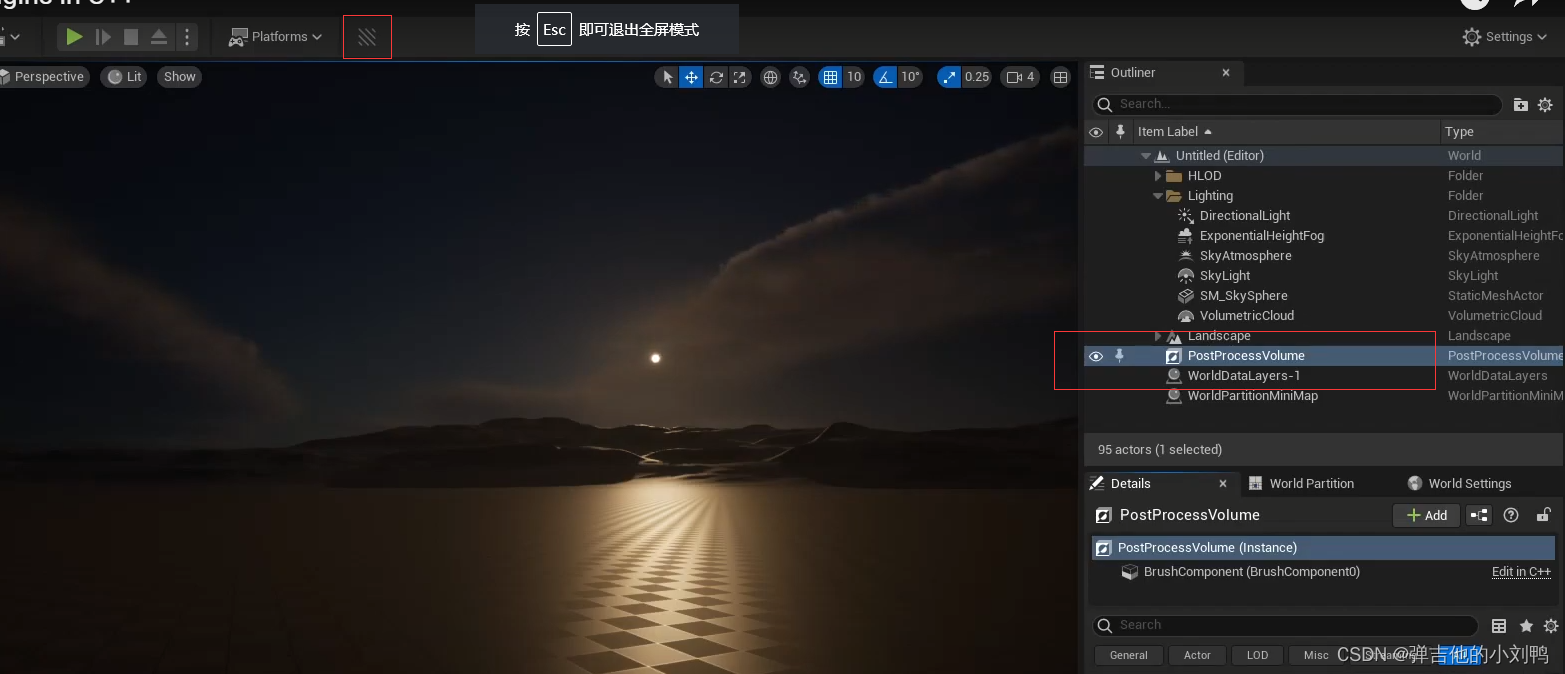
写一个简单的插件,来了解在UE里使用C++创建自定义插件的做法,这里会给Viewport窗口添加一个Button,点击按钮后会在场景里添加一个PoseProcessVolume类型的对象,使用它将场景变暗,实现Night效果,如下图所示:
这里还附带一些参数操作:
- 创建的PoseProcessVolumn的PoseProcessVolume Settings里勾选Infinete Extent,让这个后处理范围是无限的
- DirectionalLight的intensity改变为1.0
- PostProcessVolumn,调整其Expoture->ExposureCompensation值为-3
创建Editor Toolbar Button类型的Plugin
在我的C++工程类型的UE项目里,从菜单中选择"Edit"->“Plugins”,点出“New Plgin”,由于要修改的是EditorToolbar,所以在弹出的窗口中选中“Editor Toolbar Button”,创建一个名为“MakeLevelDark”的plugin (PS: 蓝图类型的UE项目貌似是没有这么多选项)。
这里我创建失败了,可能是因为我的引擎版本升级了,原来的项目没升级,导致项目有编译报错Unable to clean target while not hot-reloading.close the editor and try again,所以我把原本项目的Binaries、Intermediate、Saved和*.sln文件删掉了,重新导入了一次。才创建成功:

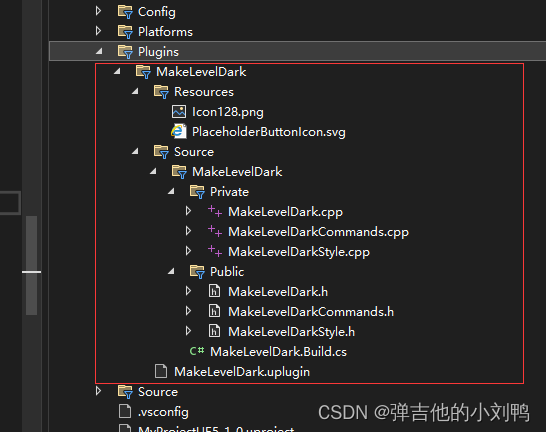
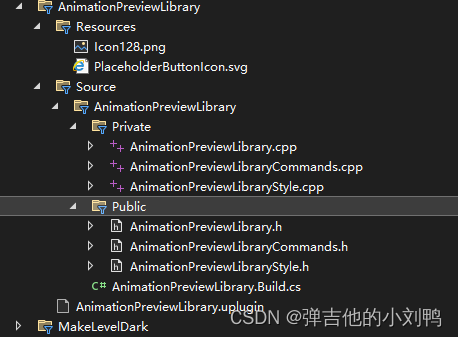
会自动打开VS2022,可以看到新创建的相关文件,MakeLevelDark、MakeLevelDarkCommands和MakeLevelDarkStyle三个类,以及一个Module的Build.cs文件:
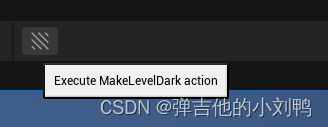
而且此时的Viewport的Toolbar就会自动出现对应的Button了:
点击之后会提示:
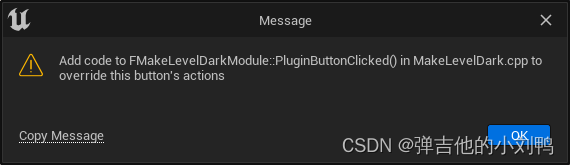
所以这里需要Override对应Module里的PluginButtonClicked函数,来执行自定义的内容,对应的函数所在位置对应的Module类:
#pragma once

#include "CoreMinimal.h"
#include "Modules/ModuleManager.h"

class FToolBarBuilder;
class FMenuBuilder;

class FMakeLevelDarkModule : public IModuleInterface
{


public:

	/** IModuleInterface implementation */
	virtual void StartupModule() override;
	virtual void ShutdownModule() override;

	// 需要自定义的函数
	void PluginButtonClicked();

private:

	void RegisterMenus();


private:
	TSharedPtr<class FUICommandList> PluginCommands;
};
写C++代码
基于具体功能,分为以下几个部分:
- 点击按钮时,找到Level里的Directional Light,改变其Intensity
- 判断场景里是否存在PostProcessVolume,如果不存在,则给一个Message提示,并创建一个新的
- 修改PoseProcessVolume的Extent和Exposure Compensation参数
Directional Light部分
为了找到Level里的Directional Light,这里设计一个通用的在场景里找Actor的函数:
#include <Kismet/GameplayStatics.h>

// 返回场景里找到的特定类型的第一个对象
AActor* FMakeLevelDarkModule::FindActor(TSubclassOf<AActor> ActorClass)
{


    // 获取World
	const UWorld* World = GEditor->GetEditorWorldContext().World();
	if (World)
	{


		TArray<AActor*>  FoundActors;
		UGameplayStatics::GetAllActorsOfClass(World, ActorClass, FoundActors);
		if (FoundActors.Num() > 0)
			return FoundActors[0];
	}

	return nullptr;
}
然后利用此函数,找到Level里的Directional Light,改变其Intensity:
AActor* FoundActor = FindActor(ADirectionalLight::StaticClass());

if (FoundActor)
{


	ADirectionalLight* Sun = Cast<ADirectionalLight>(FoundActor);

	if (Sun)
		Sun->GetLightComponent()->SetIntensity(1.f);
}
PS: VS 2022在Components文件夹下的Include路径提示没了,老给我报错,然后编译其实是好的,坑了我半天。。。
PostProcessVolume部分
这里可能需要在场景里添加PostProcessVolume对应的Actor,所以也设计个函数:
AActor* FMakeLevelDarkModule::AddActor(TSubclassOf<AActor> ActorClass)
{


	ULevel* Level = GEditor->GetEditorWorldContext().World()->GetCurrentLevel();
	return GEditor->AddActor(Level, ActorClass, FTransform());
}
然后继续后面的逻辑:
FoundActor = FindActor(APostProcessVolume::StaticClass());

// 没找到则创建
if (!FoundActor)
{


	DialogText = FText::FromString("PostProcessVolume Not Found, Creating One");
    // 在创建PoseProcessVolume的时候加个Message提示
	FMessageDialog::Open(EAppMsgType::Ok, DialogText);

	FoundActor = AddActor(APostProcessVolume::StaticClass());
}

// 直接修改
if (FoundActor)
{


	APostProcessVolume* PPVol;
	PPVol = Cast<APostProcessVolume>(FoundActor);
	if (PPVol)
	{


		PPVol->Settings.AutoExposureBias = -3.f;
		PPVol->Settings.bOverride_AutoExposureBias = true;
		PPVol->bUnbound = true;
	}
}
自定义窗口,展示项目里所有的动画资产
貌似是有两种做法:
- 通过蓝图实现,创建Editor Widget蓝图(注意是Editor Widget资产,不是Widget Blueprint)
- 通过C++创建Plugins实现
参考:Slate Editor Window Quickstart Guide
第一种方式就不提了,它也不是个插件,这里研究的是使用C++创建Slate Editor Window来创建插件
前面没写过Slate相关的内容,这里先学习一下,具体分为以下几步:
- 创建插件
- 写一个简单的Widget类,加入到插件对应的Editor Window里,学习Slate C++的写法
- 把这个Widget类变得复杂,让它可以绘制出所有动画资产
创建Editor Standalone Window类型的插件
这个就不多说了,我创建的插件名为AnimationLibraryPreviewer,结果这次又报错了:
Failed to compile plugin source code. See output log for more information.
跟Live Coding好像也没关系,很烦,只能又删除Cache文件重新导入了。。。。。
此时会创建以下文件,可以发现跟前面的Editor Toolbar Button模板插件创建的文件相同:
基于UE的模板,此时就已经可以在Window的下拉页面里找到打开Editor Window的Menu了,初始的窗口如下图所示:
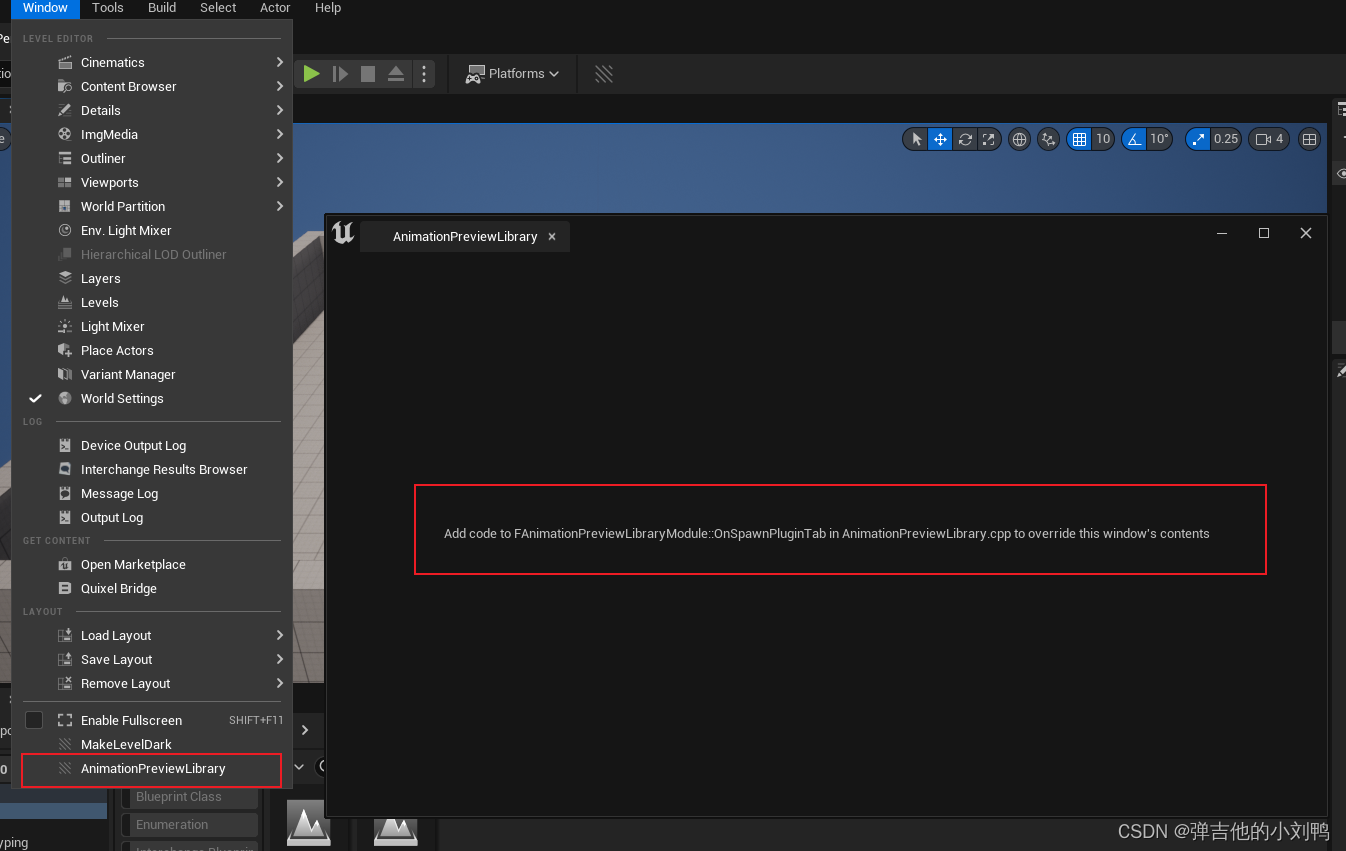
窗口上让我去改FAnimationPreviewLibraryModule::OnSpawnPluginTab函数,可以来看看对应的代码,来学习下UE里描述Slate的语法:
TSharedRef<SDockTab> FAnimationPreviewLibraryModule::OnSpawnPluginTab(const FSpawnTabArgs& SpawnTabArgs)
{


	// 创建一个长Text
    FText WidgetText = FText::Format(
        LOCTEXT("WindowWidgetText", "Add code to {0} in {1} to override this window's contents"),
        FText::FromString(TEXT("FAnimationPreviewLibraryModule::OnSpawnPluginTab")),
        FText::FromString(TEXT("FAnimationPreviewLibraryModule.cpp"))
        );

    return SNew(SDockTab)					// 1. 创建了DockableTab
    .TabRole(ETabRole::NomadTab)			// 2. 指定Tab类型
    [
        // Put your tab content here!
        SNew(SBox)							// 3. 创建Box
        .HAlign(HAlign_Center)				// 4. 水平和竖直方向的align方式都为居中
        .VAlign(VAlign_Center)
        [
            SNew(STextBlock)				// 5. 里面再创建一个TextBlock, 指定Text为WidgetText
            .Text(WidgetText)
        ]
    ];

}
重点如下:
- SNew(SDockTab)创建了一个SDockTab,代表着这个Dockable的EditorWindow
- ETabRole有五种类型:MajorTab, PanelTab, NomadTab, DocumentTab, NumRoles, 这里的Nomad是游牧民族的意思,这里可以翻译为游离的Tab,挺形象
- 这里面UI Element的父子关系是通过
[]实现的
其实用UMG创建Widget蓝图,也差不多是这么个操作,UMG是基于Slate封装(Slate的UObject性质的一层封装)的可视化编辑器,它还添加了很多事件和方法,更多的Slate语法参考Slate Overview
创建Menu类
You can add Slate widgets directly to the FAnimationPreviewLibraryModule class generated by the Plugin wizard. However, there are some limitations to how you can handle your widgets’ callbacks if you do this. Therefore, you should create a dedicated Slate widget to hold the menu’s contents, then add that widget to the FAnimationPreviewLibraryModule class.
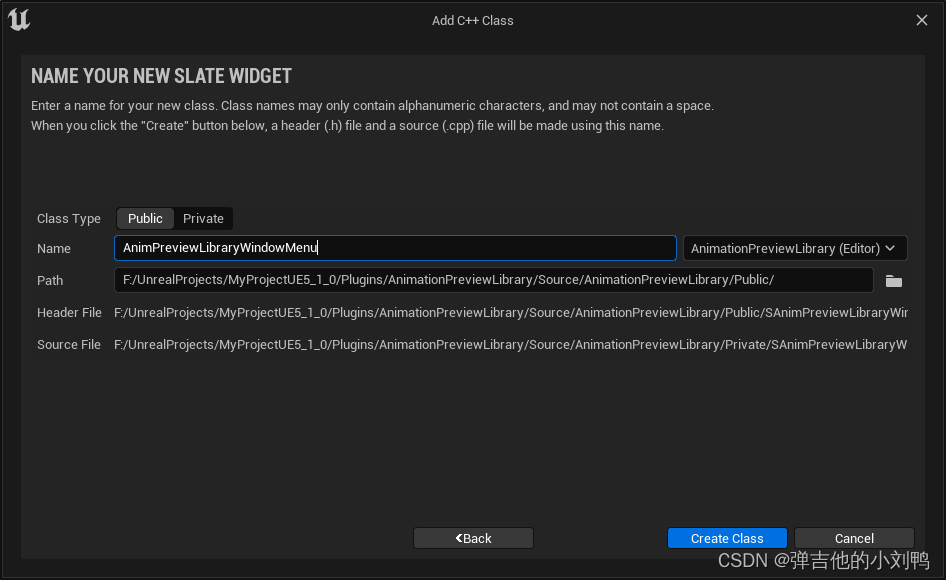
这里并没有选择直接在FAnimationPreviewLibraryModule类里添加Slate widgets,而是选择在对应的插件工程里创建了一个新的Slate Widget类AnimPreviewLibraryWindowMenu,其实就是创建了一个自定义的Slate Widget(类似于Unity里的自定义Visual Element)。
如下图所示,注意要在下拉箭头选择对应的Project,不然就会加到默认的Game Code里
创建的类会自带一个Construct函数:
// SAnimPreviewLibraryWindowMenu.cpp
#include "SAnimPreviewLibraryWindowMenu.h"
#include "SlateOptMacros.h"

BEGIN_SLATE_FUNCTION_BUILD_OPTIMIZATION
void SAnimPreviewLibraryWindowMenu::Construct(const FArguments& InArgs)
{


	// 注意这里的[]是必须要有内容的, 否则会编译报错
	/*
	ChildSlot
	[
		// Populate the widget
	];
	*/
}
END_SLATE_FUNCTION_BUILD_OPTIMIZATION
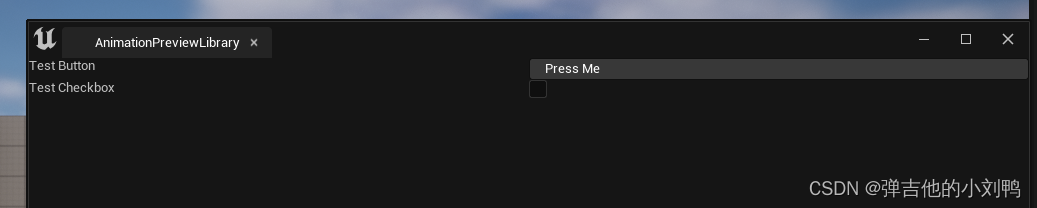
这里填充代码为:
void SAnimPreviewLibraryWindowMenu::Construct(const FArguments& InArgs)
{


    ChildSlot
    [
        SNew(SVerticalBox)                                      // 1. 先创建SVerticalBox
        + SVerticalBox::Slot()                                  // 2. 添加Slot, 里面存SHorizontalBox, 代表第一行
        .AutoHeight()
        [
            SNew(SHorizontalBox)
            + SHorizontalBox::Slot()
            .VAlign(VAlign_Top)
            [
                SNew(STextBlock)
                .Text(FText::FromString("Test Button"))
            ]
            + SHorizontalBox::Slot()
            .VAlign(VAlign_Top)
            [
                SNew(SButton)
                .Text(FText::FromString("Press Me"))
            ]
        ]
        + SVerticalBox::Slot()                                  // 3. 添加Slot, 里面存SHorizontalBox, 代表第二行
        .AutoHeight()
        [
            SNew(SHorizontalBox)
            + SHorizontalBox::Slot()
            .VAlign(VAlign_Top)
            [
                SNew(STextBlock)
                .Text(FText::FromString("Test Checkbox"))
            ]
            + SHorizontalBox::Slot()
            .VAlign(VAlign_Top)
            [
                SNew(SCheckBox)
            ]
        ]
     ];
}
接下来,需要让原本的Editor窗口创建刚刚创建的UI Element,需要修改原本的OnSpawnPluginTab,代码如下:
TSharedRef<SDockTab> FAnimationPreviewLibraryModule::OnSpawnPluginTab(const FSpawnTabArgs& SpawnTabArgs)
{


	return SNew(SDockTab)
		.TabRole(ETabRole::NomadTab)
		[
			// Put your tab content here!
			SNew(SAnimPreviewLibraryWindowMenu)
		];
}
You can’t compile Slate windows while Live Coding is active and your project is open in Unreal Editor. Make sure to close Unreal Editor before trying to compile your code.
关闭Editor,在VS里按Ctrl + F5,重新启动,再打开编辑器窗口即可,如下图所示:
简单提一下这里相关Event的处理方法,思路就是在创建Button类似的Widget时,为其指定回调函数
比如Button的写法:
+SHorizontalBox::Slot()
.VAlign(VAlign_Top)
[
    SNew(SButton)
    .Text(FText::FromString("Press Me"))
    // SP代表Shared pointer delegates
    // FOnClicked是UE里给Slate提供回调的类, OnTestButtonClicked是此类自定义的函数
    .OnClicked(FOnClicked::CreateSP(this, &SAnimPreviewLibraryWindowMenu::OnTestButtonClicked))
]

// 回调函数签名为:
FReply SAnimPreviewLibraryWindowMenu::OnTestButtonClicked()
{


    return FReply::Handled();
}
Checkbox的回调如下所示:
+SHorizontalBox::Slot()
.VAlign(VAlign_Top)
[
	// 添加对CheckBox的回调
    SNew(SCheckBox)
    // 当CheckState改变时的回调
    .OnCheckStateChanged(FOnCheckStateChanged::CreateSP(this, &SAnimPreviewLibraryWindowMenu::OnTestCheckboxStateChanged))
    // IsChecked应该是Check的时候的回调吧
    .IsChecked(FIsChecked::CreateSP(this, &SAnimPreviewLibraryWindowMenu::IsTestBoxChecked))
]
加载资产
这里的想法是:
- 找到项目里面Content文件夹下的所有的uasset的路径
- 把uasset一一加载进来,判断哪些类型为AnimAsset
- 把这些动画资产绘制到Editor Window上,每个资产对应一个Object Field
- 点击动画资产时,Project Content窗口自动锁定到对应的文件
加载并找到所有的AnimAsset
代码如下:
TArray<UObject*> MeshAssets;
EngineUtils::FindOrLoadAssetsByPath(TEXT("/Game/"), MeshAssets, EngineUtils::ATL_Regular);

for (UObject* f : MeshAssets)
{


    UAnimationAsset* animx = Cast<UAnimationAsset>(f);
    if (animx)
    {


        UE_LOG(LogTemp, Warning, TEXT("%s"), *FString(animx ->GetName()));
    }
}
动画资产绘制到Editor Window上
本来想绘制的,发现很麻烦,用Widget Reflector查了下UE里绘制类似东西的类,叫SDetailSingleItemRow,这个是带略缩图的,也是绘制在资产的Details里用的Object Field,但是它并没有暴露出来。不过我看到可以用SObjectPropertyEntryBox,虽然它不带略缩图,但是其Construct函数和GetDesiredWidth作为接口暴露出来了。
所以这里直接修改原本的SAnimPreviewLibraryWindowMenu::Construct函数:
void SAnimPreviewLibraryWindowMenu::Construct(const FArguments& InArgs)
{


	// 1. 读资源
    FAssetRegistryModule& AssetRegistryModule = FModuleManager::LoadModuleChecked<FAssetRegistryModule>("AssetRegistry");
    TArray<FAssetData> AssetData;

    TArray<UObject*> MeshAssets;
    EngineUtils::FindOrLoadAssetsByPath(TEXT("/Game/"), MeshAssets, EngineUtils::ATL_Regular);


    TArray<UAnimationAsset*> AnimAsset;
    for (UObject* f : MeshAssets)
    {


        UAnimationAsset* animx = Cast<UAnimationAsset>(f);
        if (animx)
        {


            UE_LOG(LogTemp, Warning, TEXT("%s"), *FString(animx->GetName()));
            AnimAsset.Add(animx);
        }
    }


	// 2. 绘制一个大的Container
    TSharedPtr<SVerticalBox> Container = SNew(SVerticalBox);
    for (int32 idx = 0; idx < AnimAsset.Num(); idx++)
    {


        Container->AddSlot()
        [
            SNew(SObjectPropertyEntryBox)
            .EnableContentPicker(false)
            .AllowClear(false)
            .AllowedClass(UAnimationAsset::StaticClass())
            .DisplayBrowse(true)
            .DisplayThumbnail(true)
            .ObjectPath(AnimAsset[idx]->GetPathName())
        ];
    }

	// 3. Container加到ChildSlot里
    ChildSlot
    [
        SNew(SVerticalBox)
        + SVerticalBox::Slot()
        .AutoHeight()
        [
            Container.ToSharedRef()
        ]
    ];
}
把一些选项允许用户在Obejct Field里挑选资产的东西禁用掉了,最后效果如下:
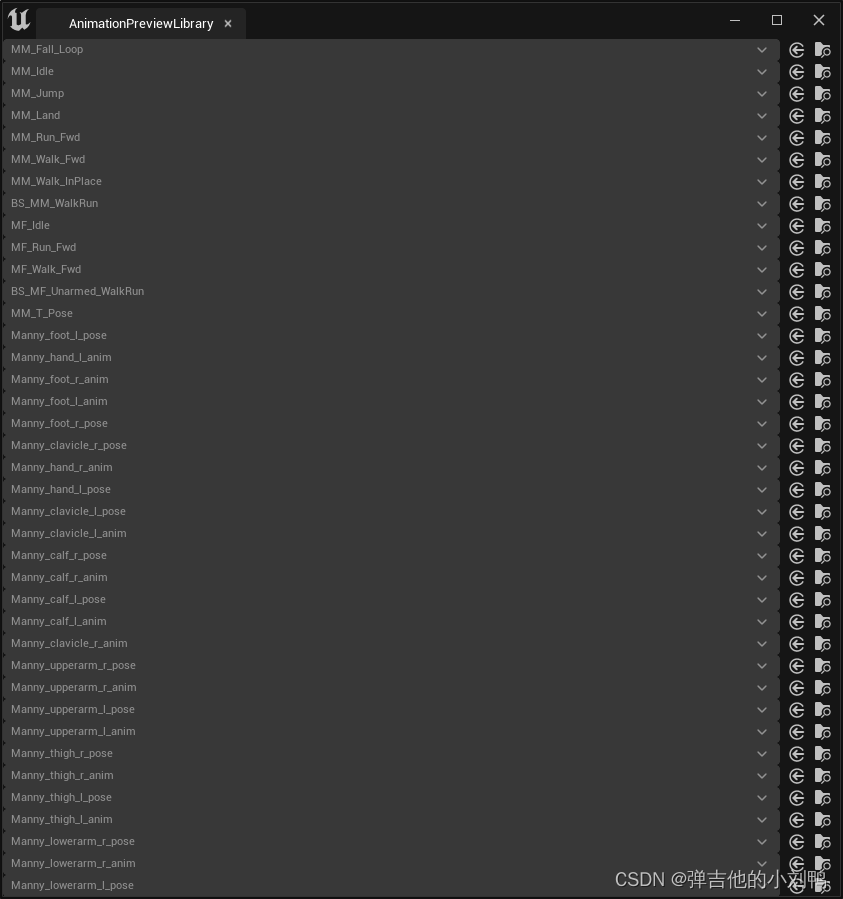
有点丑陋,而且不可以用滚轮,不过都是小问题,就这样吧
顺便提一句,游戏里面可能会创建自定义的资产,然后要打开它,编辑自定义的资产窗口,此时需要借助FAssetEditorToolkit类完成
附录
关于Slots
参考:https://docs.unrealengine.com/4.26/en-US/InteractiveExperiences/UMG/UserGuide/Slots/
参考:https://forums.unrealengine.com/t/how-to-define-a-slate-via-c/385892
Slots are the invisible glue that bind Widgets together. In Slate they are a lot more explicit in that you must first create a Slot then choose what control to place inside of it. In UMG, however, you have Panel Widgets that automatically use the right kind of Slot when Child Widgets are added to them.
Slot用于连接Widget(类似于Unity里的umxl文件用于连接Visual Elements),在UMG里,为Widget添加子Widget时,系统会自动创建Slot,再在里面创建对应的子Widget,而Slate里,则就需要自己手动创建Slot了。
You can declere only one widget in single slot, in order to have more then single widget you need a panel widget. If you ever used UMG you should already understand this concept because UMG inherent this limitation. So if you want to widget one after nother verticuly you can use SVerticalBox, you a…
Slot里只允许有一个widget,要想有多个widget,需要创建panel widget,像UE里,纵向创建UI Element的写法时,需要借助一个SVerticalBox,如下图所示:
SNew(SVerticalBox)
	// 在SVerticalBox的SNew后面连续调用+SVerticalBox::Slot(), 每个Slot里再创建一个子Widget
	+ SVerticalBox::Slot()
	[
        SNew(SButton)
        Content()
    	[
           SNew(STextBlock)
        ]
    ]
	+ SVerticalBox::Slot()
	[
        SNew(SButton)
        Content()
    	[
           SNew(STextBlock)
        ]
    ]
widget reflector
参考:https://forums.unrealengine.com/t/how-to-define-a-slate-via-c/385892
Now best way to find examples for slate is editor source code, There tool called widget reflector, in Window->Devlopment Tools which let you explore widget tree of editor, so if you wonder how specific widget was done, you scan that widget and you should get name and then you can search it in github to see how this widget got coded.
里面可以看看UE提供的Widget样例,UE4里在Window->Devlopment Tools->widget reflector,UE5里移到了Tools -> Debug->widget reflector里
UE读取文件
参考:https://forums.unrealengine.com/t/using-ffilemanagergeneric-for-listing-files-in-directory/286866/4
参考:https://forums.unrealengine.com/t/find-files-by-extension-ifilemanager-findfilesrecursive/37463/6
主要是因为UE里读取资产的路径不是全局路径,而是它自己弄的这个路径机制,前面其实写过了:
TArray<UObject*> MeshAssets;
EngineUtils::FindOrLoadAssetsByPath(TEXT("/Game/"), MeshAssets, EngineUtils::ATL_Regular);

for (UObject* f : MeshAssets)
{


    UAnimationAsset* animx = Cast<UAnimationAsset>(f);
    if (animx)
    {


        UE_LOG(LogTemp, Warning, TEXT("%s"), *FString(animx ->GetName()));
    }
}
UE获取文件夹下特定的后缀的文件的全局路径
几个重要的点:
- UE里的路径一般通过
FPaths类里的静态成员获取 - 可以通过FFileManagerGeneric找到特定文件夹下的文件对应的路径
举个例子:
// 找到特定文件夹下的所有xml文件(不包含子文件夹里的文件)
TArray<FString> FileNames;
FFileManagerGeneric FileMgr;
FileMgr.SetSandboxEnabled(true);// don't ask why, I don't know :P
FString wildcard("*.xml"); // May be "" (empty string) to search all files
FString search_path(FPaths::Combine(*FPaths::GameDir(), TEXT("Data"), *wildcard));

FileMgr.FindFiles(FileNames, *search_path,
                                 true,  // to list files
                                 false); // to skip directories

// 打印出来
for (auto f : FileNames)
{


    FString filename(f);
    UE_LOG(LogTemp, Warning, TEXT("%s"), *f);
}

FileNames.Empty();// Clear array
再举个例子,这个写法是递归的:
TArray<FString> FileNames;
FFileManagerGeneric FileMgr;
FileMgr.SetSandboxEnabled(true);
FString searchFolder(FPaths::Combine(*FPaths::ProjectDir(), TEXT("Content")));

// 其实就是const TCHAR* extension = L"*.uasset";
const TCHAR* extension = _T("*.uasset");
FileMgr.FindFilesRecursive(FileNames, *searchFolder, extension,
    true,  // to list files
    false); // to skip directories