文章目录
前言
从模型到实际的部署,将模型的输出性能转化为实际项目和工作上去,使用c++成功部署是十分重要的。自己以前也有学过c++,还有c++和opencv的基础,正好可以运用上。
源码:https://github.com/ultralytics/yolov5
版本yolov5 v6.1
1.模型转换
通过将torch生成的模型权重,转换为onnx格式
yolov5源码中提供了导出onnx格式的代码export.py,通过torch.onnx.export函数转换输出的模型。
def export_onnx(model, im, file, opset, train, dynamic, simplify, prefix=colorstr('ONNX:')):
    # YOLOv5 ONNX export
    try:
        check_requirements(('onnx',))
        import onnx
        LOGGER.info(f'\n{

      prefix} starting export with onnx {

      onnx.__version__}...')
        f = file.with_suffix('.onnx')
        torch.onnx.export(      # 模型的输入参数的类型必须全部是 torch.Tensor
            model,        # 前三个必选参数
            im,         # 初始化为0的输入
            f,          # 导出的 ONNX 文件的文件名
            verbose=False,
            opset_version=opset,     # ONNX 算子集的版本
            training=torch.onnx.TrainingMode.TRAINING if train else torch.onnx.TrainingMode.EVAL,
            do_constant_folding=not train, # # 是否执行常量折叠优化
            input_names=['images'],  # 输入名称
            output_names=['output'],    # 输出名称
            dynamic_axes={

       # 批处理变量,指定输入输出张量的哪些维度是动态的。
                'images': {


                    0: 'batch',
                    2: 'height',
                    3: 'width'},  # shape(1,3,640,640)
                'output': {


                    0: 'batch',
                    1: 'anchors'}  # coco:shape(1,25200,85)
            } if dynamic else None)

        # Checks,检查输出模型文件是否正确
        model_onnx = onnx.load(f)  # load onnx model
        onnx.checker.check_model(model_onnx)  # check onnx model,用于检查模型格式是否正确
现在导出的onnx格式是经过解码后处理模式的,所以在我们转换成onnx格式后,只要大致用c++对其进行detect.py对应的推理部署即可。
    for k, m in model.named_modules():
        if isinstance(m, Detect):   # 在Detect输出会有不同
            m.inplace = inplace
            m.onnx_dynamic = dynamic
            m.export = True
上面进行export导出时,dynamic决定是否启用动态输入数据,默认时静态的。export用来决定输出最终的预测结果时的返回参数的数量和格式,在yolo.py的Detect类里存在onnx_dynamic和export的相应的参数指令。
class Detect(nn.Module):
    stride = None  # strides computed during build
    onnx_dynamic = False  # ONNX export parameter
    export = False  # export mode
输出格式区别:
return x if self.training else (torch.cat(z, 1),) if self.export else (torch.cat(z, 1), x) # 这里导出ONNX时,和验证时一样已经进行了解码操作的
转化指令
Requirements:
    $ pip install -r requirements.txt  onnx onnx-simplifier
    $ pip install -r requirements.txt  onnx onnx-simplifier

Usage:
    $ python path/to/export.py --weights yolov5s.pt --include torchscript onnx openvino engine coreml tflite ...

Inference:
    $ python path/to/detect.py --weights yolov5s.pt                 # PyTorch
                                         yolov5s.torchscript        # TorchScript
                                         yolov5s.onnx               # ONNX Runtime or OpenCV DNN with --dnn
                                         yolov5s.xml                # OpenVINO
                                         yolov5s.engine             # TensorRT
                                         yolov5s.mlmodel            # CoreML (macOS-only)
                                         yolov5s_saved_model        # TensorFlow SavedModel
                                         yolov5s.pb                 # TensorFlow GraphDef
                                         yolov5s.tflite             # TensorFlow Lite
                                         yolov5s_edgetpu.tflite     # TensorFlow Edge TPU
比如转onnx:
可以加上–simplify,可以进一步优化导出的onnx
python export.py --weights /data/weight/yolov5s.pt --simplify --include onnx --device 0
2.利用opencv进行c++部署
使用opencv进行部署的主要头文件
#include <fstream>
#include <sstream>
#include <iostream>
#include <opencv2/dnn.hpp>      // 深度学习模块
#include <opencv2/imgproc.hpp>	// 图像处理模块
#include <opencv2/highgui.hpp>  // GUI图形

#include<time.h>
参数配置的设置
// 自定义配置结构
struct Configuration
{


	public:
	float confThreshold; // Confidence threshold,置信度*分类分数后的阈值
	float nmsThreshold;  // Non-maximum suppression threshold,iou阈值
	float objThreshold;  //Object Confidence threshold,置信度阈值
	string modelpath;   // 模型路径
};
yolov5模型
首先,定义一个yolov5的类
// 模型
class YOLOv5
{


public:
    // 初始化
	YOLOv5(Configuration config,bool isCuda);
	void detect(Mat& frame);  // 检测函数
private:
	//float* anchors;
	//int num_stride;
	float confThreshold;
	float nmsThreshold;
	float objThreshold;
	int inpWidth;
	int inpHeight;
	int num_classes;
    string classes[80] = {

    "person", "bicycle", "car", "motorbike", "aeroplane", "bus",
							"train", "truck", "boat", "traffic light", "fire hydrant",
							"stop sign", "parking meter", "bench", "bird", "cat", "dog",
							"horse", "sheep", "cow", "elephant", "bear", "zebra", "giraffe",
							"backpack", "umbrella", "handbag", "tie", "suitcase", "frisbee",
							"skis", "snowboard", "sports ball", "kite", "baseball bat",
							"baseball glove", "skateboard", "surfboard", "tennis racket",
							"bottle", "wine glass", "cup", "fork", "knife", "spoon", "bowl",
							"banana", "apple", "sandwich", "orange", "broccoli", "carrot",
							"hot dog", "pizza", "donut", "cake", "chair", "sofa", "pottedplant",
							"bed", "diningtable", "toilet", "tvmonitor", "laptop", "mouse",
							"remote", "keyboard", "cell phone", "microwave", "oven", "toaster",
							"sink", "refrigerator", "book", "clock", "vase", "scissors",
							"teddy bear", "hair drier", "toothbrush"};
	//vector<string> class_names;
	const bool keep_ratio = true;  // 保持长宽比进行缩放
	Net net;   // dnn里的
	void drawPred(float conf, int left, int top, int right, int bottom, Mat& frame, int classid);
	Mat resize_image(Mat srcimg, int *newh, int *neww, int *top, int *left);
};
初始化yolov5
YOLOv5::YOLOv5(Configuration config,bool isCuda=false)
{


	this->confThreshold = config.confThreshold;
	this->nmsThreshold = config.nmsThreshold;
	this->objThreshold = config.objThreshold;

	this->net = readNet(config.modelpath);  // 解析模型onnx权重。dnn.hpp
	 //cuda // https://blog.csdn.net/cxyhjl/article/details/125383555
	if (isCuda) {


		net.setPreferableBackend(cv::dnn::DNN_BACKEND_CUDA);
		net.setPreferableTarget(cv::dnn::DNN_TARGET_CUDA);
		cout<<"cuda"<<endl;
	}
	//cpu
	else {


		net.setPreferableBackend(cv::dnn::DNN_BACKEND_DEFAULT);
		net.setPreferableTarget(cv::dnn::DNN_TARGET_CPU);
	}
	this->num_classes = sizeof(this->classes)/sizeof(this->classes[0]);  // 类别数量
	this->inpHeight = 640;   // 输入尺寸
	this->inpWidth = 640;
}
输入图像预处理
这里用opencv的dnn处理的时候,没有使用动态输入而是使用静态输入,所以输入大小是固定为训练时的大小。
而yolov5的python代码处理时,利用长宽比进行缩放图片的输入尺寸时会对需要填充的区域进行下采样最后的步长(如32)取模操作,这样可以在短边进行无效区域填充时填充更少区域,减小短边输入尺寸(不是(640,640),可能是(640,480)),加快推理速度。
# python里letterbox取模的部分
dw, dh = new_shape[1] - new_unpad[0], new_shape[0] - new_unpad[1]  # wh padding  #
if auto:  # minimum rectangle
    dw, dh = np.mod(dw, stride), np.mod(dh, stride)  # wh padding np.mod取模运算
----------------------------------------------------------------------
dw /= 2  # divide padding into 2 sides
dh /= 2
if shape[::-1] != new_unpad:  # resize
    im = cv2.resize(im, new_unpad, interpolation=cv2.INTER_LINEAR)
top, bottom = int(round(dh - 0.1)), int(round(dh + 0.1))
left, right = int(round(dw - 0.1)), int(round(dw + 0.1))
im = cv2.copyMakeBorder(im, top, bottom, left, right, cv2.BORDER_CONSTANT, value=color)  # add border
推理前对输入图像尺寸的预处理

Mat YOLOv5::resize_image(Mat srcimg, int *newh, int *neww, int *top, int *left)
{


	int srch = srcimg.rows, srcw = srcimg.cols;  // 输入高宽
	*newh = this->inpHeight;    // 指针变量指向输入yolo模型的宽高
	*neww = this->inpWidth;
	Mat dstimg;                 // 定义一个目标源
	if (this->keep_ratio && srch != srcw) {

      // 高宽不等
		float hw_scale = (float)srch / srcw; // 保存比列
		if (hw_scale > 1) {

         // 按照yolov5的预处理进行处理
			*newh = this->inpHeight;
			*neww = int(this->inpWidth / hw_scale); //
			resize(srcimg, dstimg, Size(*neww, *newh), INTER_AREA);
			*left = int((this->inpWidth - *neww) * 0.5);
            // 和yolov5的处理对应,没有进行32的取模运算,用114像素填充到(640,640)了,最后输入还是640,640
			copyMakeBorder(dstimg, dstimg, 0, 0, *left, this->inpWidth - *neww - *left, BORDER_CONSTANT, 114);
		}
		else {


			*newh = (int)this->inpHeight * hw_scale;
			*neww = this->inpWidth;
			resize(srcimg, dstimg, Size(*neww, *newh), INTER_AREA);
			*top = (int)(this->inpHeight - *newh) * 0.5;
			copyMakeBorder(dstimg, dstimg, *top, this->inpHeight - *newh - *top, 0, 0, BORDER_CONSTANT, 114);
		}
	}
	else {


		resize(srcimg, dstimg, Size(*neww, *newh), INTER_AREA);
	}
	return dstimg;
}
进行预测推理
其实整个推理过程就是对应yolov5里的detect.py里的步骤,知道python里的步骤,只要用c++进行相应的处理即可。
python里detect.py的推理部分可以看我的:yolov5的推理输出detect.py部分
利用opencv的dnn进行推理,一些函数的输入输出可以进c++的源码和opncv官网文档查看:
https://docs.opencv.org/4.5.3/
void YOLOv5::detect(Mat& frame)
{
int newh = 0, neww = 0, padh = 0, padw = 0; // 对应python里的letterbox
Mat dstimg = this->resize_image(frame, &newh, &neww, &padh, &padw); // 预处理
Mat blob = blobFromImage(dstimg, 1 / 255.0, Size(this->inpWidth, this->inpHeight), Scalar(0, 0, 0), true, false); // return:4-dimensional Mat with NCHW dimensions order.返回一个4D矩阵
this->net.setInput(blob); // 设置输入
vector<Mat> outs; // 输出保存的容器
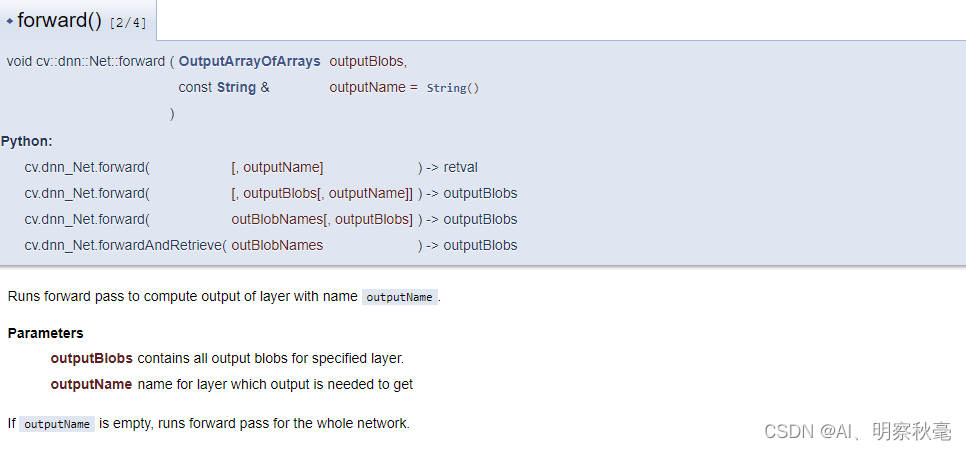
this->net.forward(outs, this->net.getUnconnectedOutLayersNames()); //返回运行结果 [b,num_pre,(5+classes)]
int num_proposal = outs[0].size[1]; // 25200
int out_dim2 = outs[0].size[2]; //
if (outs[0].dims > 2)
{
outs[0] = outs[0].reshape(0, num_proposal); // 一般都会大于二维的,所以展平二维[b,num_pre*(5+classes)]
}
/generate proposals
vector<float> confidences;
vector<Rect> boxes; // opencv里保存box的
vector<int> classIds; // 后面画图的时候根据id找类别名
float ratioh = (float)frame.rows / newh, ratiow = (float)frame.cols / neww;
///xmin,ymin,xamx,ymax,box_score,class_score
float* pdata = (float*)outs[0].data; // 定义浮点型指针,
for(int i = 0; i < num_proposal; ++i) // 遍历所有的num_pre_boxes
{
int index = i * out_dim2; // prob[b*num_pred_boxes*(classes+5)]
float obj_conf = pdata[index + 4]; // 置信度分数
if (obj_conf > this->objThreshold) // 大于阈值
{
//Mat scores = outs[0].row(row_ind).colRange(5, nout); // 相当于python里的切片操作,每类的预测类别分数
Mat scores(1, this->num_classes, CV_32FC1, pdata+index + 5); // 这样操作更好理解,定义一个保存所有类别分数的矩阵[1,80]
Point classIdPoint; //定义点
double max_class_socre; // 定义一个double类型的变量保存预测中类别分数最大值
// Get the value and location of the maximum score
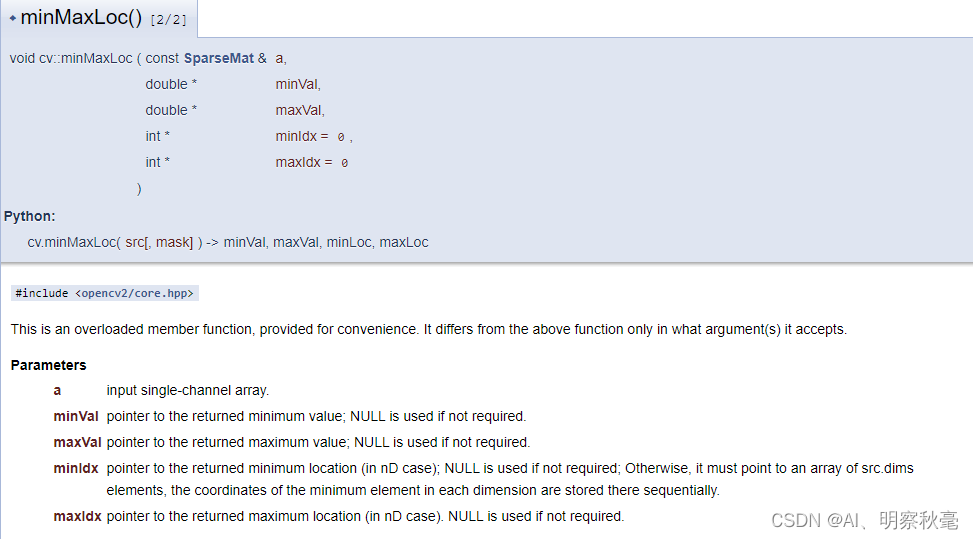
minMaxLoc(scores, 0, &max_class_socre, 0, &classIdPoint); // 求每类类别分数最大的值和索引
// 当然如果对opencv一些api不熟悉的话,可以自己写求最大分数和索引的循环
// int class_idx = 0;
// float max_class_socre = 0;
// for (int k = 0; k < this->num_classes; ++k)
// {
// if (pdata[k + index + 5] > max_class_socre)
// {
// max_class_socre = pdata[k + index + 5]; // 最大分数
// class_idx = k; // 对应的索引
// }
// }
max_class_socre *= obj_conf; // 最大的类别分数*置信度
if (max_class_socre > this->confThreshold) // 再次筛选
{
const int class_idx = classIdPoint.x; // 类别索引,在yolo里就是表示第几类
// 看到很多以前部署代码要自己解码,现在转换的时候已经一起解码了(在yolov5的yolo.py,Detect推理部分)就不用这样操作了
// float cx = (pdata[0] * 2.f - 0.5f + j) * stride; ///cx,映射回原图。对应yolov5里后处理部分
// float cy = (pdata[1] * 2.f - 0.5f + i) * stride; ///cy,但是现在的yolov5导出的onnx已经将这个处理放在里面了
// float w = powf(pdata[2] * 2.f, 2.f) * anchor_w; ///w,所以这里不需要后处理一下了,直接取输出就行
// float h = powf(pdata[3] * 2.f, 2.f) * anchor_h; ///h
// 经过后处理的只需要直接取就行
float cx = pdata[index]; //x
float cy = pdata[index+1]; //y
float w = pdata[index+2]; //w
float h = pdata[index+3]; //h
int left = int((cx - padw - 0.5 * w)*ratiow); // *ratiow,变回原图尺寸
int top = int((cy - padh - 0.5 * h)*ratioh);
confidences.push_back((float)max_class_socre);
boxes.push_back(Rect(left, top, (int)(w*ratiow), (int)(h*ratioh))); //(x,y,w,h)
classIds.push_back(class_idx); //
}
}
}
// 进行nms和画图
vector<int> indices;
dnn::NMSBoxes(boxes, confidences, this->confThreshold, this->nmsThreshold, indices);
for (size_t i = 0; i < indices.size(); ++i)
{
int idx = indices[i];
Rect box = boxes[idx];
this->drawPred(confidences[idx], box.x, box.y,
box.x + box.width, box.y + box.height, frame, classIds[idx]);
}
}
blobFromImage模块:
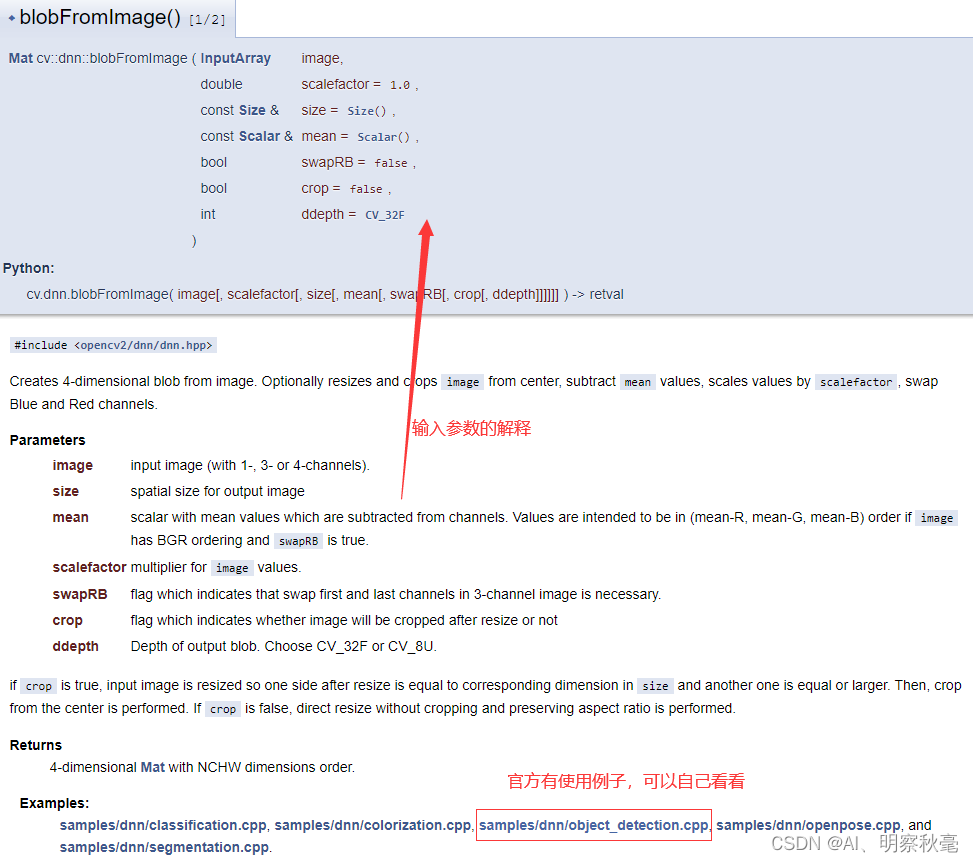
主要对应yolov5图像预处理里的像素值归一化(使用scalefactor = (1/255.0))和将opencv读取的bgr转成rgb(使用swapRB = true)。
dnn里net的forward模块:
minMaxLoc模块:
可视化输出结果
opencv的操作在python和c++里都是差不多的。
void YOLOv5::drawPred(float conf, int left, int top, int right, int bottom, Mat& frame, int classid)   // Draw the predicted bounding box
{


	//Draw a rectangle displaying the bounding box
	rectangle(frame, Point(left, top), Point(right, bottom), Scalar(0, 0, 255), 2);
	//Get the label for the class name and its confidence
	string label = format("%.2f", conf);
	label = this->classes[classid] + ":" + label;
	//Display the label at the top of the bounding box
	int baseLine;
	Size labelSize = getTextSize(label, FONT_HERSHEY_SIMPLEX, 0.5, 1, &baseLine);
	top = max(top, labelSize.height);
	//rectangle(frame, Point(left, top - int(1.5 * labelSize.height)), Point(left + int(1.5 * labelSize.width), top + baseLine), Scalar(0, 255, 0), FILLED);
	putText(frame, label, Point(left, top), FONT_HERSHEY_SIMPLEX, 0.75, Scalar(0, 255, 0), 1);
}
图片:
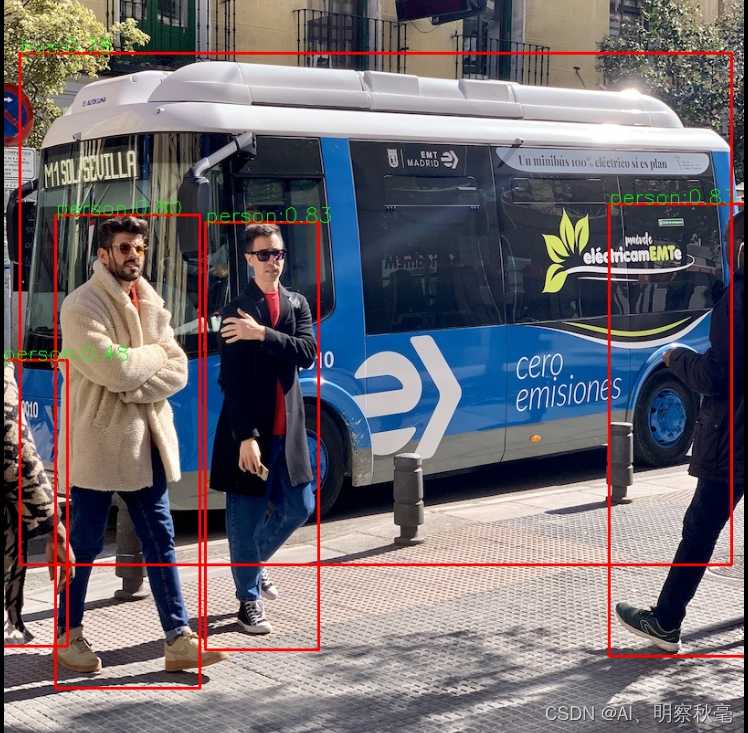
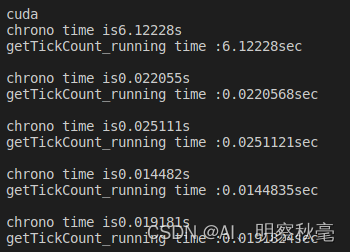
检测的时间:
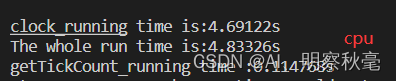
cuda在第一次使用时会初始化,这时可能检测的时间不准确,使用后面的,可以发现使用GPU的CUDA加速后,速度明显加快了。由0.11变为了0.01,快了接近10倍。
总结
c++部署
整个代码放在:https://github.com/yzy12-max/yolov5_deploy
参考:
https://docs.opencv.org/4.5.3/
https://github.com/hpc203/yolov5-v6.1-opencv-onnxrun