内容管理模块
课程分类树状结构查询
递归和内连接(左连接)两种方式
媒资管理模块
nacos配置中心
详细内容见文档笔记
-
api模块引入了service模块,并且两个模块都进行了nacos配置。由于api模块应用了service模块,所以在api的bootstrp中必须用extension-configs扩展配置文件 的方式引用service工程所用到的配置文件
-
nacos提供了shared-configs可以引入公用配置。
在content-api中配置了swagger,所有的接口工程 都需要配置swagger,这里就可以将swagger的配置定义为一个公用配置,哪个项目用引入即可。进入nacos的开发环境,添加swagger-dev.yaml公用配置。项目使用shared-configs可以引入公用配置。在接口工程的本地配置文件 中引入公用配置,如下: -
配置示例
spring: application: name: content-api cloud: nacos: server-addr: 192.168.101.65:8848 discovery: namespace: dev group: xuecheng-plus-project config: namespace: dev group: xuecheng-plus-project file-extension: yaml refresh-enabled: true extension-configs: - data-id: content-service-${ spring.profiles.active}.yaml group: xuecheng-plus-project refresh: true shared-configs: - data-id: swagger-${ spring.profiles.active}.yaml group: xuecheng-plus-common refresh: true - data-id: logging-${ spring.profiles.active}.yaml group: xuecheng-plus-common refresh: true profiles: active: dev -
nacos各配置文件 的优先级
项目应用名配置文件(nacos配置) > 扩展配置文件 > 共享配置文件 > 本地配置文件。
有时候我们在测试程序时直接在本地加一个配置进行测试,这时我们想让本地最优先,可以在nacos配置文件 中配置如下即可实现(nacos对应的项目应用名配置文件):#配置本地优先 spring: cloud: config: override-none: true
gateway
本项目主要用于路由转发
-
gateway本地bootstrap配置文件
spring: application: name: gateway cloud: nacos: server-addr: 192.168.101.65:8848 discovery: namespace: ${ spring.profiles.active} group: xuecheng-plus-project config: namespace: ${ spring.profiles.active} group: xuecheng-plus-project file-extension: yaml refresh-enabled: true shared-configs: - data-id: logging-${ spring.profiles.active}.yaml group: xuecheng-plus-common refresh: true profiles: active: dev -
nacos中gateway的配置
server:
  port: 63010 # 网关端口
spring:
  cloud:
    gateway:
#      filter:
#        strip-prefix:
#          enabled: true
      routes: # 网关路由配置
        - id: content-api # 路由id,自定义,只要唯一即可
          # uri: http://127.0.0.1:8081 # 路由的目标地址 http就是固定地址
          uri: lb://content-api # 路由的目标地址 lb就是负载均衡,后面跟服务名称
          predicates: # 路由断言,也就是判断请求是否符合路由规则的条件
            - Path=/content/** # 这个是按照路径匹配,只要以/content/开头就符合要求
#          filters:
#            - StripPrefix=1
        - id: system-api
          # uri: http://127.0.0.1:8081
          uri: lb://system-api
          predicates:
            - Path=/system/**
#          filters:
#            - StripPrefix=1
        - id: media-api
          # uri: http://127.0.0.1:8081
          uri: lb://media-api
          predicates:
            - Path=/media/**
#          filters:
#            - StripPrefix=1
上传文件接口
文件的分块合并(IO流应用)
此部分涉及IO流对文件的读取,新知识需要学习
-
分块代码:
public static void testChunk() throws IOException {


        File sourceFile = new File("D:/data/videoTest.mp4");
        String chunkPath = "D:/data/chunk/";
        File chunkFolder = new File(chunkPath);
        if (!chunkFolder.exists()) {


            chunkFolder.mkdirs();
        }
        //分块大小
        long chunkSize = 1024 * 1024 * 1;
        //分块数量
        long chunkNum = (long) Math.ceil(sourceFile.length() * 1.0 / chunkSize);
        System.out.println("分块总数:"+chunkNum);
        //缓冲区大小
        byte[] b = new byte[1024*1024];
        //使用RandomAccessFile访问文件
        RandomAccessFile raf_read = new RandomAccessFile(sourceFile, "r");
        //分块
        for (int i = 0; i < chunkNum; i++) {


            //创建分块文件
            File file = new File(chunkPath + i);
            if(file.exists()){


                file.delete();
            }
            boolean newFile = file.createNewFile();
            if (newFile) {


                //向分块文件中写数据
                RandomAccessFile raf_write = new RandomAccessFile(file, "rw");
                int len = -1;
                while ((len = raf_read.read(b)) != -1) {


                    raf_write.write(b, 0, len);
                    if (file.length() >= chunkSize) {


                        break;
                    }
                }
                raf_write.close();
                System.out.println("完成分块"+i);
            }

        }
        raf_read.close();
    }
由于平时习惯使用文件输入输出流来实现IO的读写,所以可以将RandomAccessFile改为输入输出流。
RandomAccessFile随机流和IO流的原理是不同的。随机流的优点就是可以随意从指定的位置读取文件。public static void testChunks() throws IOException{ // 要读取的文件 File sourceFile = new File("D:/data/videoTest.mp4"); // 分割文件的存储目录 String chunkPath = "D:/data/chunk/"; File chunkFolder = new File(chunkPath); if(!chunkFolder.exists()) chunkFolder.mkdirs(); // 分块大小 long chunkSize = 1024 * 1024 * 1; // 分块数量 long chunkNum = (long) Math.ceil(sourceFile.length() * 1.0 / chunkSize); System.out.println("分块总数:"+chunkNum); // 缓冲区大小 byte[] b = new byte[1024*1024]; InputStream stream_read = new FileInputStream(sourceFile); for(int i = 0; i < chunkNum; i++){ // 创建分块文件对象 File file = new File(chunkPath + i); if(file.exists()) file.delete(); // 创建分块文件 boolean newFile = file.createNewFile(); if(newFile){ int len = -1; FileOutputStream stream_write = new FileOutputStream(file); // 原理:输入流在第一次被读取使用之后,流的数据就消耗完了,所以想要重用的话, // 需要将流数据存入容器,再从容器取出数据构造流 // 所以下面的while循环和if中的break可以保证每次都是写入规定大小的数据 while((len = stream_read.read(b)) != -1){ stream_write.write(b, 0, len); if(file.length() > chunkSize) break; } stream_write.close(); System.out.println("完成分块"+i); } } stream_read.close(); } -
合并分块文件
通过对合并后文件和源文件MD5值对比可以判断合并是否成功
public void testMerge() throws IOException {


        //块文件目录
        File chunkFolder = new File("D:/data/chunk/");
        //原始文件
        File originalFile = new File("D:/data/videoTest.mp4");
        //合并文件
        File mergeFile = new File("D:/data/videoTest1.mp4");
        if (mergeFile.exists()) {


            mergeFile.delete();
        }
        //创建新的合并文件
        mergeFile.createNewFile();
        //用于写文件
        RandomAccessFile raf_write = new RandomAccessFile(mergeFile, "rw");
        //指针指向文件顶端
        raf_write.seek(0);
        //缓冲区
        byte[] b = new byte[1024];
        //分块列表
        File[] fileArray = chunkFolder.listFiles();
        // 转成集合,便于排序
        List<File> fileList = Arrays.asList(fileArray);
        // 从小到大排序
        Collections.sort(fileList, new Comparator<File>() {


            @Override
            public int compare(File o1, File o2) {


                return Integer.parseInt(o1.getName()) - Integer.parseInt(o2.getName());
            }
        });
        //合并文件
        for (File chunkFile : fileList) {


            RandomAccessFile raf_read = new RandomAccessFile(chunkFile, "rw");
            int len = -1;
            while ((len = raf_read.read(b)) != -1) {


                raf_write.write(b, 0, len);

            }
            raf_read.close();
        }
        raf_write.close();

        //校验文件
        try (

                FileInputStream fileInputStream = new FileInputStream(originalFile);
                FileInputStream mergeFileStream = new FileInputStream(mergeFile);


        ) {


            //取出原始文件的md5
            String originalMd5 = DigestUtils.md5Hex(fileInputStream);
            //取出合并文件的md5进行比较
            String mergeFileMd5 = DigestUtils.md5Hex(mergeFileStream);
            if (originalMd5.equals(mergeFileMd5)) {


                System.out.println("合并文件成功");
            } else {


                System.out.println("合并文件失败");
            }

        }


    }
业务层开发
DAO开发示例
-
生成实体类对应的mapper和xml文件
-
定义MybatisPlusConfig,用于扫描mapper和配置分页拦截器
@MapperScan("com.xuecheng.content.mapper") @Configuration public class MybatisPlusConfig { @Bean public MybatisPlusInterceptor mybatisPlusInterceptor(){ MybatisPlusInterceptor interceptor = new MybatisPlusInterceptor(); interceptor.addInnerInterceptor(new PaginationInnerInterceptor(DbType.MYSQL)); return interceptor; } } -
测试mapper功能
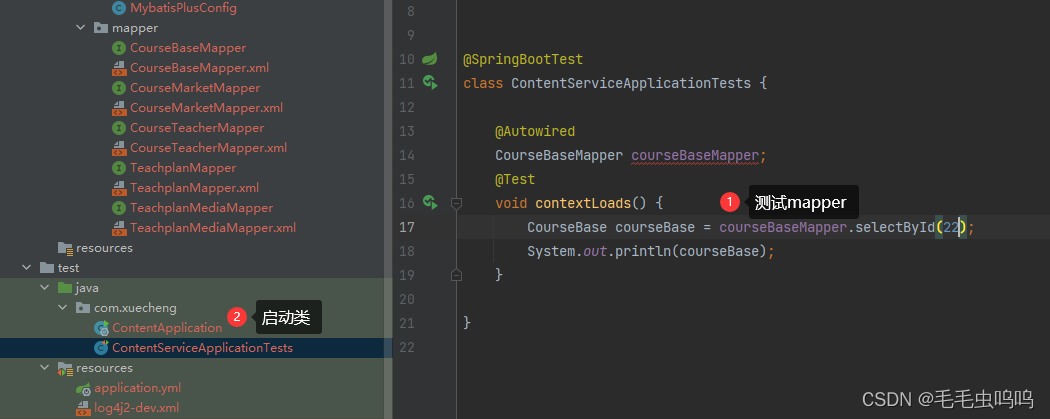
(1)测试单元测试时必须要有启动类,否则会报错
(2)配置文件连接数据库
service示例
-
创建service接口,创建实现类,以查询课程信息为例:
@Service public class CourseBaseInfoServiceImpl implements CourseBaseInfoService { @Autowired CourseBaseMapper courseBaseMapper; @Override public PageResult<CourseBase> queryCourseBaseList(PageParams pageParams, QueryCourseParamsDto queryCourseParamsDto) { LambdaQueryWrapper<CourseBase> wrapper = new LambdaQueryWrapper<>(); // 构建查询条件,根据课程名称查询 wrapper.like(StringUtils.isNotEmpty(queryCourseParamsDto.getCourseName()), CourseBase::getName, queryCourseParamsDto.getCourseName()); // 构建查询条件,根据审核状态查询 wrapper.eq(StringUtils.isNotEmpty(queryCourseParamsDto.getAuditStatus()), CourseBase::getAuditStatus, queryCourseParamsDto.getAuditStatus()); // 构建查询条件,根据课程发布状态查询 wrapper.eq(StringUtils.isNotEmpty(queryCourseParamsDto.getPublishStatus()), CourseBase::getAuditStatus, queryCourseParamsDto.getPublishStatus()); // 分页查询 Page<CourseBase> page = new Page<>(pageParams.getPageNo(), pageParams.getPageSize()); Page<CourseBase> selectPage = courseBaseMapper.selectPage(page, wrapper); return new PageResult<CourseBase>(selectPage.getRecords(), selectPage.getTotal(), pageParams.getPageNo(), pageParams.getPageSize()); } } -
存在问题
(1)由于本项目将controller和service分成了两个模块,controller放在了api模块,service和mapper放在了service模块。所以数据库连接配置写在了service的配置文件中。配置文件结尾必须是yaml,yml结尾会出错。
(2)最开始将配置文件放在了service模块的test目录下用于单元测试,导致api模块调用service中的服务时会出现数据库连接没有配置,这是因为模块之间相互引用只会引用main目录下的文件,test目录下的不会引用,需要将service中的配置文件放在main目录下的resource中。
(3)并且如果想在test中测试接口,也需要在test中的resource配置数据库连接。
(4)如果pom中添加个禁止过滤文件,也需要将yaml文件加入进去<build> <!-- 如果不添加此节点mybatis的mapper.xml文件都会被漏掉。 --> <resources> <resource> <directory>src/main/java</directory> <includes> <include>**/*.properties</include> <include>**/*.xml</include> <include>**/*.yaml</include> </includes> <filtering>false</filtering> </resource> <resource> <directory>src/main/resources</directory> <includes> <include>**/*.properties</include> <include>**/*.xml</include> <include>**/*.yaml</include> </includes> <filtering>false</filtering> </resource> </resources> </build>