作者:billy
版权声明:著作权归作者所有,商业转载请联系作者获得授权,非商业转载请注明出处
简介
在使用 QML 进行界面开发时,我们的目标是创建一套流体界面,所谓流体界面指的是UI组件是动态变化的。举个例子,当界面上的组件需要变化时,如果视觉画布突然变化会导致用户的体验感比较差。而如果在状态的变化过程中,我们添加一些引导,把状态从初始慢慢变化到目标状态,让用户可以感受到这个变化的过程,那么用户的感官体验这一块就会大大提升了,而这也就是所谓的动态变化
这里需要引出几个重要的概念:State(状态)、Transition(过度)、Animation(动画)
- State(状态):所有项目都有一个默认状态,用于定义对象和特性值的默认配置。可以通过向 states 属性添加状态项来定义新状态,以允许项在不同配置之间切换
- Transition(过度):发生状态更改时要应用的动画
- Animation(动画):随着时间的推移逐渐改变属性
具体请参考官方文档:Important Concepts in Qt Quick - States, Transitions and Animations
缓和曲线
通常动画中的变化是匀速的,如果开发者觉得太单调了,可以调节动画的变化速度曲线,即缓和曲线。我们通过动画的 easing 属性组来改变缓和曲线
- type - 缓和曲线类型
- amplitude - 幅度
- period - 周期
- overshoot - 过冲
- bezierCurve - 贝塞尔

缓和曲线的类型如下所示:
| 缓和曲线类型 | 图像 | 说明 |
|---|---|---|
| Easing.Linear | 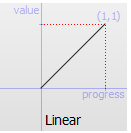 |
线性(t)函数的缓和曲线:速度是恒定的(默认值) |
| Easing.InQuad | 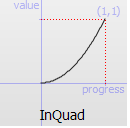 |
二次(t^2)函数的缓和曲线:从零速度加速 |
| Easing.OutQuad | 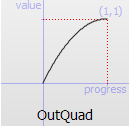 |
二次(t^2)函数的缓和曲线:减速至零速度 |
| Easing.InOutQuad | 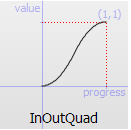 |
二次(t^2)函数的缓和曲线:加速到一半,然后减速 |
| Easing.OutInQuad | 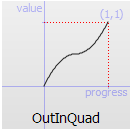 |
二次(t^2)函数的缓和曲线:减速到一半,然后加速 |
| Easing.InCubic | 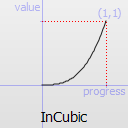 |
三次(t^3)函数的缓和曲线:从零速度加速 |
| Easing.OutCubic | 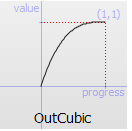 |
三次(t^3)函数的缓和曲线:减速至零速度 |
| Easing.InOutCubic | 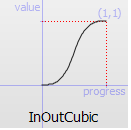 |
三次(t^3)函数的缓和曲线:加速到一半,然后减速 |
| Easing.OutInCubic | 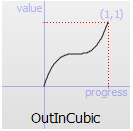 |
三次(t^3)函数的缓和曲线:减速到一半,然后加速 |
| Easing.InQuart | 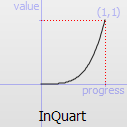 |
四次(t^4)函数的缓和曲线:从零速度加速 |
| Easing.OutQuart | 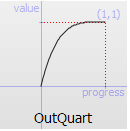 |
四次(t^4)函数的缓和曲线:减速至零速度 |
| Easing.InOutQuart | 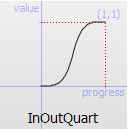 |
四次(t^4)函数的缓和曲线:加速到一半,然后减速 |
| Easing.OutInQuart |  |
四次(t^4)函数的缓和曲线:减速到一半,然后加速 |
| Easing.InQuint | 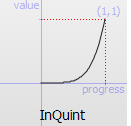 |
五次(t^5)函数的缓和曲线:从零速度加速 |
| Easing.OutQuint | 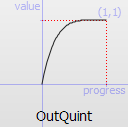 |
五次(t^5)函数的缓和曲线:减速至零速度 |
| Easing.InOutQuint | 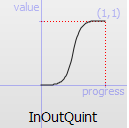 |
五次(t^5)函数的缓和曲线:加速到一半,然后减速 |
| Easing.OutInQuint | 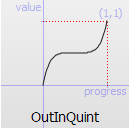 |
五次(t^5)函数的缓和曲线:减速到一半,然后加速 |
| Easing.InSine | 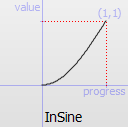 |
正弦函数(sin(t))的缓和曲线:从零速度加速 |
| Easing.OutSine | 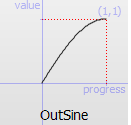 |
正弦函数(sin(t))的缓和曲线:减速至零速度 |
| Easing.InOutSine | 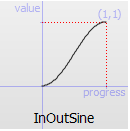 |
正弦函数(sin(t))的缓和曲线:加速到一半,然后减速 |
| Easing.OutInSine | 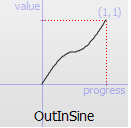 |
正弦函数(sin(t))的缓和曲线:减速到一半,然后加速 |
| Easing.InExpo | 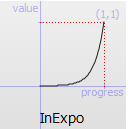 |
指数(2^t)函数的缓和曲线:从零速度加速 |
| Easing.OutExpo |  |
指数(2^t)函数的缓和曲线:减速至零速度 |
| Easing.InOutExpo | 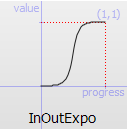 |
指数(2^t)函数的缓和曲线:加速到一半,然后减速 |
| Easing.OutInExpo | 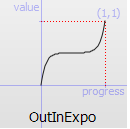 |
指数(2^t)函数的缓和曲线:减速到一半,然后加速 |
| Easing.InCirc | 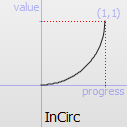 |
圆形(sqrt(1-t^2))函数的缓和曲线:从零速度加速 |
| Easing.OutCirc | 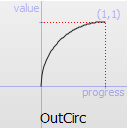 |
圆形(sqrt(1-t^2))函数的缓和曲线:减速至零速度 |
| Easing.InOutCirc | 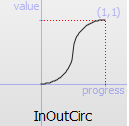 |
圆形(sqrt(1-t^2))函数的缓和曲线:加速到一半,然后减速 |
| Easing.OutInCirc | 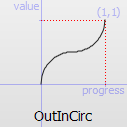 |
圆形(sqrt(1-t^2))函数的缓和曲线:减速到一半,然后加速 |
| Easing.InElastic | 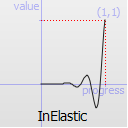 |
弹性(指数衰减正弦波)函数的缓和曲线:从零速度加速。峰值振幅可通过振幅参数设置,衰减周期可通过周期参数设置 |
| Easing.OutElastic |  |
弹性(指数衰减正弦波)函数的缓和曲线:减速至零速度。峰值振幅可通过振幅参数设置,衰减周期可通过周期参数设置 |
| Easing.InOutElastic | 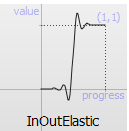 |
弹性(指数衰减正弦波)函数的缓和曲线:加速到一半,然后减速 |
| Easing.OutInElastic | 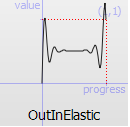 |
弹性(指数衰减正弦波)函数的缓和曲线:减速到一半,然后加速 |
| Easing.InBack | 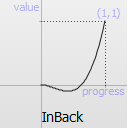 |
后退(过冲三次函数:(s+1)*t3-s*t2)函数的缓和曲线:从零速度加速 |
| Easing.OutBack | 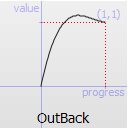 |
后退(过冲三次函数:(s+1)*t3-s*t2)函数的缓和曲线:减速至零速度 |
| Easing.InOutBack | 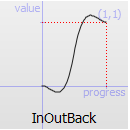 |
后退(过冲三次函数:(s+1)*t3-s*t2)函数的缓和曲线:加速到一半,然后减速 |
| Easing.OutInBack | 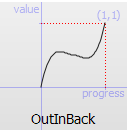 |
后退(过冲三次函数:(s+1)*t3-s*t2)函数的缓和曲线:减速到一半,然后加速 |
| Easing.InBounce | 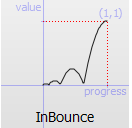 |
反弹(指数衰减抛物线反弹)函数的缓和曲线:从零速度加速 |
| Easing.OutBounce | 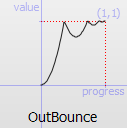 |
反弹(指数衰减抛物线反弹)函数的缓和曲线:减速至零速度 |
| Easing.InOutBounce | 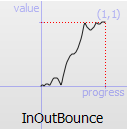 |
反弹(指数衰减抛物线反弹)函数的缓和曲线:加速到一半,然后减速 |
| Easing.OutInBounce | 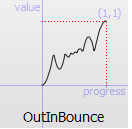 |
反弹(指数衰减抛物线反弹)函数的缓和曲线:减速到一半,然后加速 |
| Easing.Bezier | - | 由 easing.beziercrove 属性定义的自定义缓和曲线 |
动画类型
- AnchorAnimation - 为锚定值的更改设置动画

Rectangle {
    id: myRect
    width: 100; height: 100
    color: "red"

    property int type: 1

    states: [
        State {
            name: "right"
            AnchorChanges { target: myRect; anchors.right: parent.right }
        },
        State {
            name: "bottom"
            AnchorChanges { target: myRect; anchors.bottom: parent.bottom }
        },
        State {
            name: "left"
            AnchorChanges { target: myRect; anchors.left: parent.left }
        },
        State {
            name: "top"
            AnchorChanges { target: myRect; anchors.top: parent.top }
        }
    ]

    transitions: Transition {
        AnchorAnimation { duration: 500 }
    }

    MouseArea {
        anchors.fill: parent
        onClicked: {
            let state = {
                1: "right",
                2: "bottom",
                3: "left",
                4: "top"
            }
            myRect.state = state[myRect.type]

            myRect.type++
            if ( myRect.type > 4 ) {
                myRect.type = 1
            }
        }
    }
}
- ColorAnimation - 为颜色值的更改设置动画

Rectangle {
    id: myRect
    width: 100; height: 100
    color: "black"

    property int type: 1

    states: [
        State {
            name: "red"
            PropertyChanges { target: myRect; color: "red" }
        },
        State {
            name: "yellow"
            PropertyChanges { target: myRect; color: "yellow" }
        },
        State {
            name: "pink"
            PropertyChanges { target: myRect; color: "pink" }
        },
        State {
            name: "blue"
            PropertyChanges { target: myRect; color: "blue" }
        },
        State {
            name: "black"
            PropertyChanges { target: myRect; color: "black" }
        }
    ]

    transitions: Transition {
        ColorAnimation { duration: 500 }
    }

    MouseArea {
        anchors.fill: parent
        onClicked: {
            let state = {
                1: "red",
                2: "yellow",
                3: "pink",
                4: "blue",
                5: "black",
            }
            myRect.state = state[myRect.type]

            myRect.type++
            if ( myRect.type > 5 ) {
                myRect.type = 1
            }
        }
    }
}
- NumberAnimation - 为 qreal 类型值的更改设置动画

Rectangle {
    id: myRect
    width: 100; height: 100
    color: "red"

    property int type: 1

    states: [
        State {
            name: "step1"
            PropertyChanges { target: myRect; x: 60; y: 60; width: 120; height: 120; rotation: 30 }
        },
        State {
            name: "step2"
            PropertyChanges { target: myRect; x: 60; y: 60; width: 120; height: 120; rotation: 60 }
        },
        State {
            name: "step3"
            PropertyChanges { target: myRect; x: 40; y: 40; width: 180; height: 180; rotation: 90 }
        },
        State {
            name: "step4"
            PropertyChanges { target: myRect; x: 100; y: 100; width: 50; height: 50; rotation: 45 }
        }
    ]

    transitions: Transition {
        NumberAnimation { duration: 500 }
    }

    MouseArea {
        anchors.fill: parent
        onClicked: {
            let state = {
                1: "step1",
                2: "step2",
                3: "step3",
                4: "step4"
            }
            myRect.state = state[myRect.type]

            myRect.type++
            if ( myRect.type > 4 ) {
                myRect.type = 1
            }
        }
    }
}
- ParentAnimation - 为父类的更改设置动画

Rectangle {
    id: myRect
    width: 300; height: 100
    color: "black"

    property int type: 1

    Rectangle {
        id: redRect
        width: 100; height: 100
        color: "red"
    }

    Rectangle {
        id: blueRect
        x: 110
        width: 100; height: 100
        color: "blue"
    }

    Rectangle {
        id: yellowRect
        x: 220; y: 10
        width: 50; height: 50
        color: "yellow"

        states: [
            State {
                name: "red"
                ParentChange { target: yellowRect; parent: redRect; x: 10; y: 10 }
            },
            State {
                name: "blue"
                ParentChange { target: yellowRect; parent: blueRect; x: 10; y: 10 }
            },
            State {
                name: "black"
                ParentChange { target: yellowRect; parent: myRect; x: 220; y: 10 }
            }
        ]

        transitions: Transition {
            ParentAnimation {
                NumberAnimation { properties: "x,y"; duration: 500 }
            }
        }

        MouseArea {
            anchors.fill: parent
            onClicked: {
                let state = {
                    1: "red",
                    2: "blue",
                    3: "black"
                }
                yellowRect.state = state[myRect.type]

                myRect.type++
                if ( myRect.type > 3 ) {
                    myRect.type = 1
                }
            }
        }
    }
}
- PathAnimation - 沿路径设置项目的动画

Rectangle {
    width: 400; height: 400

    PathInterpolator {
        id: motionPath

        path: Path {
            startX: 0; startY: 0

            PathCubic {
                x: 350; y: 350

                control1X: 350; control1Y: 0
                control2X: 0; control2Y: 350
            }
        }

        NumberAnimation on progress { id: animation; from: 0; to: 1; duration: 2000 }
    }

    Rectangle {
        x: motionPath.x; y: motionPath.y
        width: 50; height: 50
        rotation: motionPath.angle
        color: "green"
    }

    MouseArea {
        anchors.fill: parent
        onClicked: animation.start()
    }
}
- PropertyAnimation - 为特性值的更改设置动画

Rectangle {
    width: 100; height: 100
    color: "red"

    property bool location: true

    Behavior on x { PropertyAnimation {} }

    MouseArea {
        anchors.fill: parent
        onClicked: {
            var x = location ? 50 : 0
            parent.x = x
            location = !location
        }
    }
}
- RotationAnimation - 为旋转的更改设置动画

Item {
    width: 300; height: 300

    Rectangle {
        id: myRect
        width: 150; height: 100
        anchors.centerIn: parent
        color: "red"
        antialiasing: true

        property int type: 1

        states: [
            State {
                name: "state1"
                PropertyChanges { target: myRect; rotation: 45 }
            },
            State {
                name: "state2"
                PropertyChanges { target: myRect; rotation: 90 }
            },
            State {
                name: "state3"
                PropertyChanges { target: myRect; rotation: 180 }
            }
        ]

        transitions: Transition {
            RotationAnimation { duration: 1000; direction: RotationAnimation.Counterclockwise }
        }
    }

    MouseArea {
        anchors.fill: parent
        onClicked: {
            let state = {
                1: "state1",
                2: "state2",
                3: "state3"
            }
            myRect.state = state[myRect.type]

            myRect.type++
            if ( myRect.type > 3 ) {
                myRect.type = 1
            }
        }
    }
}
- Vector3dAnimation - 为 QVector3d 值的更改设置动画

Rectangle {
    id: myRect
    x: 50; y: 50
    width: 100; height: 100
    color: "red"

    transform: Rotation {
        angle: 45
        origin.x: 50; origin.y: 50
        axis: Qt.vector3d(0, 1, 0)

        SequentialAnimation on axis {
            id: animation
            running: false
            Vector3dAnimation { from: "1, 0, 0"; to: "0, 1, 0"; duration: 1000 }
            Vector3dAnimation { from: "0, 1, 0"; to: "0, 0, 1"; duration: 1000 }
            Vector3dAnimation { from: "0, 0, 1"; to: "1, 0, 1"; duration: 1000 }
            Vector3dAnimation { from: "1, 0, 1"; to: "1, 1, 0"; duration: 1000 }
            Vector3dAnimation { from: "1, 1, 0"; to: "1, 1, 1"; duration: 1000 }
            Vector3dAnimation { from: "1, 1, 1"; to: "1, 0, 1"; duration: 1000 }
            Vector3dAnimation { from: "1, 0, 1"; to: "0, 0, 1"; duration: 1000 }
            Vector3dAnimation { from: "0, 0, 1"; to: "0, 1, 0"; duration: 1000 }
            Vector3dAnimation { from: "0, 1, 0"; to: "1, 0, 0"; duration: 1000 }
        }
    }

    MouseArea {
        anchors.fill: parent
        onClicked: animation.start()
    }
}
组合动画
- SequentialAnimation - 按顺序运行动画

Rectangle {
    id: rect
    width: 100; height: 100
    color: "red"

    SequentialAnimation {
        id: animation
        running: false
        NumberAnimation { target: rect; property: "x"; to: 100; duration: 500 }
        NumberAnimation { target: rect; property: "y"; to: 100; duration: 500 }
        NumberAnimation { target: rect; property: "x"; to: 0; duration: 500 }
        NumberAnimation { target: rect; property: "y"; to: 0; duration: 500 }
    }

    MouseArea {
        anchors.fill: parent
        onClicked: animation.start()
    }
}
- ParallelAnimation - 并行运行动画

Rectangle {
    id: rect
    width: 100; height: 100
    color: "red"

    ParallelAnimation {
        id: animation
        running: false
        NumberAnimation { target: rect; property: "x"; to: 100; duration: 1000 }
        NumberAnimation { target: rect; property: "y"; to: 100; duration: 1000 }
        NumberAnimation { target: rect; property: "width"; to: 200; duration: 1000 }
        NumberAnimation { target: rect; property: "height"; to: 200; duration: 1000 }
        NumberAnimation { target: rect; property: "rotation"; to: 90; duration: 1000 }
    }

    MouseArea {
        anchors.fill: parent
        onClicked: animation.start()
    }
}
行为动画
- Behavior - 为特性更改指定默认动画

Rectangle {
    id: coloredRect
    width: 100; height: 100
    anchors.centerIn: parent
    color: "red"

    states: State {
        name: "GreenState"
        when: mouser.containsMouse

        PropertyChanges {
            target: coloredRect
            color: "green"
        }
    }

    Behavior on color {  ColorAnimation {} }

    MouseArea {
        id: mouser
        anchors.fill: parent
        hoverEnabled: true
    }
}
动画暂停
- PauseAnimation - 在动画中引入暂停

Rectangle {
    id: rect
    width: 100; height: 100
    color: "red"

    SequentialAnimation {
        id: animation
        running: false
        NumberAnimation { target: rect; property: "x"; to: 100; duration: 500 }
        NumberAnimation { target: rect; property: "y"; to: 100; duration: 500 }
        PauseAnimation { duration: 1000 }
        NumberAnimation { target: rect; property: "x"; to: 0; duration: 500 }
        NumberAnimation { target: rect; property: "y"; to: 0; duration: 500 }
    }

    MouseArea {
        anchors.fill: parent
        onClicked: animation.start()
    }
}
弹簧动画
- SpringAnimation - 模拟弹簧的振荡行为,使用适当的弹簧常数来控制加速度和阻尼,以控制效果消失的速度

Rectangle {
    id: rect
    width: 50; height: 50
    color: "red"

    Behavior on x { SpringAnimation { spring: 2; damping: 0.2 } }
    Behavior on y { SpringAnimation { spring: 2; damping: 0.2 } }

    MouseArea {
        anchors.fill: parent
        onClicked: {
            rect.x = mouse.x - rect.width/2
            rect.y = mouse.y - rect.height/2
        }
    }
}
属性跟踪动画
- SmoothedAnimation - 允许特性平滑跟踪值

Item {
    Rectangle {
        width: 60; height: 60
        x: rect1.x - 5; y: rect1.y - 5
        color: "green"

        Behavior on x { SmoothedAnimation { velocity: 200; duration: 500 } }
        Behavior on y { SmoothedAnimation { velocity: 200; duration: 500 } }
    }

    Rectangle {
        id: rect1
        x: 5; y: 5
        width: 50; height: 50
        color: "red"
    }

    focus: true
    Keys.onRightPressed: rect1.x = rect1.x + 100
    Keys.onLeftPressed: rect1.x = rect1.x - 100
    Keys.onUpPressed: rect1.y = rect1.y - 100
    Keys.onDownPressed: rect1.y = rect1.y + 100
}
动画中运行脚本
- ScriptAction - 在动画中运行脚本

Rectangle {
    id: rect
    width: 100; height: 100
    color: "red"

    SequentialAnimation {
        id: animation
        running: false
        NumberAnimation { target: rect; property: "x"; to: 100; duration: 500 }
        NumberAnimation { target: rect; property: "y"; to: 100; duration: 500 }
        ScriptAction { script: doSomething() }
        NumberAnimation { target: rect; property: "x"; to: 0; duration: 500 }
        NumberAnimation { target: rect; property: "y"; to: 0; duration: 500 }
        ScriptAction { script: doStateStuff() }
    }

    MouseArea {
        anchors.fill: parent
        onClicked: animation.start()
    }

    function doSomething() {
        rect.color = "blue"
        rect.width = 120
        rect.height = 120
    }

    function doStateStuff() {
        rect.color = "red"
        rect.width = 100
        rect.height = 100
    }
}