这个主要参考PaddleOCR下的 /doc/doc_ch/inference.md
先按照这里的教程学习模型转化:
一、训练模型转inference模型
检测模型转inference模型
下载超轻量级中文检测模型:
wget -P ./ch_lite/ https://paddleocr.bj.bcebos.com/dygraph_v2.0/ch/ch_ppocr_mobile_v2.0_det_train.tar && tar xf ./ch_lite/ch_ppocr_mobile_v2.0_det_train.tar -C ./ch_lite/上述模型是以MobileNetV3为backbone训练的DB算法,将训练好的模型转换成inference模型只需要运行如下命令:
# -c 后面设置训练算法的yml配置文件
# -o 配置可选参数
# Global.pretrained_model 参数设置待转换的训练模型地址,不用添加文件后缀 .pdmodel,.pdopt或.pdparams。
# Global.load_static_weights 参数需要设置为 False。
# Global.save_inference_dir参数设置转换的模型将保存的地址。
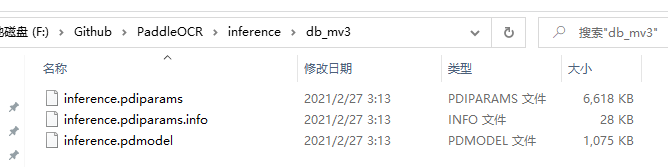
python tools/export_model.py -c configs/det/ch_ppocr_v2.0/ch_det_mv3_db_v2.0.yml -o Global.pretrained_model=./ch_lite/ch_ppocr_mobile_v2.0_det_train/best_accuracy Global.load_static_weights=False Global.save_inference_dir=./inference/det_db/转inference模型时,使用的配置文件和训练时使用的配置文件相同。另外,还需要设置配置文件中的Global.pretrained_model参数,其指向训练中保存的模型参数文件。 转换成功后,在模型保存目录下有三个文件:
inference/det_db/
    ├── inference.pdiparams         # 检测inference模型的参数文件
    ├── inference.pdiparams.info    # 检测inference模型的参数信息,可忽略
    └── inference.pdmodel           # 检测inference模型的program文件
保存后生成的文件:

上面是使用下载的模型转换的,下面介绍使用自己训练的模型转化:
使用自己训练的模型转化
承接paddleocr学习笔记(四)评估、推理 将里面使用的自己训练的模型保存成推理模型
# 保存自己训练的模型
python tools/export_model.py -c configs/det/det_mv3_db.yml -o Global.pretrained_model=./output/db_mv3/best_accuracy Global.load_static_weights=False Global.save_inference_dir=./inference/db_mv3/
可以看到保存的模型如下:
二、文本检测模型推理
文本检测模型推理,默认使用DB模型的配置参数。当不使用DB模型时,在推理时,需要通过传入相应的参数进行算法适配,细节参考下文。
1. 超轻量中文检测模型推理
超轻量中文检测模型推理,可以执行如下命令:使用的是第一步中下载解压转化的推理模型
python tools/infer/predict_det.py --image_dir="./doc/imgs/00018069.jpg" --det_model_dir="./inference/det_db/"可视化文本检测结果默认保存到./inference_results文件夹里面,结果文件的名称前缀为'det_res'。
检测结果如下:
[2021/02/27 14:52:09] root INFO: Predict time of ./doc/imgs/00018069.jpg: 1.1728620529174805
[2021/02/27 14:52:09] root INFO: The visualized image saved in ./inference_results\det_res_00018069.jpg

通过参数limit_type和det_limit_side_len来对图片的尺寸进行限制, limit_type可选参数为[max, min], det_limit_size_len 为正整数,一般设置为32 的倍数,比如960。
参数默认设置为limit_type='max', det_limit_side_len=960。表示网络输入图像的最长边不能超过960, 如果超过这个值,会对图像做等宽比的resize操作,确保最长边为det_limit_side_len。 设置为limit_type='min', det_limit_side_len=960 则表示限制图像的最短边为960。
如果输入图片的分辨率比较大,而且想使用更大的分辨率预测,可以设置det_limit_side_len 为想要的值,比如1216。
python tools/infer/predict_det.py --image_dir="./doc/imgs/00018069.jpg" --det_model_dir="./inference/det_db/" --det_limit_type=max --det_limit_side_len=1216检测结果如下:
[2021/02/27 14:58:47] root INFO: Predict time of ./doc/imgs/00018069.jpg: 1.1828348636627197
[2021/02/27 14:58:47] root INFO: The visualized image saved in ./inference_results\det_res_00018069.jpg
如果想使用CPU进行预测,执行命令如下:通过检测显存变化,确实前面的显存上升又下降了,这个就没有显存变化,同时通过观察推理时间,CPU比GPU快很多,这主要是因为模型较小GPU的优势不明显,其次GPU加载模型比CPU慢,完成第一次推理后GPU的推理速度才会明显快于CPU,所以看速度应该在批量测试中去比较。
python tools/infer/predict_det.py --image_dir="./doc/imgs/00018069.jpg" --det_model_dir="./inference/det_db/" --use_gpu=False检测结果:
[2021/02/27 15:03:34] root INFO: Predict time of ./doc/imgs/00018069.jpg: 0.13463759422302246
[2021/02/27 15:03:34] root INFO: The visualized image saved in ./inference_results\det_res_00018069.jpg
使用自己训练转化的推理模型测试:
python tools/infer/predict_det.py --image_dir="./doc/imgs/00018069.jpg" --det_model_dir="./inference/db_mv3/"检测结果如下:由于我只是训练了icdar2015的1000张数据,而且是自然场景多是街景图片,不包含文档类图片,跟百度官方大数据集训练的模型效果自然是没有可比性,此处只是说明转化模型的正确性。
[2021/02/27 15:06:36] root INFO: Predict time of ./doc/imgs/00018069.jpg: 1.1948025226593018
[2021/02/27 15:06:36] root INFO: The visualized image saved in ./inference_results\det_res_00018069.jpg
使用icdar2015中的数据检测一下自己训练的模型:
python tools/infer/predict_det.py --image_dir="./doc/imgs_en/img_10.jpg" --det_model_dir="./inference/db_mv3/"检测结果如下:
[2021/02/27 15:11:13] root INFO: Predict time of ./doc/imgs_en/img_10.jpg: 1.1848294734954834
[2021/02/27 15:11:13] root INFO: The visualized image saved in ./inference_results\det_res_img_10.jpg