这里写目录标题
声明:
本文章例子来源于bilibili up 程序猿拉大锯 本文章主要是自己对于一些知识点理解算是总结吧,记录自己的学习
本专栏不会进行收费,所有文章都会设置成试读,请各位读者放心,设置收费专栏是为了让更多的人看到此专栏
自己的感悟:
自己从19年的下半年就开始第一次接触自定义View的内容,期间也断断续续看过一些视频,也自己亲手做过一些小的demo啊等等,最终却都是以失败告终,可能是网上的关于自定义View的内容很乱也没有一个很完整的一套流程,也可能是自己当时比较浮躁,看一些知识点时都是大眼一看,就觉得自己会了,等到真正操作起来却又手忙脚乱,无从下手的感觉。知识嘛,肯定是多多益善,毕竟也是跟我们的薪资有着直接关系的,有枪不用和没有枪是两回事(扯得有点远了 哈哈)
所以本专栏作者势必要将自定义View 给拿下,手拿把掐
在啃这块硬骨头的同时,我也希望将自己在学习过程中的一些经验和自己对于一些内容的总结分享给准备和正在学习自定义View内容的你,希望能够给你提供绵薄之力,共同前进!!!
学习呢是一个循序渐进的过程,我也不希望也不想在刚开始一上来就那一大堆的文字理念让大家失去往下看的耐心,这里我们就通过一个个的实例来验证我们的理念,最后形成一套完整的体系(套路)
ok ,废话不多说,这里直接开始我们的正题:
自定义View的控件类型分为自定义组合控件/自定义View/和自定义ViewGroup
今天我们要探索的就是最简单的自定义组合控件
自定义组合控件,顾名思义就是现有的控件组合起来实现我们想要的效果
今天要和大家一起学习的组合控件就是
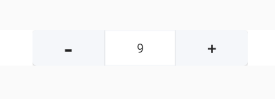
可以看出这个组合控件是由两个button和一个EditText 组成的,下面我们就来一步步实现此功能
自定义组合控件的流程
自定义组合控件流程可以分为5个步骤,分别是:
- 1.继承自RelativeLayout
- 2.定义获取相关属性->res/values/attrs
- 3.把子view加载进来
- 4.定义功能接口 interface
- 5.暴露点击事件供外部实现
- 6.将属性设置到内容中
1.继承自RelativeLayout
首先在实现之前还是要来一点有关自定义view内容的知识,像我们日常使用的一些父容器(RelativeLayout,LinearLayout,FrameLayoutd等等)都是直接或者间接继承自ViewGroup的,以及直接或间接继承自View的像TextView、EditText、Button啊等,其中我们也会发现他们的一些特性就是父容器中可以包含一个或者多个子View,我们的这个组合控件我们就需要用一个父容器来包裹他们
来看代码
public class InputNumberView extends RelativeLayout {
 public InputNumberView(Context context) {
        super(context);
    }

    public InputNumberView(Context context, AttributeSet attrs) {
        super(context, attrs);
    }

    public InputNumberView(Context context, AttributeSet attrs, int defStyleAttr) {
        super(context, attrs, defStyleAttr);
    }
}
这里我们声明InputNumberView类继承自RelativeLayout 布局,其中我们要是实现以上的三个必要的构造法方法
这里为了统一入口,我们稍微修改一下构造方法,让我们在使用我们自定义的组合控件时不管是用那种方法获取实例都进行初始化操作
public class InputNumberView extends RelativeLayout {
    public InputNumberView(Context context) {
        this(context,null);
    }

    public InputNumberView(Context context, AttributeSet attrs) {
        this(context, attrs,0);
    }

    public InputNumberView(Context context, AttributeSet attrs, int defStyleAttr) {
        super(context, attrs, defStyleAttr);
    }
}
欧克,到这里我们的第一个步骤算是结束了,让我们成热打铁赶紧开始下一个步骤
2.定义获取相关属性->res/values/attrs
在我们日常使用控件时,为了达到我们想要的效果,都会设置一些已经封装好的属性,比如textSize啊,margin,padiing,color啊等等,那这些都是如何实现的呢,别着急,我们也来一步步实现我们定制一些特有的属性
首先找到你Androidstudio res/values新建attrs.xml,在resource标签下设置的你想要设置的属性
 //自定义属性标签
    <declare-styleable name="InputNumberView">
        <attr name="max" format="integer"/>
        <attr name="min" format="integer"/>
        <attr name="step" format="integer"/>
        <attr name="defaultValue" format="integer"/>
        <attr name="disable" format="boolean"/>
        //引用类型和颜色
        <attr name="btnColor" format="color|reference"/>
        //dimension dp px sp
        <attr name="valueSize" format="dimension"/>
    </declare-styleable>
扩展:
Integer,比如说行数,TextView的maxLine,就是Integer类型
enum,枚举类型
boolean,布尔类型,true/false
dimension,尺寸比如说size,margin_left这些,单位为px,dp,sp这些
color,颜色嘛,比如说background,比如说textColor
flags,标记
float,浮点数,也就是小数,比如0.1
fraction,百分数,50%
refrence,引用,比如说background,src,有同学可能有疑问了,background可以是color又可以是refrence,怎么整呢? 其实是可以多个的哈,比如说:name=“switch_time” format=“integer|float”,可以是Integer类型,或者float类型
string,这个最简单了,比如说text
属性定义好了,那我们如何在布局中使用呢?
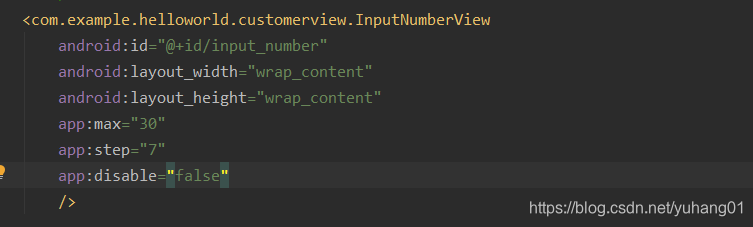
在我们先要展示的布局中,把我们定义好的类的全路径设置进去,然后就可以敲我们已经定义好的属性了
属性定义好了,我们也在布局中给我们定义好的属性进行赋值操作了,那么如何读取到我们设置好的属性值呢?下面我们来一起看
来到我们声明好的InputNumberView 中,我们已经统一了入口,然后在里面我们就可以进行初始化操作了
public InputNumberView(Context context, AttributeSet attrs, int defStyleAttr) {
        super(context, attrs, defStyleAttr);
        //获取相关属性
         initAttrs(context, attrs);
    }
     private void initAttrs(Context context, AttributeSet attrs) {
        //获取设置属性资源
        TypedArray a = context.obtainStyledAttributes(attrs, R.styleable.InputNumberView);
        max = a.getInt(R.styleable.InputNumberView_max, 0);
        min = a.getInt(R.styleable.InputNumberView_min, 0);
        step = a.getInt(R.styleable.InputNumberView_step, 1);
        focus = a.getBoolean(R.styleable.InputNumberView_disable,false);
        btnResource = a.getResourceId(R.styleable.InputNumberView_btnColor,-1);
        //设置默认值
        defaultValue = a.getInt(R.styleable.InputNumberView_defaultValue, 0);
        this.currentNumber = defaultValue;
        //资源回收
        a.recycle();
    }
这里我们调用了context的obtainStyledAttributes();将AttributeSet和我们定义好的InputNumberView属性导入进来
然后我们就可以获取我们定义的属性啦 记得在获取属性时要传入默认值哟
好了这里我们就将定义好的属性获取到了并放到了指定的变量中
这里我们获取完属性后记得要将资源进行回收
3.把子view加载进来
属性我们也获取到了,就该加载我们的内容了
加载子View的方式共有三种,第一种是使用LayoutInflater将我们想要加载的内容加载进来,第二种是在我们要显示的布局中将控件显示到我们定义的自定义View标签中,第三种就是使用代码生成
这里我们采取最简单的方式就是使用LayoutInflater加载我们写好的布局,代码如下:
 public InputNumberView(Context context, AttributeSet attrs, int defStyleAttr) {
        super(context, attrs, defStyleAttr);
        //获取相关属性
         initAttrs(context, attrs);
         //加载子View
         initView(context);
    }
     //初始化布局
    private void initView(Context context) {
        /**
         * 以下代码都是将view添加到当前容器中
         * LayoutInflater.from(context).inflate(resource,ViewGroup,boolean)
         * inflate的第二参数是ViewGroup的或子类的引用,因为我们继承RelativeLayout所以可以直接填this
         * 第三参数为true时表示将当前布局引用绑定到当前root(第二参数中去)返回的结果是当前的root
         * LayoutInflater.from(context).inflate(resource,ViewGroup)
         * 当所有参数都不为空时默认会进入LayoutInflater.from(context).inflate(resource,ViewGroup,boolean)
         * 也等价于: View view = LayoutInflater.from(context).inflate(R.layout.input_number_view, this, false);
         *         addView(view);
         */

        LayoutInflater.from(context).inflate(R.layout.input_number_view,this,true);
    }
这里我们来看一下我们定义的子布局的内容
<?xml version="1.0" encoding="utf-8"?>
<LinearLayout
    xmlns:android="http://schemas.android.com/apk/res/android"
    android:layout_width="wrap_content"
    android:layout_height="40dp"
    android:gravity="center_vertical"
    android:orientation="horizontal"
    >
    <Button
        android:id="@+id/minus_btn"
        android:background="@drawable/shape_num_btn"
        android:layout_width="80dp"
        android:gravity="center"
        android:layout_height="match_parent"
        android:text="-"
        android:textSize="30dp"
        />
    <EditText
        android:id="@+id/value_edt"
        android:background="@drawable/shape_number_input_bg"
        android:gravity="center"
        android:textSize="14sp"
        android:focusable="false"
        android:text="0"
        android:layout_width="80dp"
        android:layout_height="match_parent"/>
<Button
    android:id="@+id/plus_btn"
    android:layout_width="80dp"
    android:layout_height="match_parent"
    android:background="@drawable/select_num_right_btn"
    android:gravity="center"
    android:textSize="18sp"
    android:text="+"
    />
</LinearLayout>
这里我们定义了两个按钮,一个文本框
上述注释中详细讲解了LayoutInfalter的使用,两种方式都可以实现布局的加载,这里就不再累赘
ok ,到这一步我们就可以看到效果了,这里运行一个我们的代码就可以呈现如下图的效果就说明成功了
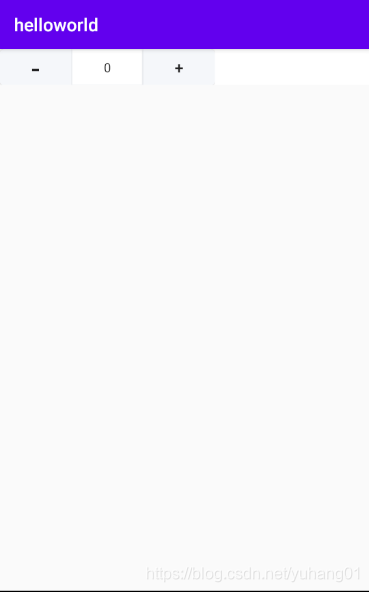
当然这时你点击我们的按钮是没有反应的,因为我们还没有定义按钮的触发事件,离成功就剩一半了 继续往下看
因为下面要涉及点击事件,所以这里我们先拿到我们定义的两个按钮和文本框的实例
  //初始化布局
    private void initView(Context context) {
        /**
         * 以下代码都是将view添加到当前容器中
         * LayoutInflater.from(context).inflate(resource,ViewGroup,boolean)
         * inflate的第二参数是ViewGroup的或子类的引用,因为我们继承RelativeLayout所以可以直接填this
         * 第三参数为true时表示将当前布局引用绑定到当前root(第二参数中去) 返回的结果是当前的root
         * LayoutInflater.from(context).inflate(resource,ViewGroup)
         * 当所有参数都不为空时默认会进入LayoutInflater.from(context).inflate(resource,ViewGroup,boolean)
         * 也等价于: View view = LayoutInflater.from(context).inflate(R.layout.input_number_view, this, false);
         *         addView(view);
         */

        LayoutInflater.from(context).inflate(R.layout.input_number_view,this,true);
        minus = this.findViewById(R.id.minus_btn);
        plus = this.findViewById(R.id.plus_btn);
        EditText value = this.findViewById(R.id.value_edt);
    }
  //事件监听
    private void initListener() {
        minus.setOnClickListener(new OnClickListener() {
            @Override
            public void onClick(View v) {
                currentNumber--;

            }
        });
        plus.setOnClickListener(new OnClickListener() {
            @Override
            public void onClick(View v) {
                currentNumber++;
            }
        });
    }
4.定义功能接口 interface
   public interface onNumberValueChangedListener{
        void onNumberChanged(int number);
    }
这里我们先定义一个onNumberValueChangedListener的接口 然后在里面定义了一个方法
当我们的文本框中的值发生改变了,就将最新的值给我们定义方法的number参数
5.暴露点击事件供外部实现
private onNumberValueChangedListener mOnNumberChangedListener = null;

public void setOnNumberChangedListener(onNumberValueChangedListener listener){
        this.mOnNumberChangedListener = listener;
    }
     //更新数字
    private void updateText() {
        value.setText(String.valueOf(currentNumber));
        if (mOnNumberChangedListener != null) {
            mOnNumberChangedListener.onNumberChanged(this.currentNumber);
        }
    }
这里我们设置了一个setOnNumberChangedListener方法供外部调用,然后这里又定义了一个updateText的方法,当我们点击两个其中一个按钮时,调用此方法就会将最新的值给我们的number参数,在外部直接读取我们的bunmer参数就可以获取到当前显示的文本值了
来看一下我们的点击事件
   //事件监听
    private void initListener() {
        minus.setOnClickListener(new OnClickListener() {
            @Override
            public void onClick(View v) {
                currentNumber--;
                updateText();
            }
        });
        plus.setOnClickListener(new OnClickListener() {
            @Override
            public void onClick(View v) {
                currentNumber++;

                updateText();
            }
        });
    }
我们外部调用的方法如下:
inputNumber = findViewById(R.id.input_number);
inputNumber.setOnNumberChangedListener(new InputNumberView.onNumberValueChangedListener() {
@Override
public void onNumberChanged(int number) {
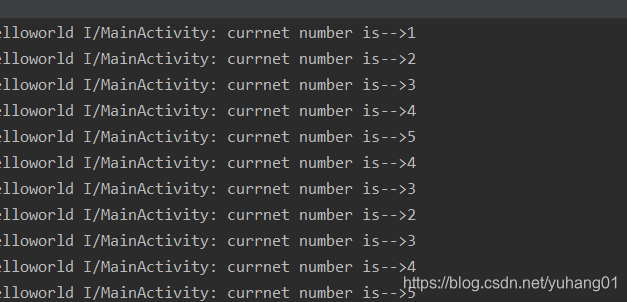
Log.i("MainActivity","currnet number is-->"+number);
}
});
看一下效果吧
打印的效果
Perfect!
6.将属性设置到内容中
所以这里我们的initListener就需要改动一下
  //事件监听
    private void initListener() {
        minus.setOnClickListener(new OnClickListener() {
            @Override
            public void onClick(View v) {
                currentNumber-=step;
                if(currentNumber<=min){
                    currentNumber = min;
                }
                updateText();
            }
        });
        plus.setOnClickListener(new OnClickListener() {
            @Override
            public void onClick(View v) {
                currentNumber+=step;
                if(currentNumber>=max){
                    currentNumber = max;
                }
                updateText();
            }
        });
    }
哦了,自定义组合控件到这里就算结束了
下面来看完整代码
public class InputNumberView extends RelativeLayout {
    private int currentNumber = 0;
    private Button minus;
    private Button plus;
    private EditText value;
    private onNumberValueChangedListener mOnNumberChangedListener = null;
    private int max;
    private int min;
    private int step;
    private boolean focus;
    private int btnResource;
    private int defaultValue;

    public InputNumberView(Context context) {
        this(context,null);
    }

    public InputNumberView(Context context, AttributeSet attrs) {
        this(context, attrs,0);
    }

    public InputNumberView(Context context, AttributeSet attrs, int defStyleAttr) {
        super(context, attrs, defStyleAttr);
        //调用this 不管走那个构造方法都会进入该构造方法内
        //获取相关属性
         initAttrs(context, attrs);
         initView(context);
         initListener();
    }

    private void initAttrs(Context context, AttributeSet attrs) {
        //获取设置属性资源
        TypedArray a = context.obtainStyledAttributes(attrs, R.styleable.InputNumberView);
        max = a.getInt(R.styleable.InputNumberView_max, 0);
        min = a.getInt(R.styleable.InputNumberView_min, 0);
        step = a.getInt(R.styleable.InputNumberView_step, 1);
        focus = a.getBoolean(R.styleable.InputNumberView_disable,false);

        //a.getColor(R.styleable.InputNumberView_btnColor, Color.parseColor(""));
        btnResource = a.getResourceId(R.styleable.InputNumberView_btnColor,-1);
        //设置默认值
        defaultValue = a.getInt(R.styleable.InputNumberView_defaultValue, 0);
        this.currentNumber = defaultValue;
        //资源回收
        a.recycle();
    }

    //事件监听
    private void initListener() {
        minus.setOnClickListener(new OnClickListener() {
            @Override
            public void onClick(View v) {
                currentNumber-=step;
                if(currentNumber<=min){
                    currentNumber = min;
                }
                updateText();
            }
        });
        plus.setOnClickListener(new OnClickListener() {
            @Override
            public void onClick(View v) {
                currentNumber+=step;
                if(currentNumber>=max){
                    currentNumber = max;
                }
                updateText();
            }
        });
    }

    //初始化布局
    private void initView(Context context) {
        /**
         * 以下代码都是将view添加到当前容器中
         * LayoutInflater.from(context).inflate(resource,ViewGroup,boolean)
         * inflate的第二参数是ViewGroup的或子类的引用,因为我们继承RelativeLayout所以可以直接填this
         * 第三参数为true时表示将当前布局引用绑定到当前root(第二参数中去) 返回的结果是当前的root
         * LayoutInflater.from(context).inflate(resource,ViewGroup)
         * 当所有参数都不为空时默认会进入LayoutInflater.from(context).inflate(resource,ViewGroup,boolean)
         * 也等价于: View view = LayoutInflater.from(context).inflate(R.layout.input_number_view, this, false);
         *         addView(view);
         */

        LayoutInflater.from(context).inflate(R.layout.input_number_view,this,true);
        minus = this.findViewById(R.id.minus_btn);
        plus = this.findViewById(R.id.plus_btn);
        value = this.findViewById(R.id.value_edt);
        //初始化控件值
        updateText();
        minus.setEnabled(!focus);
        plus.setEnabled(!focus);
    }

    //暴漏get/set方法 是外部可以读取设置值
    public int getCurrentNumber() {
        return currentNumber;
    }

    public void setCurrentNumber(int currentNumber) {
        this.currentNumber = currentNumber;
        updateText();
    }
    //更新数字
    private void updateText() {
        value.setText(String.valueOf(currentNumber));
        if (mOnNumberChangedListener != null) {
            mOnNumberChangedListener.onNumberChanged(this.currentNumber);
        }
    }
    public void setOnNumberChangedListener(onNumberValueChangedListener listener){
        this.mOnNumberChangedListener = listener;
    }

   public interface onNumberValueChangedListener{
        void onNumberChanged(int number);
    }
}
要显得布局:
activity_main.xml
<?xml version="1.0" encoding="utf-8"?>
<LinearLayout xmlns:android="http://schemas.android.com/apk/res/android"
    xmlns:tools="http://schemas.android.com/tools"
    android:layout_width="match_parent"
    xmlns:yh="http://schemas.android.com/apk/res-auto"
    android:background="#ffffff"
    android:layout_height="wrap_content"
    tools:context=".MainActivity">

    <com.example.helloworld.customerview.InputNumberView
        android:id="@+id/input_number"
        android:layout_width="wrap_content"
        android:layout_height="wrap_content"
        yh:max= "30"
        yh:step="7"
        yh:disable="false"
        yh:btnColor="@drawable/shape_number_right_bg"
        yh:defaultValue="2"
        yh:min = "-30"
        />
</LinearLayout>
MainActivity
public class MainActivity extends AppCompatActivity {
    private InputNumberView inputNumber;

    @Override
    protected void onCreate(Bundle savedInstanceState) {
        super.onCreate(savedInstanceState);
        setContentView(R.layout.activity_main);

        inputNumber = findViewById(R.id.input_number);
        inputNumber.setOnNumberChangedListener(new InputNumberView.onNumberValueChangedListener() {
            @Override
            public void onNumberChanged(int number) {
                 Log.i("MainActivity","currnet number is-->"+number);
            }
        });
    }
}
来看一下最后完结的效果:

到这里呢 我们的第一篇自定义View初探也算是完结了,这里就是先带大家熟悉一边自定义组合控件的流程,如果有什么问题欢迎下方评论,看到后我会第一时间进行解答的
制作不易,希望多多点赞哟!!!