##使用场景
在开发中,或许一个业务需求中会出现很多系统控件组合成的布局,并且经常需要复用。
比如下图中 qq或者微博的title栏,在一款app中,可能不同的界面 类似的view要出现很多次,这个时候 就可以设计自己的view控件,就称为组合控件吧。
 创建灵活的模板,通过调用自己的view,提高开发效率、降低耦合度。好处不言而喻
这边以微博的title为例,创建一个组合控件
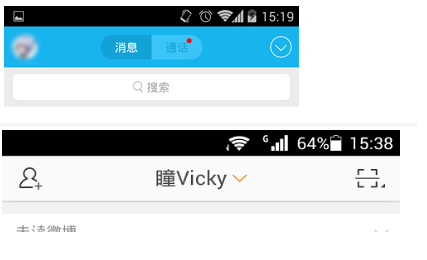
首先分析一下,上图微博的当前页面似乎包含了三四个控件,具体看你要怎么做了:
ImageButton、TextView+DrwableRight、ImageButton
或者是 ImageButton、TextView+ImageView、ImageButton。
这边以三个控件为例,创建一个布局,在里面添加三个控件,然后控制其属性
创建控件
- 为控件添加自定义属性:
在资源文件res-values文件夹下创建一个xml文件attrs,这时候可以考虑一下控件中需要哪些属性,比如(左边的控件是否可见、中间的text文本、整个title的背景等等),可以根据需求去添加。
<?xml version="1.0" encoding="utf-8"?>
<resources>
    <declare-styleable name="TitleBar">
    <!--定义自己想要的属性,在代码中引用,format指的是返回到代码中的格式-->
        <!--中间文本-->
        <attr name="centerText" format="string" />
        <!--中间的空间是否显示右侧的图标-->
        <attr name="centerIsShowRightIcon" format="string" />
        <!--title的背景色//背景可能会包括颜色或者是资源文件 所以format这样表示-->
        <attr name="titleBackground" format="reference|color" />
        <!--左右两边的图-->
        <attr name="leftImageDrwable" format="reference" />
        <attr name="rightImageDrwable" format="reference" />
    </declare-styleable>
</resources>- 创建控件,并加入系统自带控件
使用布局加入控件,并关联
创建一个布局
<?xml version="1.0" encoding="utf-8"?>
<RelativeLayout xmlns:android="http://schemas.android.com/apk/res/android"
    xmlns:tools="http://schemas.android.com/tools"
    android:layout_width="match_parent"
    android:layout_height="50dp"
    android:background="@android:color/holo_green_dark"
    tools:context="com.example.skym.customviewcontrol.MainActivity">

    <ImageButton
        android:id="@+id/ib_left"
        android:layout_width="wrap_content"
        android:layout_height="wrap_content"
        android:layout_alignParentStart="true"
        android:layout_alignParentTop="true"
        android:src="@mipmap/ic_launcher" />

    <TextView
        android:id="@+id/tv_title"
        android:layout_width="wrap_content"
        android:layout_height="wrap_content"
        android:layout_centerHorizontal="true"
        android:layout_centerVertical="true"
        android:text="sinaWeibo"
        android:textColor="@android:color/white"
        android:textSize="15dp" />

    <ImageButton
        android:id="@+id/ib_right"
        android:layout_width="wrap_content"
        android:layout_height="wrap_content"
        android:layout_alignParentEnd="true"
        android:layout_alignParentTop="true"
        android:src="@mipmap/ic_launcher" />
</RelativeLayout>
//使用布局添加
    private void initUiViews(Context context) {
        //关联布局
        View.inflate(context, R.layout.layout_title_bar, this);
        ibLeft = (ImageButton) findViewById(R.id.ib_left);
        ibRight = (ImageButton) findViewById(R.id.ib_right);
        tvTitle = (TextView) findViewById(R.id.tv_title);
    }
使用代码加入控件,并关联
 private void initCodeViews(Context context) {
        ibRight = new ImageButton(context);
        ibLeft = new ImageButton(context);
        tvTitle = new TextView(context);
        //控件new出来后  接下来设置三个控件的大小 位置  并加入到当前的布局
        mleftLayoutParams = new LayoutParams(ViewGroup.LayoutParams.WRAP_CONTENT, ViewGroup.LayoutParams.WRAP_CONTENT);
        mleftLayoutParams.addRule(RelativeLayout.ALIGN_PARENT_START, TRUE);
        addView(ibLeft, mleftLayoutParams);

        mrightLayoutParams = new LayoutParams(ViewGroup.LayoutParams.WRAP_CONTENT, ViewGroup.LayoutParams.WRAP_CONTENT);
        mrightLayoutParams.addRule(RelativeLayout.ALIGN_PARENT_END, TRUE);
        addView(ibRight, mrightLayoutParams);

        mtextLayoutParams = new LayoutParams(ViewGroup.LayoutParams.WRAP_CONTENT, ViewGroup.LayoutParams.WRAP_CONTENT);
        mtextLayoutParams.addRule(RelativeLayout.CENTER_HORIZONTAL, TRUE);
        mtextLayoutParams.addRule(RelativeLayout.CENTER_VERTICAL, TRUE);
        addView(tvTitle, mtextLayoutParams);

    }
两种用法应该是一样的,可以挑一个方便的,个人认为用ui比较方便
    //关联属性
    private void contactAttrs() {
        //关联属性后 只要在引用控件的xml中设置centerText就可以,其他属性也是一样
        tvTitle.setText(mCenterTextViewText);
        //右侧的icon是否显示,这边简单举例 需要灵活设置图片 还需要自己封装一个方法
        tvTitle.setCompoundDrawables(null,
                null,
                mIsShowCenterIconToRight ? getResources().getDrawable(R.drawable.ic_launcher) : null,
                null);

        //这个属性设置的是当前控件的背景,这个控件继承了RelativeLayout,所以直接调用this里的方法
        this.setBackground(mBackground);

        ibLeft.setImageDrawable(mLeftDrawble);
        ibRight.setImageDrawable(mLeftDrawble);
    }
到这一部 静态布局已经做好了
- 在layout中使用控件
直接在布局中引用
<?xml version="1.0" encoding="utf-8"?>
<RelativeLayout xmlns:android="http://schemas.android.com/apk/res/android"
    //这边注意添加这句代码,因为我们用到了自定义属性,所以要加入自定义属性的命名空间
    //名称可以自定义,这边我就用"auto"
    **xmlns:auto="http://schemas.android.com/apk/res-auto"**

    xmlns:tools="http://schemas.android.com/tools"
    android:layout_width="match_parent"
    android:layout_height="match_parent"
    tools:context="com.example.skym.customviewcontrol.MainActivity">

    <com.example.skym.customviewcontrol.TitleBar
        android:id="@+id/titlebar"
        android:layout_width="wrap_content"
        android:layout_height="wrap_content"
        auto:centerIsShowRightIcon="true"
        auto:centerText="2016年10月13日"
        auto:leftImageDrwable="@drawable/ic_launcher"
        auto:rightImageDrwable="@drawable/ic_launcher"
        auto:titleBackground="@android:color/holo_red_dark" />

</RelativeLayout>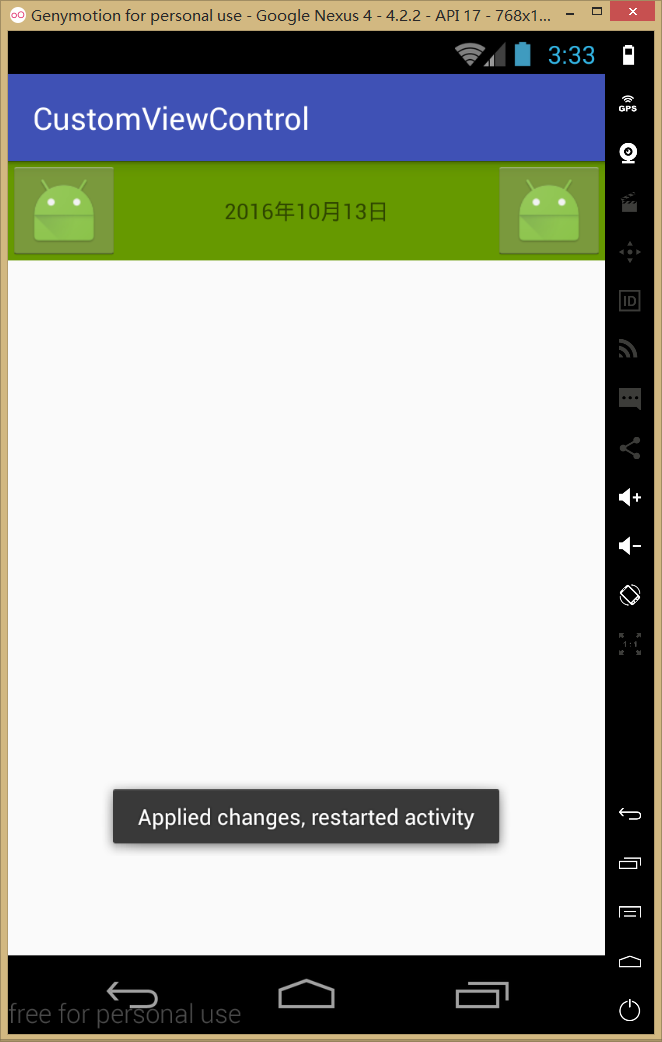
事件处理、代码控制控件属性
为了复用,可以定义一个回调接口进行各种操作
 //设置中间文本内容
    public void setCenterText(String text){
        tvTitle.setText(text);
    }

    public void setmCallback(TitleBarCliclCallback mCallback) {
        this.mCallback = mCallback;
    }

    //按钮监听回调
    public interface TitleBarCliclCallback {
        public void leftClick();

        public void rightClick();
    }

    private void setListener() {
        ibLeft.setOnClickListener(new OnClickListener() {
            @Override
            public void onClick(View v) {
                mCallback.leftClick();
            }
        });
        ibRight.setOnClickListener(new OnClickListener() {
            @Override
            public void onClick(View v) {
                mCallback.rightClick();
            }
        });
    }
在MainActivity中使用
  mTitleBar = (TitleBar) findViewById(R.id.titlebar);
        mTitleBar.setmCallback(new TitleBar.TitleBarCliclCallback() {
            @Override
            public void leftClick() {
                Toast.makeText(MainActivity.this,"leftClick",Toast.LENGTH_SHORT).show();

            }

            @Override
            public void rightClick() {
                Toast.makeText(MainActivity.this,"rightClick",Toast.LENGTH_SHORT).show();
            }
        });

        mTitleBar.setCenterText("mainActivity");
    }
下面是控件完整代码
public class TitleBar extends RelativeLayout {

    private String mCenterTextViewText;
    private boolean mIsShowCenterIconToRight;
    private Drawable mBackground;
    private Drawable mLeftDrawble;
    private Drawable mRightDrawble;
    private ImageButton ibLeft, ibRight;
    private TextView tvTitle;

    private LayoutParams mleftLayoutParams, mrightLayoutParams, mtextLayoutParams;

    //有自定义的属性,要用到attrs。所以需要两个参数的构造方法
    public TitleBar(Context context, AttributeSet attrs) {
        super(context, attrs);

        initAttrs(attrs);
        initCodeViews(context);
//        initUiViews(context);
        contactAttrs();
    }

    //关联属性
    private void contactAttrs() {
        //关联属性后 只要在引用控件的xml中设置centerText就可以,其他属性也是一样
        tvTitle.setText(mCenterTextViewText);
        //右侧的icon是否显示,这边简单举例 需要灵活设置图片 还需要自己封装一个方法
        tvTitle.setCompoundDrawables(null,
                null,
                mIsShowCenterIconToRight ? getResources().getDrawable(R.drawable.ic_launcher) : null,
                null);

        //这个属性设置的是当前控件的背景,这个控件继承了RelativeLayout,所以直接调用this里的方法
        this.setBackground(mBackground);

        ibLeft.setImageDrawable(mLeftDrawble);
        ibRight.setImageDrawable(mLeftDrawble);
    }

    //使用ui的方式加入空间
    private void initUiViews(Context context) {
        //关联布局
        View.inflate(context, R.layout.layout_title_bar, this);
        ibLeft = (ImageButton) findViewById(R.id.ib_left);
        ibRight = (ImageButton) findViewById(R.id.ib_right);
        tvTitle = (TextView) findViewById(R.id.tv_title);


    }

    //与initUiViews 方法作用一致 可以挑一个用 个人认为用ui加入比较方便
    //使用代码加入控件,并关联属性
    private void initCodeViews(Context context) {
        ibRight = new ImageButton(context);
        ibLeft = new ImageButton(context);
        tvTitle = new TextView(context);
        //控件有了  接下来要设置控件大小 位置  并加入到当前的布局
        mleftLayoutParams = new LayoutParams(ViewGroup.LayoutParams.WRAP_CONTENT, ViewGroup.LayoutParams.WRAP_CONTENT);
        mleftLayoutParams.addRule(RelativeLayout.ALIGN_PARENT_START, TRUE);
        addView(ibLeft, mleftLayoutParams);

        mrightLayoutParams = new LayoutParams(ViewGroup.LayoutParams.WRAP_CONTENT, ViewGroup.LayoutParams.WRAP_CONTENT);
        mrightLayoutParams.addRule(RelativeLayout.ALIGN_PARENT_END, TRUE);
        addView(ibRight, mrightLayoutParams);

        mtextLayoutParams = new LayoutParams(ViewGroup.LayoutParams.WRAP_CONTENT, ViewGroup.LayoutParams.WRAP_CONTENT);
        mtextLayoutParams.addRule(RelativeLayout.CENTER_HORIZONTAL, TRUE);
        mtextLayoutParams.addRule(RelativeLayout.CENTER_VERTICAL, TRUE);
        addView(tvTitle, mtextLayoutParams);

    }

    //获取到在attrs中创建的各个属性
    private void initAttrs(AttributeSet attrs) {
        final TypedArray a = getContext().obtainStyledAttributes(attrs, R.styleable.TitleBar);
        //TitleBar_centerText 是系统生成的属性名默认格式 联想就能找到了 对应xml中TitleBar下的centerText
        //这个属性返回的是String,其他的属性写法一样
        mCenterTextViewText = a.getString(R.styleable.TitleBar_centerText);
        //默认值false
        mIsShowCenterIconToRight = a.getBoolean(R.styleable.TitleBar_centerIsShowRightIcon, false);
        mBackground = a.getDrawable(R.styleable.TitleBar_titleBackground);
        mLeftDrawble = a.getDrawable(R.styleable.TitleBar_leftImageDrwable);
        mRightDrawble = a.getDrawable(R.styleable.TitleBar_rightImageDrwable);

        //用完a后 回收TypedArray 节省资源
        a.recycle();
    }
}