声明
本文章例子来源于bilibili up 程序猿拉大锯 本文章主要是自己对于一些知识点理解算是总结吧,记录自己的学习
本专栏不会进行收费,所有文章都会设置成试读,请各位读者放心,设置收费专栏是为了让更多的人看到此专栏
ok ,根据上篇文章你肯定对自定义组合控件算是有了一定的理解了,为了加深记忆,这里再上一个有关自定义组合控件的例子,按照我们之前的步骤,看看是否还能走通,加深记忆
自定义组合控件流程可以分为5个步骤,分别是:
1.继承自父容器
2.定义获取相关属性->res/values/attrs
3.把子view加载进来
4.定义功能接口 interface
5.暴露点击事件供外部实现
6.将属性设置到内容中
今天要和大家分享的是这个:
1.继承自父容器
public class LoginKeyPadView extends LinearLayout {
    public LoginKeyPadView(Context context) {
        super(context);
    }

    public LoginKeyPadView(Context context, @Nullable AttributeSet attrs) {
        super(context, attrs);
    }

    public LoginKeyPadView(Context context, @Nullable AttributeSet attrs, int defStyleAttr) {
        super(context, attrs, defStyleAttr);
    }
}
这里我们声明LoginKeyPadView类继承自LinearLayout布局,这里你可以继承任何你喜欢的父容器
还记得上篇文章这里怎么操作的么 对 统一入口
public class LoginKeyPadView extends LinearLayout {
    public LoginKeyPadView(Context context) {
        this(context,null);
    }

    public LoginKeyPadView(Context context, @Nullable AttributeSet attrs) {
        this(context, attrs,0);
    }

    public LoginKeyPadView(Context context, @Nullable AttributeSet attrs, int defStyleAttr) {
        super(context, attrs, defStyleAttr);
    }
}
2.定义获取相关属性->res/values/attrs
因为这里我们准备使用Layout Inflater 加载子布局,这里为了方便起见也就不写属性了 直接跳过该步骤
这里我们先来新建子view
在res/layout下新建key_pad.xml布局,开始搭建我们的子View内容
<?xml version="1.0" encoding="utf-8"?>
<LinearLayout
    xmlns:android="http://schemas.android.com/apk/res/android" android:layout_width="match_parent"
    android:orientation="vertical"
    android:layout_height="match_parent">
  <LinearLayout
      android:orientation="horizontal"
      android:layout_width="match_parent"
      android:layout_height="wrap_content">
      <TextView
          android:id="@+id/number_1"
          style="@style/numberKeyPad"
          android:text="1"
          />
      <TextView
          android:id="@+id/number_2"
          style="@style/numberKeyPad"
          android:text="2"
         />
      <TextView
          android:id="@+id/number_3"
          style="@style/numberKeyPad"
          android:text="3"
          />


  </LinearLayout>
    <LinearLayout
        android:orientation="horizontal"
        android:layout_width="match_parent"
        android:layout_height="wrap_content">
        <TextView
            android:id="@+id/number_4"
            style="@style/numberKeyPad"
            android:text="4"
            />
        <TextView
            android:id="@+id/number_5"
            style="@style/numberKeyPad"
            android:text="5"
            />
        <TextView
            android:id="@+id/number_6"
            style="@style/numberKeyPad"
            android:text="6"
            />


    </LinearLayout>
    <LinearLayout
        android:orientation="horizontal"
        android:layout_width="match_parent"
        android:layout_height="wrap_content">
        <TextView
            android:id="@+id/number_7"
            style="@style/numberKeyPad"
            android:text="7"
            />
        <TextView
            android:id="@+id/number_8"
            style="@style/numberKeyPad"
            android:text="8"
            />
        <TextView
            android:id="@+id/number_9"
            style="@style/numberKeyPad"
            android:text="9"
            />


    </LinearLayout>
    <LinearLayout
        android:orientation="horizontal"
        android:layout_width="match_parent"
        android:layout_height="wrap_content">
        <TextView
            android:id="@+id/number_0"
            style="@style/numberKeyPad"
            android:text="1"
            />
        <TextView
            android:id="@+id/number_del"
            style="@style/numberKeyPad"
            android:text="删除"
            android:layout_weight="2"
            />
    </LinearLayout>
</LinearLayout>
这里为了节省代码量,我们将重复的代码抽离到values/style里面
    <style name="numberKeyPad">
        <item name="android:layout_weight">1</item>
        <item name="android:layout_height">50dp</item>
        <item name="android:gravity">center</item>
        <item name="android:layout_width">0dp</item>
        <item name="android:layout_margin">5dp</item>
        <item name="android:background">@drawable/num_key_pad</item>
        <item name="android:textColor">#FFFFFF</item>
        <item name="android:textSize">16sp</item>
        <item name="android:textStyle">bold</item>
    </style>
这里是我们抽离的公共的方法体 直接在布局中使用 style="@style/numberKeyPad"就可以使用了
这里的背景颜色为了有按下转换背景色的效果,以及圆角效果 这里使用了三个drawable
在drawable下新建.xml的的文件
shape_num_keypad_normal.xml
<?xml version="1.0" encoding="utf-8"?>
<shape xmlns:android="http://schemas.android.com/apk/res/android"
    android:shape="rectangle">
    <solid android:color="#383838"/>
    <corners android:radius="5dp"/>

</shape>
shape_num_keypad_press.xml
<?xml version="1.0" encoding="utf-8"?>
<shape xmlns:android="http://schemas.android.com/apk/res/android"
    android:shape="rectangle">
    <solid android:color="#585858"/>
    <corners android:radius="5dp"/>

</shape>
这里我们首先设置shape标签,并且设定 android:shape="rectangle"为矩形显示
然后在shape标签里设置了矩形的颜色和圆角
num_key_pad.xml
<?xml version="1.0" encoding="utf-8"?>
<selector xmlns:android="http://schemas.android.com/apk/res/android">
  <item android:drawable="@drawable/shape_num_keypad_press" android:state_pressed="true"/>
    <item android:drawable="@drawable/shape_num_keypad_normal" />
</selector>
然后将我们设置好的两个文件放入到select标签中,android:drawable指定引用路径,android:state_pressed="true"设置的是选中状态下这样我们的子View就有一个属于自己的默认按下的状态了
3.把子view加载进来
public LoginKeyPadView(Context context, @Nullable AttributeSet attrs, int defStyleAttr) {
        super(context, attrs, defStyleAttr);
        //这里设置点击事件是为了让按下的效果显示出来
        LayoutInflater.from(context).inflate(R.layout.keypad,this,true);
        this.findViewById(R.id.number_1).setOnClickListener(this);
        this.findViewById(R.id.number_2).setOnClickListener(this);
        this.findViewById(R.id.number_3).setOnClickListener(this);
        this.findViewById(R.id.number_4).setOnClickListener(this);
        this.findViewById(R.id.number_5).setOnClickListener(this);
        this.findViewById(R.id.number_6).setOnClickListener(this);
        this.findViewById(R.id.number_7).setOnClickListener(this);
        this.findViewById(R.id.number_8).setOnClickListener(this);
        this.findViewById(R.id.number_9).setOnClickListener(this);
        this.findViewById(R.id.number_0).setOnClickListener(this);
        this.findViewById(R.id.number_del).setOnClickListener(this);
    }

    @Override
    public void onClick(View v) {

    }
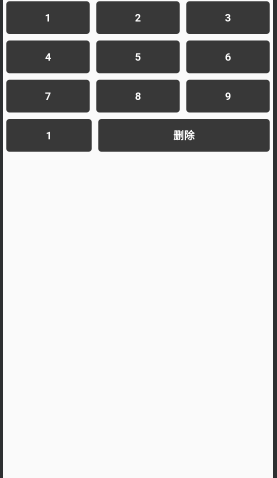
这时我们就可以来看一下效果啦
在要显示的布局中设置
  <com.example.helloworld.customerview.LoginKeyPadView
        android:layout_width="match_parent"
        android:layout_height="match_parent"/>
这时我们就可以看到效果啦
这里为了让我们的内容根据给定的尺寸进行自适配 我们还是要稍微修改一下我们的布局
keypad.xml
<?xml version="1.0" encoding="utf-8"?>
<LinearLayout
    xmlns:android="http://schemas.android.com/apk/res/android" android:layout_width="match_parent"
    android:orientation="vertical"
    android:layout_height="match_parent">
  <LinearLayout
      android:orientation="horizontal"
      android:layout_width="match_parent"
      android:layout_weight="1"
      android:layout_height="0dp">
      <TextView
          android:id="@+id/number_1"
          style="@style/numberKeyPad"
          android:text="1"
          />
      <TextView
          android:id="@+id/number_2"
          style="@style/numberKeyPad"
          android:text="2"
         />
      <TextView
          android:id="@+id/number_3"
          style="@style/numberKeyPad"
          android:text="3"
          />


  </LinearLayout>
    <LinearLayout
        android:orientation="horizontal"
        android:layout_width="match_parent"
        android:layout_weight="1"
        android:layout_height="0dp">
        <TextView
            android:id="@+id/number_4"
            style="@style/numberKeyPad"
            android:text="4"
            />
        <TextView
            android:id="@+id/number_5"
            style="@style/numberKeyPad"
            android:text="5"
            />
        <TextView
            android:id="@+id/number_6"
            style="@style/numberKeyPad"
            android:text="6"
            />


    </LinearLayout>
    <LinearLayout
        android:orientation="horizontal"
        android:layout_width="match_parent"
        android:layout_weight="1"
        android:layout_height="0dp">
        <TextView
            android:id="@+id/number_7"
            style="@style/numberKeyPad"
            android:text="7"
            />
        <TextView
            android:id="@+id/number_8"
            style="@style/numberKeyPad"
            android:text="8"
            />
        <TextView
            android:id="@+id/number_9"
            style="@style/numberKeyPad"
            android:text="9"
            />


    </LinearLayout>
    <LinearLayout
        android:orientation="horizontal"
        android:layout_width="match_parent"
        android:layout_weight="1"
        android:layout_height="0dp">
        <TextView
            android:id="@+id/number_0"
            style="@style/numberKeyPad"
            android:text="0"
            />
        <TextView
            android:id="@+id/number_del"
            style="@style/numberKeyPad"
            android:text="删除"
            android:layout_weight="2"
            />


    </LinearLayout>
</LinearLayout>
这里我们将最外层里面的Linear Layout 的高度都设置为odp并设置了weight值 让其充满整个屏幕
 <style name="numberKeyPad">
        <item name="android:layout_weight">1</item>
        <item name="android:layout_height">match_parent</item>
        <item name="android:gravity">center</item>
        <item name="android:layout_width">0dp</item>
        <item name="android:layout_margin">5dp</item>
        <item name="android:background">@drawable/num_key_pad</item>
        <item name="android:textColor">#FFFFFF</item>
        <item name="android:textSize">16sp</item>
        <item name="android:textStyle">bold</item>
    </style>
然后将style里面的android:layout_height设置为match_parent 然后就可以在要显示的布局中设置他的指定宽高了
<?xml version="1.0" encoding="utf-8"?>
<LinearLayout xmlns:android="http://schemas.android.com/apk/res/android"
xmlns:tools="http://schemas.android.com/tools"
android:layout_width="match_parent"
xmlns:yh="http://schemas.android.com/apk/res-auto"
android:background="#ffffff"
android:gravity="center"
android:layout_height="match_parent"
tools:context=".MainActivity">
<com.example.helloworld.customerview.LoginKeyPadView
android:layout_width="200dp"
android:layout_height="300dp"/>
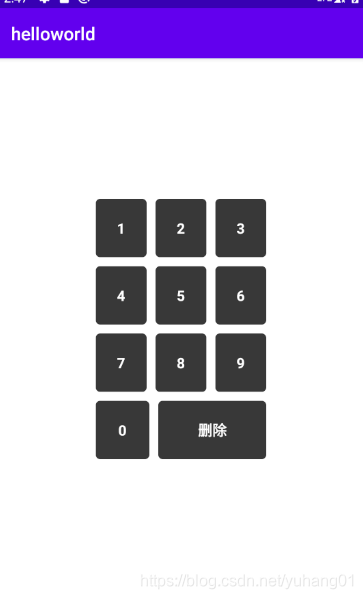
</LinearLayout>
效果如下图所示
4.定义功能接口 interface
 public interface onKeyPressListener{
        //数字键盘被点击
        void onNumberPress(int number);
        //删除键被点击
        void onDelPress();
    }
5.暴露点击事件供外部实现
private onKeyPressListener onKeyPressListener = null;
public void setOnKeyPressListener(onKeyPressListener listener){
        onKeyPressListener = listener;
    }
这里就是暴漏方法供外部实现
来看我们的点击事件中处理
@Override
    public void onClick(View v) {
        if(onKeyPressListener==null){
            return;
        }
      if(v.getId()==R.id.number_del){
          //按下删除键
          onKeyPressListener.onDelPress();
      }else {
          String text = ((TextView) v).getText().toString();
          onKeyPressListener.onNumberPress(Integer.parseInt(text));
      }
    }
欧克到这里就算是结束了 因为我们没有设置属性 所以也就不用第6步骤了
来看完整代码:
LoginKeyPadView
public class LoginKeyPadView extends LinearLayout implements View.OnClickListener {

    private onKeyPressListener onKeyPressListener = null;

    public LoginKeyPadView(Context context) {
        this(context,null);
    }

    public LoginKeyPadView(Context context, @Nullable AttributeSet attrs) {
        this(context, attrs,0);
    }

    public LoginKeyPadView(Context context, @Nullable AttributeSet attrs, int defStyleAttr) {
        super(context, attrs, defStyleAttr);
        LayoutInflater.from(context).inflate(R.layout.keypad,this,true);
        this.findViewById(R.id.number_1).setOnClickListener(this);
        this.findViewById(R.id.number_2).setOnClickListener(this);
        this.findViewById(R.id.number_3).setOnClickListener(this);
        this.findViewById(R.id.number_4).setOnClickListener(this);
        this.findViewById(R.id.number_5).setOnClickListener(this);
        this.findViewById(R.id.number_6).setOnClickListener(this);
        this.findViewById(R.id.number_7).setOnClickListener(this);
        this.findViewById(R.id.number_8).setOnClickListener(this);
        this.findViewById(R.id.number_9).setOnClickListener(this);
        this.findViewById(R.id.number_0).setOnClickListener(this);
        this.findViewById(R.id.number_del).setOnClickListener(this);
    }

    @Override
    public void onClick(View v) {
        if(onKeyPressListener==null){
            return;
        }
      if(v.getId()==R.id.number_del){
          //按下删除键
          onKeyPressListener.onDelPress();
      }else {
          String text = ((TextView) v).getText().toString();

          onKeyPressListener.onNumberPress(Integer.parseInt(text));
      }
    }

    public void setOnKeyPressListener(onKeyPressListener listener){
        onKeyPressListener = listener;
    }

    public interface onKeyPressListener{
        //数字键盘被点击
        void onNumberPress(int number);
        //删除键被点击
        void onDelPress();
    }
}
key_pad.xml
<?xml version="1.0" encoding="utf-8"?>
<LinearLayout
    xmlns:android="http://schemas.android.com/apk/res/android" android:layout_width="match_parent"
    android:orientation="vertical"
    android:layout_height="match_parent">
  <LinearLayout
      android:orientation="horizontal"
      android:layout_width="match_parent"
      android:layout_weight="1"
      android:layout_height="0dp">
      <TextView
          android:id="@+id/number_1"
          style="@style/numberKeyPad"
          android:text="1"
          />
      <TextView
          android:id="@+id/number_2"
          style="@style/numberKeyPad"
          android:text="2"
         />
      <TextView
          android:id="@+id/number_3"
          style="@style/numberKeyPad"
          android:text="3"
          />


  </LinearLayout>
    <LinearLayout
        android:orientation="horizontal"
        android:layout_width="match_parent"
        android:layout_weight="1"
        android:layout_height="0dp">
        <TextView
            android:id="@+id/number_4"
            style="@style/numberKeyPad"
            android:text="4"
            />
        <TextView
            android:id="@+id/number_5"
            style="@style/numberKeyPad"
            android:text="5"
            />
        <TextView
            android:id="@+id/number_6"
            style="@style/numberKeyPad"
            android:text="6"
            />


    </LinearLayout>
    <LinearLayout
        android:orientation="horizontal"
        android:layout_width="match_parent"
        android:layout_weight="1"
        android:layout_height="0dp">
        <TextView
            android:id="@+id/number_7"
            style="@style/numberKeyPad"
            android:text="7"
            />
        <TextView
            android:id="@+id/number_8"
            style="@style/numberKeyPad"
            android:text="8"
            />
        <TextView
            android:id="@+id/number_9"
            style="@style/numberKeyPad"
            android:text="9"
            />


    </LinearLayout>
    <LinearLayout
        android:orientation="horizontal"
        android:layout_width="match_parent"
        android:layout_weight="1"
        android:layout_height="0dp">
        <TextView
            android:id="@+id/number_0"
            style="@style/numberKeyPad"
            android:text="0"
            />
        <TextView
            android:id="@+id/number_del"
            style="@style/numberKeyPad"
            android:text="删除"
            android:layout_weight="2"
            />


    </LinearLayout>
</LinearLayout>
activity_main.xml
<?xml version="1.0" encoding="utf-8"?>
<LinearLayout xmlns:android="http://schemas.android.com/apk/res/android"
    xmlns:tools="http://schemas.android.com/tools"
    android:layout_width="match_parent"
    xmlns:yh="http://schemas.android.com/apk/res-auto"
    android:background="#ffffff"
    android:gravity="center"
    android:layout_height="match_parent"
    tools:context=".MainActivity">
    <com.example.helloworld.customerview.LoginKeyPadView
        android:id="@+id/padview"
        android:layout_width="200dp"
        android:layout_height="300dp"/>

</LinearLayout>
MainActivity
public class MainActivity extends AppCompatActivity {
private LoginKeyPadView padView;
@Override
protected void onCreate(Bundle savedInstanceState) {
super.onCreate(savedInstanceState);
setContentView(R.layout.activity_main);
padView = findViewById(R.id.padview);
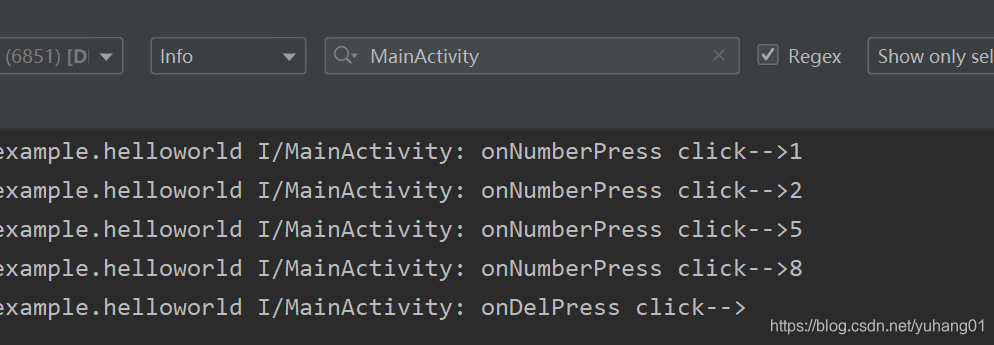
padView.setOnKeyPressListener(new LoginKeyPadView.onKeyPressListener() {
@Override
public void onNumberPress(int number) {
Log.i("MainActivity","onNumberPress click-->"+number);
}
@Override
public void onDelPress() {
Log.i("MainActivity","onDelPress click-->");
}
});
}
}
欧克,到这里我们的自定义View组合控件篇也算是完结了
下一篇就开始正式我们的自定义View的内容了
我们下次再见