1. nginx的安装和命令
   12  useradd -M -s /sbin/nologin nginx
   13  yum -y install gcc gcc-c++ openssl-devel zlib-devel pcre-devel
   14  tar -zxf nginx-1.11.5.tar.gz
   15  cd nginx-1.11.5
   16  ./configure --prefix=/usr/local/nginx --user=nginx --group=nginx --with-http_stub_status_module
   17  make && make install
   18  ln -s /usr/local/nginx/sbin/nginx  /usr/local/sbin/
   19  nginx -v
nginx的常用命令
检测配置文件语法: nginx -t
启动:  nginx
关闭:  nginx -s stop
重新加载: nginx -s reload
重启:先停止 再开启
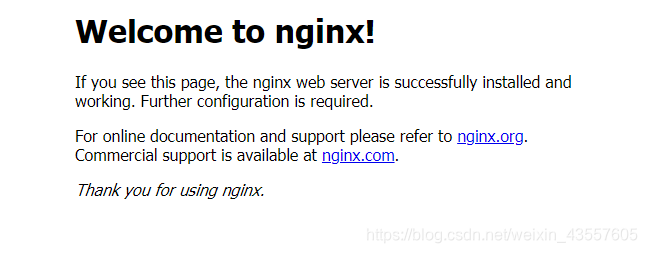
启动后 访问本机ip 如果可以看到如下 证明安装成功
2. nginx配置文件
#user  nobody;
worker_processes  1;

#error_log  logs/error.log;
#error_log  logs/error.log  notice;
#error_log  logs/error.log  info;

#pid        logs/nginx.pid;


events {
    worker_connections  1024;
}


http {
    include       mime.types;
    default_type  application/octet-stream;

    #log_format  main  '$remote_addr - $remote_user [$time_local] "$request" '
    #                  '$status $body_bytes_sent "$http_referer" '
    #                  '"$http_user_agent" "$http_x_forwarded_for"';

    #access_log  logs/access.log  main;

    sendfile        on;
    #tcp_nopush     on;

    #keepalive_timeout  0;
    keepalive_timeout  65;

    #gzip  on;

    server {
        listen       80;
        server_name  localhost;

        #charset koi8-r;

        #access_log  logs/host.access.log  main;

        location / {
            root   html;
            index  index.html index.htm;
        }

        #error_page  404              /404.html;

        # redirect server error pages to the static page /50x.html
        #
        error_page   500 502 503 504  /50x.html;
        location = /50x.html {
            root   html;
        }

        # proxy the PHP scripts to Apache listening on 127.0.0.1:80
        #
        #location ~ \.php$ {
        #    proxy_pass   http://127.0.0.1;
        #}

        # pass the PHP scripts to FastCGI server listening on 127.0.0.1:9000
        #
        #location ~ \.php$ {
        #    root           html;
        #    fastcgi_pass   127.0.0.1:9000;
        #    fastcgi_index  index.php;
        #    fastcgi_param  SCRIPT_FILENAME  /scripts$fastcgi_script_name;
        #    include        fastcgi_params;
        #}

        # deny access to .htaccess files, if Apache's document root
        # concurs with nginx's one
        #
        #location ~ /\.ht {
        #    deny  all;
        #}
    }


    # another virtual host using mix of IP-, name-, and port-based configuration
    #
    #server {
    #    listen       8000;
    #    listen       somename:8080;
    #    server_name  somename  alias  another.alias;

    #    location / {
    #        root   html;
    #        index  index.html index.htm;
    #    }
    #}


    # HTTPS server
    #
    #server {
    #    listen       443 ssl;
    #    server_name  localhost;

    #    ssl_certificate      cert.pem;
    #    ssl_certificate_key  cert.key;

    #    ssl_session_cache    shared:SSL:1m;
    #    ssl_session_timeout  5m;

    #    ssl_ciphers  HIGH:!aNULL:!MD5;
    #    ssl_prefer_server_ciphers  on;

    #    location / {
    #        root   html;
    #        index  index.html index.htm;
    #    }
    #}

}
配置文件层次:
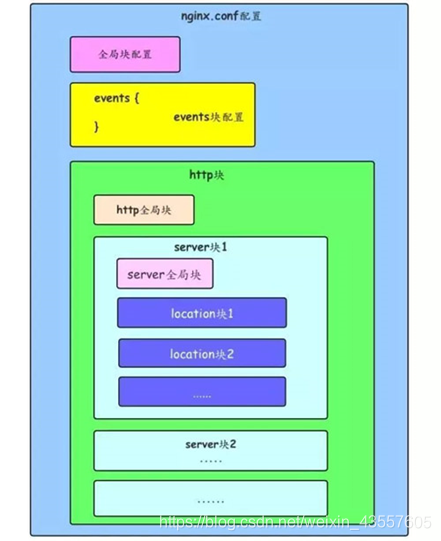
配置文件层次:
events {
 events里的配置项
}

http {
    server {
        location / {
        }
    }
}
各模块的含义:
- main 用于nginx全局信息的配置
- events nginx工作模式的配置(nginx支持的模型有select poll epoll kqueue(BSD系统) kqueue效率很高 类似于epoll)
- http http协议信息的配置
- upstream 负载均衡模块(默认没有 需要自己手写 与server是平行模块)
- server 服务器访问信息配置
- location 用于进行访问的路由 location会带有独特的匹配表示 用于匹配不同的请求
3. 基于nginx的虚拟主机的实现
虚拟主机定义:
在web服务中就是一个独立的网站站点,这个独立的站点可能会有独立的域名、IP、端口,具有独立的程序和资源目录,可以独立的对外提供访问服务
3.1 基于域名的虚拟主机
[root@localhost ~]# vim /usr/local/nginx/conf/nginx.conf
#在原有的server上添加一个server 内容如下
    server {
        listen       80;
        server_name  www.abc.com;

        location / {
            root /usr/local/nginx/html/abc;
            index index.html index.htm;
        }
    }

修改原有的server模块的内容 修改内容如下
    server {
        listen       80;
        server_name  www.test.com;

        #charset koi8-r;

        #access_log  logs/host.access.log  main;

        location / {
            root   /usr/local/nginx/html/test;
            index  index.html index.htm;
        }
检测语法并重新加载nginx
[root@localhost ~]# nginx -t
nginx: the configuration file /usr/local/nginx/conf/nginx.conf syntax is ok
nginx: configuration file /usr/local/nginx/conf/nginx.conf test is successful
[root@localhost ~]# nginx -s reload
创建响应的目录 并做域名解析
[root@localhost ~]# mkdir /usr/local/nginx/html/{abc,test}
[root@localhost ~]# echo "abc" > /usr/local/nginx/html/abc/index.html
[root@localhost ~]# echo "test" > /usr/local/nginx/html/test/index.html

[root@localhost ~]# vim /etc/hosts
住家内容如下
192.168.20.130 www.test.com
192.168.20.130 www.abc.com
访问验证
[root@localhost ~]# curl http://www.abc.com
abc
[root@localhost ~]# curl http://www.test.com
test
3.2 基于端口的虚拟主机
[root@localhost ~]# vim /usr/local/nginx/conf/nginx.conf
        listen       8888;  第一个server里的端口改为8888 其他的不变
[root@localhost ~]# nginx -s reload
访问测试
[root@localhost ~]# curl http://192.168.20.130:8888
abc
[root@localhost ~]# curl http://192.168.20.130:80
test
3.3 基于ip的虚拟主机
添加一个ip用于测试
[root@localhost ~]# ifconfig ens32:1 192.168.20.188/24
[root@localhost ~]# ifconfig | grep 188
        inet 192.168.20.188  netmask 255.255.255.0  broadcast 192.168.20.255
修改配置
[root@localhost ~]# vim /usr/local/nginx/conf/nginx.conf
        listen       80; #第一个server的端口 改回80
        server_name  192.168.20.188; #第一个server的域名
        server_name  192.168.20.130; #第二个server的域名
重新加载并访问测试
[root@localhost ~]# nginx -s reload
[root@localhost ~]# curl http://192.168.20.188
abc
[root@localhost ~]# curl http://192.168.20.130
test
4. nginx 平滑升级
查看当前nginx版本
[root@localhost ~]# nginx -v
nginx version: nginx/1.11.5
确认当前nginx运行状态 正在运行
[root@localhost ~]# netstat -anput | grep 80 | grep LISTEN
tcp        0      0 0.0.0.0:80              0.0.0.0:*               LISTEN      14155/nginx: master
平滑升级的操作
   55  tar -zxf nginx-1.15.4.tar.gz
   56  cd nginx-1.15.4
   57  ./configure --prefix=/usr/local/nginx --user=nginx --group=nginx --with-http_stub_status_module
   58  make
   60  cd /usr/local/nginx/
   61  mv sbin/nginx sbin/nginx.old
   62  mv conf/nginx.conf conf/nginx.conf.old
   63  cp /root/nginx-1.15.4/objs/nginx sbin/nginx
   64  cp /root/nginx-1.15.4/conf/nginx.conf conf/nginx.conf
   65  nginx -s reload
查看现在的版本
[root@localhost nginx]# nginx -v
nginx version: nginx/1.15.4
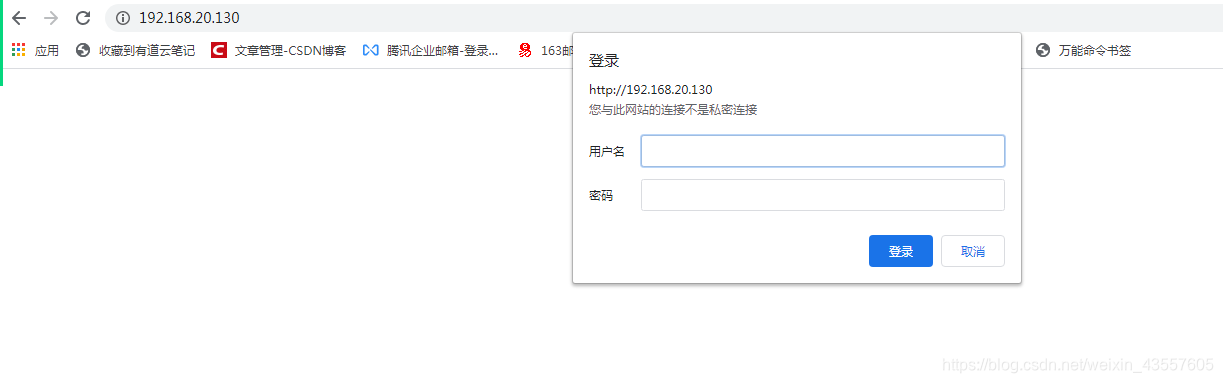
5. nginx访问控制
[root@localhost ~]# vim /usr/local/nginx/conf/nginx.conf
        location / {
            root   html;
            index  index.html index.htm;
            auth_basic "Please login"; #添加的内容
            auth_basic_user_file /usr/local/nginx/conf/.passwd;#添加的内容
        }
[root@localhost ~]# echo "tiezhu:$(openssl passwd 123456)" > /usr/local/nginx/conf/.passwd
[root@localhost ~]# chmod 400 /usr/local/nginx/conf/.passwd
[root@localhost ~]# chown nginx /usr/local/nginx/conf/.passwd
[root@localhost ~]# nginx -t
nginx: the configuration file /usr/local/nginx/conf/nginx.conf syntax is ok
nginx: configuration file /usr/local/nginx/conf/nginx.conf test is successful
[root@localhost ~]# nginx -s reload
访问ip 进行测试
6. nginx启动脚本
[root@localhost ~]# vim /etc/init.d/nginx
#!/bin/bash
CMD=/usr/local/nginx/sbin/nginx
case $1 in
start)
$CMD
;;
stop)
$CMD -s quit
;;
restart)
$CMD -s quit
$CMD
;;
reload)
$CMD -s reload
;;
*)
  echo "Usage: $0 { start | stop | restart | reload }"
  exit 1
;;
esac
[root@localhost ~]# chmod +x /etc/init.d/nginx