布局性能优化(Hierarchy Viewer)
Hierarchy Viewer工具
Layouts是Android应用里直接影响用户体验的一个关健部分。如果Layout设计的不好,可能导政你的应用大量的内存占用从而导致U响应很慢。Android SDK提供了工具帮助你分析你的Layouts的性能问题。结合这个工具同时查看本文,你能实现滑动流畅、占用内存最小的用户界面。
HierarchyViewer工具在< sdk>/tools/目录下。打开该工具,会显示有效设备列表和某个设备正在运行的组件。点击"Load View Hierarchy查看这被选中的app的布局层次。
然而在我的sdk/tools下并没有HierarchyViewer工具,然后我在网上看到sdk/tools/libs下有个hierarchyviewer.jar,可以双击,我试了以下,然并卵。。。。
后来发现打开monitor.bat,就找到HierarchyViewer工具


可以通过以下数据优化布局:
渲染出该布局的完整的item所需的时间为
Measure:0.977ms(测量)
Layout:0.167ms(布局)
Draw:2.717ms(绘制)
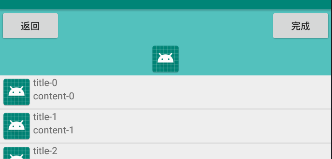
使用listView时的布局
优化前
<?xml version="1.0" encoding="utf-8"?>
<LinearLayout
    xmlns:android="http://schemas.android.com/apk/res/android" android:layout_width="match_parent"
    android:layout_height="match_parent">

    <ImageView
        android:layout_width="wrap_content"
        android:layout_height="wrap_content"
        android:id="@+id/imageView"
        android:src="@mipmap/ic_launcher"/>
    <LinearLayout
        android:layout_width="match_parent"
        android:layout_height="wrap_content"
        android:orientation="vertical">
        <TextView
            android:layout_width="match_parent"
            android:layout_height="wrap_content"
            android:text="New Text"
            android:id="@+id/textView_title"/>
        <TextView
            android:layout_width="match_parent"
            android:layout_height="wrap_content"
            android:text="New Text"
            android:id="@+id/textView_content"/>
    </LinearLayout>

</LinearLayout>
优化后
<?xml version="1.0" encoding="utf-8"?>
<RelativeLayout
    xmlns:android="http://schemas.android.com/apk/res/android" android:layout_width="match_parent"
    android:layout_height="match_parent">

    <ImageView
        android:layout_width="wrap_content"
        android:layout_height="wrap_content"
        android:id="@+id/imageView"
        android:layout_alignParentTop="true"
        android:layout_alignParentStart="true"
        android:layout_alignParentLeft="true"
        android:src="@mipmap/ic_launcher"/>

    <TextView
        android:layout_width="match_parent"
        android:layout_height="wrap_content"
        android:text="New Text"
        android:layout_alignParentEnd="true"
        android:layout_alignParentRight="true"
        android:layout_alignParentTop="true"
        android:layout_toEndOf="@id/imageView"
        android:layout_toRightOf="@id/imageView"
        android:id="@+id/textView_title"/>
    <TextView
        android:layout_width="match_parent"
        android:layout_height="wrap_content"
        android:text="New Text"
        android:layout_alignParentEnd="true"
        android:layout_alignParentRight="true"
        android:layout_below="@id/textView_title"
        android:layout_toEndOf="@id/imageView"
        android:layout_toRightOf="@id/imageView"
        android:id="@+id/textView_content"/>

</RelativeLayout>
具体使用可以参考:https://blog.csdn.net/swordgirl2011/article/details/52887925
重用布局和<include/>
为了提高你的Layouts的复用性,你也可以使用<include/>和<merge/>标签内嵌一个布局到另一个布局里。
布局重用时十分强大的,能让你产生可重用的复杂布局。
比如:定义了一个title bar。文件名为(titlebar.xml),被包含在每个activity的布局文件里。
<?xml version="1.0" encoding="utf-8"?>
<FrameLayout xmlns:android="http://schemas.android.com/apk/res/android"
    android:layout_width="match_parent"
    android:layout_height="wrap_content"
    android:background="@color/mediacontroller_bg_pressed">

    <ImageView
        android:layout_width="match_parent"
        android:layout_height="wrap_content"
        android:src="@mipmap/ic_launcher"/>
</FrameLayout>
<?xml version="1.0" encoding="utf-8"?>
<RelativeLayout xmlns:android="http://schemas.android.com/apk/res/android"
    xmlns:app="http://schemas.android.com/apk/res-auto"
    xmlns:tools="http://schemas.android.com/tools"
    android:layout_width="match_parent"
    android:layout_height="match_parent"
    tools:context=".Main3Activity">

    <include layout="@layout/title_bar"/>
    <ListView
        android:layout_width="match_parent"
        android:layout_height="match_parent"
        android:id="@+id/listView" />

</RelativeLayout>

在<include/>标签里,你也能重写所有的layout参数(任何android:layout_*属性),然而,如果你想要用<include/>标签重写布局属性,为了其他的布局属性生效,你必须同时重写android:layout_width="“和android:layout_height=”"两个方法
使用<merge/>标签
某些时候,自定义可重用的布局包含了过多的层级标签,比如我们需要在LinearLayout里面嵌入一个可重用的组件,而恰恰这个自定义的可重用的组件根节点也是LinearLayout,这样就多了一层没有用的嵌套,这样无疑只会拖慢程序速度。而这个时候如果我们使用merge根标签就可以避免这样的问题。
<?xml version="1.0" encoding="utf-8"?>
<merge xmlns:android="http://schemas.android.com/apk/res/android"
    android:layout_width="match_parent"
    android:layout_height="wrap_content">

    <ImageView
        android:layout_width="match_parent"
        android:layout_height="wrap_content"
        android:src="@mipmap/ic_launcher"/>
</merge>
<?xml version="1.0" encoding="utf-8"?>
<LinearLayout xmlns:android="http://schemas.android.com/apk/res/android"
    xmlns:app="http://schemas.android.com/apk/res-auto"
    xmlns:tools="http://schemas.android.com/tools"
    android:layout_width="match_parent"
    android:layout_height="match_parent"
    android:orientation="vertical"
    tools:context=".Main3Activity">

    <LinearLayout
        android:layout_width="match_parent"
        android:layout_height="wrap_content"
        android:background="@color/mediacontroller_bg_pressed">
        <include layout="@layout/title_bar"/>
    </LinearLayout>

    <ListView
        android:layout_width="match_parent"
        android:layout_height="match_parent"
        android:id="@+id/listView" />

</LinearLayout>

在需要时加载视图
有时你的布局可能需要一些复杂却又很少被用到的视图。无论他们是item详情、进度指示器,或撤销的消息,你都可以在需要的时候加载这些视图,来减少内存使用量并加快渲染速度。

定义一个ViewStub:
ViewStub是一个没有尺寸大小并且不会在布局中嵌套或渲染任何东西的轻量级的视图。因此在视图层次展现或隐藏它的代价非常小。每一个ViewStub仅仅需要包含android:layout属性来展现指定的布局。
<?xml version="1.0" encoding="utf-8"?>
<LinearLayout xmlns:android="http://schemas.android.com/apk/res/android"
    xmlns:app="http://schemas.android.com/apk/res-auto"
    xmlns:tools="http://schemas.android.com/tools"
    android:layout_width="match_parent"
    android:layout_height="match_parent"
    android:orientation="vertical"
    tools:context=".Main3Activity">

    <LinearLayout
        android:layout_width="match_parent"
        android:layout_height="wrap_content"
        android:orientation="vertical"
        android:background="@color/mediacontroller_bg_pressed">
        <ViewStub
            android:layout_width="match_parent"
            android:layout_height="wrap_content"
            android:layout="@layout/inc"
            android:id="@+id/stub_import"/>
        <include layout="@layout/title_bar"/>
    </LinearLayout>

    <ListView
        android:layout_width="match_parent"
        android:layout_height="match_parent"
        android:id="@+id/listView" />

</LinearLayout>
<?xml version="1.0" encoding="utf-8"?>
<RelativeLayout xmlns:android="http://schemas.android.com/apk/res/android"
    android:layout_width="match_parent"
    android:layout_height="match_parent">
    <Button
        android:layout_width="wrap_content"
        android:layout_height="wrap_content"
        android:text="返回"
        android:id="@+id/button_back"
        android:layout_alignParentStart="true"
        android:layout_alignParentLeft="true"/>
    <Button
        android:layout_width="wrap_content"
        android:layout_height="wrap_content"
        android:text="完成"
        android:id="@+id/button_ok"
        android:layout_alignParentRight="true"
        android:layout_alignParentEnd="true"/>
</RelativeLayout>

注意:inflate()方法在视图渲染完毕后便直接展示该已渲染的视图View。因此,如果你需要和布局交互的话,不需要在调用findViewById()方法
一个ViewStub是可见的后渲染完毕,该元素便不再是视图层次的一部分。它被已渲染的布局途欢,并且该布局的根视图的id是在ViewStub中被android:infatedId属性指定的id。(在android:id指定的id只有在这个ViewStub布局是可见、渲染完毕才是有效的)
注意:ViewStub的一个缺点是,目前它在要渲染的布局中并不支持<merge/>标签