版权声明:本文为博主原创文章,未经博主允许不得转载。 https://blog.csdn.net/Haiqiang1995/article/details/90048571
最近在使用opencv做一些图像处理和检测的内容,今天主要讲一下基于mobilenet模型进行目标检测的一般流程。
部署环境:vs2017 +opencv3.3+C++
1、添加引用库和命名空间
添加我们所需要使用的dnn库,和相关依赖
#include<iostream>
#include<opencv2/dnn.hpp>//opencv2的dnn模块
#include<opencv2/opencv.hpp>

using namespace std;
using namespace cv;
using namespace cv::dnn;![]()
2、指定模型文件和描述文件位置
cv::String model_bin_file = "D:/new_cv/opencv/sources/samples/data/dnn/MobileNetSSD_deploy.caffemodel";
cv::String model_txt_file = "D:/new_cv/opencv/sources/samples/data/dnn/MobileNetSSD_deploy.prototxt";
const char* classNames[] = { "background",
"aeroplane", "bicycle", "bird", "boat",
"bottle", "bus", "car", "cat", "chair",
"cow", "diningtable", "dog", "horse",
"motorbike", "person", "pottedplant",
"sheep", "sofa", "train", "tvmonitor" };
3、输入待检测目标图片
接下来我们输入我们需要检测的图片,并验证可以访问
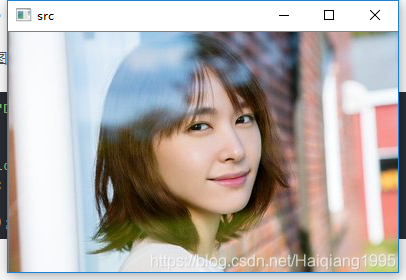
	Mat src = imread("D:/test/test.jpg");
	if (src.empty())
	{
		cout << "load image error" << endl;
		return -1;
	}
	imshow("src", src);
原始src:最喜欢的明星,哈哈哈哈
4、查看模型描述文件,确定图像width和height
对于定义好的caffemodel,我们在进行检测和训练的过程中,都要按模型的需要resize成目标大小,下面是样例的描述文件(deploy.prorotxt)的起始位置,data是我们输入的层级名称(后面会用到),
name: "MobileNet-SSD"
input: "data"
input_shape {
  dim: 1
  dim: 3
  dim: 300
  dim: 300
}

dim:1  ——表示对待识别样本进行数据增广的数量,该值的大小可自行定义。但一般会进行5次crop,将整幅图像分为多个flip。该值为10则表示会将待识别的样本分为10部分输入到网络进行识别。如果相对整幅图像进行识别而不进行图像数据增广,则可将该值设置为1.

dim:3 ——该值表示处理的图像的通道数,若图像为RGB图像则通道数为3,设置该值为3;若图像为灰度图,通道数为1则设置该值为1.

dim:300 ——图像的长度,可以通过网络配置文件中的数据层中的crop_size来获取。

dim:300——图像的宽度,可以通过网络配置文件中的数据层中的crop_size来获取。
我们可以看到,该模型需要输入单个3通道的300*300的图像,因此,我们在程序中指定输入固定的width和height如下
const size_t width = 300;//const表示不能被修改
const size_t height = 300;//size_t 表示vector的下标类型,一般是sizeof(*)的返回值
const float scaleFector = 0.007843f;
const float meanVal = 127.5;
5、初始化网络模型
常见初始化caffe网络模型接口有两种方法:
方法1)
	Ptr<dnn::Importer> importer;//智能指针的用法
	try {
		importer = dnn::createCaffeImporter(caffe_txt_file, caffe_bin_file);
	}
	catch (const cv::Exception &err)//Importer can throw error which we can catch
	{
		cerr << err.msg << endl;
	}

	Net net;
	importer->populateNet(net);//填充网络
	importer.release();
这种方法:在opencv3.3 之前可以用,之后的版本,Importer被禁掉了,可以使用
方法2)
Net net = readNetFromCaffe(caffe_txt_file, caffe_bin_file);
6、数据载入和检测环节
	Mat detectionMat(detection.size[2], detection.size[3], CV_32F, detection.ptr<float>());
	float confidence_threshold = 0.6;
	cout << "rows" << detectionMat.rows << endl;
	cout << "cols" << detectionMat.cols << endl;
	for (int i = 0; i < detectionMat.rows; i++) {
		float confidence = detectionMat.at<float>(i, 2);
		if (confidence > confidence_threshold) {
			size_t objIndex = (size_t)(detectionMat.at<float>(i, 1));
			//		cout << objIndex << endl;
			float tl_x = detectionMat.at<float>(i, 3) * frame.cols;
			float tl_y = detectionMat.at<float>(i, 4) * frame.rows;
			float br_x = detectionMat.at<float>(i, 5) * frame.cols;
			float br_y = detectionMat.at<float>(i, 6) * frame.rows;

			Rect object_box((int)tl_x, (int)tl_y, (int)(br_x - tl_x), (int)(br_y - tl_y));
			rectangle(frame, object_box, Scalar(0, 0, 255), 2, 8, 0);
			putText(frame, format("%s", classNames[objIndex]), Point(20, 20), FONT_HERSHEY_COMPLEX, 1.0, Scalar(3, 9, 45), 2, 8, 0);
		}
检测图像:
