首先需要按照官方文档在本机的电脑上安装好MMDetection,不熟悉的小伙伴可以看我下面的这篇教程。
mmdetection的使用_dejahu的博客-CSDN博客
安装好mmdetection后,对图片和视频进行目标检测非常简单,只需要3个文件即可
- 模型的配置文件
- 模型文件
- 需要进行推理的图片或者视频
详细的代码如下:
from mmdet.apis import init_detector, inference_detector, show_result_pyplot
import mmcv

config_file = '../configs/faster_rcnn/faster_rcnn_r50_fpn_1x_coco.py'
# download the checkpoint from model zoo and put it in `checkpoints/`
# url: https://download.openmmlab.com/mmdetection/v2.0/faster_rcnn/faster_rcnn_r50_fpn_1x_coco/faster_rcnn_r50_fpn_1x_coco_20200130-047c8118.pth
checkpoint_file = '../checkpoints/faster_rcnn_r50_fpn_1x_coco_20200130-047c8118.pth'

# build the model from a config file and a checkpoint file
model = init_detector(config_file, checkpoint_file, device='cuda:0')

# test a single image
img = 'demo.jpg'
result = inference_detector(model, img)

# show the results
show_result_pyplot(model, img, result)
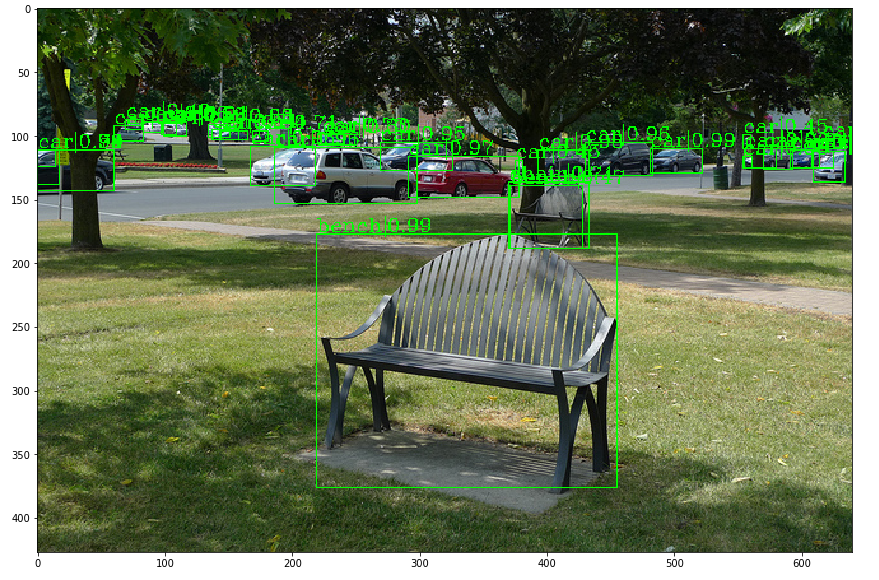
可视化的效果如下,boundingbox左上方的文字分别表示类别和置信度。