1.在官网下载压缩包
2.解压压缩包
tar zxf haproxy-1.7.3.tar.gz
注:压缩包解压后里面如果有.spec文件就可以做成.rpm安装包
cd haproxy-1.7.3
find . -name *.spec

3.安装rpmbuild
yum install rpm-build -y
4.安装其他必须的软件
yum install gcc -y
yum install pcre-devel -y
5.制作安装包
rpmbuild -tb haproxy-1.7.3.tar.gz ##制作安装包
制作好的安装包会在 rpmbuild/RPMS/x86_64/
6.安装
[root@server1 ~]# cd rpmbuild/RPMS/x86_64/
[root@server1 x86_64]# ls
haproxy-1.7.3-1.x86_64.rpm
[root@server1 x86_64]# yum install haproxy-1.7.3-1.x86_64.rpm -y
7.复制配置文件
cp haproxy-1.7.3/examples/content-sw-sample.cfg /etc/haproxy/haproxy.cfg
8.修改配置文件
vim /etc/haproxy/haproxy.cfg
global
maxconn 65535
stats socket /var/run/haproxy.stat mode 600 level admin
log 127.0.0.1 local0
uid 200
gid 200
chroot /var/empty
daemon
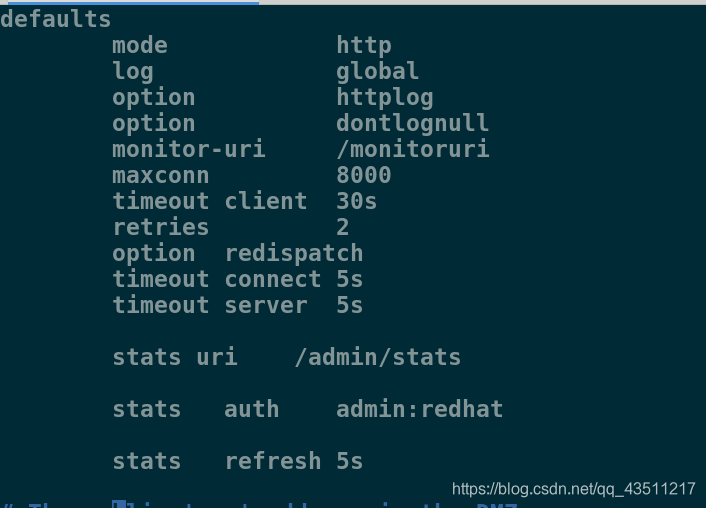
defaults
mode http
log global
option httplog
option dontlognull
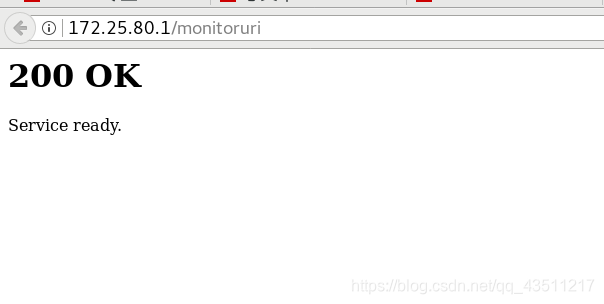
monitor-uri /monitoruri
maxconn 8000
timeout client 30s
retries 2
option redispatch
timeout connect 5s
timeout server 5s
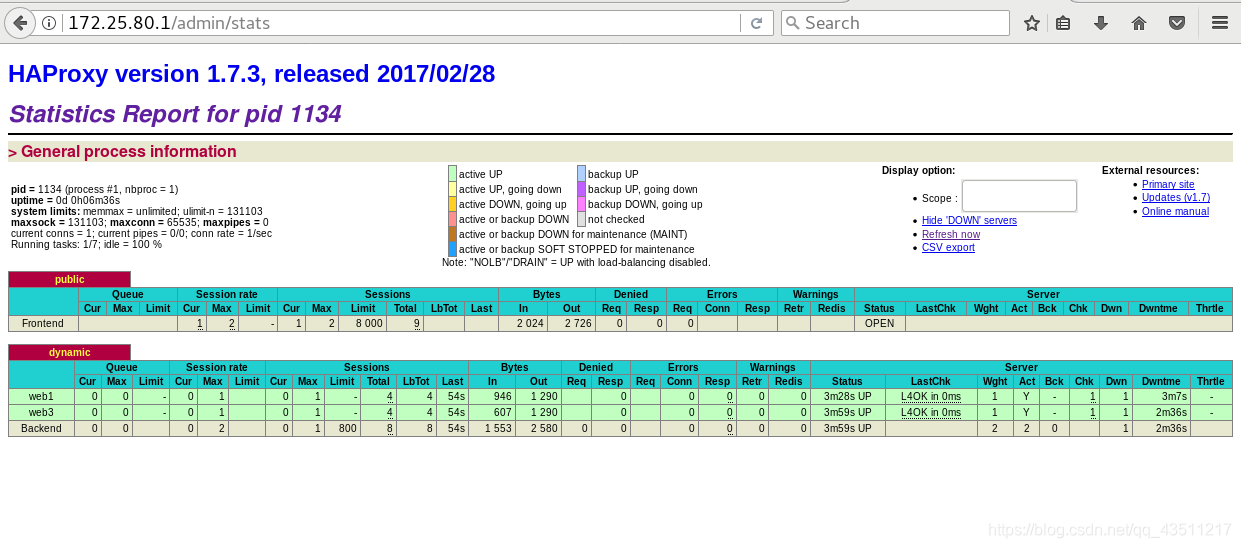
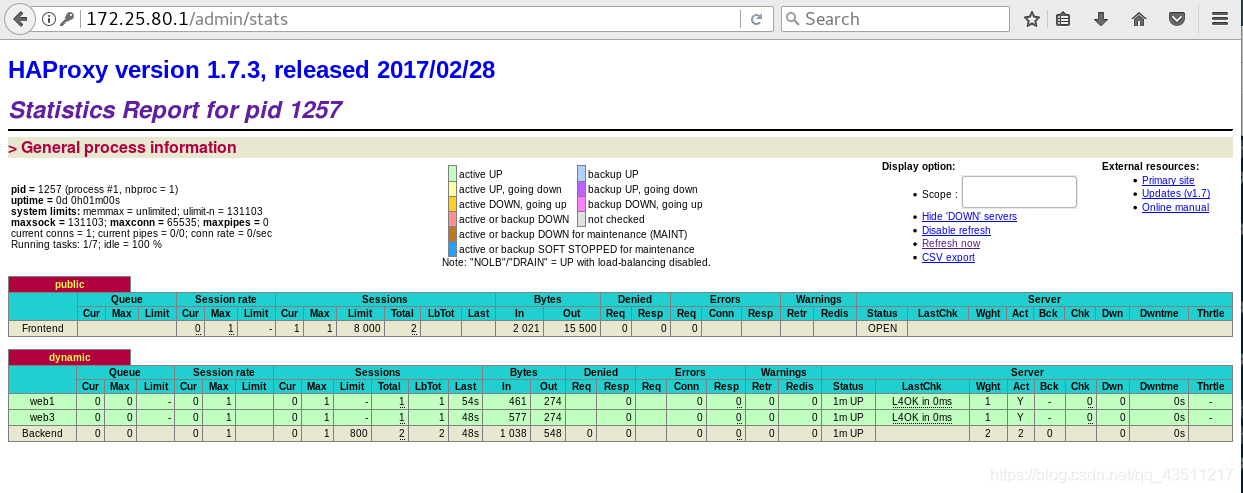
stats uri /admin/stats
# The public 'www' address in the DMZ
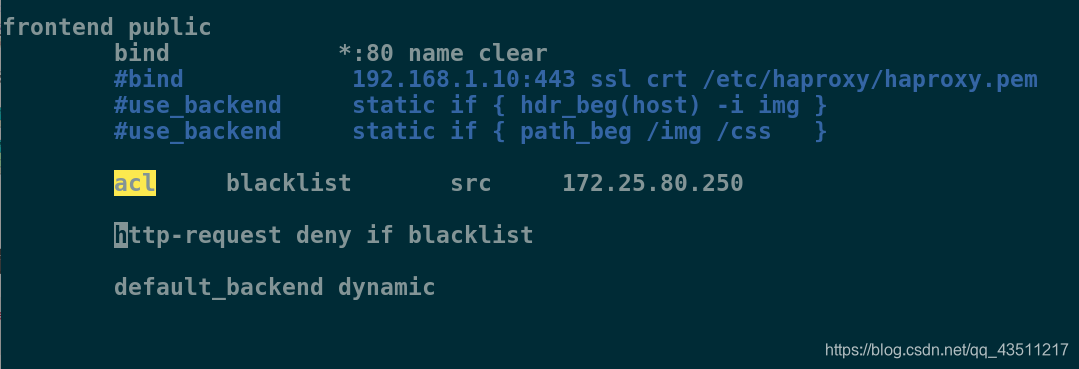
frontend public
bind 172.25.80.1:80 name clear
#bind 192.168.1.10:443 ssl crt /etc/haproxy/haproxy.pem
#use_backend static if { hdr_beg(host) -i img }
#use_backend static if { path_beg /img /css }
default_backend dynamic
# The static backend backend for 'Host: img', /img and /css.
backend dynamic
# mode http
balance roundrobin
server web1 172.25.80.2:80 check inter 1000
server web3 172.25.80.3:80 check inter 1000
9.开启服务
[root@server1 ~]# /etc/init.d/haproxy start
Starting haproxy:                                          [  OK  ]
10.开启server2和server3的httpd,编写默认发布页
[root@server2 ~]# /etc/init.d/httpd start
Starting httpd: httpd: Could not reliably determine the server's fully qualified domain name, using 172.25.10.2 for ServerName
[ OK ]
vim /var/www/html/index.html
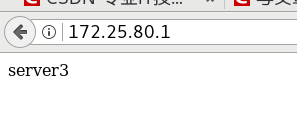
server2
vim /var/www/html/index.html
server3
11.测试
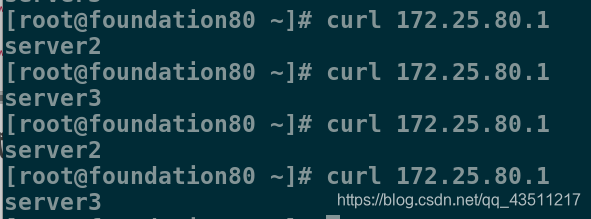
12.在浏览器测试
172.25.80.1/monitoruri
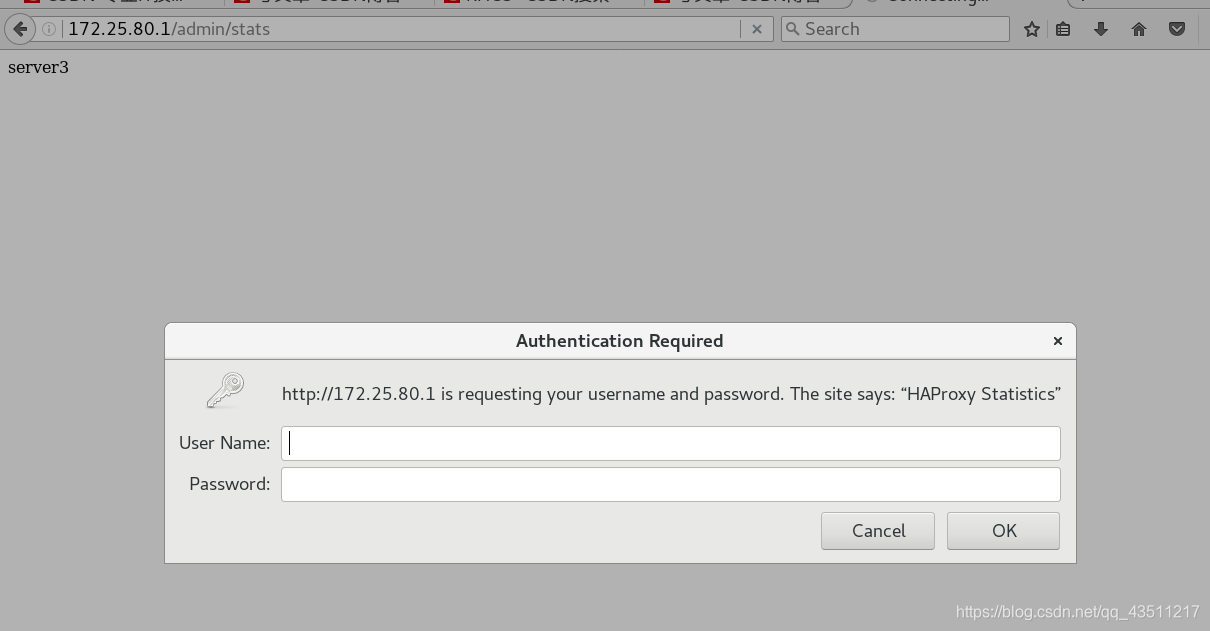
172.25.10.1/admin/stats
13.设置管理密码
vim /etc/haproxy/haproxy.cfg
        option  redispatch
        timeout connect 5s
        timeout server  5s

        stats uri    /admin/stats

        stats   auth    admin:redhat			##设置管理员和密码

        stats   refresh 5s			##刷新时间
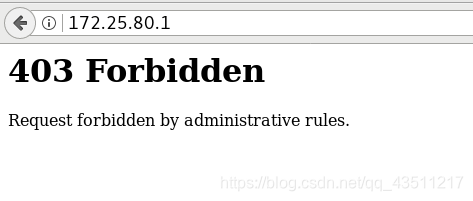
14.设置黑名单
vim /etc/haproxy/haproxy.cfg

        acl     blacklist       src     172.25.80.250

        http-request deny if blacklist

        default_backend dynamic
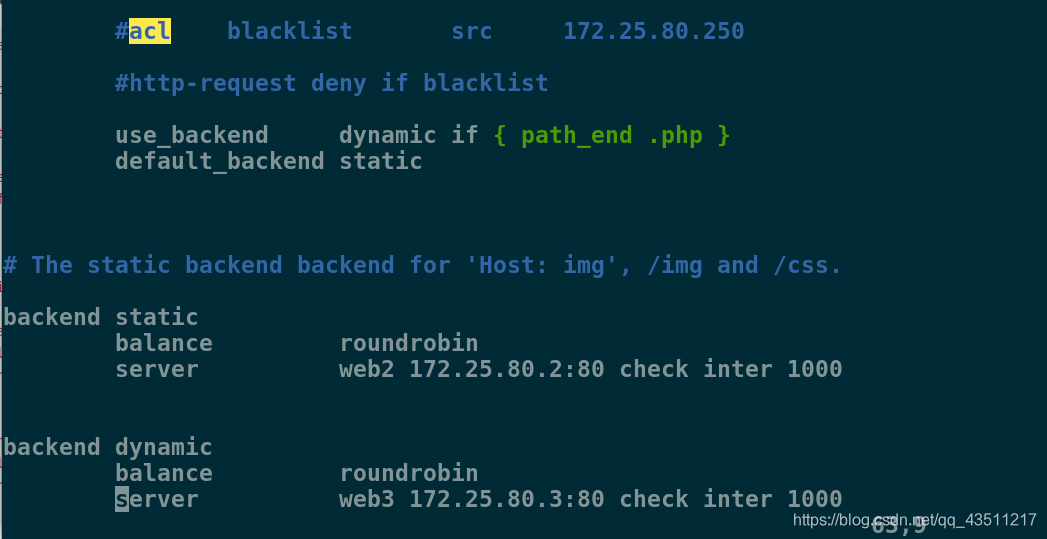
15.页面的动静分离
vim /etc/haproxy/haproxy.cfg

        #acl    blacklist       src     172.25.80.250

        #http-request deny if blacklist

        use_backend     dynamic if { path_end .php }		##结尾为.php时为动态
        default_backend static		##默认为静态


# The static backend backend for 'Host: img', /img and /css.

backend static				##静态时访问server2
        balance         roundrobin
        server          web2 172.25.80.2:80 check inter 1000


backend dynamic				##动态时访问server3
        balance         roundrobin
        server          web3 172.25.80.3:80 check inter 1000
对server3的修改
yum install php -y
vim /var/www/html/index.php
<?php
        phpinfo()
?>

/etc/init.d/httpd restart
16.测试