前言:
实验环境:我们前三章搭建好的Lnmp架构。
原理分析:
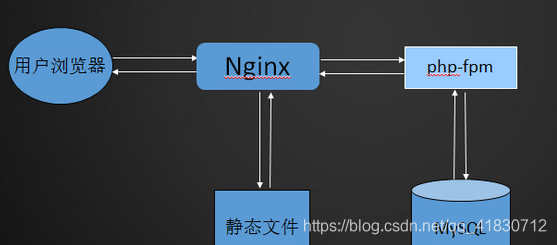
浏览器发送http request请求到服务器(Nginx),服务器响应并处理web请求,将一些静态资源(CSS,图片,视频等)保存服务器上,然后将php脚本通过接口传输协议(网关协议)PHP-FCGI(fast-cgi)传输给PHP-FPM(进程管理程序),PHP-FPM不做处理,然后PHP-FPM调用PHP解析器进程,PHP解析器解析php脚本信息。PHP解析器进程可以启动多个,进行并发执行。然后将解析后的脚本返回到PHP-FPM,PHP-FPM再通过fast-cgi的形式将脚本信息传送给Nginx.服务器再通过Http response的形式传送给浏览器。浏览器再进行解析与渲染然后进行呈现。
1.Apache+PHP 和 Nginx+PHP的区别
Apache一般是把PHP当做自己的一个模块来启动;而Ngnix则是把http请求变量转发给PHP进程,即PHP独立进程,与Ngnix通信,这种方式叫做Fast-CGI运行方式。所以Apache所编译的PHP不能用于Nginx。
2.什么是Fast-CGI
Fast-CGI是一个可伸缩的、高速的在HTTP server和动态脚本语言间通信的接口。多数流行的HTTP server都支持Fast-CGI,包括Apache、Nginx和lighttpd等。同时,Fast-CGI也被许多脚本语言支持,其中就有PHP。
Fast-CGI是从CGI发展改进而来的。传统CGI接口方式的主要缺点是性能很差,因为每次HTTP服务器遇到动态程序时都需要重新启动脚本解析器来执行解析,然后将结果返回给HTTP服务器。这在处理高并发访问时几乎是不可用的。另外传统的CGI接口方式安全性也很差,现在已经很少使用了。
FastCGI接口方式采用C/S结构,可以将HTTP服务器和脚本解析服务器分开,同时在脚本解析服务器上启动一个或者多个脚本解析守护进程。当HTTP服务器每次遇到动态程序时,可以将其直接交付给Fast-CGI进程来执行,然后将得到的结果返回给浏览器。这种方式可以让HTTP服务器专一地处理静态请求或者将动态脚本服务器的结果返回给客户端,这在很大程度上提高了整个应用系统的性能。
3.Nginx+Fast-CGI运行原理
Nginx不支持对外部程序的直接调用或者解析,所有的外部程序(包括PHP)必须通过Fast-CGI接口来调用。Fast-CGI接口在Linux下是socket(这个socket可以是文件socket,也可以是ip socket)。
wrapper:为了调用CGI程序,还需要一个Fast-CGI的wrapper(wrapper可以理解为用于启动另一个程序的程序),这个wrapper绑定在某个固定socket上,如端口或者文件socket。当Nginx将CGI请求发送给这个socket的时候,通过Fast-CGI接口,wrapper接收到请求,然后Fork(派生)出一个新的线程,这个线程调用解释器或者外部程序处理脚本并读取返回数据;接着,wrapper再将返回的数据通过Fast-CGI接口,沿着固定的socket传递给Nginx;最后,Nginx将返回的数据(html页面或者图片)发送给客户端。这就是Nginx+Fast-CGI的整个运作过程。
4、lnmp架构优化
在优化的过程中,我们最重要的是对I/O进行处理。 cpu从内存拿数据比从磁盘拿数据要快很多,所以我们来看整个lnmp可供我们加缓存以优化。
关于i/o
当客户端请求静态数据,nginx自己处理,这里会有磁盘I/O;
当客户端请求动态数据,nginx通过fastcgi把请求转交给后面的应用程序服务器,当这些应用程序拿数据就需要去后面的MySQL去拿,这里就又有一个磁盘I/O。
一、配置php页面缓存
一、获得软件包资源,解压缩
[root@server1 ~]# tar zxf memcache-2.2.5.tgz
[root@server1 ~]# cd memcache-2.2.5
[root@server1 memcache-2.2.5]# ls			#查看没有发现./configure的编译环境
config9.m4  example.php                 memcache.php        memcache_standard_hash.c
config.m4   memcache.c                  memcache_queue.c    php_memcache.h
config.w32  memcache_consistent_hash.c  memcache_queue.h    README
CREDITS     memcache.dsp                memcache_session.c

二、设定php环境变量
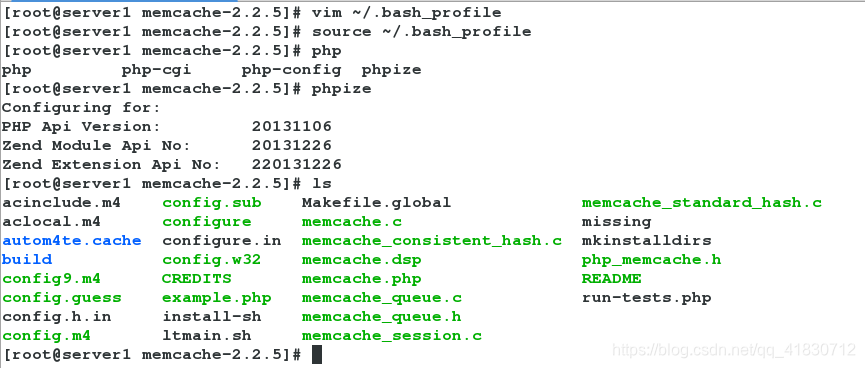
[root@server1 memcache-2.2.5]# vim ~/.bash_profile
10 PATH=$PATH:$HOME/bin:/usr/local/lnmp/mysql/bin:/usr/local/lnmp/php/bin

[root@server1 memcache-2.2.5]# source ~/.bash_profile
[root@server1 memcache-2.2.5]# php		#可以用来试探当前的环境,从而生成./configure
php         php-cgi     php-config  phpize
[root@server1 memcache-2.2.5]# phpize
Configuring for:
PHP Api Version:         20131106
Zend Module Api No:      20131226
Zend Extension Api No:   220131226
[root@server1 memcache-2.2.5]# ls          #可以看见有./configure编译环境存在
acinclude.m4    config.sub    Makefile.global             memcache_standard_hash.c
aclocal.m4      configure     memcache.c                  missing
autom4te.cache  configure.in  memcache_consistent_hash.c  mkinstalldirs
build           config.w32    memcache.dsp                php_memcache.h
config9.m4      CREDITS       memcache.php                README
config.guess    example.php   memcache_queue.c            run-tests.php
config.h.in     install-sh    memcache_queue.h
config.m4       ltmain.sh     memcache_session.c
三、进行memcacahe的存在特性测试
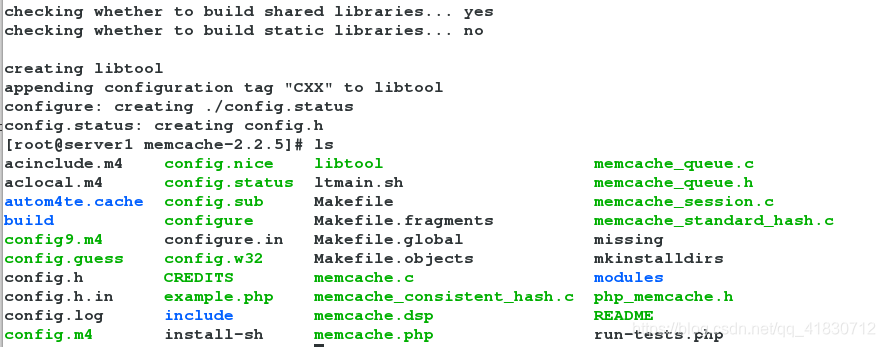
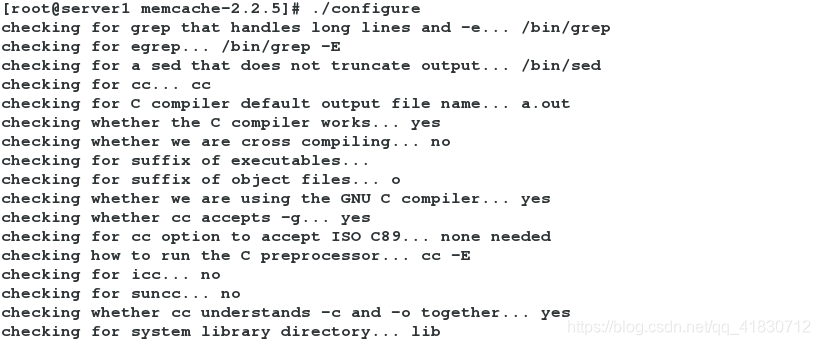
[root@server1 memcache-2.2.5]# ./configure #会生成config.h
四、编译安装
make && make install
注意:会生成 /usr/local/lnmp/php/lib/php/extensions/no-debug-non-zts-20131226/目录
五、查看 /usr/local/lnmp/php/lib/php/extensions/no-debug-non-zts-20131226/目录内容

六、修改php配置文件(让php和memcache建立连接)
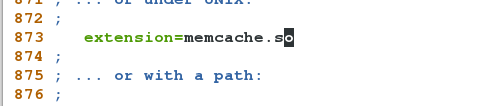
[root@server1 no-debug-non-zts-20131226]# vim /usr/local/lnmp/php/etc/php.ini
873    extension=memcache.so
[root@server1 no-debug-non-zts-20131226]# /etc/init.d/php-fpm reload
Reload service php-fpm  done
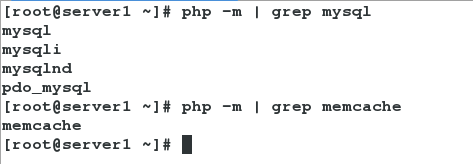
查询是否配置完成:
[root@server1 ~]# php -m | grep mysql
mysql
mysqli
mysqlnd
pdo_mysql
[root@server1 ~]# php -m | grep memcache
memcache
[root@server1 ~]#

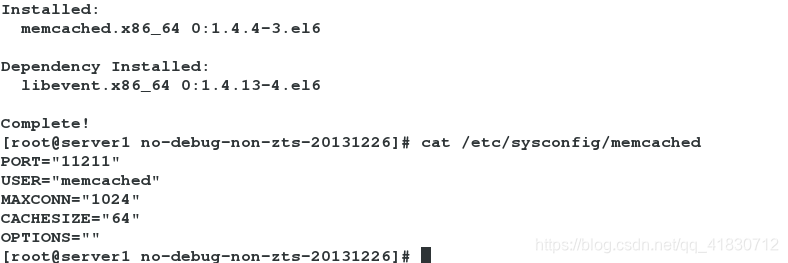
七、安装memcached(可以让本机识别) 启动后是一个守护进程(让可以访问本机的11211端口)
yum install memcached -y
cat /etc/sysconfig/memcached #可以查看他的监控信息
PORT="11211"			#监听端口
USER="memcached"		#使用的身份
MAXCONN="1024"			#同时最大连接数
CACHESIZE="64"			#使用的内存大小
OPTIONS=""				#附加参数,例如:OPTIONS="-l 127.0.0.1",只能本机访问,不对公网开放
启动memcached服务
[root@server1 no-debug-non-zts-20131226]# /etc/init.d/memcached start
Starting memcached:                                        [  OK  ]

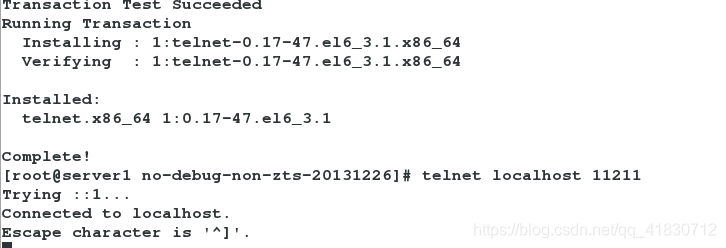
八、安装telnet服务
[root@server1 no-debug-non-zts-20131226]# telnet localhost 11211
Trying ::1...
Connected to localhost.
Escape character is '^]'.
set name 0 5 6		#设置key-value存储 	KEY值,序号 缓存时间  VALUE值长度
redhat
STORED
get name			#查看
VALUE name 0 6
redhat
END
九、将memcache的发布页复制到nginx的发布目录下
cp memcache.php example.php /usr/local/lnmp/nginx/html/

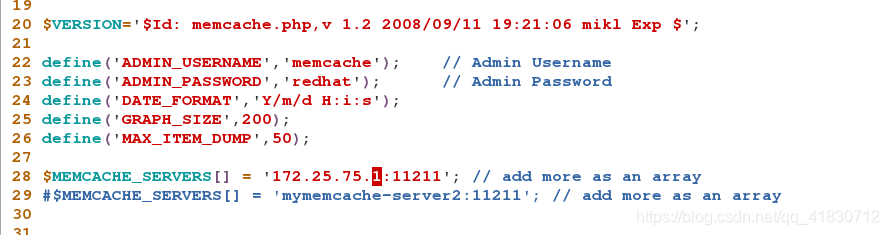
十、编写memcache.php文件内容
[root@server1 html]# vim memcache.php
 23 define('ADMIN_PASSWORD','redhat');      // Admin Password
 28 $MEMCACHE_SERVERS[] = '172.25.75.1:11211'; // add more as an array
 29 #$MEMCACHE_SERVERS[] = 'mymemcache-server2:11211'; // add more as an array
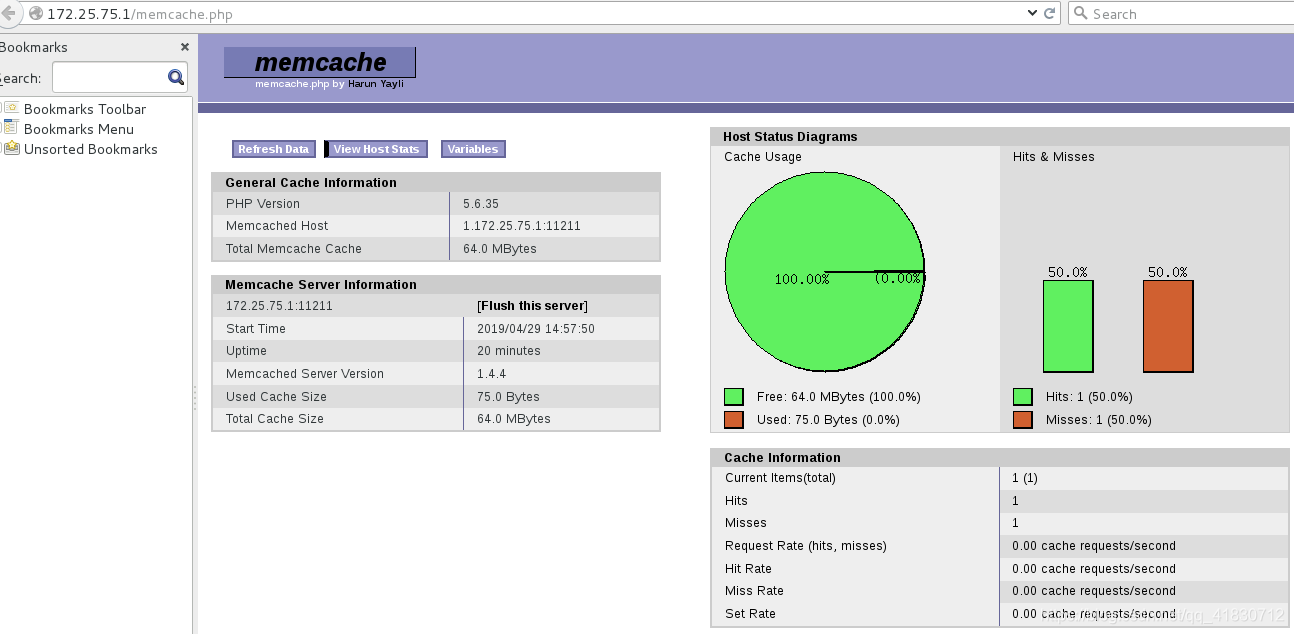
十一、测试
浏览器输入:http://172.25.75.1/memcache.php
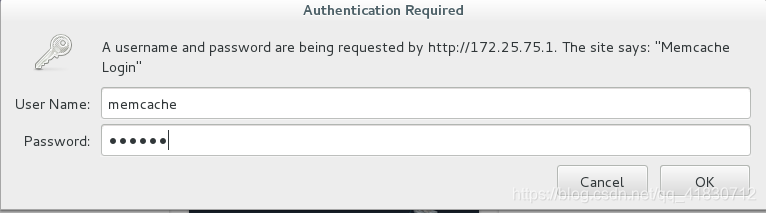
输入正确的用户名,密码
压力测试:
在真实机
[root@foundation75 Desktop]# ab -c 10 -n 5000 http://172.25.75.1/index.php
ab是用来压力测试的 -c表示:让10台机器随时并发, -n:加起来发5000次
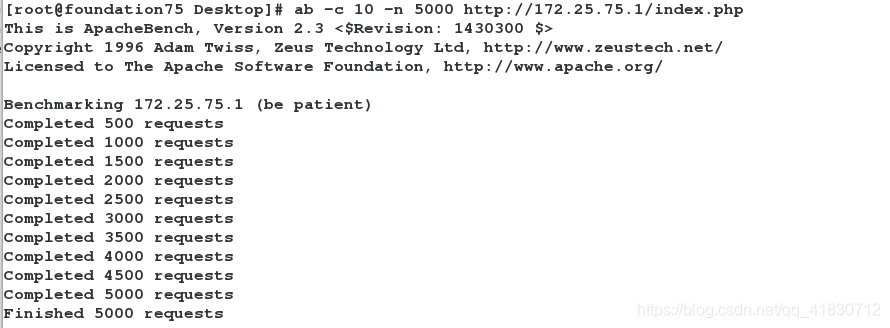

总用时:19.398秒
ab -c 10 -n 5000 http://172.25.75.1/example.php
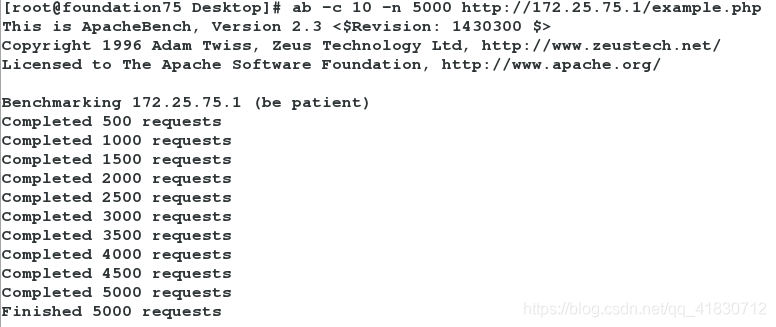

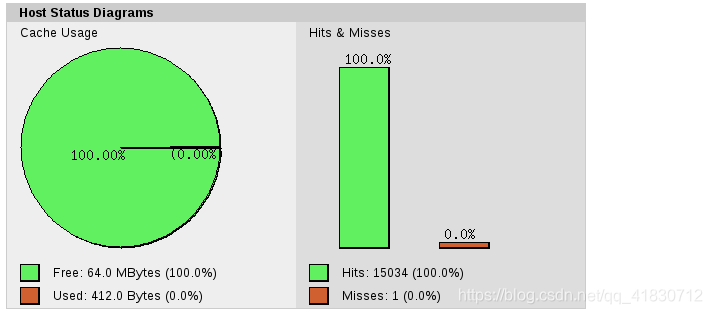
用时3.239秒,缓存命中率100%。
二、OpenResty配置nginx前端缓存
1、关闭之前不带memcache的nginx。
[root@server1 ~]# nginx -s stop
2、解压缩OpenResty
[root@server1 ~]# tar zxf openresty-1.13.6.1.tar.gz
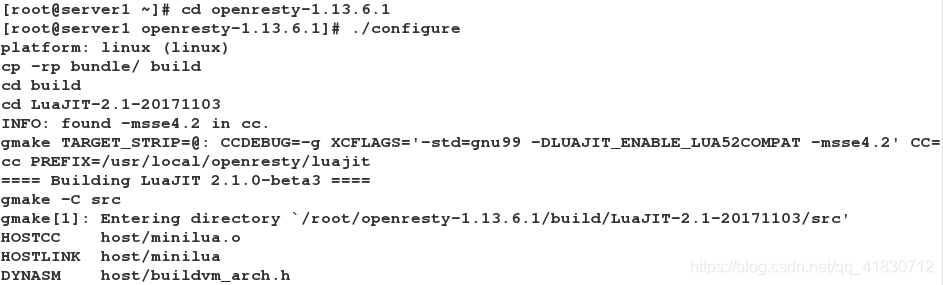
3、进行存在特性测试
[root@server1 ~]# cd openresty-1.13.6.1
[root@server1 openresty-1.13.6.1]# ./configure
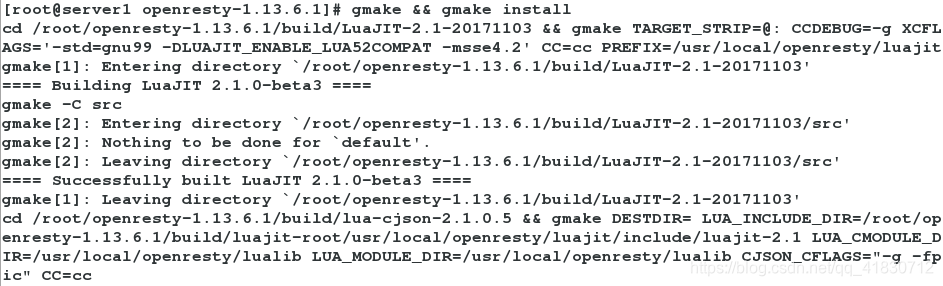
4、编译安装
[root@server1 openresty-1.13.6.1]# gmake && gmake install
5、将index.php、example.php复制到新的软件路径下
[root@server1 html]# pwd
/usr/local/openresty/nginx/html
[root@server1 html]# cp /usr/local/lnmp/nginx/html/index.php .
[root@server1 html]# cp /usr/local/lnmp/nginx/html/example.php .

6、编辑OpenResty中nginx的配置文件
[root@server1 html]# cd ../conf/
[root@server1 conf]# pwd
/usr/local/openresty/nginx/conf
[root@server1 conf]# vim nginx.conf
2 user nginx nginx;
3 worker_processes auto;
17 http {
18 include mime.types;
19 default_type application/octet-stream;
20 upstream memcache { #添加模块
21 server localhost:11211;
22 keepalive 512;
23 }
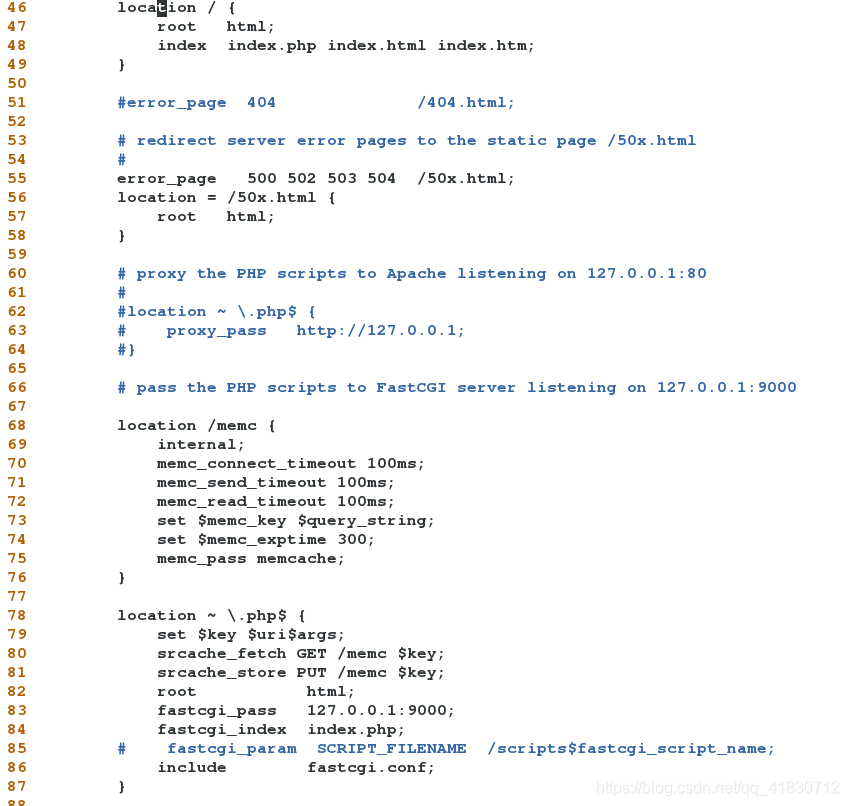
46 location / {
47 root html;
48 index index.php index.html index.htm;
49 }
68 location /memc {
69 internal;
70 memc_connect_timeout 100ms;
71 memc_send_timeout 100ms;
72 memc_read_timeout 100ms;
73 set $memc_key $query_string;
74 set $memc_exptime 300;
75 memc_pass memcache;
76 }
77
78 location ~ \.php$ {
79 set $key $uri$args;
80 srcache_fetch GET /memc $key;
81 srcache_store PUT /memc $key;
82 root html;
83 fastcgi_pass 127.0.0.1:9000;
84 fastcgi_index index.php;
85 # fastcgi_param SCRIPT_FILENAME /scripts$fastcgi_script_name;
86 include fastcgi.conf;
87 }
7、检查配置文件是否有错误
[root@server1 sbin]# pwd
/usr/local/openresty/nginx/sbin
[root@server1 sbin]# ls
nginx
[root@server1 sbin]# ./nginx -t
nginx: the configuration file /usr/local/openresty/nginx/conf/nginx.conf syntax is ok
nginx: configuration file /usr/local/openresty/nginx/conf/nginx.conf test is successful

8、启动服务
[root@server1 sbin]# pwd
/usr/local/openresty/nginx/sbin
[root@server1 sbin]# ./nginx
9、测试
此时是openresty开启的nginx起作用

压力测试:
[root@foundation75 ~]# ab -c 10 -n 5000 http://172.25.75.1/index.php
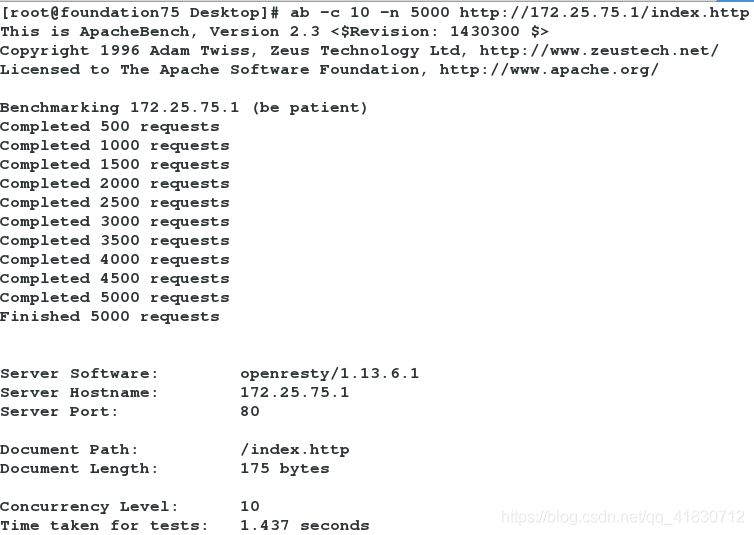
会出现1.437s,此时服务的软件是openresty/1.13.6.1
接下来,我们将openresty的nginx关闭,将nginx打开
[root@server1 sbin]# pwd
/usr/local/openresty/nginx/sbin
[root@server1 sbin]# ./nginx -s stop
[root@server1 sbin]# nginx

压力测试:
[root@foundation75 ~]# ab -c 10 -n 5000 http://172.25.75.1/index.php
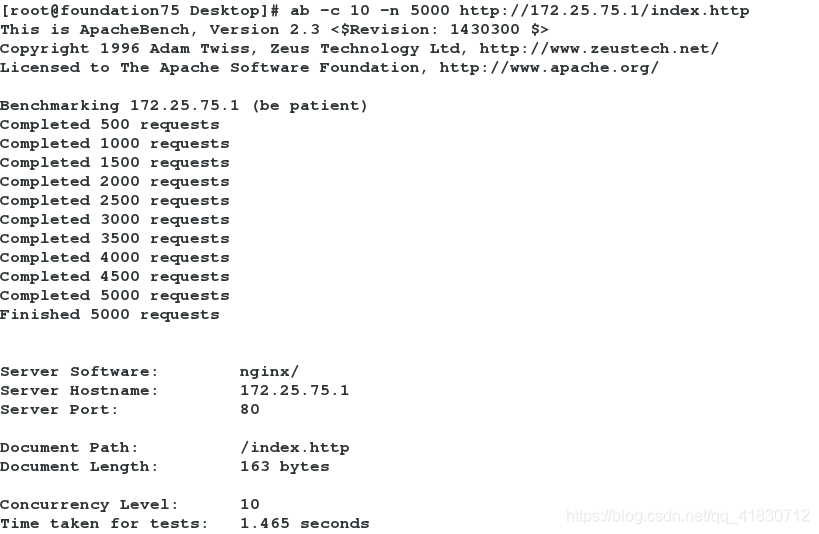
会出现1.465s,此时服务的软件是nginx/1.14.2