Color Mask解释,见unity文档:
ColorMask
ColorMask RGB | A | 0 | any combination of R, G, B, A
Set color channel writing mask. Writing ColorMask 0 turns off rendering to all color channels. Default mode is writing to all channels (RGBA), but for some special effects you might want to leave certain channels unmodified, or disable color writes completely.
When using multiple render target (MRT) rendering, it is possible to set up different color masks for each render target, by adding index (0–7) at the end. For example, ColorMask RGB 3 would make render target #3 write only to RGB channels.
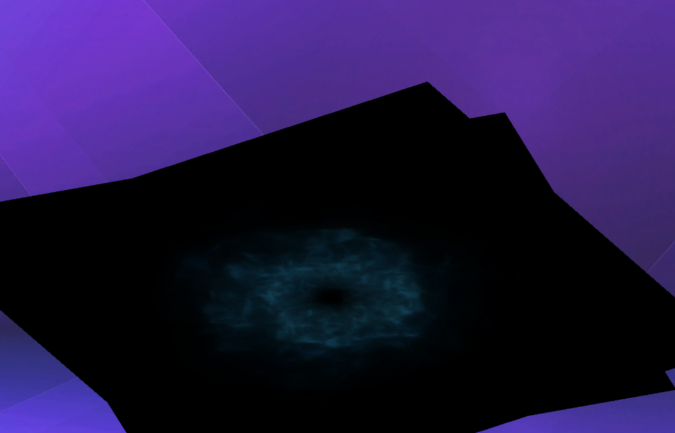
如下面问题,这是通过RenderTexture渲染了一个粒子,挂在NGUI的UITexture中。
希望去掉黑色区域而完全展现背景颜色,可通过ColorMask解决。
摄像机颜色为:

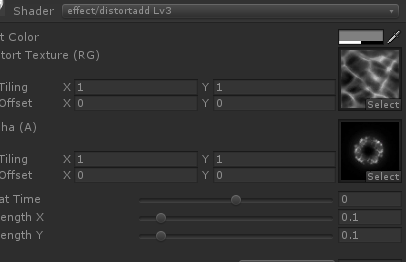
粒子shader为:


 1 Shader "effect/distortadd Lv3"
 2 {
 3     Properties
 4     {
 5         _TintColor ("Tint Color", Color) = (0.5,0.5,0.5,0.5)
 6         _NoiseTex ("Distort Texture (RG)", 2D) = "white" {}
 7         _MainTex ("Alpha (A)", 2D) = "white" {}
 8         _HeatTime  ("Heat Time", range (-1,1)) = 0
 9         _ForceX  ("Strength X", range (0,1)) = 0.1
10         _ForceY  ("Strength Y", range (0,1)) = 0.1
11     }
12
13     Category
14     {
15         Tags { "Queue"="Transparent+400" "RenderType"="Transparent" }
16         Blend SrcAlpha One
17         Cull Off Lighting Off ZWrite Off Fog { Color (0,0,0,0) }
18         BindChannels
19         {
20             Bind "Color", color
21             Bind "Vertex", vertex
22             Bind "TexCoord", texcoord
23         }
24
25         SubShader
26         {
27             Pass
28             {
29                 CGPROGRAM
30                 #pragma vertex vert
31                 #pragma fragment frag
32                 #pragma fragmentoption ARB_precision_hint_fastest
33                 #pragma multi_compile_particles
34                 #include "UnityCG.cginc"
35
36                 struct appdata_t
37                 {
38                     float4 vertex : POSITION;
39                     fixed4 color : COLOR;
40                     float2 texcoord: TEXCOORD0;
41                 };
42
43                 struct v2f
44                 {
45                     float4 vertex : POSITION;
46                     fixed4 color : COLOR;
47                     float2 uvmain : TEXCOORD1;
48                 };
49
50                 fixed4 _TintColor;
51                 fixed _ForceX;
52                 fixed _ForceY;
53                 fixed _HeatTime;
54                 float4 _MainTex_ST;
55                 float4 _NoiseTex_ST;
56                 sampler2D _NoiseTex;
57                 sampler2D _MainTex;
58
59                 v2f vert (appdata_t v)
60                 {
61                     v2f o;
62                     o.vertex = UnityObjectToClipPos(v.vertex);
63                     o.color = v.color;
64                     o.uvmain = TRANSFORM_TEX( v.texcoord, _MainTex );
65                     return o;
66                 }
67
68                 fixed4 frag( v2f i ) : COLOR
69                 {
70                     //noise effect
71                     fixed4 offsetColor1 = tex2D(_NoiseTex, i.uvmain + _Time.xz*_HeatTime);
72                     fixed4 offsetColor2 = tex2D(_NoiseTex, i.uvmain + _Time.yx*_HeatTime);
73                     i.uvmain.x += ((offsetColor1.r + offsetColor2.r) - 1) * _ForceX;
74                     i.uvmain.y += ((offsetColor1.r + offsetColor2.r) - 1) * _ForceY;
75                     return 2.0f * i.color * _TintColor * tex2D( _MainTex, i.uvmain);
76                 }
77                 ENDCG
78             }
79         }
80         // ------------------------------------------------------------------
81         // Fallback for older cards and Unity non-Pro
82
83         SubShader
84         {
85             Blend DstColor Zero
86             Pass
87             {
88                 Name "BASE"
89                 SetTexture [_MainTex] {    combine texture }
90             }
91         }
92     }
93 }
shader使用图片为:

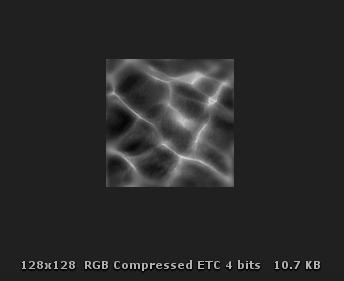
只所以出现黑色,是因为此shader渲染出来的颜色就是黑色(见图片颜色),alpha也全为1,再通过Blend SrcAlpha One命令混合,由于目标颜色为黑色(见摄像机颜色),alpha为0,由此渲染后的结果完全是此图片的颜色。
要想去除黑色,可以通过 ColorMask RGB来屏蔽此通道输出的alpha,而完全取摄像机的alpha(即为0)。见shader代码:

此时效果如下:

转载请注明出处:https://www.cnblogs.com/jietian331/p/10675265.html
之所以ColorMask会解决这个问题,是因为ColorMask和Blend命令的执行先后顺序,先Blend,再ColorMask,这样Blend时使用frag shader中输出的alpha,保持了rgb颜色的正常,再color mask,屏蔽alpha通道,此时会去取摄像机的alpha。
资源如下: