1.引入依赖
maven中直接引入
    <dependency>
      <groupId>org.springframework.boot</groupId>
      <artifactId>spring-boot-starter-thymeleaf</artifactId>
    </dependency>
1
2
3
4 <dependency>
<groupId>org.springframework.boot</groupId>
<artifactId>spring-boot-starter-thymeleaf</artifactId>
</dependency>
1
2
3
4
可以查看依赖关系,发现spring-boot-starter-thymeleaf下面已经包括了spring-boot-starter-web,所以可以把spring-boot-starter-web的依赖去掉.
2.配置视图解析器
spring-boot很多配置都有默认配置,比如默认页面映射路径为
classpath:/templates/*.html
同样静态文件路径为
classpath:/static/
在application.properties中可以配置thymeleaf模板解析器属性.就像使用springMVC的JSP解析器配置一样
#thymeleaf start
spring.thymeleaf.mode=HTML5
spring.thymeleaf.encoding=UTF-8
spring.thymeleaf.content-type=text/html
#开发时关闭缓存,不然没法看到实时页面
spring.thymeleaf.cache=false
#thymeleaf end
1
2
3
4
5
6
7#thymeleaf start
spring.thymeleaf.mode=HTML5
spring.thymeleaf.encoding=UTF-8
spring.thymeleaf.content-type=text/html
#开发时关闭缓存,不然没法看到实时页面
spring.thymeleaf.cache=false
#thymeleaf end
1
2
3
4
5
6
7
具体可以配置的参数可以查看 org.springframework.boot.autoconfigure.thymeleaf.ThymeleafProperties这个类,上面的配置实际上就是注入到该类中的属性值.
3.编写DEMO
1.控制器
    @Controller
    public class HelloController {

        private Logger logger = LoggerFactory.getLogger(HelloController.class);
        /**
         * 测试hello
         * @return
         */
        @RequestMapping(value = "/hello",method = RequestMethod.GET)
        public String hello(Model model) {
            model.addAttribute("name", "Dear");
            return "hello";
        }

    }
1
2
3
4
5
6
7
8
9
10
11
12
13
14
15 @Controller
public class HelloController {
private Logger logger = LoggerFactory.getLogger(HelloController.class);
/**
* 测试hello
* @return
*/
@RequestMapping(value = "/hello",method = RequestMethod.GET)
public String hello(Model model) {
model.addAttribute("name", "Dear");
return "hello";
}
}
1
2
3
4
5
6
7
8
9
10
11
12
13
14
15
2.view(注释为IDEA生成的索引,便于IDEA补全)
<!DOCTYPE HTML>
<html xmlns:th="http://www.thymeleaf.org">
<head>
    <title>hello</title>
    <meta http-equiv="Content-Type" content="text/html; charset=UTF-8" />
</head>
<body>
<!--/*@thymesVar id="name" type="java.lang.String"*/-->
<p th:text="'Hello!, ' + ${name} + '!'" >3333</p>
</body>
</html>
1
2
3
4
5
6
7
8
9
10
11<!DOCTYPE HTML>
<html xmlns:th="http://www.thymeleaf.org">
<head>
<title>hello</title>
<meta http-equiv="Content-Type" content="text/html; charset=UTF-8" />
</head>
<body>
<!--/*@thymesVar id="name" type="java.lang.String"*/-->
<p th:text="'Hello!, ' + ${name} + '!'" >3333</p>
</body>
</html>
1
2
3
4
5
6
7
8
9
10
11
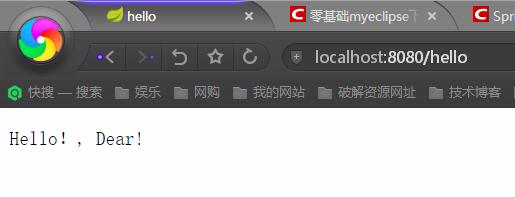
3.效果
4.基础语法
回味上面的DEMO,可以看出来首先要在改写html标签
<html xmlns:th="http://www.thymeleaf.org">
1
2<html xmlns:th="http://www.thymeleaf.org">
1
2
这样的话才可以在其他标签里面使用th:*这样的语法.这是下面语法的前提.
1.获取变量值
<p th:text="'Hello!, ' + ${name} + '!'" >3333</p>
1
2<p th:text="'Hello!, ' + ${name} + '!'" >3333</p>
1
2
可以看出获取变量值用$符号,对于javaBean的话使用变量名.属性名方式获取,这点和EL表达式一样.
另外$表达式只能写在th标签内部,不然不会生效,上面例子就是使用th:text标签的值替换p标签里面的值,至于p里面的原有的值只是为了给前端开发时做展示用的.这样的话很好的做到了前后端分离.
2.引入URL
Thymeleaf对于URL的处理是通过语法@{…}来处理的
<a th:href="@{http://blog.csdn.net/u012706811}">绝对路径</a>
<a th:href="@{/}">相对路径</a>
<a th:href="@{css/bootstrap.min.css}">Content路径,默认访问static下的css文件夹</a>
1
2
3<a th:href="@{http://blog.csdn.net/u012706811}">绝对路径</a>
<a th:href="@{/}">相对路径</a>
<a th:href="@{css/bootstrap.min.css}">Content路径,默认访问static下的css文件夹</a>
1
2
3
类似的标签有:th:href和th:src
3.字符串替换
很多时候可能我们只需要对一大段文字中的某一处地方进行替换,可以通过字符串拼接操作完成:
<span th:text="'Welcome to our application, ' + ${user.name} + '!'">
1
2<span th:text="'Welcome to our application, ' + ${user.name} + '!'">
1
2
一种更简洁的方式是:
<span th:text="|Welcome to our application, ${user.name}!|">
1
2<span th:text="|Welcome to our application, ${user.name}!|">
1
2
当然这种形式限制比较多,|…|中只能包含变量表达式${…},不能包含其他常量、条件表达式等。
4.运算符
在表达式中可以使用各类算术运算符,例如+, -, *, /, %
th:with="isEven=(${prodStat.count} % 2 == 0)"
1
2th:with="isEven=(${prodStat.count} % 2 == 0)"
1
2
逻辑运算符>, <, <=,>=,==,!=都可以使用,唯一需要注意的是使用<,>时需要用它的HTML转义符:
    th:if="${prodStat.count} > 1"
    th:text="'Execution mode is ' + ( (${execMode} == 'dev')? 'Development' : 'Production')"
1
2 th:if="${prodStat.count} > 1"
th:text="'Execution mode is ' + ( (${execMode} == 'dev')? 'Development' : 'Production')"
1
2
5.条件
if/unless
Thymeleaf中使用th:if和th:unless属性进行条件判断,下面的例子中,标签只有在th:if中条件成立时才显示:
<a th:href="@{/login}" th:unless=${session.user != null}>Login</a>
1
2<a th:href="@{/login}" th:unless=${session.user != null}>Login</a>
1
2
th:unless于th:if恰好相反,只有表达式中的条件不成立,才会显示其内容。
Switch
Thymeleaf同样支持多路选择Switch结构:
<div th:switch="${user.role}">
  <p th:case="'admin'">User is an administrator</p>
  <p th:case="#{roles.manager}">User is a manager</p>
</div>
1
2
3
4<div th:switch="${user.role}">
<p th:case="'admin'">User is an administrator</p>
<p th:case="#{roles.manager}">User is a manager</p>
</div>
1
2
3
4
默认属性default可以用*表示:
<div th:switch="${user.role}">
  <p th:case="'admin'">User is an administrator</p>
  <p th:case="#{roles.manager}">User is a manager</p>
  <p th:case="*">User is some other thing</p>
</div>
1
2
3
4
5<div th:switch="${user.role}">
<p th:case="'admin'">User is an administrator</p>
<p th:case="#{roles.manager}">User is a manager</p>
<p th:case="*">User is some other thing</p>
</div>
1
2
3
4
5
6.循环
渲染列表数据是一种非常常见的场景,例如现在有n条记录需要渲染成一个表格
,该数据集合必须是可以遍历的,使用th:each标签:<body>
<h1>Product list</h1>
<table>
<tr>
<th>NAME</th>
<th>PRICE</th>
<th>IN STOCK</th>
</tr>
<tr th:each="prod : ${prods}">
<td th:text="${prod.name}">Onions</td>
<td th:text="${prod.price}">2.41</td>
<td th:text="${prod.inStock}? #{true} : #{false}">yes</td>
</tr>
</table>
<p>
<a href="../home.html" th:href="@{/}">Return to home</a>
</p>
</body>
1
2
3
4
5
6
7
8
9
10
11
12
13
14
15
16
17
18
19
20<body>
<h1>Product list</h1>
<table>
<tr>
<th>NAME</th>
<th>PRICE</th>
<th>IN STOCK</th>
</tr>
<tr th:each="prod : ${prods}">
<td th:text="${prod.name}">Onions</td>
<td th:text="${prod.price}">2.41</td>
<td th:text="${prod.inStock}? #{true} : #{false}">yes</td>
</tr>
</table>
<p>
<a href="../home.html" th:href="@{/}">Return to home</a>
</p>
</body>
1
2
3
4
5
6
7
8
9
10
11
12
13
14
15
16
17
18
19
20
可以看到,需要在被循环渲染的元素(这里是)中加入th:each标签,其中th:each=”prod : ${prods}”意味着对集合变量prods进行遍历,循环变量是prod在循环体中可以通过表达式访问。
7.Utilities
为了模板更加易用,Thymeleaf还提供了一系列Utility对象(内置于Context中),可以通过#直接访问:
- #dates
- #calendars
- #numbers
- #strings
- arrays
- lists
- sets
- maps
- …
下面用一段代码来举例一些常用的方法:
date
/*
 * Format date with the specified pattern
 * Also works with arrays, lists or sets
 */
${#dates.format(date, 'dd/MMM/yyyy HH:mm')}
${#dates.arrayFormat(datesArray, 'dd/MMM/yyyy HH:mm')}
${#dates.listFormat(datesList, 'dd/MMM/yyyy HH:mm')}
${#dates.setFormat(datesSet, 'dd/MMM/yyyy HH:mm')}

/*
 * Create a date (java.util.Date) object for the current date and time
 */
${#dates.createNow()}

/*
 * Create a date (java.util.Date) object for the current date (time set to 00:00)
 */
${#dates.createToday()}
1
2
3
4
5
6
7
8
9
10
11
12
13
14
15
16
17
18/*
* Format date with the specified pattern
* Also works with arrays, lists or sets
*/
${#dates.format(date, 'dd/MMM/yyyy HH:mm')}
${#dates.arrayFormat(datesArray, 'dd/MMM/yyyy HH:mm')}
${#dates.listFormat(datesList, 'dd/MMM/yyyy HH:mm')}
${#dates.setFormat(datesSet, 'dd/MMM/yyyy HH:mm')}
/*
* Create a date (java.util.Date) object for the current date and time
*/
${#dates.createNow()}
/*
* Create a date (java.util.Date) object for the current date (time set to 00:00)
*/
${#dates.createToday()}
1
2
3
4
5
6
7
8
9
10
11
12
13
14
15
16
17
18
string
/*
 * Check whether a String is empty (or null). Performs a trim() operation before check
 * Also works with arrays, lists or sets
 */
${#strings.isEmpty(name)}
${#strings.arrayIsEmpty(nameArr)}
${#strings.listIsEmpty(nameList)}
${#strings.setIsEmpty(nameSet)}

/*
 * Check whether a String starts or ends with a fragment
 * Also works with arrays, lists or sets
 */
${#strings.startsWith(name,'Don')}                  // also array*, list* and set*
${#strings.endsWith(name,endingFragment)}           // also array*, list* and set*

/*
 * Compute length
 * Also works with arrays, lists or sets
 */
${#strings.length(str)}

/*
 * Null-safe comparison and concatenation
 */
${#strings.equals(str)}
${#strings.equalsIgnoreCase(str)}
${#strings.concat(str)}
${#strings.concatReplaceNulls(str)}

/*
 * Random
 */
${#strings.randomAlphanumeric(count)}
1
2
3
4
5
6
7
8
9
10
11
12
13
14
15
16
17
18
19
20
21
22
23
24
25
26
27
28
29
30
31
32
33
34/*
* Check whether a String is empty (or null). Performs a trim() operation before check
* Also works with arrays, lists or sets
*/
${#strings.isEmpty(name)}
${#strings.arrayIsEmpty(nameArr)}
${#strings.listIsEmpty(nameList)}
${#strings.setIsEmpty(nameSet)}
/*
* Check whether a String starts or ends with a fragment
* Also works with arrays, lists or sets
*/
${#strings.startsWith(name,'Don')} // also array*, list* and set*
${#strings.endsWith(name,endingFragment)} // also array*, list* and set*
/*
* Compute length
* Also works with arrays, lists or sets
*/
${#strings.length(str)}
/*
* Null-safe comparison and concatenation
*/
${#strings.equals(str)}
${#strings.equalsIgnoreCase(str)}
${#strings.concat(str)}
${#strings.concatReplaceNulls(str)}
/*
* Random
*/
${#strings.randomAlphanumeric(count)}
1
2
3
4
5
6
7
8
9
10
11
12
13
14
15
16
17
18
19
20
21
22
23
24
25
26
27
28
29
30
31
32
33
34
快速的学习还是直接写例子最快,后期写Demo遇到问题再加上去
参考链接: http://www.tianmaying.com/tutorial/using-thymeleaf
整合项目地址:
https://github.com/nl101531/JavaWEB
补充
在spring-boot1.4之后,支持thymeleaf3,可以更改版本号来进行修改支持.
3相比2极大的提高了效率,并且不需要标签闭合,类似的link,img等都有了很好的支持,按照如下配置即可
  <properties>
    <project.build.sourceEncoding>UTF-8</project.build.sourceEncoding>
    <!-- set thymeleaf version -->
    <thymeleaf.version>3.0.0.RELEASE</thymeleaf.version>
    <thymeleaf-layout-dialect.version>2.0.0</thymeleaf-layout-dialect.version>
    <!--set java version-->
    <java.version>1.8</java.version>
</properties> <properties>
<project.build.sourceEncoding>UTF-8</project.build.sourceEncoding>
<!-- set thymeleaf version -->
<thymeleaf.version>3.0.0.RELEASE</thymeleaf.version>
<thymeleaf-layout-dialect.version>2.0.0</thymeleaf-layout-dialect.version>
<!--set java version-->
<java.version>1.8</java.version>
</properties>