第一步:在pom.xml文件导入thymeleaf依赖
<dependency>
<groupId>org.springframework.boot</groupId>
<artifactId>spring-boot-starter-thymeleaf</artifactId>
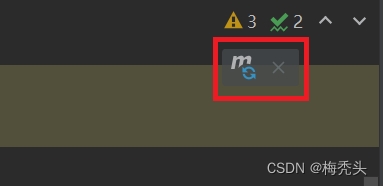
</dependency>这时候代码会出现报红的情况,点击右上角的按钮,加载依赖就可以解决
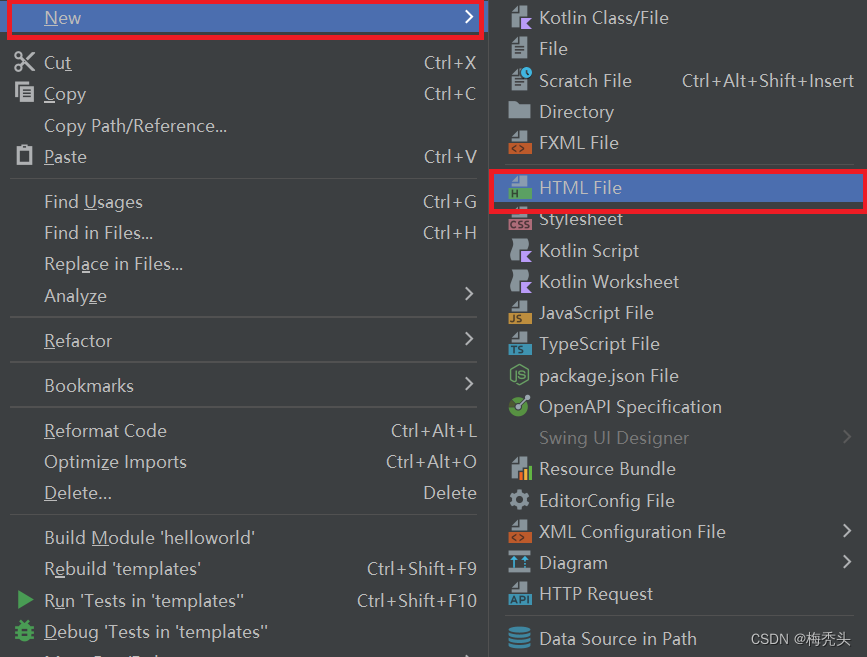
第二步:创建thymeleaf的模板页面
1、在templates文件夹下创建一个HTML文件,右键templates文件夹,New,HTML File
创建好的.html文件需要对<html>的开始标签进行修改
<html xmlns:th="http:/www.thymeleaf.org">
th:text="${}" 这是thymeleaf特有的标签,学过EL表达式就会知道这个类似于EL的c标签<c:out>,<c:set>之类的
<!DOCTYPE html>
<html xmlns:th="http:/www.thymeleaf.org">
<head>
    <meta charset="UTF-8">
    <title>index</title>
</head>
<body>
<h1 th:text="${message}">Hi!</h1>
</body>
</html>
第三步:创建Controller类
@Controller
public class ThymeleafController {
    @GetMapping({"/" , "/index"})
    public String index(Model model){
        model.addAttribute("message","Hello,thymeleaf");
        return "index"; //返回index视图
    }
}
@Controller 作用:返回一个视图
{"/" , "/index"} 作用:可以使用/或者/index来访问controller的方法
最后,启动项目
点击右上角的绿色箭头,到浏览器输入http://localhost:8080/index访问(可以在下方控制台查看机子的端口号)
效果图,在这里就不展示了