源码Gitub地址:https://github.com/heibaiying/spring-samples-for-all
一、config 简介
spring cloud config 分为服务端和客户端,服务端称为分布式配置中心,集中管理配置文件,客户端为各个业务单元,它们从配置中心获取相关配置,同时config 还实现了配置热更新,在服务不停机的情况下刷新配置。
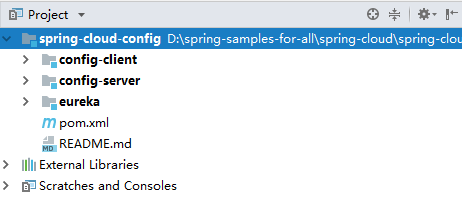
二、项目结构
- config-server: 配置中心;
- config-client: 服务单元,可以从配置中心获取相关配置;
- eureka: 注册中心。
三、config-server 配置中心的实现
3.1 导入依赖
<?xml version="1.0" encoding="UTF-8"?>
<project xmlns="http://maven.apache.org/POM/4.0.0" xmlns:xsi="http://www.w3.org/2001/XMLSchema-instance"
         xsi:schemaLocation="http://maven.apache.org/POM/4.0.0 http://maven.apache.org/xsd/maven-4.0.0.xsd">
    <modelVersion>4.0.0</modelVersion>

    <parent>
        <groupId>com.heibaiying.config</groupId>
        <artifactId>spring-cloud-config</artifactId>
        <version>0.0.1-SNAPSHOT</version>
    </parent>

    <artifactId>config-server</artifactId>

    <dependencies>
        <dependency>
            <groupId>org.springframework.boot</groupId>
            <artifactId>spring-boot-starter-web</artifactId>
        </dependency>
        <dependency>
            <groupId>org.springframework.cloud</groupId>
            <artifactId>spring-cloud-config-server</artifactId>
        </dependency>
        <dependency>
            <groupId>org.springframework.cloud</groupId>
            <artifactId>spring-cloud-starter-netflix-eureka-client</artifactId>
        </dependency>
    </dependencies>

    <build>
        <plugins>
            <plugin>
                <groupId>org.springframework.boot</groupId>
                <artifactId>spring-boot-maven-plugin</artifactId>
            </plugin>
        </plugins>
    </build>

</project>
3.2 在启动类上添加@EnableDiscoveryClient和@EnableConfigServer 注解
@SpringBootApplication
@EnableDiscoveryClient
@EnableConfigServer
public class ConfigServerApplication {

    public static void main(String[] args) {
        SpringApplication.run(ConfigServerApplication.class, args);
    }

}
3.3 指定注册中心地址,并配置git仓库地址的配置文件路径
server:
  port: 8020
# 指定注册中心地址
eureka:
  client:
    serviceUrl:
      defaultZone: http://localhost:8010/eureka/
# 指定服务命名
spring:
  application:
    name: config-server
  cloud:
    config:
      server:
        git:
          uri: https://github.com/heibaiying/spring-samples-for-all/
          search-paths: spring-cloud/spring-cloud-test-config/
          # 如果代码仓库是公开的 则 不需要设置用户名和密码
          username:
          password:
          # 指定拉取的配置文件的存放位置,配置文件最后存储的目录为 basedir + search-paths
          # 这个地方还需要注意的是,配置文件的仓库最好只放配置文件
          # 因为配置中心不仅会拉取search-paths下的文件,还会把uri指定仓库中的全部文件拉取到basedir下
          basedir: D:\git-config
      # 指定分支
      label: master
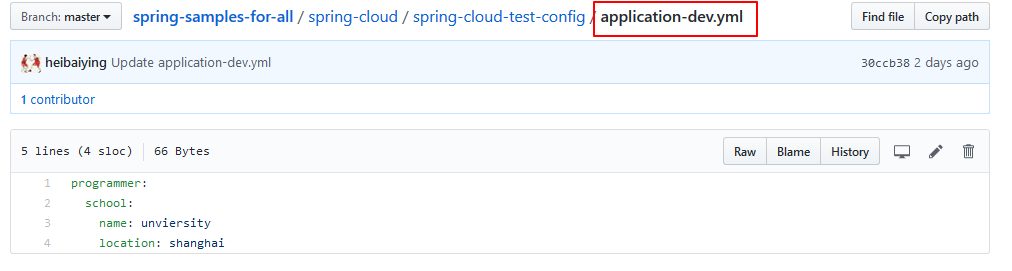
这里的git 仓库就是本用例的仓库,是公开的仓库,所以不用配置用户名和密码,配置文件如下
- application.yml 为主配置;
- application-dev.yml 为开发环境配置。

3.4 启动eureka和config-server服务,访问 http://localhost:8020/application-dev.yml
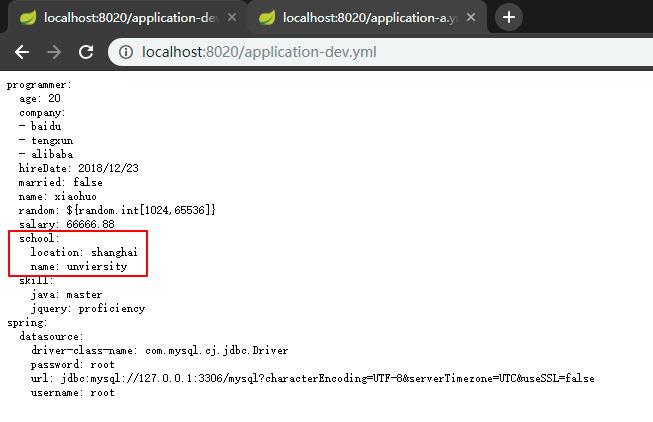
这里需要注意的拉取配置的时候,我们此时指定拉取的是dev配置,application.yml实际 配置如下:
这说明在用配置中心拉取配置的时候,和我们在本地开发的时候是一致的,配置是互补的,即dev中的实际配置应该是主配置和dev配置的结合,且遵循同名属性精确优先的原则。
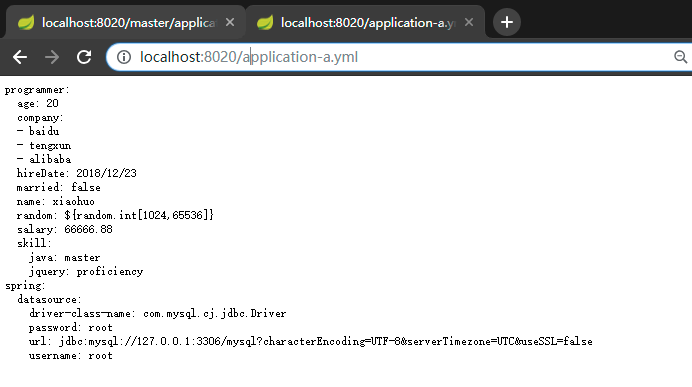
3.5 http请求地址和资源文件映射
在本用例中如果我们想要直接访问主配置,用以下路径 http://localhost:8020/application.yml 是不行的,会得到错误页面。如果想要访问主配置,,可以用http://localhost:8020/application-X.yml,其中可以是任意字符,原因是:
请求地址和实际的配置文件应该遵循以下规则,application为配置文件名,profile 为环境,label为分支(如果不指定默认就是master分支)。
- /{application}/{profile}[/{label}]
- /{application}-{profile}.yml
- /{label}/{application}-{profile}.yml
- /{application}-{profile}.properties
- /{label}/{application}-{profile}.properties
访问主配置:
四、config-client 搭建
4.1 导入依赖
<?xml version="1.0" encoding="UTF-8"?>
<project xmlns="http://maven.apache.org/POM/4.0.0" xmlns:xsi="http://www.w3.org/2001/XMLSchema-instance"
         xsi:schemaLocation="http://maven.apache.org/POM/4.0.0 http://maven.apache.org/xsd/maven-4.0.0.xsd">
    <modelVersion>4.0.0</modelVersion>

    <parent>
        <groupId>com.heibaiying.config</groupId>
        <artifactId>spring-cloud-config</artifactId>
        <version>0.0.1-SNAPSHOT</version>
    </parent>

    <artifactId>config-client</artifactId>

    <dependencies>
        <dependency>
            <groupId>org.springframework.boot</groupId>
            <artifactId>spring-boot-starter-web</artifactId>
        </dependency>
        <!--config client-->
        <dependency>
            <groupId>org.springframework.cloud</groupId>
            <artifactId>spring-cloud-starter-config</artifactId>
        </dependency>
        <!--eureka-client-->
        <dependency>
            <groupId>org.springframework.cloud</groupId>
            <artifactId>spring-cloud-starter-netflix-eureka-client</artifactId>
        </dependency>
    </dependencies>

    <build>
        <plugins>
            <plugin>
                <groupId>org.springframework.boot</groupId>
                <artifactId>spring-boot-maven-plugin</artifactId>
            </plugin>
        </plugins>
    </build>

</project>
4.2 新建 bootstrap.yml配置文件,指定注册中心地址和配置中心服务名,并在启动类上开启自动注册@EnableDiscoveryClient
这里需要特别说明的是,在之前的所有项目中我们采用的配置文件都是application.yml,但是这里一定要采用bootstrap.yml。
假设我们的数据库配置是放在远程配置中心的,那么我们应该先去远程配置中心拉取配置,然后再去进行数据库的自动化配置,反之如果我们先进行了数据库的自动化配置,那么就会因为找不到url或驱动而抛出异常。
- bootstrap.yml(bootstrap.properties)用来程序引导时执行,应用于更加早期配置信息读取,bootstrap.yml 先于 application.yml 加载。
- application.yml(application.properties) 应用程序各个模块的配置信息。
server:
  port: 8030
spring:
  application:
    name: config-client
  cloud:
    config:
      discovery:
        enabled: true
        # 这里我们指定的是服务名 如果配置中心有多个,且用同一个服务名,我们的客户端拉取配置的时候是负载均衡的,配置中心也就是高可用的
        serviceId: config-server
      # 指定分支
      label: master
      # 指定环境
      profile: dev


# 注意指定注册中心的配置不要从公共配置中拉取,要在本地的配置文件中指定
# 因为我们必须要先从注册中心去获取可用的配置中心, 从配置中心去拉取配置
eureka:
    client:
      serviceUrl:
        defaultZone: http://localhost:8010/eureka/
@SpringBootApplication
@EnableDiscoveryClient
public class ConfigClientApplication {

    public static void main(String[] args) {
        SpringApplication.run(ConfigClientApplication.class, args);
    }

}
4.3 创建配置映射类用于测试
@Component
@ConfigurationProperties(prefix = "programmer")
@Data
@ToString
public class Programmer{

    private String name;
    private int age;
    private boolean married;
    private Date hireDate;
    private float salary;
    private int random;
    private Map<String, String> skill;
    private List company;
    private School school;

}
@RestController
public class ConfigController {

    @Autowired
    private Programmer programmer;

    @RequestMapping("programmer")
    public String getProgrammer() {
        return programmer.toString();
    }
}
4.4 依次启动eureka,config-server,config-client ,访问 http://localhost:8030/programmer
这里需要注意是在启动eureka和config-server,要稍等一会在启动config-client,这里是为了确保config-server已经将服务注册到eureka,然后我们的config-client才能从eureka中获取配置中心的服务。

启动的时候可以从控制台看到如下拉取服务的信息:
Fetching config from server at : http://localhost:8020/
Located environment: name=config-client, profiles=[dev], label=master, version=50dcfb85cd751e4f28761cd6bad84c1f73034002, state=null
五、集成 spring-cloud-bus 实现配置热更新
5.1 消息总线简介
在微服务的架构中,我们通常想要构建一个共同的消息主题被所有微服务实例所监听,以便对所有微服务实例的管理和通知,这就是消息总线,spring cloud bus 就是消息总线的一种实现。
目前spring cloud bus 支持的消息中间件有 RabbitMQ和kafka, 我们下面的整合采用的是RrabbitMQ。
关于热更新只需要对配置客户端(config-client)做更改,不需要对(config-server)做改动。
5.1 导入bus依赖
<dependency>
    <groupId>org.springframework.cloud</groupId>
    <artifactId>spring-cloud-starter-bus-amqp</artifactId>
</dependency>
<!--因为要用到端点功能(主要是刷新端点),所以需要导入actuator-->
<dependency>
    <groupId>org.springframework.boot</groupId>
    <artifactId>spring-boot-starter-actuator</artifactId>
</dependency>
5.2 修改bootstrap.yml 配置,开启总线配置,配置rabbitmq 和 开启热刷新端点
server:
  port: 8030
spring:
  application:
    name: config-client
  cloud:
    config:
      discovery:
        enabled: true
        # 这里我们指定的是服务名 如果配置中心有多个,且用同一个服务名,我们的客户端拉取配置的时候是负载均衡的,配置中心也就是高可用
        serviceId: config-server
      # 指定分支
      label: master
      # 指定环境
      profile: dev
    bus:
      #开启总线
      enabled: true
      # 打开ack跟踪的标志(默认关闭)
      trace:
        enabled: true
  # 使用bus实现热更新
  rabbitmq:
    host: 127.0.0.1
    port: 5672
    username: guest
    password: guest


# 注意指定注册中心的配置不要从公共配置中拉取,要在本地的配置文件中指定
# 因为我们必须要先从注册中心去获取可用的配置中心, 然后从配置中心去拉取配置
eureka:
    client:
      serviceUrl:
        defaultZone: http://localhost:8010/eureka/

# 暴露热刷新的端点
management:
  endpoints:
    web:
      exposure:
        include: bus-refresh
5.3 用@RefreshScope指定需要热刷新的配置
@Component
@ConfigurationProperties(prefix = "programmer")
@Data
@ToString
@RefreshScope // 定义下面配置热刷新范围
public class Programmer{

    private String name;
    private int age;
    private boolean married;
    private Date hireDate;
    private float salary;
    private int random;
    private Map<String, String> skill;
    private List company;
    private School school;

}
5.4 依次启动eureka,config-server, config-client 服务
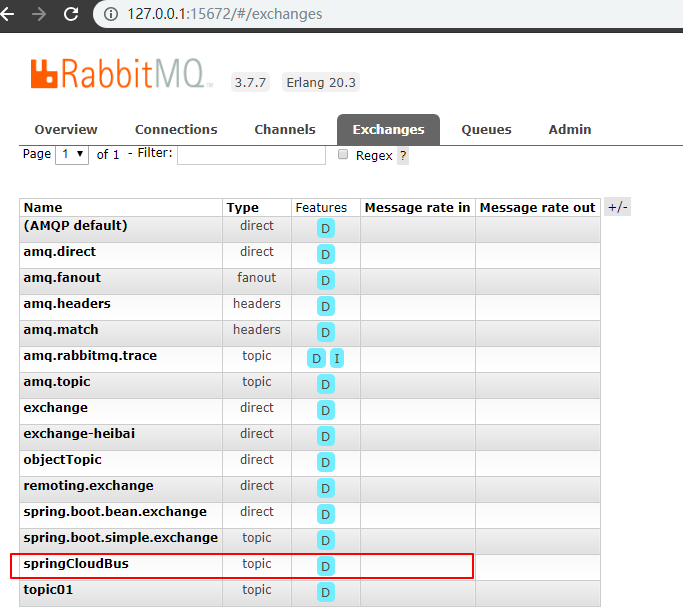
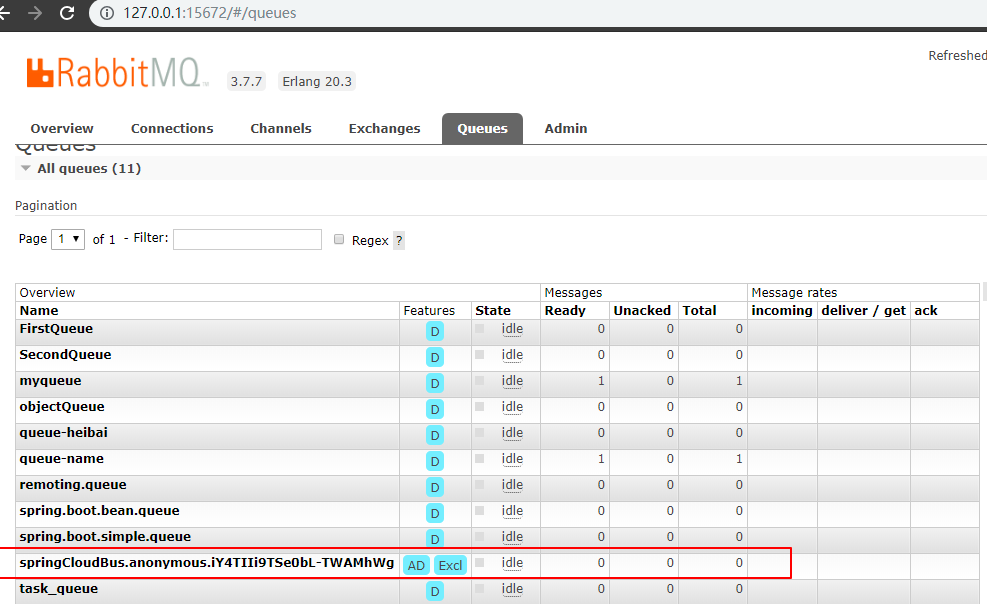
在client服务端启动时候,可以在控制台 看到bus 自动创建了交换机、队列等
Created new connection: rabbitConnectionFactory#496c6d94:22/SimpleConnection@185d85d2 [delegate=amqp://[email protected]:5672/, localPort= 63713]
o.s.amqp.rabbit.core.RabbitAdmin         : Auto-declaring a non-durable, auto-delete, or exclusive Queue (springCloudBus.anonymous.iY4TIIi9TSe0bL-TWAMhWg) durable:false, auto-delete:true, exclusive:true. It will be redeclared if the broker stops and is restarted while the connection factory is alive, but all messages will be lost.
也可以在 rabbitmq 管控台查看
5.6 直接在 git 上修改配置文件,然后用 post 触发热刷新端点 http://localhost:8030/actuator/bus-refresh ,即可看到配置已经热刷新
注意: 这里的只能用 post 方式请求 ,可以用 postman 等测试软件

热刷新的过程在控制台有详细的打印,部分日志如下:
# 消息传播
Attempting to connect to: [127.0.0.1:5672]
Created new connection: rabbitConnectionFactory.publisher#b00f2d6:0/SimpleConnection@403c0406 [delegate=amqp://[email protected]:5672/, localPort= 62748]
# 从配置中心拉取配置文件
Fetching config from server at : http://DESKTOP-8JGSFLJ:8020/
# 刷新应用上下文 AnnotationConfigApplicationContext
Refreshing org.springframework.context.annotation.AnnotationConfigApplicationContext@62e12f66
附:源码Gitub地址:https://github.com/heibaiying/spring-samples-for-all